EN User and maintenance manual
IMPORTANT SAFETY INSTRUCTIONS These instructions shall also be available on website: www.whirlpool.eu YOUR SAFETY AND THAT OF OTHERS IS VERY IMPORTANT This manual and the appliance itself provide important safety warnings, to be read and observed at all times. This is the danger symbol, pertaining to safety, which alerts users to potential risks to themselves and others.
- Do not touch the appliance with any wet part of the body and do not operate it when barefoot. - This appliance is designed solely for use as a domestic appliance for cooking food. No other type of use is permitted (e.g.: heating rooms). - The Manufacturer declines all responsibility for inappropriate use or incorrect setting of the controls. - The appliance and its accessible parts become hot during use. Care should be taken to avoid touching heating elements.
- Never leave the appliance unattended during food drying. If alcoholic beverages are used when cooking foods (e.g. rum, cognac, wine), remember that alcohol evaporates at high temperatures. As a result, there is a risk that vapours released by the alcohol may catch fire upon coming into contact with the electrical heating element. - Never use steam cleaning equipment. - Do not touch the oven during the pyrolysis cycle. Keep children away from the oven during the pyrolysis cycle.
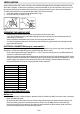
INSTALLATION After unpacking the oven, make sure that it has not been damaged during transport and that the oven door closes properly. In the event of problems, contact the dealer or your nearest After-sales Service. To prevent any damage, only remove the oven from its polystyrene foam base at the time of installation. To safely move the oven, use the handle provided in the accessories pack. 1. Insert the handle securely into the lateral holes (Fig. 1) 2. Lift the handle up as shown in Fig. 2 Fig. 1 Fig.
During use: - Do not place heavy objects on the door as they could damage it. Do not cling to the door or hang anything from the handle. Do not cover the inside of the oven with aluminium foil. Never pour water into the inside of a hot oven; this could damage the enamel coating. Never drag pots or pans across the bottom of the oven as this could damage the enamel coating. Make sure that the electrical cables of other appliances do not touch hot parts of the oven or become trapped in the door.
DECLARATION OF CONFORMITY - - This oven, which is intended to come into contact with foodstuffs, complies with European Regulation ( ) n.1935/2004 and has been designed, manufactured and sold in conformity with the safety requirements of the “Low Voltage” directive 2006/95/CE (which replaces 73/23/CEE and subsequent amendments), the protection requirements of “EMC” 2004/108/CE. This appliance meets the eco design requirements of European regulations n. 65/2014 and n.
CLEANING WARNING - Never use steam cleaning equipment. Only clean the oven when it is cool to the touch. Disconnect the appliance from the power supply. Oven exterior IMPORTANT: do not use corrosive or abrasive detergents. If any of these products accidentally comes into contact with the appliance, clean immediately with a damp cloth. • Clean the surfaces with a damp cloth. If it is very dirty, add a few drops of washing up detergent to the water. Finish off with a dry cloth.
Induction Plate: • When cool to the touch, use a sponge and suitable liquid detergent for ovens or hobs. Do not clean the induction plate in a dishwasher. Internal Electrical Socket: • Remove the metallic plug cover; use a humidified sponge to clean the plug. Do not use metallic and/ or sharp tools. Cooking Vessel: • Suitable for dishwashing. Alternatively, use soft sponge and suitable liquid detergent. MAINTENANCE - WARNING Use protective gloves.
MOVING THE TOP HEATING ELEMENT (SOME MODELS ONLY) 1. 2. 3. Remove the side accessory holder grilles (Fig. 4). Pull the heating element out a little (Fig. 5) and lower it (Fig. 6). To reposition the heating element, lift it up, pulling it slightly towards you, making sure it comes to rest on the lateral supports. Fig. 4 Fig. 5 Fig. 6 REPLACING THE OVEN LAMP To replace the rear lamp (if present): 1. Disconnect the oven from the power supply. 2. Unscrew the lamp cover (Fig.
INSTRUCTIONS FOR OVEN USE FOR ELECTRICAL CONNECTION, SEE THE PARAGRAPH ON INSTALLATION The induction oven is equipped with an electrical socket on the rear wall of the oven to supply power to the heating element inside the induction plate when plugged in. The induction plate is designed to work together with the induction cooking vessel supplied with the oven. Improved cooking performances and energy consumption can be achieved by using the cooking vessel and induction plate. 1. Control panel 2.
ACCESSORIES NOT SUPPLIED Other accessories can be purchased separately from the After-sales Service. INSERTING WIRE SHELVES AND OTHER ACCESSORIES IN THE OVEN 1. 2. Insert the wire shelf horizontally, with the raised part “A” upwards (Fig. 1). The other accessories, like the drip tray and baking tray, are inserted with the raised part on the flat section “B” facing upwards (Fig. 2). Fig. 1 Fig.
REMOVAL OF THE COOKING VESSEL AND INDUCTION PLATE REMOVING THE COOKING VESSEL: IMPORTANT: The induction cooking vessel can become extremely hot. Always use oven gloves to touch and move it. Fig. 1 Fig. 2 1. Using both hands, grasp the front handle and partially remove the cooking vessel (Fig. 1). 2. Then use the lateral handles to better grasp and fully remove the cooking vessel (Fig. 2).
CONTROL PANEL DESCRIPTION TOUCH KEYS: to use, simply touch the corresponding symbol (a light touch is all that is required). On/Off (when you press on / off button to turn off the oven an acoustic signal will sound, this sound can not be disabled).
USING THE APPLIANCE FOR THE FIRST TIME - LANGUAGE SELECTION AND SETTING THE TIME For correct use of the oven, when it is switched on for the first time you will have to select the desired language and set the correct time. Proceed as follows: 1. Press : the display will show the list of the first three available languages. 2. Press buttons and to scroll down the list. 3. When the desired language is highlighted, press to select it. After language selection, the display will flash 12:00. 4.
PREHEATING THE OVEN (Standard Functions Only) 180°C --:-- TEMPERATURE No COOK TIME Forced Air PREHEAT --:-END TIME 180°C --:-- TEMPERATURE No COOK TIME Forced Air PREHEAT --:-END TIME 180°C --:-- TEMPERATURE Yes COOK TIME Forced Air PREHEAT --:-END TIME If you wish to preheat the oven before inserting food, change the oven’s default selection as follows: 1. Using buttons and , move the cursor to preheating. 2. Press button to select the setting: “No” flashes on the display. 3.
SETTING END OF COOKING TIME / DELAYED START The end of cooking time can be set, delaying the start of cooking by up to a maximum of 23 hours and 59 minutes. This can only be done once cooking time has been set. This setting is only possible when pre-heating is not required for the selected function.
Please turn food Cooking nearly finished Please check on food Cooking Finished at 19:45 Press to Prolong Cooking N.B.: some dishes must be turned or stirred half way through cooking: the oven will emit an acoustic signal and the display will indicate what action is required. The initial cooking time displayed is merely for guidance: it can be prolonged automatically during cooking. Shortly before cooking time finishes, the oven prompts you to check that the food is cooked to your satisfaction.
KEY-LOCK This function can be used to lock the control panel buttons. To activate it, press and at the same time for at least 3 seconds. If activated, the functions of the buttons are locked and the display shows a message and the symbol . This function can also be activated during cooking. To deactivate it, repeat the above procedure. When the key-lock function is activated, the oven can be switched off using button .
FUNCTION DESCRIPTION TABLE MAIN MENU SETTINGS RECIPES STARCLEAN™ TRADITIONAL SPECIALS INDUCTION FUNCTIONS Setting the display (language, time, brightness, volume of acoustic signal, energy saving function). Selecting 30 different pre-set recipes (see enclosed recipe booklet). The oven automatically sets the optimum cooking temperature, function and time. It is important to follow the instructions given in the recipe book regarding preparation, accessories and which oven shelf to use.
SPECIALS DEFROST KEEP WARM RISING CONVENIENCE MAXI COOKING To speed up defrosting of food. Place food on the middle shelf. Leave food in its packaging in order to prevent it from drying out on the outside. For keeping just-cooked food hot and crisp (e.g: meat, fried food or flans). Place food on the middle shelf. The function will not activate if the temperature in the oven is above 65°C. For optimal rising of sweet or savory dough. Place the dough on the 2nd shelf.
INDUCTION FUNCTIONS The function automatically selects the ideal Roast beef 4 steps: from 0.6 to 2 kg cooking temperature and mode for different weight categories (see oven display). It is Roast meat possible to roast any type of meat (e.g. beef, 3 steps: from 1 to 4 kg veal, pork, ribs, lamb, etc.). The function “top finishing” is optimal to obtain high level of fillet / piece surface browning. The function automatically selects the ideal Whole 5 steps: from 0.
Low grill Top Finishing Medium grill High grill FINISHING Low power Base Finishing Medium power High power Recipe with cooking vessel (provided) Lasagna Pasta pasticciata/ cannelloni Roast beef rare 48° (0.6 - 0.8 Kg) Roast beef rare 48° (0.9 - 1.2 Kg) Roast beef rare 48° (1.3 - 1.5 Kg) Roast beef rare 48° (1.6 - 2 Kg) Roast pork / veal (1 - 2 Kg) Roast pork / veal (2 - 3 Kg) Roast pork / veal (3 - 4 Kg) Pork ribs Function Casserole / Main Range time (min.-max) LOW* Range time (min.
Recipe with cooking vessel (provided) Function Fish fillet / piece Preheat Level tray Temperature 3 3 3 3 3 3 3 3 Automatic Automatic Automatic Automatic Automatic Automatic Automatic Automatic 3 3 3 3 Automatic Automatic Automatic Automatic Cod fish Roasted potatoes Mixed vegetables Stuffed zucchini Stuffed tomatoes Small cakes Biscuit / Sablè Fruit tart Cookies – muffins Cookies Pastry cakes No No No No No No No No Quiche Lorraine Traditional bread Homestyle pizza Crisp pizza Salty cakes Brea
COOKING TABLE Recipe Function Pre- Shelf (from heating bottom) Temp.
Recipe Savoury pies (vegetable pie, quiche lorraine) Vols-au-vent / Puff pastry savouries Lasagna / Baked pasta / Cannelloni / Flans Lamb / Veal / Beef / Pork 1 Kg Chicken / Rabbit / Duck 1 Kg Turkey / Goose 3 Kg Baked fish / en papillote (fillet, whole) Stuffed vegetables (tomatoes, courgettes, aubergines) Toast Function Pre- Shelf (from heating bottom) Temp.
Recipe Function Pre- Shelf (from heating bottom) Temp.
TESTED RECIPES in compliance with IEC 50304/60350:2009-03 and DIN 3360-12:07:07 Recipe Function Pre- Shelf (from Temp. Time Accessories and notes heating bottom) (°C) (min) IEC 60350-1:2011-12 § 7.5.2 Shortbread - 3 170 - 1-4 160 - 3 170 - 1-4 160 - 2 170 - 1-4 160 - 2/3 185 - 1-4 175 - 5 High 15-30 Drip-tray / baking tray Level 4: baking tray 25-40 Level 1: drip-tray / baking tray IEC 60350-1:2011-12 § 7.5.
RECOMMENDED USE AND TIPS How to read the cooking table The table indicates the best function to use for any given food, to be cooked on one or more shelves at the same time. Cooking times start from the moment food is placed in the oven, excluding pre-heating (where required). Cooking temperatures and times are purely for guidance and will depend on the amount of food and type of accessory used.
- - - When using the roast Meat and whole roast Chicken functions, the meat does not need to be turned over. For the “Roast beef” function: after cooking for 15 minutes it is recommended that the meat is turned to achieve even surface browning. When the beef is cooked to your liking take it out of the oven and leave to rest.
400010781325 AU Whirlpool is a registered trademark of Whirlpool, USA Printed in Italy 02/2015