AMW 393 AMW 436 AMW 483 AMW 497 AMW 493/1 MW 4200 AMW 498 Gebrauchsanweisung Instructions for use Mode d’emploi Gebruiksaanwijzing Istruzioni per l’uso Οδηγίες Χρήσης Instrukcje użytkowania Használati utasítás Инструкция за употреба Brugsanvisning Bruksanvisning Käyttöohje Manual de utilização Instrucciones para el uso Návod k použití Návod na použitie Instrucţiuni de utilizare Инструкции по эксплуатации 1
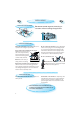
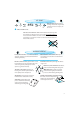
INSTALLATION MOUNTING THE APPLIANCE FOLLOW THE SUPPLIED separate mounting instructions when installing the appliance. PRIOR TO CONNECTING CHECK THAT THE VOLTAGE on the rating plate corresponds to the voltage in your home. DO NOT REMOVE THE MICROWAVE INLET PROTECTION PLATES located on the side of the oven cavity wall. They prevent grease & food particles from entering the microwave inlet channels. ENSURE the oven cavity is empty before mounting. ENSURE THAT THE APPLIANCE IS NOT DAMAGED.
IMPORTANT SAFETY INSTRUCTIONS READ CAREFULLY AND KEEP FOR FUTURE REFERENCE DO NOT HEAT, OR USE FLAMMABLE MATERIALS in or near the oven. Fumes can create a fire hazard or explosion. DO NOT USE YOUR MICROWAVE oven for drying textiles, paper, spices, herbs, wood, flowers, fruit or other combustible materials. Fire could result. IF MATERIAL INSIDE / OUTSIDE THE OVEN SHOULD IGNITE OR SMOKE IS OBSERVED, keep oven door closed and turn the oven off.
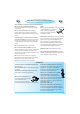
IMPORTANT PRECAUTIONS GENERAL THIS APPLIANCE IS DESIGNED FOR DOMESTIC USE ONLY! THIS APPLIANCE IS INTENDED to be used built-in. Do not use it freestanding. THIS APPLIANCE IS INTENDED for heating food and beverages. Drying of food or clothing and heating of warming pads, slippers, sponges, damp cloth and similar may lead to risk of injury, ignition or fire. THE APPLIANCE SHOULD NOT BE OPERATED without food in the oven when using microwaves. Operation in this manner is likely to damage the appliance.
ACCESSORIES GENERAL THERE ARE a number of accessories available on the market. Before you buy, ensure they are suitable for microwave use. ENSURE THAT THE UTENSILS YOU USE are oven proof and allow microwaves to pass through them before cooking. WHEN YOU PUT FOOD AND ACCESSORIES in the microwave oven, ensure that they do not come in contact with the interior of the oven. This is especially important with accessories made of metal or metal parts.
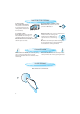
PAUSE OR STOP COOKING TO PAUSE COOKING: THE COOKING CAN BE PAUSED to check, turn or stir the food by opening the door. The setting will be maintained for 10 minutes. IF YOU DON’T WANT TO CONTINUE COOKING: REMOVE THE FOOD, close the door and press the STOP button TO CONTINUE COOKING: CLOSE THE DOOR and press the Start button ONCE. The cooking is resumed from where it was paused. PRESSING THE START BUTTON TWICE will increase the time by 30 seconds.
KITCHEN TIMER USE THIS FUNCTION when you need a kitchen timer to measure exact time for various purposes such as cooking eggs, pasta or letting the dough rise before baking etc. PRESS THE +/- BUTTONS to set the time to measure. PRESS THE POWER BUTTON repeatedly to set the power to 0 W. PRESS THE START BUTTON. AN ACOUSTIC SIGNAL will be heard when the timer has finished to count down. CLOCK PRESS THE STOP BUTTON (3 seconds) until the left-hand digit (hour’s) flicker.
COOK & REHEAT WITH MICROWAVES USE THIS FUNCTION for normal cooking and reheating, such as vegetables, fish, potatoes and meat. PRESS THE +/- BUTTONS to set the time. PRESS THE POWER BUTTON repeatedly to set the power. PRESS THE START BUTTON. ONCE THE COOKING PROCESS HAS BEEN STARTED: The time can easily be increased in 30-second steps by pressing the Start button. Each press increases the time with 30 seconds.
JET START THIS FUNCTION IS USED for quick reheating of food with a high water content such as clear soups, coffee or tea. PRESS THE START BUTTON. THIS FUNCTION AUTOMATICALLY STARTS with maximum microwave power level and the cooking time set to 30 seconds. Each additional press increases the time with 30 seconds. You may also alter the time by pressing the +/- buttons to increase or decrease the time after the function has started.
JET DEFROST USE THIS FUNCTION only if the net weight is between 100 g- 2 Kg. ALWAYS PLACE THE FOOD on the glass turntable. PRESS THE JET DEFROST BUTTON. PRESS THE + / - BUTTONS to set the weight of the food. PRESS THE START BUTTON. MIDWAY THROUGH THE DEFROSTING PROCESS the oven stops and prompts you to TURN FOOD. Open the door. Turn the food. Close the door and restart by pressing the Start button. NOTE: The oven continues automatically after 2 min. if the food hasn’t been turned.
GRILL USE THIS FUNCTION TO brown the surface of foods. PRESS THE GRILL BUTTON. PRESS THE +/- BUTTONS to set the time. PRESS THE START BUTTON. DO NOT LEAVE THE OVEN DOOR OPEN for long periods when the Grill is in operation, as this will cause a drop in temperature. NOTE: PRESSING THE GRILL BUTTON during cooking switches the Grill element on and off. The timer will continue to count down when the Grill element is turned off.
GRILL COMBI USE THIS FUNCTION TO cook such food as Gratin’s, Lasagne, Poultry and Baked potatoes. PRESS THE GRILL BUTTON. PRESS THE POWER BUTTON to set the microwave power. PRESS THE +/- BUTTONS to set the time. PRESS THE START BUTTON. DURING OPERATION you can switch the Grill element on/off by pressing the Grill button. THE MAX. POSSIBLE MICROWAVE POWER LEVEL when using the Grill is limited to a factory-preset level.
CRISP PRESS THE CRISP BUTTON. USE THIS FUNCTION TO reheat and cook pizzas and other dough based food. It is also good for frying bacon and eggs, sausages, hamburgers etc. PRESS THE +/- BUTTONS to set the time. PRESS THE START BUTTON. IT IS NOT POSSIBLE TO CHANGE OR SWITCH, the Power level or Grill, on/off, when using the Crisp function. THE OVEN AUTOMATICALLY use Microwaves and Grill in order to heat the Crisp-plate.
MAINTENANCE & CLEANING CLEANING IS THE ONLY MAINTENANCE normally required. FAILURE TO MAINTAIN THE OVEN in a clean condition could lead to deterioration of the surface that could adversely affect the life of the appliance and possibly result in a hazardous situation. THE GRILL ELEMENT does not need cleaning since the intense heat will burn off any splashes, but the cavity ceiling below it may need regular cleaning. This should be done with warm water, detergent and a sponge.
TROUBLE SHOOTING GUIDE IF THE OVEN DOES NOT WORK, do not make a service call until you have made the following checks: The Turntable and turntable support is in place. The Plug is properly inserted in the wall socket. The Door is properly closed. Check your Fuses and ensure that there is power available. Check that the oven has ample ventilation. Wait for 10 minutes, then try to operate the oven once more. Open and then close the door before you try again.
DATA FOR TEST HEATING PERFORMANCE IN ACCORDANCE WITH IEC 60705. THE INTERNATIONAL ELECTROTECHNICAL COMMISSION has developed a standard for comparative testing of heating performance of different microwave ovens. We recommend the following for this oven: TEST AMOUNT APPROX. TIME POWER LEVEL CONTAINER 12.3.1 750 G 10 MIN 750 W PYREX 3.220 12.3.2 475 G 5 ½ MIN 750 W PYREX 3.827 12.3.3 900 G 15 MIN 750 W PYREX 3.838 13.