Istruzioni per luso COMBINATO FRIGORIFERO/CONGELATORE Sommario I Italiano, 1 DE Deutsch, 37 GB English, 13 CZ Èesky, 49 F Français,25 Installazione, 2 Posizionamento e collegamento Descrizione dellapparecchio, 3-4 Vista dinsieme Pannello di controllo Avvio e utilizzo, 5-6-7-8 Avviare lapparecchio Come muoversi nel display Utilizzare al meglio il frigorifero Utilizzare al meglio il congelatore Manutenzione e cura, 9 BCB 333 A VE I/HA BCB 333 AA VE I/HA BCB 333 AA VE I S/HA Escludere la corr
Installazione I ! È importante conservare questo libretto per poterlo consultare in ogni momento. In caso di vendita, di cessione o di trasloco, assicurarsi che resti insieme allapparecchio per informare il nuovo proprietario sul funzionamento e sui relativi avvertimenti. ! Leggere attentamente le istruzioni: ci sono importanti informazioni sullinstallazione, sulluso e sulla sicurezza. Posizionamento e collegamento Posizionamento 1. Posizionare lapparecchio in un ambiente ben aerato e non umido. 2.
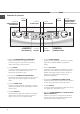
Descrizione dellapparecchio Vista dinsieme I Le istruzioni sulluso valgono per diversi modelli per cui è possibile che la figura presenti particolari differenti rispetto a quelli dellapparecchio acquistato. La descrizione degli oggetti più complessi si trova nelle pagine seguenti. Balconcino estraibile con coperchio, con PORTAUOVA e SCATOLA BURRO* A.I.R.
I Pannello di controllo Manopola FUNZIONAMENTO FRIGORIFERO Pulsante MODE Funzione SUPER COOL Impostazione SCOMPARTO FRIGORIFERO Funzione HOLIDAY Funzione SUPER FREEZE Funzione ICE PARTY Pulsante SELECT Manopola FUNZIONAMENTO CONGELATORE e ON/OFF PRODOTTO Impostazione SCOMPARTO CONGELATORE Manopola FUNZIONAMENTO FRIGORIFERO Gestisce laccensione e lo spegnimento dello scomparto frigorifero e permette di impostare le relative temperature di funzionamento.
Avvio e utilizzo Avviare lapparecchio ! Prima di avviare lapparecchio, seguire le istruzioni sullinstallazione (vedi Installazione). ! Prima di collegare lapparecchio pulire bene i vani e gli accessori con acqua tiepida e bicarbonato. ! Lapparecchio è provvisto di un controllo salvamotore che fa avviare il compressore solo dopo circa 8 minuti dallaccensione. Questo accade anche dopo ogni interruzione dellalimentazione elettrica, volontaria o involontaria (black out).
I Utilizzare il display Impostare la temperatura Se il vano interessato è spento, sul relativo spazio di segnalazione sul display (Impostazione SCOMPARTO FRIGORIFERO e Impostazione SCOMPARTO CONGELATORE) apparirà la scritta OFF. Se il vano è acceso appariranno invece le temperature impostate in quel momento. Per modificarle agire direttamente sulla manopola relativa al vano interessato (Manopola FUNZIONAMENTO FRIGORIFERO e Manopola FUNZIONAMENTO CONGELATORE e ON/OFF PRODOTTO).
Ligiene alimentare Dopo lacquisto degli alimenti, eliminare qualsiasi tipo di confezione esterna in carta/cartone o altri involucri, che potrebbero introdurre nel frigo batteri o sporcizia.
I Bacinella GHIACCIO. La collocazione sulla parte superiore dei cassetti ripisti nel vano freezer garantisce una maggior pulizia (il ghiaccio non viene più a contatto con gli alimenti) ed ergonomia (non si sgocciola in fase di caricamento). 1. Verificare che la bacinella sia completamente vuota e riempirla dacqua attraverso lapposito foro. 2. Fare attenzione a non superare il livello indicato (MAX WATER LEVEL).
Manutenzione e cura Escludere la corrente elettrica Durante i lavori di pulizia e manutenzione è necessario isolare lapparecchio dalla rete di alimentazione: 1. posizionare la manopola FUNZIONAMENTO CONGELATORE e ON/OFF PRODOTTO su Off; 2. staccare la spina dalla presa. ! Se non si segue questa procedura può scattare lallarme: esso non è sintomo di anomalia. Per ripristinare il normale funzionamento è sufficiente posizionare la manopola FUNZIONAMENTO CONGELATORE e ON/OFF PRODOTTO sul valore desiderato.
Precauzioni e consigli I ! Lapparecchio è stato progettato e costruito in conformità alle norme internazionali di sicurezza. Queste avvertenze sono fornite per ragioni di sicurezza e devono essere lette attentamente. Questa apparecchiatura è conforme alle seguenti Direttive Comunitarie: - 73/23/CEE del 19/02/73 (Bassa Tensione) e successive modificazioni; - 89/336/CEE del 03/05/89 (Compatibilità Elettromagnetica) e successive modificazioni; - 2002/96/CE..
Anomalie e rimedi Può accadere che lapparecchio non funzioni. Prima di telefonare allAssistenza (vedi Assistenza), controllare che non si tratti di un problema facilmente risolvibile aiutandosi con il seguente elenco. I Anomalie: Possibili cause / Soluzione: Il DISPLAY non si accende. La spina non è inserita nella presa della corrente o non abbastanza da fare contatto, oppure in casa non cè corrente. Il motore non parte.
Assistenza 195062532.00 01/2007 - Xerox Business Services Prima di contattare lAssistenza: Verificare se lanomalia può essere risolta autonomamente (vedi Anomalie e Rimedi). In caso negativo, contattare il Numero Unico Nazionale 199.199.199. I modello Comunicare: il tipo di anomalia il modello della macchina (Mod.) il numero di serie (S/N) Queste informazioni si trovano sulla targhetta caratteristiche posta nel vano frigorifero in basso a sinistra. Mod.
Operating Instructions REFRIGERATOR/FREEZER COMBINATION Contents I Italiano, 1 DE Deutsch, 37 GB English, 13 CZ Èesky, 49 F Français,25 Installation, 14 Positioning and connection Description of the appliance, 15-16 Overall view Control panel Start-up and use, 17-18-19-20 Starting the appliance Using the display Using the refrigerator to its full potential Using the freezer to its full potential Maintenance and care, 21 BCB 333 A VE I/HA BCB 333 AA VE I/HA BCB 333 AA VE I S/HA Switching the appli
Installation GB ! Before placing your new freezer into operation please read these operating instructions carefully. They contain important information for safe use, for installation and for care of the appliance. ! Please keep these operating instructions for future reference. Pass them on to possible new owners of the appliance. Positioning and connection Positioning 1. Place the appliance in a well-ventilated humidity-free room. 2. Do not obstruct the rear fan grills.
Description of the appliance Overall view GB The instructions contained in this manual are applicable to different model refrigerators. The diagrams may not directly represent the appliance purchased. For more complex features, consult the following pages. Removable lidded shelf with EGG TRAY and BUTTER DISH* A.I.R.
GB Control panel REFRIGERATOR OPERATION Knob MODE button SUPER COOL function REFRIGERATOR COMPARTMENT setting HOLIDAY function REFRIGERATOR OPERATION Knob This knob turns the refrigerator compartment on or off and enables you to set the relative operating temperatures. MODE button This button allows you to navigate the display to have access to the various settings/functions and to turn off the alarm buzzers.
Start-up and use Starting the appliance ! Before starting the appliance, follow the installation instructions (see Installation). ! Before connecting the appliance, clean the compartments and accessories well with lukewarm water and bicarbonate. ! The appliance comes with a motor protection control system which makes the compressor start approximately 8 minutes after being switched on. The compressor also starts each time the power supply is cut off whether voluntarily or involuntarily (blackout).
GB Using the display Setting the temperature If the compartment concerned is switched off, the word OFF will appear on the relative indication space on the display (REFRIGERATOR COMPARTMENT setting and FREEZER COMPARTMENT setting). If the compartment is switched on, then the temperatures set at that time will appear. To change them, turn the relative knob directly (REFRIGERATOR OPERATION Knob and FREEZER OPERATION and APPLIANCE ON/OFF Knob).
Food hygiene 1. Once you have bought your food, remove all external packaging made of paper/cardboard or other wrappers, which could introduce bacteria or dirt inside your refrigerator. 2. Protect the food, (especially easily perishable items and those that have a strong smell), in order to avoid contact between them, thereby removing both the possibility of germ/bacteria contamination as well as the diffusion of strong odours inside the fridge. 3.
GB ICE trays. The Easy Ice trays are set into the top part of the freezer drawers to maximise the space within the freezer. The trays are drip-free and sealed to prevent food from tainting the ice cubes. 1. Check that the tray is completely empty and fill it with water through the opening provided. 2. Take care not to exceed the level indicated (MAX WATER LEVEL). Excess water prevents the ice cubes from dispensing (if this happens, wait for the ice to melt and empty the tray). 3.
Maintenance and care Switching the appliance off Defrosting the freezer compartment During cleaning and maintenance it is necessary to disconnect the appliance from the electricity supply: 1. set the FREEZER OPERATION and APPLIANCE ON/ OFF Knob on Off 2. pull the plug out of the socket ! If this procedure is not followed, the alarm may sound. This alarm does not indicate a malfunction.
Precautions and tips GB ! The appliance was designed and manufactured in compliance with international safety standards. The following warnings are provided for safety reasons and must be read carefully. This appliance complies with the following Community Directives: - 73/23/EEC of 19/02/73 (Low Voltage) and subsequent amendments; -89/336/EEC of 03.05.89 (Electromagnetic Compatibility) and subsequent amendments; - 2002/96/CE..
Troubleshooting If the appliance does not work, before calling for Assistance (see Assistance), check for a solution from the following list. GB Malfunctions: Possible causes / Solutions: The display does not illuminate. The plug has not been inserted into the electrical socket, or not far enough to make contact, or there is no power in the house. The motor does not start. The appliance comes with a motor protection control (see Start-up and use).
Assistance 195062532.00 02/2007 - Xerox Business Services GB Before calling for Assistance: Check if the malfunction can be solved on your own (see Troubleshooting). If after all the checks, the appliance still does not operate or the problem persists, call the nearest Service Centre Communicating: type of malfunction appliance model (Mod.) serial number (S/N) This information can be found on the data plate located on the bottom left side of the refrigerator compartment.
Mode demploi COMBINE REFRIGERATEUR/CONGELATEUR Sommaire I Italiano, 1 DE Deutsch, 37 GB English, 13 CZ Èesky, 49 F Français,25 Installation, 26 Mise en place et raccordement Description de lappareil, 27-28 Vue densemble Tableau de bord Mise en marche et utilisation, 29-30-31-32 Mise en service de lappareil Comment se déplacer sur l'afficheur Pour profiter à plein de votre réfrigérateur Pour profiter à plein de votre congélateur Entretien et soins, 33 BCB 333 A VE I/HA BCB 333 AA VE I/HA BCB 33
Installation F ! Conservez ce mode demploi pour pouvoir le consulter à tout moment. En cas de vente, de cession ou de déménagement, veillez à ce quil suive lappareil pour informer le nouveau propriétaire sur son fonctionnement et lui fournir les conseils correspondants. ! Lisez attentivement les instructions : elles contiennent des conseils importants sur linstallation, lutilisation et la sécurité de votre appareil. Mise en place et raccordement Mise en place 1.
Description de lappareil Vue densemble F Ces instructions dutilisation sappliquent à plusieurs modèles, il se peut donc que les composants illustrés présentent des différences par rapport à ceux de lappareil que vous avez acheté. Vous trouverez dans les pages suivantes la description des objets plus complexes. Balconnet amovible à abattant, contenant un SUPPORT A OEUFS et une BOITE A BEURRE* A.I.R.
F Tableau de bord Bouton FONCTIONNEMENT REFRIGERATEUR Touche MODE Fonction SUPER COOL Programmation COMPARTIMENT REFRIGERATEUR Fonction HOLIDAY Bouton FONCTIONNEMENT REFRIGERATEUR C'est lui qui sert à brancher et à débrancher le compartiment réfrigérateur et à sélectionner les températures de fonctionnement. Touche MODE Pour se déplacer sur l'afficheur et accéder aux sélections/fonctions disponibles et éteindre les alarmes sonores.
Mise en marche et utilisation Mise en service de lappareil ! Avant de mettre lappareil en service, suivez bien les instructions sur linstallation (voir Installation). ! Avant de brancher votre appareil, nettoyez bien les compartiments et les accessoires à leau tiède additionnée de bicarbonate. ! Cet appareil est équipé dun système protège-moteur qui ne fait démarrer le compresseur que 8 minutes après son branchement.
F Comment se déplacer sur l'afficheur Sélection des températures Si le compartiment concerné est éteint, le message OFF apparaîtra dans la partie correspondante de l'afficheur (Programmation COMPARTIMENT REFRIGERATEUR et Programmation COMPARTIMENT CONGELATEUR). Si le compartiment est branché, il y aura par contre affichage des températures sélectionnées à ce moment-là.
L'hygiène alimentaire 1. Après achat, les aliments doivent être débarrassés de leur emballage extérieur en papier/carton ou autre qui pourrait véhiculer des bactéries ou des saletés à lintérieur du réfrigérateur. 2. Protégez les aliments (notamment ceux qui se détériorent rapidement et ceux qui dégagent une forte odeur ) pour éviter tout contact entre eux et éliminer ainsi toute possibilité de contamination de germes/bactéries et la diffusion dodeurs particulières à lintérieur du réfrigérateur. 3.
F Bac à GLAÇONS. Placés dans la partie supérieure des tiroirs du compartiment freezer, ils sont plus ergonomiques et garantissent davantage de propreté: en effet, les glaçons ne touchent plus aux aliments stockés dans le freezer; de plus, fini l'eau qui dégouline lorsque vous rangez votre bac (un couvercle est fourni pour boucher le récipient après l'avoir rempli). 1. Pour sortir le bac, poussez-le vers le haut .
Entretien et soin Mise hors tension Dégivrage du compartiment congélateur Pendant les opérations de nettoyage et dentretien, débranchez lappareil du réseau dalimentation: 1. amenez le bouton FONCTIONNEMENT CONGELATEUR et ON/OFF APPAREIL sur Off; 2. débranchez la fiche de la prise de courant. ! Si cette procédure nest pas respectée, lalarme peut se déclencher : ceci ne dénote pas une anomalie.
Précautions et conseils F ! Lappareil a été conçu et fabriqué conformément aux normes internationales de sécurité. Ces conseils sont fournis pour des raisons de sécurité et doivent être lus attentivement. Cet appareil est conforme aux Directives Communautaires suivantes : - 73/23/CEE du 19/02/73 (Basse Tensione) et modifications suivantes; -89/336/CEE du 03/05/89 (Compatibilité Electromagnétique) et modifications suivantes; - 2002/96/CE..
Anomalies et remèdes Il peut arriver que lappareil ne fonctionne pas. Avant de téléphoner au service de dépannage (voir Assistance), contrôlez sil ne sagit pas dun problème facile à résoudre à laide de la liste suivante. Anomalies: Causes / Solution possibles: Lafficheur est éteint. La fiche nest pas branchée dans la prise de courant ou pas assez enfoncée pour quil y ait contact ou bien il y a une coupure de courant. Le moteur ne démarre pas.
Assistance 195062532.00 02/2007 - Xerox Business Services Avant de contacter le centre dAssistance : Vérifiez si vous pouvez résoudre lanomalie vous-même (voir Anomalies et Remèdes). Si, malgré tous ces contrôles, lappareil ne fonctionne toujours pas et linconvénient persiste, faites appel au service après-vente le plus proche de chez vous. F modèle Signalez : le type danomalie le modèle de lappareil (Mod.
Gebrauchsanleitungen KÜHL-/GEFRIERKOMBI Inhaltsverzeichnis I Italiano, 1 DE Deutsch, 37 GB English, 13 CZ Èesky, 49 F Français,25 Installation, 38 Aufstellort und elektrischer Anschluss Beschreibung Ihres Gerätes, 39-40 Geräteansicht Bedienblende Inbetriebsetzung und Gebrauch, 41-42-43-44 Einschalten Ihres Gerätes So bediene ich das Display Optimaler Gebrauch des Kühlschranks Optimaler Gebrauch des Gefrierfachs Wartung und Pflege, 45 BCB 333 A VE I/HA BCB 333 AA VE I/HA BCB 333 AA VE I S/HA Abs
Installation DE ! Es ist äußerst wichtig, diese Bedienungsanleitung sorgfältig aufzubewahren, um sie jederzeit zu Rate ziehen zu können. Sorgen Sie dafür, dass sie im Falle eines Umzugs oder Übergabe an einen anderen Benutzer das Gerät stets begleitet, damit auch der Nachbesitzer die Möglichkeit hat, diese zu Rate zu ziehen. ! Lesen Sie bitte folgende Hinweise aufmerksam durch, sie liefern wichtige Informationen hinsichtlich der Installation, dem Gebrauch und der Sicherheit.
Beschreibung Ihres Gerätes Geräteansicht DE Die Gebrauchsanleitungen gelten für mehrere Gerätemodelle. Demnach ist es möglich, dass die Abbildung Details enthält, über die Ihr Gerät nicht verfügt. Die Beschreibung weiterer Komponenten ersehen Sie auf nachfolgender Seite. Abnehmbare Ablagen mit Deckel, mit EIERFACH und BUTTERDOSE * A.I.R.
DE Bedienblende Schalter KÜHLZONE MODETaste Funktion SUPER COOL KÜHLZONE Einstellung Funktion HOLIDAY Funktion SUPER FREEZE Funktion ICE PARTY SELECTTaste GEFRIERZONE und Geräte-EIN/AUSSchalter GEFRIERZONE Einstellung KÜHLZONE-Schalter Mittels dieser Taste wird die Kühlzone ein- bzw. ausgeschaltet, und ermöglicht außerdem die Einstellung der entsprechenden Betriebstemperaturen.
Inbetriebsetzung und Gebrauch Inbetriebsetzung Ihres Gerätes ! Bevor Sie Ihr Gerät in Betrieb setzen, beachten Sie bitte aufmerksam die Installationshinweise (siehe Installation). ! Bevor Sie das Gerät anschließen, müssen die Fächer und das Zubehör gründlich mit lauwarmem Wasser und Bikarbonat gereinigt werden. ! Das Gerät ist mit einem Motorschutzkontrollsystem ausgerüstet, aufgrund dessen der Kompressor erst 8 Minuten nach Einschalten startet. Dies geschieht auch nach jeder Stromunterbrechung bzw.
DE So bediene ich das Display Einstellung der Temperaturen Ist das Fach, dessen Temperatur eingestellt werden soll, ausgeschaltet, wird auf dem entsprechenden Display (KÜHLZONE -Einstellung und GEFRIERZONE Einstellung) die Anzeige OFF eingeblendet. Ist das Fach jedoch eingeschaltet, erscheint die soeben eingestellte Temperatur. Um diese zu ändern, drehen Sie den Schalterknopf der entsprechenden Zone (Schalter KÜHLZONE und GEFRIERZONE und Geräte-EIN/AUSSchalter) auf die gewünschte Temperatur.
Lebensmittelhygiene 1. Entfernen Sie nach dem Erwerb der Nahrungsmittel jedwede äußere Verpackung aus Papier/Karton oder andere äußere Umhüllungen, durch die Bakterien oder Schmutz in den Kühlschrank gelangen könnten. 2. Sorgen Sie dafür, dass die Nahrungsmittel (insbesondere die leicht verderblichen und diejenigen mit starkem Eigengeruch/Eigengeschmack) nicht direkt untereinander in Kontakt kommen.
DE EISSCHALE. Dank der Positionierung dieses Behälters oben an den Schalen der Gefrierzone ist größere Ergonomie und Sauberkeit gewährleistet: Die Berührung mit dem gelagerten Gefriergut wird vermieden, wie auch ein Verschütten von Wasser beim Füllen des Behälters (ein entsprechender Verschluss, mit dem die Öffnung nach Füllen verschlossen werden kann, wird mitgeliefert). 1.
Wartung und Pflege Abschalten Ihres Gerätes vom Stromnetz Abtauen des Gefrierfachs Bei Reinigungs- und Wartungsmaßnahmen muss das Gerät vom Stromnetz getrennt werden: 1. Drehen Sie den GEFRIERZONE und Geräte-EIN/AUSSchalter auf Off, 2. und ziehen Sie den Netzstecker aus der Steckdose. Ist die Reifschicht jedoch zu dick, muss manuell abgetaut werden: 1. Gehen Sie hierzu wie folgt vor: Aktivieren Sie einen Tag vorher die Funktion SUPER FREEZE in der Betriebsweise 24 Stunden.
Vorsichtsmaßregeln und Hinweise DE ! Das Gerät wurde nach den strengsten internationalen Sicherheitsvorschriften entworfen und gebaut. Nachstehende Hinweise werden aus Sicherheitsgründen geliefert und sollten aufmerksam gelesen werden. Dieses Gerät entspricht den folgenden EGRichtlinien: -73/23/EWG vom 19.02.73 (Niederspannung) und nachfolgenden Änderungen. - 89/336/EWG vom 03.05.89 (elektromagnetische Verträglichkeit) und nachfolgenden Änderungen. - 2002/96/CE..
Störungen und Abhilfe Gerätestörung: Bevor Sie sich an den Technischen Kundendienst wenden (siehe Kundendienst), vergewissern Sie sich bitte zuerst, ob es sich um eine Kleinigkeit handelt, die Sie selbst beheben können. Ziehen Sie hierzu nachstehendes Verzeichnis zu Rate. Störungen: Mögliche Ursachen / Abhilfe: Das Display ist vollkommen dunkel Der Netzstecker steckt nicht in der Steckdose, oder er sitzt nicht fest, so dass kein Kontakt hergestellt wird; oder es besteht ein Stromausfall.
Kundendienst 195062532.00 02/2007 - Xerox Business Services Bevor Sie sich an den Kundendienst wenden: Prüfen Sie bitte, ob die Störung nicht selbst behoben werden kann (siehe Störungen und Abhilfe). Sollte trotz aller Kontrollen das Gerät nicht funktionieren, bzw. die Störung weiter bestehen bleiben, kontaktieren Sie bitte die nächstgelegene technische Kundendienststelle. DE Modell Geben Sie bitte Folgendes an: die Art der Störung das Gerätemodell (Mod.) die Modellnummer (S/N).
Návod k pouití KOMBINOVANÁ CHLADNIÈKA/MRAZNIÈKA Obsah I Italiano, 1 DE Deutsch, 37 GB English, 13 CZ Èesky, 49 F Français,25 CZ Instalace, 50 Umístìní a zapojení Popis zaøízení, 51-52 Celkový pohled Ovládací panel Uvedení do provozu a pouití, 53-54-55-56 Uvedení zaøízení do provozu Pohyb na displeji Optimální zpùsob pouití chladnièky Optimální zpùsob pouití mraznièky Údrba a péèe, 57 BCB 333 A VE I BCB 333 AA VE I BCB 333 AA VE I S Vypnutí pøívodu elektrického proudu Vyèitìní zaøízení Zabr
Instalace CZ ! Je dùleité uschovat tento návod za úèelem jeho dalí konzultace. V pøípadì prodeje, darování nebo stìhování se ujistìte, e zùstane spolu se zaøízením, aby informoval nového vlastníka o èinnosti zaøízení a o pøísluných upozornìních. ! Pozornì si pøeètìte uvedené pokyny: obsahují dùleité informace týkající se instalace, pouití a bezpeènosti. Umístìní a zapojení Umístìní 1. Zaøízení umístìte do dobøe vìtraného prostoru s nízkou vlhkostí. 2.
Popis zaøízení Celkový pohled CZ Pokyny k pouití platí pro rùzné modely, a proto je moné, e na obrázku budou zobrazeny souèásti, které se lií od zakoupeného zaøízení. Popis nejsloitìjích souèástí je uveden na následujících stránkách. Vyjímatelný drák s víèkem, s VLOKOU NA VEJCE a KRABIÈKOU NA MÁSLO* A.I.R.
CZ Ovládací panel Otoèný ovladaè ÈINNOSTI CHLADNIÈKY Tlaèítko REIMU Funkce SUPER COOL Nastavení CHLADICÍHO PROSTORU Funkce HOLIDAY Otoèný ovladaè ÈINNOSTI CHLADNIÈKY Slouí k zapnutí a vypnutí chladicího prostoru a umoòuje nastavení pøísluných provozních teplot. Tlaèítko MODE Umoòuje pohyb na displeji, který zabezpeèuje pøístup k jednotlivým nastavením/funkcím a vypnutí zvukových alarmù.
Uvedení do provozu a pouití Uvedení zaøízení do provozu ! Pøed uvedením zaøízení do provozu se øiïte pokyny pro instalaci (viz Instalace). ! Pøed zapojením zaøízení dokonale vyèistìte jednotlivé prostory a pøísluenství vlanou vodou a bikarbonátem. ! Zaøízení je vybaveno jistièem, který uvede kompresor do èinnosti a po uplynutí pøiblinì 8 minut od zapnutí. K uvedenému opodìnému uvedení do èinnosti dojde po kadém (úmyslném nebo neúmyslném) pøeruení elektrického napájení (výpadku).
CZ Pouití displeje Nastavení teploty Kdy je daný prostor vypnutý, bude v pøísluné èásti displeje vyhrazené pro signalizaci (Nastavení CHLADICÍHO PROSTORU a Nastavení MRAZICÍHO PROSTORU) zobrazen nápis OFF. V pøípadì, e je pøísluný prostor zapnutý, budou zobrazené teploty nastaveny v daném okamiku. Jejich zmìnu je moné provést pøímo otoèným ovladaèem pøísluného prostoru (Otoèný ovladaè ÈINNOSTI CHLADNIÈKY a Otoèný ovladaè ÈINNOSTI MRAZNIÈKY a ZAPNUTÍ/ VYPNUTÍ VÝROBKU).
Hygiena pøi zacházení s potravinami Po zakoupení potravin odstraòte vechny druhy vnìjích papírových/kartonových nebo jiných obalù, díky kterým by se do chladnièky mohly dostat bakterie nebo pína.
CZ Miska NA LED. Její umístìní na horní èásti polic uloených v mrazicím prostoru zaruèuje vìtí èistotu (led se ji nedotýká potravin) a lepí ergonomii (zabrání se odkapávání bìhem jejich plnìní). 1. Zkontrolujte, zda je miska zcela prázdná, a naplòte ji vodou prostøednictvím pøísluného otvoru. 2. Dbejte pøitom, aby nedolo k pøekroèení vyznaèené úrovnì (MAX WATER LEVEL). Pøíli velké mnoství vody brání uvolòování kouskù ledu (kdy se tak stane, vyèkejte na rozputìní ledu a vyprázdnìte misku). 3.
Údrba a péèe Vypnutí pøívodu elektrického proudu Bìhem èitìní a údrby je tøeba odizolovat zaøízení od napájecího pøívodu: 1. pøetoète otoèný ovladaè ÈINNOSTI MRAZNIÈKY a ZAPNUTÍ/VYPNUTÍ VÝROBKU do polohy Vypnutí; 2. odpojte zástrèku ze zásuvky. ! V pøípadì, e nebude dodren uvedený postup, mùe dojít k aktivaci alarmu: alarm, který se objeví v uvedeném pøípadì, není pøíznakem závady.
Opatøení a rady CZ ! Toto zaøízení bylo navreno a vyrobeno ve shodì s mezinárodními bezpeènostními pøedpisy. Tato upozornìní jsou uvádìna z bezpeènostních dùvodù a musí se pozornì pøeèíst. Tento spotøebiè je ve shodì s následujícími smìrnicemi Evropské unie: - 72/23/EHS z 19.02.1973 (Nízké napìtí) ve znìní pozdìjích pøedpisù; - 89/336/EHS z 03.05.1989 (Elektromagnetická kompatibilita) ve znìní pozdìjích pøedpisù; - 2002/96/ES.
Závady a zpùsob jejich odstranìní Mùe se stát, e zaøízení nebude fungovat. Døíve, ne se obrátíte na Servisní slubu (viz Servisní sluba), s pomocí následujícího seznamu zkontrolujte, zda se nejedná o snadno odstranitelný problém. Závady: Moné pøíèiny / Zpùsob odstranìní: Nedochází k zapnutí DISPLEJE. Zástrèka není zastrèena do zásuvky elektrického rozvodu nebo øádnì nedoléhá nebo byla pøeruena dodávka elektrického proudu v celém bytì/domì. Nedochází k uvedení motoru do chodu.
Servisní sluba 195062532.00 02/2007 - Xerox Business Services CZ Døíve, ne se obrátíte na servisní slubu: Zkontrolujte, zda zjitìnou závadu nemùete odstranit vy sami (viz Závady a zpùsob jejich odstranìní). Jestlie zaøízení ani po vech provedených kontrolách nefunguje a zjitìná závada pøetrvává, obrate se na nejblií Servisní støedisko. výrobní èíslo model Uveïte: druh závady model vaeho spotøebièe (Mod.