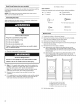
ICE MAKER SAFETY Your safety and the safety of others are very important. We have provided many important safety messages in this manual and on your appliance. Always read and obey all safety messages. This is the safety alert symbol, This symbol alerts you to potential hazards that can kill or hurt you and others, All safety messages will follow the safety alert symbol and either the word “DANGER” or “WARNING.
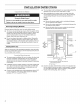
INSTALLATION INSTRUCTIONS WARNING Excessive Weight Hazard Use two or more people to move and install ice maker. Failure to do so can result in back or other injury. Removing Packaging Materials Remove tape and glue from your ice maker before using. m To remove any remaining tape or glue from the exterior of the ice maker, rub the area briskly with your thumb. Tape or glue residue narc also be easily removed by rubbing a small amount of liquid dish soap over the adhesive with your fingers.
Electrical Shock Hazard Plug into a grounded 3 prong outlet. Do not remove ground prong. Do not use an adapter, Do not use an extension cord. Failure to follow these Instructions can resell in death, fire, or electrical shock. Before you move your ice maker info its final location, iris important to make sure you have the proper electrical connection: A115 Volt, 80 Hz., AC only, 15or 20-amp electrical supply.
3. Push up on the top front of the ice maker, and then locate the leveling screws that are on the bottom front of the ice maker. 4. Using an adjustable wrench, change the height of the legs as follows: = Turn the leveling leg to the right to lower that side of the fce maker. ® Turn the leveling leg fo the left to raise that side of the ice maker. NOTE: The ice maker should not wobble. Use shims to add stability when needed, 8.
REAR VIEW 4, Water supply tube clamp 8. Vent phase (drain pump models only) C. Inlet water tube clamp ad supply line connector ©. Drain hose (drain pump models only) 6. Remove and discard the short, black plastic tube from the end of the water line inlet 7. Thread the nut onto the end of the tubing. Tighten the nut by hand. Then tighten it with a wrench two mote turns, Do not over tighten.
Drain Pump System {on some models} Connect the ice maker drain to your drain in accordance with the International Plumbing Code and any local codes and ordinances. NOTE: If the drain hose becomes twisted and water cannot drain, your ice maker will not quark. Connecting the Drain After ensuring that the drain system is adequate.
Reverse Hinges Reverse Door Catch 1. Unscrew and remove the top hinge. Replace the screws in 1. Remove the hole plugs from the opposite side of the door the empty hinge holes, and set aside, 2. Remove the screws from the bottom of the opposite side of 2. Remove the screws from the magnetic door catch and the ice maker cabinet. Turn the top hinge upside down so replace it on the opposite side of the door. that the hinge pin points up.
you. Because the sounds are new to you, you might be concerned about them. Most of the new sounds are normal. Hard surfaces such as floors, walls and cabinets can make the sounds seem louder than they actually are. The following describes the kinds of sounds that might be new to you and what may be making them. w You will hear a buzzing sound when the water valve opens fo Till the water reservoir for each cycle. wm Rattling noises may come from the flow of the refrigerant or the water line.
1. To start ice production, press ON. 2. To stop ice maker operation, press OFF. ONT OFF LOCKOUT SERVICE CLEAN CYCLE NOTES: = Pressing the On/Off switch does not shut off power to the ice maker. = Allow 24 hours to traduce the first batch of ice. Discard the first batch produced. Lockout Mode The control panel can be turned off for easy cleaning or to avoid unintentional activation by children or small pets, NOTE: The lock feature does not shut off power to the ice maker or fo the ice maker bin fight.
Condenser interior Components A dirty or clogged condenser: wm Obstructs proper airflow. m Reduces ice making capacity. m Causes higher than recommended operating temperatures which may lead to component failure. 4 Electrical Shock Hazard Disconnect power before cleaning. Replace all parts and panels before operating. Failure to do so can result in death or electrical shock. 1. Unplug ice maker or disconnect power. 2.
9. Remove, clean and replace the ice scoop and ice scoop holder. = After removing the ice scoop, remove the holder by removing the two thumb screws. = Wash the ice scoop holder along with the other interior components using the following instructions. = Replace the ice scoop holder by replacing the thumb S Crews. A Tums screws 8, Ice scoop holder 10.
TROUBLESHOOTING Try the solutions suggested here first in order to avoid the cost of an unnecessary service call. Your ice maker will not operate WARNING 2 Electrical Shock Hazard Lug into a grounded 3 prong outlet, {a not remove ground prong. Do not use an adapter. Do not use an extension cor. Failure to follow these instructions can resell in death, fire, or electrical shock. wu Is there ice between the evaporator plate and the cutting grid? Check that the ice maker is level. See “Leveling.
Grid is not cutting ice sheets Thin, soft or clumps of ice wis the cutter grid securely in place? Check the cutter grid shames plug to make sure the connection is intact. See “Interior Components” section of “Cleaning” for instructions on cutter grid removal. fee Jurist Off taste, odor or gray color in the ice wis there unusually high mineral content in the water supply? The water may need to be filtered or treated. mis there mineral scale buildup? Clean your ice maker.
WHIRLPOOL CORPORATION MAJOR APPLIANCE WARRANTY LIMITED WARRANTY For one year from the date of purchase, when this major appliance is operated and maintained according to instructions attached to or furnished with the product, Whirlpool Corporation or Whirlpool Canada LP (hereafter “Whirlpool” will pay for Factory Specified Parts and repair labor to correct defects in materials or workmanship. Service must be provided by a Whirlpool designated service company.
SÉCURITÉ DE LA MACHINE A GLAÇONS Votre sécurité et celle des autres est trais importante. Nous donnons de nombreux messages de sécurité importants dans ce manuel et sur votre appareil ménager. Assurez-vous de toujours lire tous les messages de sécurité et de vous y conformer. Voici le symbole d'alerte de sécurité Ce symbole d'alerte de sécurité vous signale les dangers potentiels de décès et de blessures graves a vous et a d’autres.
INSTRUCTIONS INSTALLATION A AVERTISSEMENT Risque du poids excessif Utiliser deux ou plus de personnes pour déplacer et installer la machine a glaçons. Le non-respect de cette instruction peut causer une blessure au dos ou d'autre blessure. Enlèvement des matériaux d’emballage Enlever le ruban adhésif et la colle de la machine 4 lagons avant de utiliser. wm Pour enlever ce qui reste du ruban adhésif ou de Ja colle de la surface extérieure de la machine a lagons, frotter la surface hivernent avec le pouce.
Risque de choc électrique Brancher sur une prise 4 3 alvéoles relise 3 la terre. Me pas enlever la broche de lisions a la terre. Me pas utiliser un adaptateur. Ne pas utiliser un câble de rallonge. Le non-respect de ces instructions peut causer un décès, un incendie ou un choc électrique.
2. Placer le niveau sur le dessus du produit pour voir sial machine a lagons est d’ aplomb d’avant en arriéré et transversalement. 3. Pousser vers le haut sur la partie supérieure avant de Ja machine & lagons pour repérer les vis de nivellement qui se trouvent sur Je fond avant de la machine & lagons. 4. Au moyen d'une clé a molette, modifier la hauteur des pieds ocrer suit © = Tournai le pied de nivellement vers la droite pour abaisser cae cité de la machine & glaçons.
VUE ARRIÉRÉ o 10. A. Bride lotir tuyau arrive d’exeat B. Tuyau sidération (seulement pour maladies aber pompe de vidage) ©. Bride pour tuyau o admission d'saut ef connecter & fa canalisation Alimentation en sat D. Thuya de vidange (seulement pour démodes aber pompe de vidange) Retirer et jeter le tube court noir en plastique de 'extrémité du tuyau d'admission d'eau. Visser ['écrou dans le raccord & ‘extrémité du tuyau. Serrer {'écrou manuellement. Ensuite le serrer deux tours de plus avec une clé.
Système avec pompe de vidange {sur certains modelés} Raccorder le drain de la machine a lagons au drain de vidange conformément au Code international de plomberie ef & tous les codes et règlements locaux. REMARQUE : Si le tuyau de vidange devient tordu ef que l'eau rie peut pas se vidanger, votre machine a lagons ne fonctionnera pas.
inversion des charnières Inversion du loquet de porte 8. Ôter axe de la charnière supérieure. Réinstallation de la porte — 1. Placer la douille de plastique de la charnière dans le trou de la. 1. Dévisser et der la charnière supérieure. Réinstaller Jes vis 1. Ôter les bouchons de trous du caté opposé de la porte et les dans les trous vides de chapitre, mettre de coté. 2. Ôter les vis du coté opposé inférieur de la caisse de la 2.
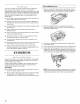
SHEKEL DOTA Hi est possible que voire nouvelle machine a lagons émette des bruits qui ne vous sont pas familiers, Comme ces bruits sont nouveau, ils peuvent vous inquiéter. La plupart de ces nouveaux bruits sont normaux.
5. Les lagons tombent dans le bac d'entreposage. La machine a lagons s’arrête automatiquement dés que le bac est plein. et elle sa remet en marche lorsqu'il faut plus de lagons, Le bac a lagons n'est pas réfrigéré et la glace fondra un peu. Le degré de fonte dépend de la température de la pièce. REMARQUE : Selon les variations de températures de la pique ef de l'eau, la quantité de glace produite ef entreposée variera.
1. Teindre la machine 4 lagons. 2. Attendre minutes que 1a glace tombe dans le bac d’entreposage. Retirer toute la glace du bac d’entreposage. 3. Dévisser le capuchon de vidange du bas du bac a eau situé a 'intérieur du bac d'entreposage tel qu'illustré. Laisser eau se vidanger complètement. 4. Réinstaller le capuchon de vidange solidement sur le bac 8 eau, Bile capuchon de vidange est dessert, ‘eau s’écoulera du bac a sau et la glace sera mince ou il n'y aura pas de glace. 5.
on 8. Retirer les deux vis 4 dallette qui maintiennent le bac & eau en Composants intérieurs place. Appuyer avec une main sur avant du bac tout en 8. ~ tirant vers "avant sur le c61é arriéré inférieur. Débrancher la machine & lagons ou déconnecter la source de courant électrique. Qui ver la porte ou se trouve Je bac & glaçons et retirer tout lagon qui s'y trouve Retirer le capuchon de vidange du réservoir d'eau et vidanger ce dernier complètement.
12. Faire les vérifications suivantes : = Le capuchon de vidange du bac a eau est solidement en place. 8i le capuchon de vidange est desserré, 'eau s'écoulera du bac a eau et la glace sera mince ou pin’s aura pas de glace. = Le tuyau provenant du bac 4 eau est inséré dans ouverture de vidange du bac d’entreposage. 13. Glisser la grille de coupe en place et la fixer en remettant la vis du c&té droit et la cale d'espacement en plastique. Serrer ensuite la vis du coté gauche.
DÉPANNAGE Essayer d'abord les solutions suggérées ici afin d'éviter le colt d'une visite de service non nécessaire. cheminement de ba mach La machine a lagons ne fonctionne pas 3 wu Y a-t-il un bruit de “chuintement™? Vérifier ce qui sut: = S'assurer gue l'alimentation en eau ast correctement raccordée et ouverte. = Vérifier que le capuchon de vidange ast serré et que fa porno de vidange est correctement fixée au bac a eau.
mY a-t-il une accumulation de tartre dans la machine & lagons? $'il y a une accumulation blanche de tartre dans le système d'eau ou de congélation de la machine a lagons, il faut nettoyer l'appareil, Voir “Composants intérieurs” dans la section “Nettoyage”. w Le capuchon de vidange est-il bien en place? Si le capuchon de vidange est desserré, l'eau s’écoulera du bac a eau et la glace sera mince ou if n'y aura pas de glace. Resserrer le capuchon de vidange s'il est desserré.
GARANTIE DES GROS APPAREILS MÉNAGERS WHIRLPOOL CORPORATION GARANTIE LIMITÉE Pendant un an 4 compter de Ia date d'achat, lorsque ce gros appareil ménager est utilisé et entretenus conformément aux instructions jointes 4 ou fournies avec le produit, Whirlpool Corporation ou Whirlpool Canada LP (ci-après désignées “Whirlpool” lapera paru les piges spécifiques par ['usine et la pour corriger les vices de matériaux ou de fabrication.