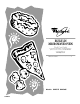
® BUILT-IN MICROWAVE OVEN Use & Care Guide For questions about features, operation/performance, parts, accessories or service, call: 1-800-253-1301. or visit our website at... www.whirlpool.com Table of Contents.........................................
TABLE OF CONTENTS MICROWAVE OVEN SAFETY........................................................2 Electrical Requirements ...............................................................4 PARTS AND FEATURES................................................................5 MICROWAVE OVEN CONTROL....................................................5 MICROWAVE OVEN USE ..............................................................6 Food Characteristics ..............................................................
IMPORTANT SAFETY INSTRUCTIONS When using electrical appliances basic safety precautions should be followed, including the following: WARNING: To reduce the risk of burns, electric shock, fire, injury to persons, or exposure to excessive microwave energy: ■ Read all instructions before using the microwave oven. ■ Read and follow the specific “PRECAUTIONS TO AVOID POSSIBLE EXPOSURE TO EXCESSIVE MICROWAVE ENERGY” found in this section. ■ The microwave oven must be grounded.
PRECAUTIONS TO AVOID POSSIBLE EXPOSURE TO EXCESSIVE MICROWAVE ENERGY (a) Do not attempt to operate this oven with the door open since open-door operation can result in harmful exposure to microwave energy. It is important not to defeat or tamper with the safety interlocks. (b) Do not place any object between the oven front face and the door or allow soil or cleaner residue to accumulate on sealing surfaces. (c) Do not operate the oven if it is damaged.
PARTS AND FEATURES This manual covers different models. The oven you have purchased may have some or all of the parts and features listed. The location and appearance of the features shown here may not match those of your model. B A C D I E F H A. Lower oven control B. Microwave oven control C. Light D. Cooking guide label E. Glass turntable G This unit must be connected to a 240-volt circuit. F. Removable turntable support G. Door handle H. Metal shielded window I.
MICROWAVE OVEN USE A magnetron in the oven produces microwaves which reflect off the metal floor, walls and ceiling and pass through the turntable and appropriate cookware to the food. Microwaves are attracted to and absorbed by fat, sugar and water molecules in the food, causing them to move, producing friction and heat which cooks the food. ■ Do not lean on or allow children to swing on the microwave oven door. ■ Do not operate microwave oven when it is empty.
MATERIAL RECOMMENDATIONS Paper: Towels, Dinnerware, Napkins Use nonrecycled and those approved by the manufacturer for microwave oven use. Plastic: Wraps, Bags, Covers, Dinnerware, Containers Use those approved by the manufacturer for microwave oven use. Pottery and Clay Follow manufacturer’s recommendations. Styrofoam* Do not use in microwave oven. Straw, Wicker, Wooden Containers Do not use in microwave oven. Wax Paper Acceptable for use.
Cook Power To Use: 1. Put food into oven and close door. 2. Touch number pads to set a length of time to cook. Oven automatically cooks at high cook power. 3. Touch COOK POWER to set a cooking power other than 100%. Each time you touch Cook Power, the cook power will decrease by 10%. Choose a cooking power using the Cooking Power chart. 4. Touch START. The display will count down the cook time. NOTES: ■ If you want to add more time during or after cooking, use Add A Minute or Cook A Bit More.
Add A Minute Add A Minute lets you cook food for 1 minute at 100% cook power or add 1 or more minutes to your Micro Time cooking cycle. To add cooking time during Micro Time cooking, touch ADD A MINUTE once for each extra minute. ■ You can enter Add A Minute only after closing the door. When cooking time ends, 4 tones will sound and repeat every minute until you open the oven door or touch UPPER OFF/ CANCEL. This will clear the display.
■ ■ During multistage cooking, you may use Add A Minute to increase any stage’s cooking time. When the stage you want to change is active, touch ADD A MINUTE. During the last stage, you may also touch COOK A BIT MORE to increase the cooking time. Cook A Bit More increases the last stage’s remaining cooking time by adding a percentage of the last stage’s expired cooking time. ■ If the last stage is Micro Time, you may use Cook A Bit More after cooking.
DEFROST CHART MEAT, POULTRY AND FISH DEFROST PREPARATION The Custom Defrost system has 6 categories: Meat, Poultry, Fish, Bagel, Fruit Juice, and Roll/Muffin. Use the following chart as a guide. Use the following chart as a guide when defrosting meat, poultry, or fish. When setting the Defrost cycle, the net weight must be entered in pounds and tenths of pounds. FOOD SETTING CODE WEIGHT OR QUANTITY MEAT Meats* 1 0.1 to 6.6 lbs (45 g to 3 kg) Beef: ground, steaks, roast, stew Poultry* 2 0.
2. Touch START or wait 5 seconds for the popping to begin automatically. The upper oven display will count down the popping time. Time may be added to popping time by touching COOK A BIT MORE during or after popping. When the popcorn cycle ends, “End” will appear in the display, 4 end-of-cycle tones will sound, and then reminder tones will sound every minute. Baked Potato One or more 10 oz (283 g) potatoes can be baked automatically in the microwave oven by using the Baked Potato function.
MICROWAVE OVEN CARE General Cleaning IMPORTANT: Before cleaning, make sure all controls are off and the oven is cool. Always follow label instructions on cleaning products. Soap, water and a soft cloth or sponge are suggested first unless otherwise noted. MICROWAVE OVEN DOOR AND EXTERIOR The area where the oven door and frame touch when closed should be kept clean. Cleaning Method: ■ Mild, nonabrasive soaps and detergents: Rinse with clean water and dry with soft, lint-free cloth.
TROUBLESHOOTING Try the solutions suggested here first in order to avoid the cost of an unnecessary service call. Nothing will operate ■ ■ Microwave oven door looks wavy Has a household fuse blown, or has a circuit breaker tripped? Replace the fuse or reset the circuit breaker. If the problem continues, call an electrician. ■ Is the appliance wired properly? See Installation Instructions.
ASSISTANCE OR SERVICE Before calling for assistance or service, please check “Troubleshooting.” It may save you the cost of a service call. If you still need help, follow the instructions below. When calling, please know the purchase date and the complete model and serial number of your appliance. This information will help us to better respond to your request. If you need replacement parts If you need to order replacement parts, we recommend that you use only FSP® replacement parts.
WHIRLPOOL CORPORATION MAJOR APPLIANCE WARRANTY ONE YEAR LIMITED WARRANTY For one year from the date of purchase, when this major appliance is operated and maintained according to instructions attached to or furnished with the product, Whirlpool Corporation or Whirlpool Canada LP (hereafter “Whirlpool”) will pay for FSP® replacement parts and repair labor to correct defects in materials or workmanship. Service must be provided by a Whirlpool designated service company. ITEMS WHIRLPOOL WILL NOT PAY FOR 1.