ELECTRICRANGE For questions about features, operation/performance parts, accessories or service, call: 1-800-253-1301. or visit our website at... www.whirlpool.com Table of Contents Model 9782189A .................................................
TABLEOF CONTENTS RANGE SAFETY ............................................................................. The Anti-Tip Bracket .................................................................... 3 3 PARTS AND FEATURES ................................................................ 6 COOKTOP USE .............................................................................. Cooktop Controls ......................................................................... ACCUSIMMER TMFeature .................
RANGESAFETY Your safety and the safety of others are very important. We have provided many important safety messages in this manual and on your appliance. Always read and obey all safety messages. This symbol alerts you to potential hazards that can kill or hurt you and others. All follow the safety alert symbol and either the word "DANGER" or Thissafety is themessages safety alertwillsymbol. "WARNING." These words mean: You can be killed or seriously injured if you don't immediately follow instructions.
iMPORTANT SAFETY iNSTRUCTiONS WARNING: To reduce the risk of fire, electrical shock, injury to persons, or damage when using the range, follow basic precautions, including the following: [] WARNING: TO REDUCE THE RISK OF TIPPING OF THE RANGE, THE RANGE MUST BE SECURED BY PROPERLY INSTALLED ANTI-TIP DEVICES. TO CHECK IF THE DEVICES ARE INSTALLED PROPERLY, SLIDE RANGE FORWARD, LOOK FOR ANTI-TIP BRACKET SECURELY ATTACHED TO FLOOR, AND SLIDE RANGE BACK SO REAR RANGE FOOT IS UNDER ANTI-TIP BRACKET.
IMPORTANT SAFETY INSTRUCTIONS • Keep Oven Vent Ducts Unobstructed. For self-cleaning ranges - • Placement of Oven Racks - Always place oven racks in desired location while oven is cool. If rack must be moved while oven is hot, do not let potholder contact hot heating element in oven. • DO NOT TOUCH HEATING ELEMENTS OR INTERIOR SURFACES OF OVEN - Heating elements may be hot even though they are dark in color. Interior surfaces of an oven become hot enough to cause burns.
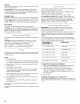
PARTSANDFEATURES This manual covers several different models. The range you have purchased may have some or all of the parts and features listed. The location and appearance of the features shown here may not match your model. Control Panel 2 3 4 oF, ° 5 6 7 1. Surface Cooking Area Locator 2. Electronic Oven Control 3. °" [E=C_ oo 4. 5. Keep Warm Element Switch Left Front Control Knob Right Rear Control Knob 8 6. Left Rear Control Knob 7. ACCUSlMMER 8.
COOKTOPUSE The ACCUSlMMER setting is an adjustable heat setting for more precise simmering. It is the right front surface cooking area or element. The indicator light will glow when the ACCUSIMMER setting is on. When the setting is not on, the right front surface cooking area or element will function as usual. To use: 1. Press the ACCUSlMMER switch to the ON position. OFF O0 2_ _8 3° *7 4 I Fire Hazard Turn off all controls when done cooking. 2. Failure to do so can result in death or fire.
Hot Surface Indicator Light (under ceramic glass) The hot surface indicator light will glow as long as any surface cooking area is too hot to touch, even after the surface cooking area(s) is turned off. Thesurface cooking areawillglowredwhenanelement ison.It willcycleonandoff,atallsettings, tomaintain theselected heat level. It isnormal forthesurface ofwhiteceramic glasstoappear to change colorwhensurface cooking areas arehot.Astheglass cools,itwillreturntoitsoriginal color.
COOKWARE CHARACTERISTICS Copper • Heats very quickly and evenly. Earthenware • Follow manufacturer's • Use on low heat settings. instructions. COOKWARE CHARACTERISTICS Porcelain enamel-on-steel or cast iron • Stainless See stainless steel or cast iron. steel Heats quickly, but unevenly. A core or base of aluminum or copper on stainless steel provides even heating. ELECTRONICOVENCONTROL 2 ) SELF-CLEANING OVEN 6 7 8 9 10 11 12 1. Convection Selector 4. Clock 7.
All Tones All of the above tones are preset on, all except the end-of-cycle tones can be turned off. To Turn Off/On: Press and hold STOP TIME for 5 seconds. A tone will sound and "oFF" or "Snd OFF" (depending on your model) will appear on the display. Repeat to change back to "on" or "Snd On" (depending on your model). The Control Lock shuts down the control panel pads (buttons) to prevent unintended use of the oven(s).
BAKEWARE OVENUSE To cook food evenly, hot air must be able to circulate. Allow 2 in. (5 cm) of space around bakeware and oven walls. Use the following chart as a guide. Odors are normal when the range is new. This happens the first time the oven is used or when the oven is heavily soiled. NUMBER OF PAN(S) POSITION ON RACK IMPORTANT: The health of some birds is extremely sensitive to the fumes given off. Exposure to the fumes may result in death to certain birds.
On models without a temperature probe, always rely on a meat thermometer to determine doneness of meat and poultry. The internal temperature, not appearance, is what counts. A meat thermometer is not supplied with this appliance. • Insert the thermometer into the center of the thickest portion of the meat or inner thigh or breast of poultry. The tip of the thermometer should not touch fat, bone or gristle. • After reading the thermometer once, push it into the meat 1/2in. (1.25 cm) more and read again.
To Vari Broil: Changing the temperature when custom broiling allows more precise control when cooking. The lower the temperature, the slower the cooking. Thicker cuts and unevenly shaped pieces of meat, fish and poultry may cook better at lower broiling temperatures. 1. Press BROIL. Press the TEMP "up" or "down" arrow pads to enter a temperature other than 500°F (260°C). The broil range can be set between 170°F and 500°F (77°C and 260°C). 2. Press START.
To Convection Bake or Roast: Before convection baking or roasting, position the racks according to the "Positioning Racks and Bakeware" section. When using two racks, place them on rack positions 2 and 4, When roasting with CONV BAKE, it is not necessary to wait for the oven to preheat before putting food in, unless recommended in the recipe. 1. Press CONV BAKE, 2. Food/Rack Position Cook Time (minutes) Oven Temp. Internal Food Temp.
To Convection Broil: 4. Before convection broiling, see the "Broiling" section for general broiling guidelines and rack positioning. Allow the oven to preheat for 5 minutes. Position food on the grid in the broiler pan, then place it in the center of the oven rack with the longest side parallel to the door. Close the door. 1. 5. 6. 7. arrow pads to enter When the set cook time ends, the oven will shut off automatically and "End" will appear on the display. Press START.
Prepare Oven: • Remove the broiler pan, grid, cookware and bakeware and, on some models, the temperature probe from the oven. 4. Press START. The start time is automatically calculated and displayed. • Remove any foil from the oven because it may burn or melt, damaging the oven. The door will automatically lock and "LOCKED" and "DELAY" will appear on the display. The door will not unlock until the oven cools. • Remove oven racks to keep them shiny and easy to slide.
Heavy soil, dark streaks, specks and discoloration • Cooktop Polishing Creme or non-abrasive OVEN RACKS cleanser: Rub product into soil with a damp paper towel or soft cloth. Continue rubbing until white film disappears. • Cooktop Polishing Creme and Cooktop Scraper: Rub creme into soil with damp paper towel. Hold scraper as flat as possible on surface and scrape. Repeat for stubborn spots. Polish entire cooktop with creme and paper towel.
Push door down and pull straight out to remove door completely. 3= Cooktop will not operate • Is the control knob set correctly? Push in knob before turning to a setting. • On ceramic glass models, is the "Cooktop See "Cooktop Lockout" section. Lockout" set? Right front surface cooking area will not operate To Replace: 1. Hold oven door by the handle and place the top of the door under the cooktop overhang. 2. Use front of leg to apply pressure to slide hinges into the slots as far as possible.
Display shows messages • Is the display showing "PF"? There has been a power failure. Clear the display. See "Display(s)" section. On some models, reset the clock, if needed. See "Clock" section. Is the display showing a letter followed by a number? Press OFF/CANCEL, OFF or CANCEL/OFF to clear the display. See "Display(s)" section. If it reappears, call for service. See "Assistance or Service" section. Self-Cleaning cycle will not operate • Is the oven door open? Close the oven door all the way.
WH]RI2OOL®COOKTOP,BUILT.INOVENANDRANGEWARRANTY FULL ONE-YEAR WARRANTY For one year from the date of purchase, when this appliance is operated and maintained according to instructions attached to or furnished with the product, Whirlpool Corporation will pay for FSP ® replacement parts and repair labor to correct defects in materials or workmanship. Service must be provided by a Whirlpool Corporation designated service company.