Gebrauchsanweisung
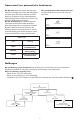
Aufstellung 4 Wichtige Sicherheitshinweise 4 Umweltschutz 5 Wichtige Vorsichtsmaßnahmen 5 Kundendienst 6 Zubehör 7 Startschutz 8 Tastensperre 8 Garzustand (nur automatische Funktionen) 9 Meldungen 9 Abkühlen 10 Abkürzungen 10 Ein/Aus 11 Einstellungen ändern 11 Kurzzeitmesser 15 Garen und Aufwärmen mit Mikrowellen 15 Schnellstartfunktion 16 Crisp 17 Grill 18 Kombinationsbetrieb mit Grill 19 Turbogrill 20 Kombinationsbetrieb mit Turbogrill 21 Schnelles Vorheizen 22
Aufstellung MONTAGE DES GERÄTS Die mitgelieferte separate Einbauanleitung zum Aufbau des Geräts befolgen. Stromschlag, Brand oder sonstige Gefährdungen die Folge sein. Verwenden Sie keine Verlängerungskabel: Sollte das Netzkabel zu kurz sein, lassen Sie einen qualifizierten Elektriker oder Wartungstechniker eine Steckdose in der Nähe des Geräts anbringen. VOR DEM ANSCHLIESSEN Die Spannung auf dem Typenschild muss der Spannungsversorgung in Ihrem Haus entsprechen.
Umweltschutz Entsorgen des Verpackungsmaterials • Die Verpackung besteht aus 100 % recyclingfähigem Material und ist durch das Recycling-Symbol gekennzeichnet . • Entsorgen Sie die verschiedenen Verpackungsmaterialien des Geräts ordnungsgemäß und umweltgerecht. • Durch eine vorschriftsmäßige Entsorgung tragen Sie zum Umweltschutz bei und vermeiden potentielle Unfallgefahren, die bei einer unsachgemäßen Entsorgung des Produkts entstehen können.
Kundendienst Bevor Sie den Kundendienst kontaktieren: 1. Versuchen Sie bitte zunächst, das Problem selbst anhand der Beschreibungen in Abschnitt "Erst einmal selbst prüfen" zu lösen. 2. Schalten Sie das Gerät aus und danach wieder ein, um zu prüfen, ob der Fehler weiterhin erscheint. Sollte der Fehler nach Durchführung der oben genannten Prüfungen weiterhin bestehen, kontaktieren Sie bitte den Kundendienst.
Zubehör ALLGEMEINES Eine Reihe von Zubehörteilen kann käuflich erworben werden. Prüfen Sie vor dem Kauf, ob sie für das Mikrowellengerät geeignet sind. Nur hitzebeständiges und mikrowellengeeignetes Kochgeschirr verwenden. Stellen Sie Speisen und Zubehör ur dann in das Mikrowellengerät, wenn diese nicht mit dessen Innenwänden in Berührung kommen. Das gilt besonders dann, wenn die Zubehörteile aus Metall oder Metallteilen bestehen.
Startschutz Die Startschutz-Funktion wird eine Minute nach Rücksetzung des Gerätes in den "Stand-By-Modus" aktiviert. Die Sicherheitsverriegelung wird erst dann freigegeben, wenn die Tür geöffnet und geschlossen wird, z. B. wenn Speisen in die Mikrowelle gestellt werden. Sicherheitssperre ist aktiv und drücken Tastensperre Benutzen Sie diese Funktion, damit Kinder das Gerät nicht unbeaufsichtigt benutzen können. Wenn die Tastensperre aktiviert ist, sind alle Tasten gesperrt. 1.
Garzustand (nur automatische Funktionen) Die Garstufe ist für die meisten automatischen Funktionen verfügbar. Sie können das Endergebnis persönlich über den Modus "Garstufe einstellen" regulieren. Verglichen mit den standardmäßigen Voreinstellungen lässt sich damit eine höhere oder niedrigere Endtemperatur festlegen. Bei der Verwendung einer dieser Funktionen verwendet das Gerät die Standardeinstellung. Diese Einstellung liefert normalerweise das beste Ergebnis.
Abkühlen Nach Abschluss einer Funktion kann das Gerät einen Abkühlvorgang starten. Das ist normal. Danach schaltet sich das Gerät automatisch ab. Ist die Temperatur höher als 100 °C, wird die aktuelle Garraumtemperatur angezeigt. Achten Sie darauf, dass Sie nicht die Geräteinnenwand berühren, wenn Sie Speisen aus dem Gerät entnehmen. Verwenden Sie Ofenhandschuhe. Ist die Temperatur niedriger als 50 °C, wird die 24-StundenUhr angezeigt.
Ein/Aus Das Gerät wird mit den mit den Tasten Ein-/Aus ein- und ausgeschaltet. . Wenn das Gerät eingeschaltet wird, funktionieren alle Tasten normal und die 24-Stunden-Anzeige wird nicht angezeigt. Wenn das Gerät ausgeschaltet wird, reagiert nur noch eine Taste. D.h. die Start-Taste (siehe Schnellstart) und die OK-Taste (siehe Zeitschaltuhr). Auf dem Display wird die 24-Stunden-Anzeige dargestellt.
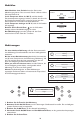
Sprache Anweisungen Sprache Zeit Geräte- und Displayeinstellungen 1. Drücken Sie die OK-Taste. 2. Benutzen Sie die Auf-/Ab-Tasten, um eine der verfügbaren Sprachen auszuwählen. 3. Drücken Sie die OK-Taste erneut, um die Änderung zu bestätigen. Français English Italiano Bitte Sprache wählen Sprache wurde eingestellt Uhr einstellen Sprache Zeit Lautstärke Geräte- und Displayeinstellungen 1. Drücken Sie die OK-Taste. (Die linken Ziffern (Stundenangabe) blinken.). 2.
Lautstärke einstellen Zeit Lautstärke Helligkeit Geräte- und Displayeinstellungen 1. Drücken Sie die OK-Taste. 2. Benutzen Sie die Auf-/Ab-Tasten, um die gewünschte Lautstärke auf stumm, schwach, mittel oder laut einzustellen. 3. Drücken Sie die OK-Taste erneut, um die Änderung zu bestätigen. Hoch Mittel Niedrig Für normale Umgebungsbedingungen Lautstärke wurde eingestellt Helligkeit Lautstärke Helligkeit Kontrast Geräte- und Displayeinstellungen 1. Drücken Sie die OK-Taste. 2.
Stand-By Kontrast Stand-By-Modus w Anweisungen Geräte- und Displayeinstellungen 1. Drücken Sie die OK-Taste. 2. Benutzen Sie die Auf-/Ab-Tasten, um die Einstellung STAND-BY (ECO) EIN oder AUS zu schalten. 3. Drücken Sie die OK-Taste erneut, um die Änderung zu bestätigen. Wenn Stand-By (ECO) eingeschaltet ist, schaltet die Anzeige nach einer Weile automatisch ab, um Energie zu sparen. Sie schaltet sich automatisch wieder ein, sobald eine Taste gedrückt oder die Tür geöffnet wird.
Kurzzeitmesser Verwenden Sie diese Funktion, wenn Sie einen Kurzzeitmesser zur genauen Messung der Zeit für verschiedene Vorgänge benötigen, z. B. zum Kochen von Eiern oder zum Gehenlassen von Teig vor dem Backen usw. Diese Funktion ist nur verfügbar, wenn das Gerät ausgeschaltet oder im Standby-Modus ist. Timer einstellen: drücken, Timer starten: drücken 1. Drücken Sie die OK-Taste. 2. Benutzen Sie die Auf-/Ab-Tasten, um die gewünschte Zeitdauer mit dem Kurzzeitmesser einzustellen. 3.
Leistungsstufe NUR MIKROWELLE Leistungsstufe Gebrauchsempfehlung: 900 W Zum Aufwärmen von Getränken, Wasser, klaren Suppen, Kaffee, Tee oder anderen Nahrungsmitteln mit hohem Wassergehalt. Wählen Sie eine niedrigere Leistungsstufe, falls die Speise Ei oder Sahne enthält. 750 W Garen von Gemüse, Fleisch etc. 650 W Garen von Fisch. 500 W Schonendere Zubereitung, z. B. bei Saucen mit hohem Eiweißgehalt, Käse und Eierspeisen, sowie zum Fertigkochen von Eintopfgerichten.
Crisp Diese Funktion dient zum Aufwärmen oder Backen von Pizzen und anderen Backwaren. Außerdem können mit dieser Funktion schnell und einfach Eier mit Speck, Hamburger, Würstchen usw. gebraten werden. q Automatisch Manuell et Sensor Normale Garfunktionen 1. 2. 3. 4. 5. Drücken Sie die Menü-Taste. Drücken Sie die OK-Taste, wenn Manuell angezeigt wird. Benutzen Sie die Auf-/Ab-Tasten, bis Crisp angezeigt wird. Drücken Sie die OK-Taste, um Ihre Auswahl zu bestätigen.
Grill Diese Funktion dient dazu, den Speisen rasch eine schöne gebräunte Oberfläche zu verleihen. Für Speisen wie Toast, Steaks und Würstchen, setzen Sie die Speisen auf den hohen Rost. q et u Automatisch Manuell Sensor Normale Garfunktionen Drücken Sie die Menü-Taste. Drücken Sie die OK-Taste, wenn Manuell angezeigt wird. Benutzen Sie die Auf-/Ab-Tasten, bis Grill angezeigt wird. Drücken Sie die OK-Taste, um Ihre Auswahl zu bestätigen. Benutzen Sie die Auf-/Ab-Tasten, um die Garzeit einzustellen. 6.
Kombinationsbetrieb mit Grill Verwenden Sie diese Funktion zum Garen von Speisen wie Lasagne, Fisch und Kartoffelgratins. q et uo Automatisch Manuell Sensor a wr yi Normale Garfunktionen 1. Drücken Sie die Menü-Taste. 2. Drücken Sie die OK-Taste, wenn Manuell angezeigt wird. 3. Benutzen Sie die Auf-/Ab-Tasten, bis Grill + MW angezeigt wird. 4. Drücken Sie die OK-Taste, um Ihre Auswahl zu bestätigen. 5. Benutzen Sie die Auf-/Ab-Tasten, um die Garzeit einzustellen. 6.
Turbogrill Verwenden Sie diese Funktion zum Garen von Speisen wie Hähnchenfilets, gratiniertem Gemüse und Obst. q et u Automatisch Manuell Sensor 1. Drücken Sie die Menü-Taste. 2. Drücken Sie die OK-Taste, wenn Manuell angezeigt wird. 3. Benutzen Sie die Auf-/Ab-Tasten, bis Turbogrill angezeigt wird. 4. Drücken Sie die OK-Taste, um Ihre Auswahl zu bestätigen. 5. Benutzen Sie die Auf-/Ab-Tasten, um die Garzeit einzustellen. 6. Drücken Sie die OK-Taste, um Ihre Einstellung zu bestätigen. 7.
Kombinationsbetrieb mit Turbogrill Verwenden Sie diese Funktion zum Garen von Speisen wie gefülltes Gemüse und Hühnchenfrikassee. q et uo wr yi Automatisch Manuell Sensor Normale Garfunktionen 1. Drücken Sie die Menü-Taste. 2. Drücken Sie die OK-Taste, wenn Manuell angezeigt wird. 3. Benutzen Sie die Auf-/Ab-Tasten, bis Turbogrill + MW angezeigt wird. 4. Drücken Sie die OK-Taste, um Ihre Auswahl zu bestätigen. 5. Benutzen Sie die Auf-/Ab-Tasten, um die Garzeit einzustellen. 6.
Schnelles Vorheizen Diese Funktion eignet sich zum Vorheizen des leeren Garraums. Das Vorheizen erfolgt stets bei leerem Garraum, in der gleichen Weise, wie ein herkömmlicher Backofen vor dem Garen oder Backen vorgeheizt wird. q et Automatisch Manuell Sensor y Normale Garfunktionen wr 1. Drücken Sie die Menü-Taste. 2. Drücken Sie die OK-Taste, wenn Manuell angezeigt wird. 3. Benutzen Sie die Auf-/Ab-Tasten, bis Schnelles Vorheizen angezeigt wird. 4.
Heißluft Benutzen Sie diese Funktion zur Zubereitung von Meringuen, Gebäck, Biskuitkuchen, Aufläufen, Geflügel und Braten. q Automatisch Manuell Sensor et u Normale Garfunktionen 1. Drücken Sie die Menü-Taste. 2. Drücken Sie die OK-Taste, wenn Manuell angezeigt wird. 3. Benutzen Sie die Auf-/Ab-Tasten, bis Heißluft angezeigt wird. 4. Drücken Sie die OK-Taste, um Ihre Auswahl zu bestätigen. 5. Benutzen Sie die Auf-/Ab-Tasten, um die Garzeit einzustellen. 6.
Kombinationsbetrieb mit Heißluft Diese Funktion eignet sich zum Garen von Bratenfleisch, Geflügel, gebackenen Kartoffeln, Tiefkühlgerichten, Biskuitkuchen, Gebäck, Fisch und Pudding. q Automatisch Manuell Sensor Normale Garfunktionen et uo wr yi a 1. Drücken Sie die Menü-Taste. Heißluft 2. Drücken Sie die OK-Taste, wenn Manuell angezeigt wird. Heißluft + MW 3. Benutzen Sie die Auf-/Ab-Tasten, bis Heißluft + MW Schnelles Vorheizen angezeigt wird. 4.
Sensor Aufwärmen Diese Funktion dient zum Aufwärmen von tiefgekühlten, gekühlten oder zimmertemperierten Fertiggerichten. Die Speise auf einen mikrowellengeeigneten und hitzebeständigen Essteller oder in ein entsprechendes Kochgeschirr geben. q wr Manuell Sensor Einstellungen Normale Garfunktionen 1. Drücken Sie die Menü-Taste. 2. Benutzen Sie die Auf-/Ab-Tasten bis der Sensor angezeigt wird. 3. Drücken Sie die OK-Taste, um Ihre Auswahl zu bestätigen. 4.
Manuelles Auftauen Beim manuellen Auftauen entsprechend dem Kapitel "Garen und Aufwärmen mit der Mikrowelle" vorgehen und die Leistung auf 160 W einstellen. Überprüfen Sie die Speisen in regelmäßigen Abständen. Mit der Zeit wissen Sie aus Erfahrung, welche Einstellungen die unterschiedlichen Mengen benötigen. Tiefkühlkost in Plastikbeuteln, Klarsichtfolie oder Kartons können Sie direkt mit der Verpackung auftauen, solange diese Verpackugnen keine Metallteile (z. B. Drahtverschlüsse) enthalten.
GEWICHT: Bei dieser Funktion muss das Nettogewicht der Speise bekannt sein. Das Gerät berechnet anschließend automatisch die Zeit bis zur Beendigung des Vorgangs. Wenn das Gewicht nicht dem empfohlenen Wert entspricht: entsprechend dem Kapitel "Garen und Aufwärmen mit der Mikrowelle" vorgehen und die Leistung auf 160 W einstellen. TIEFGEKÜHLTE SPEISEN: Falls die Speisen wärmer sind als die Tiefkühltemperatur (-18 °C), wählen Sie ein niedrigeres Gewicht.
Crispsensor Diese Funktion dient dazu, Speisen vom tiefgefrorenen Zustand schnell auf Serviertemperatur zu bringen. Die Crisp-Automatik wird nur für tiefgefrorene Fertiggerichte verwendet. q wr y et u Manuell Sensor Einstellungen Garen mit Sensor 1. Drücken Sie die Menü-Taste. 2. Benutzen Sie die Auf-/Ab-Tasten, bis der Sensor angezeigt wird. 3. Drücken Sie die OK-Taste, um Ihre Auswahl zu bestätigen. 4. Benutzen Sie die Auf-/Ab-Tasten, bis Crispsensor angezeigt wird. 5.
Verwenden Sie für diese Funktion nur die mitgelieferte Crisp-Platte. Andere auf dem Markt erhältliche Crisp-Platten führen nicht zu einem zufrieden stellenden Ergebnis. Stellen Sie keine Behälter oder Verpackungen auf die Crisp-Platte! Es darf nur die Speise auf die Crisp-Platte. SPEISE *** HINWEISE Pommes Frites (300 g - 600 g) Verteilen Sie die Pommes Frites in einer gleichmäßigen Schicht auf der Crisp-Platte. Bestreuen Sie sie mit Salz, falls gewünscht.
Dampfsensor Diese Funktion eignet sich für Gemüse, Fisch, Reis und Nudeln. Diese Funktion arbeitet in 2 Schritten. Im ersten Schritt wird die Speise schnell auf Siedetemperatur gebracht. Im zweiten Schritt wird automatisch auf eine niedrigere Temperatur heruntergeschaltet, damit die Speise nur noch köchelt und nicht überkocht. q wr y et Manuell Sensor Einstellungen Garen mit Sensor 1. 2. 3. 4. Drücken Sie die Menü-Taste. Benutzen Sie die Auf-/Ab-Tasten, bis der Sensor angezeigt wird.
Aufweichen Verwenden Sie diese Funktion, zum Aufweichen von Lebensmitteln zur einfacheren Verarbeitung Die automatische Aufweich-Funktion wird für Speisen verwendet, die in nachfolgender Tabelle aufgeführt sind. q w r iy Einstellungen AUTO Automatik Manuell Automatische Funktionen und Rezepte 1. Drücken Sie die Menü-Taste. 2. Benutzen Sie die Auf-/Ab-Tasten, bis Automatik angezeigt wird. 3. Drücken Sie die OK-Taste, um Ihre Auswahl zu bestätigen. 4.
Schmelzen Benutzen Sie diese Funktion zum spritzfreien Schmelzen von Lebensmitteln. Die Schmelzfunktion wird für Speisen verwendet, die in nachfolgender Tabelle aufgeführt sind. q w ry i Einstellungen AUTO Automatik Manuell Automatische Funktionen und Rezepte 1. Drücken Sie die Menü-Taste. 2. Benutzen Sie die Auf-/Ab-Tasten, bis Automatik angezeigt wird. 3. Drücken Sie die OK-Taste, um Ihre Auswahl zu bestätigen. 4. Benutzen Sie die Auf-/Ab-Tasten, bis Schmelzen angezeigt wird. 5.
Rezepte Diese Funktion dient dazu, rasch Ihr Lieblingsrezept aufzurufen. q wr y ia s et uo a Einstellungen AUTO Automatik Manuell Automatische Funktionen und Rezepte 1. Drücken Sie die Menü-Taste. 2. Benutzen Sie die Auf-/Ab-Tasten, bis Automatik angezeigt wird. 3. Drücken Sie die OK-Taste, um Ihre Auswahl zu bestätigen. 4. Benutzen Sie die Auf-/Ab-Tasten, bis Rezepte angezeigt wird. 5. Drücken Sie die OK-Taste, um Ihre Auswahl zu bestätigen. 6.
SPEISE MENGE Beef 800 g -1,5 kg Schwein 800 g -1,5 kg Lamm 1 kg, 1,5 kg Kalb 800 g -1,5 kg Roast Rippchen 700 g- 1,2 kg Entrecote 2 - 6 pcs Lammkotelett 2 - 8 pcs Bratwurst ZUBEHÖR Hitzebeständiges Braten würzen und in den kalten Mikrowellengeschirr auf dem Garraum stellen niedrigen Rost. Crisp-Platte (Tiefgefr.) Hotdog Hamburger Schweinespeck Hoher Rost auf Drehteller 200 g - 800 g Crisp-Platte Fetten Sie die Crisp-Platte leicht ein.
SPEISE MENGE Gebacken Gekocht 600 g - 1,2 kg Mikrowellengeschirr mit Deckel oder abgedeckt mit Haushaltsfolie 300 g - 800 g Dampfeinsatz Gebraten 300 g - 800 g Crisp-Platte Dämpfen 300 g - 800 g Dampfeinsatz Gratin 600 g - 1,2 kg Hitzebeständiges Mikrowellengeschirr auf dem Drehteller Fisch ganz Gedämpfte Filets FISCH ZUBEHÖR Hitzebeständiges Mikrowellengeschirr 600 g - 1,2 kg auf dem niedrigen Rost Koteletts HINWEISE Würzen und die Oberseite leicht mit Butter einpinseln.
SPEISE MENGE Nudeln 1 - 4 Portionen NUDELN Haugemacht 4-10 Portionen Tiefgefr. 500 g - 1,2 kg Lasagne ZUBEHÖR HINWEISE Empfohlene Zeit für die Nudeln einstellen. Wasser in den Dampfgaruntersatz gießen. Mit dem Dampfgaruntersatz und Deckel abdecken. Deckel Nudeln hineingeben, wenn Sie das Gerät dazu auffordert, und garen Sie mit Deckel. Hitzebeständiges Bereiten Sie Ihr Lieblingsrezept zu Mikrowellengeschirr auf dem oder befolgen Sie das Rezept auf der niedrigen Rost Lasagne-Verpackung.
SPEISE MENGE Brotlaib ZUBEHÖR 1 bis 2 Stück Brötchen Hinzufügen, wenn das Gerät vorgeheizt ist. Für vakuumverpackte Brötchen. In das vorgeheizte Gerät geben. Aus der Verpackung nehmen. In das vorgeheizte Gerät geben. Zu Brötchen formen oder in Crisp-Platte kleinere Stücke und auf die gefettete Crisp-Platte geben. Ein Rezept mit einem Hitzebeständiges Gesamtgewicht von 700 - 80g Mikrowellengeschirr auf dem mischen. niedrigen Rost Stellen Sie den Kuchen in das vorgeheizte Gerät. Backblech Tiefgefr.
SPEISE MENGE Popcorn 90 g - 100 g Geröstete Nüsse 50 g - 200 g SNACKS Hähnchen Hühnerflügel 300 g - 600 g Nuggets (tiefgefr.) 250 g - 600 g Haugemacht 1 Beschickung Tiefgefr. 300 g - 800 g ZUBEHÖR Tüte auf den Drehteller setzen. Immer nur eine Tüte garen. Nüsse auf die vorgeheizte CrispPlatte geben. Bei Aufforderung rühren. Crisp-Platte Obsttorte HINWEISE Nuggets auf die vorgeheizte CrispPlatte geben. Wenden, wenn Sie das Gerät dazu auffordert.
Reinigung und Pflege Im Normalfall müssen Sie das Gerät nur reinigen. Wird das Gerät nicht laufend sauber gehalten, kann dies zur Abnutzung der Oberfläche führen, was die Lebensdauer des Gerätes verringern und evtl. zu gefährlichen Situationen führen kann. Verwenden Sie keine Topfkratzer aus Metall, Scheuermittel, Topfkratzer aus Stahlwolle und keine groben Reinigungstücher usw., da diese das Bedienfeld sowie die Innen- und Außenflächen des Gerätes beschädigen können.
Erst einmal selbst prüfen anrufen, geben Sie bitte die Seriennummer und Typenbezeichnung des Gerätes an (siehe Kundendienst-Aufkleber). Weitere Hinweise finden Sie im Garantieheft. Das Netzkabel darf nur gegen ein Originalkabel ausgetauscht werden, das über unseren Kundendienst bezogen werden kann. Das Netzkabel darf nur von einem dafür geschulten Kundendiensttechniker ausgetauscht werden. Reparaturen am Gerät dürfen nur von einem qualifizierten Kundendiensttechniker vorgenommen werden.
Technische Daten Netzspannung 230 V / 50 Hz Eingangsnennleistung 2.800 W Sicherung 16 A Ausgangsleistung MW 900 W Grill 1.600 W Heißluft 1.
Printed in Italy 03/11 5019 721 02042/A n D