Instructions for use
Installing the built-in / under the counter column oven 5 Safeguarding the environment 6 Warnings 6 Before using the oven 7 Oven accessories 8 Care and Maintenance 9 Troubleshooting guide 13 After Sales Service 13
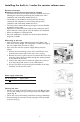
Installing the built-in / under the counter column oven Recommendations Important: Disconnect the oven from the mains before carrying out any installation work or servicing. • It must be installed by a qualified electrician following the instructions provided by the manufacturer and in compliance with local safety standards in force. • Once you have unpacked the oven, check that the appliance has not been damaged during transportation and that the door closes properly.
Installing the built-in / under the counter column oven Electrical connection Regulations require that the apparatus be earthed. • The electrical connection must be made by a qualified electrician following the instructions provided by the manufacturer and in compliance with local safety standards in force. • The installer is responsible for ensuring that the electrical connection of the appliance is carried out properly and in compliance with local safety standards in force.
Safeguarding the environment Disposing of packaging • The packing material can be 100% recycled as confirmed by the recycling symbol . • The various pieces of packaging should not be disposed off into the environment but disposed of in compliance with local authority standards. Disposal of old appliances • The appliances are made with recyclable or re-usable material. Disposal must be carried out in accordance with local environmental regulations for waste disposal.
Warnings • Residual condensation after the last use, could over time, damage the oven and the surrounding units. We advise you to: - always use the lowest temperature; - cover the food; - remove the food from the oven when cooked; - dry the damp parts of the cold oven. • The oven screen and door handle heat up when the appliance stays on for a long period of time at a high temperature. • Never touch the oven with any wet part of the body or operate it with bare feet.
Oven accessories The accessories vary according to the model. The accessories provided with the oven are listed in the separate Product Description Sheet (under Accessories). Drip tray (1) Placed under the grid to collect grease or pieces of food or used as a plate, for example, to cook meat, chicken, fish with or without vegetables. Pour some water into the drip tray to prevent fat spatters or smoke. Baking tray (2) For baking biscuits, cakes and pizzas.
Care and Maintenance Important: Do not use water pressure cleaners or steam cleaners. Oven exterior and internal frame of the oven • Clean with a damp cloth. If it is very dirty, add a few drops of washing up liquid to the water. Wipe with a dry cloth. • Do not use corrosive or abrasive cleaning products, which could dull the surface. If one of these products should accidentally come into contact with the oven, clean it with a damp cloth immediately.
Care and Maintenance Pyrolysis cleaning This function allows you to eradicate the traces of food produced during the cooking cycles. These traces, burnt at a temperature of approx. 500°C, can be easily removed with a damp sponge once the oven has cooled down. • You only need to carry out a pyrolytic cleaning when the oven is particularly dirty and not after each use. • If the oven is installed under a worktop, make sure that the hot plates or rings are not on when carrying out the pyrolytic cycle.
Care and Maintenance Warning: use protective gloves for the following operations. Follow these instructions very carefully to prevent injury and damaging the oven door and hinges. Make a careful note of the position of the pieces of glass before dismantling it so that you fit them back on again in the right position. Do not touch the hinges when cleaning and/or removing the door (Fig. 1). How to remove the oven door: • Use protective gloves. • Open the door fully (see Fig. 2).
Instructions for removing the door • Remove the internal glass by lifting it by the side and removing it from its position (Fig. 7). • Remove the second and third piece of glass, paying attention to the position of the lettering “REFLECTING SIDE” if present (Fig. 8).
Troubleshooting guide Oven not working: • Make sure there is a power supply and that the oven is connected to the mains supply. • Turn the oven off and restart it to see if the fault persists. If the door is blocked: • Turn the oven off and restart it to see if the fault is repeated. IMPORTANT: • Make sure that the oven control knob is not turned to “0” or to the “lamp” symbol .
Printed in Italy 02/09 5019 710 02081 n GB