Instruction for use Bruksanvisning Gebruiksaanwijzing Manual de utilização Instrucţiuni de utilizare www.whirlpool.com.
INDEX INSTALLATION 3 Installation SAFETY 4 Important safety instructions 5 Trouble shooting guide 6 Precautions ACCESSORIES AND MAINTENANCE 7 Accessories 8 Maintenance & Cleaning CONTROL PANEL 9 Control panel GENERAL USE 10 Stand-by mode 10 Start Protection / Child Lock 10 Pause or Stop cooking 10 Add / Stir /Turn food 11 Clock COOKING FUNCTIONS 12 Jet Start 13 Microwave 14 Grill 15 Combi Grill (Microwave + Grill) 16 Forced Air 17 Combi Air (Microwave + Forced Air) 18 Crisp SPECIAL FUNCTIONS 19 Jet Reheat M
INSTALLATION Prior to connecting Position the oven at a distance from other heating sources. For sufficient ventilation there must be a space of at least 30 cm above the oven. The microwave oven shall not be placed in a cabinet. This oven is not intended to be placed or used on a working surface lower than 850 mm above the floor. Check that the voltage on the rating plate corresponds to the voltage in your home.
IMPORTANT SAFETY INSTRUCTIONS READ CAREFULLY AND KEEP FOR FUTURE REFERENCE If material inside / outside the oven should ignite or smoke is emitted, keep oven door closed and turn the oven off. Disconnect the power cord or shut off power at the fuse or circuit breaker panel. Do not leave the oven unattended, especially when using paper, plastic or other combustible materials in the cooking process. Paper can char or burn and some plastics can melt if used when heating foods.
IMPORTANT SAFETY INSTRUCTIONS The appliances are not intended to be operated by means of an external timer or separate remote-control system. Do not leave the oven unattended if you are using a lot of fat or oil since they can overheat and cause a fire! Do not heat, or use flammable materials in or near the oven. Fumes can create a fire hazard or explosion. Do not use your microwave oven for drying textiles, paper, spices, herbs, wood, flowers or other combustible materials. Fire could result.
PRECAUTIONS GENERAL This appliance is intended to be used in household and similar applications such as : - Staff kitchen areas in shops, offices and other working environments; - Farm houses; - By clients in hotels, motels and other residential environments; - Bed and breakfast type environments. No other use is permitted (e.g. heating rooms). The appliance should not be operated without food in the oven when using microwaves. Operation in this manner is likely to damage the appliance.
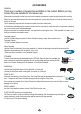
ACCESSORIES GENERAL There are a number of accessories available on the market. Before you buy, ensure they are suitable for microwave use. Ensure that the utensils you use are oven proof and allow microwaves to pass through them before cooking. When you put food and accessories in the microwave oven, ensure that they do not come in contact with the interior of the oven. This is especially important with accessories made of metal or metal parts.
MAINTENANCE & CLEANING Failure to maintain the oven in a clean condition could lead to deterioration of the surface that could adversely affect the life of the appliance and possibly result in a hazardous situation. Do not use metal scouring pads, abrasive cleansers, steel-wool pads, gritty washcloths, etc. which can damage the control panel, and the interior and exterior oven surfaces. Use a cloth with a mild detergent or a paper towel with spray glass cleaner. Apply spray glass cleaner to a paper towel.
control panel q w e r t y u i o a s d f g h j k q s w d f g e r t y u h i j o k a l 1( 2) 2! 2$ 2% 2^ 2& 2* l 1( 2) 2! 2@ 2# 2@ 2# 2$ 2% 3! 3$ 2^ 3% 2& 3@ 3# 3^ 2* 2( 3) 2( 3) 3! 3@ 3# 3$ 3% 3^ AU Microwave button Grill button Combi (Combi Grill / Combi Air) button Jet Reheat Menu button Jet Defrost Menu button Display Auto clean / Clock button Minus button Stop button OK button Forced Air button Steam button Crisp button Chef menu button Stop Turntable button Plus button Jet Start button
STAND-BY mode The oven is in Stand-by mode when the clock is displayed (or, if the clock has not been set, when the display will show “:”). START PROTECTION / CHILD LOCK This automatic safety function is activated one minute after the oven has returned to “Stand-by mode”. When the safety function is active the door must be opened and closed in order to start the cooking, otherwise the display will show “door”.
clock To set the Clock of your appliance: q w e r t Press & hold the Auto Clean/Clock button for 3 second. Press the Plus/Minus buttons to set the hours. Press the OK/Jet Start. The minutes will start blinking. Press the Plus/Minus buttons to set the minutes. Press the OK/Jet Start button.The clock is set.
JET START This function allows to start the Microwave function at maximum power (800 watt) for 30 seconds, simply pressing the Jet Start button. It is suggested for quick reheating of food with a high water content such as clear soups, coffee or tea. q Press the Jet Start Button. Pressing the Jet Start button the Microwave function will start at maximum microwave power (800 Watt) for 30 seconds. Each additional pressing will increase the cooking time of 30 seconds.
mICROWAVE Microwave function allows to quickly cook or reheat food and beverages. Plate Cover (sold separately) Suggested Accessory: q Press the Microwave button. The maximum power level (800 W) will be shown on the display and the watt icons starts blinking. w e r t Press Plus/Minus buttons to set the power. Press the OK button to confirm. Press Plus/Minus buttons to set the cooking time. Press the OK/Jet Start button. The function will start.
Grill This function uses a powerful quartz grill to brown foods, creating a grill or a gratin effect. Grill function allows to brown foods like cheese toast, hot sandwiches, potato croquettes, sausages, vegetables. Dedicated accessory: q w e High Rack Press the Grill button. Press Plus/Minus buttons to set the cooking time. Press the OK/Jet Start button. The function will start. Tips and suggestions: • For food like cheese, toast, steaks and sausages, place food on the high Wire Rack.
Combi grill (Microwave + GRILL) This function combines Microwave and Grill heating, allowing you to cook gratin in less time. Dedicated accessory: High Rack q w Press the Combi button . e Press Plus/Minus buttons to set the Microwave power (see the table below). r t y Press the OK button to confirm. Press the Plus/Minus buttons to select “1“ and press the OK Button to confirm. Press Plus/Minus buttons to set the cooking time. Press the OK/Jet Start button. The function will start.
forced air This function allows you to obtain oven-baked dishes. Using a powerful heat element and fan, the cooking cycle is just like that of a traditional oven. Use this function to cook meringues, pastry, cakes, soufflés, poultry and roast meats. Dedicated accessory: q w e r t Low Rack Press the Forced Air button . Press Plus/Minus buttons to set the temperature. Press the OK button to confirm. Press Plus/Minus buttons to set the cooking time. Press the OK/Jet Start button. The function will start.
Combi Air (Microwave + Forced Air) This function combines Microwave and Forced Air cooking, allowing you to prepare oven-baked dishes in less time. Combi Air allows you to cook dishes like roast meat, poultry, jacket potatoes, precooked frozen foods, fish, cakes and pastry. Dedicated accessory: Low Rack q w Press the Combi button . e Press the Plus/Minus buttons to set the temperature and press the OK button to confirm.
crisp This exclusive Whirlpool function allows for perfectly golden brown results both on the top and bottom surfaces of the food. Using both Microwave and Grill cooking, the Crisp Plate will rapidly reach the right temperature and begin to brown and crisp the food. The following accessories are designed to be used with the Crisp function: - the Crisp Plate - the Crisp Handle (sold separately) to manage the hot Crisp Plate. Use this function to reheat and cook pizzas, quiches, and other dough based food.
JET REheat menu This function allows you to automatically reheat your dishes. Use this function to reheat: soup, sauce, chilled pizza, plated meal, beverage. Plate Cover (sold separately) Suggested Accessory: q w e r Press the Jet Reheat Menu button. Press the Plus/Minus buttons to set the food class (see the below table) and press the OK button to confirm. Press Plus/Minus buttons to set the food weight. Press the OK/Jet Start button. The reheating cycle will start.
JET DEFROST menu This function allows you to quickly defrost food automatically. Use this function to defrost Meat, Poultry, Fish, Vegetables and Bread. q Press the Jet Defrost Menu button. w Press the Plus/Minus buttons to set the food type (see the below table) and press the OK button to confirm. e Press Plus/Minus buttons to set the food weight. r Press the OK/Jet Start button. The defrosting cycle will start.
steam MENU This function allows you to obtain healthy and natural tasting dishes by cooking with steam. Use this function to steam cook food such as pasta, rice, vegetables and fish. The provided steamer accessory must always be used with this function. You will be asked to set the boiling time for the rice and pasta according to your food package recommendation.
To cook vegetables or fish (P3-P8): Lid Dedicated Accessory: Grid Steamer Bowl A: Pour water up to the steam water level marked on the bowl. B: Insert the grid and put the food in. C: Cover with lid and insert in the oven. D: Set the function on the control panel: q w e r Press the Steam button. Press Plus/Minus buttons to set the food type (see the table below) and press the OK button to confirm. Press Plus/Minus buttons to set the food weight (min: 150 - max: 500g).
chef menu A selection of automatic recipes with pre-set cooking parameters values to offer optimal cooking results. q w Press the Chef Menu button. e r Press the OK button to confirm. t Press the OK/Jet Start button. The function will start. Press and hold Plus/Minus buttons to select the food type (see the below table). Depending on the food class, the display could ask you to set the Weight. Use the Plus/Minus buttons to set the asked values.
RECIPE u Quiche i Cordon Bleu/ Chicken Cutlets initial Crisp Fry Weight state recipes amount Room temperature Frozen DURATION PREPARATION 950g 18Min. Prepare the ready made pastry 370g, Line the Crisp Plate with the pastry. Prick it. Put into oven and prebake. Prepare the stuffing: 4 eggs ,150ml crème fraiche, 100g diced bacon, 130g (3½dl) grated cheese (Gruyere or similar) , Black pepper and ground nutmeg for season, mix them.
RECIPE h Fresh Pizza j Muffins k Biscuits l Meringues initial state Room temperature Room temperature Room temperature Room temperature Crisp Fry Weight DURATION recipes amount PREPARATION 700g 21min Measure 37°C 150g water directly into the mixing bowl and dissolve15g yeast into the water. Measure 2ml salt and 2tbs oil and weigh 225g flour and add to the water. Knead well until a dough is formed (takes about 5 minutes). Cover with a towel and let rise for 30 minutes at room temperature.
STOP TURNTABLE To get the best possible results with this particular microwave, the Glass Turntable has to rotate while cooking.
ENVIRONMENTAL HINTS The packing box may be fully recycled as confirmed by the recycling symbol. Follow local disposal regulations. Keep potentially hazardous packaging (plastic bags, polystyrene etc.) out of the reach of children. This appliance is marked according to the European directive 2002/96/EC on Waste Electrical and Electronic Equipment (WEEE).
In accordance with IEC 60705, Edition 4, 2010-04. The International Electrotechnical Commission has developed a standard for comparative testing of heating performance of different microwave ovens. We recommend the following for this oven: Test Amount Approx. time Power level Container 12.3.1 (Egg custard) 1000 g 12min 800W Pyrex 3.227 12.3.2 (Sponge cake) 475 g 7min 800W Pyrex 3.827 12.3.3 (meat loaf) 900 g 14-15min 800W Pyrex 3.838 12.3.