A Note To You 2 ImporQntSafety lnsbuctions 3 Parts And Features 6 Using Your Range 7 Using The SetfCleaning Cyde 18 Caring For Your Range 21 If You Need Assistance Or service 25 Warranty 28 1-800-253-1301 GA Us with qestions SELF-CLEANING or comments.
A Note To You Thank you for buying a Whirlpool appliance. You have purchased a quality, worldclass home appliance. Years of engineering experience have gone into its manufacturing. To ensure that you will enjoy many years of trouble-free operation, we have developed this Use and Care Guide. It is full of valuable information on how to operate and maintain your appliance properly and safely. Please read it carefully.
Important Safety Instructions To reduce the risk of fire, electrical shock, injury to persons, or damage when using the range, follow basic precautions, including the following: General Read all instructions before using the range. 4nstall or locate the range only in accordance with the provided Installation Instructions. l @WARNING: To reduce the risk of ti ping of the appliance, the app Piance must be secured by a proper1 installed anti-tip bracket.
Jse only d potholders. Moist or damp por holders on hot surfaces ma result in burns from steam. b 0 not let potholder touch hot heating elements. Do not use a towel or bulk cloth for a potholder. It coul J catch on fire. *Keep range vents unobstructed. *Do not heat unopened containers. They could explode. The hot contents could cause burns and container particles could cause Injury. @Do not store flammable materials on or near the range. The fumes can create an explosion and/or fire hazard.
Grease l Grease is flammable. Do not allow grease to collect around cooktop or in vents. Wipe spillovers immediately. @Do not use water on grease fires. Never pick up a flaming pan. Smother flaming pan on range by coverin with a wellfitted lid, cookie s?l eet or flat tray. Flaming grease outside of an can be extin uished with ii aking soda or, i? available, a multipurpose dry chemical or foam-type extinguisher. Care and cleaning @Clean cooktop with care.
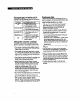
Parts And Features This section contains captioned illustrations of your range. Use them to become familiar with the location and appearance of all parts and features.
Using Your Range In This Section Using the surface For beat air circulation Using aluminum .7 ..................................... .9 Broiling Energy foil for baking ...................... .10 Betting the clock ............................................... Broiling 10 and pans .............................. rack Positioning Paw Paw unitm ..................................... 11 .............................................................. tipa .........................................
Until you get usad to the settings, use the following as a guide. For best results, start cooking at the high settings; then turn the control knob down to continue cooking. SElTING HI Medium-high Medium (opposite OFF) Medium-low LO Using RECOMMENDED USE To start foods cooking. l To bring liquids to a boil. l To hold a rapid boil. l To fry chicken or pancakes. l For gravy, pudding and icing. l To cook large amounts of vegetables. l To keep food cooking after starting it on a higher setting.
Home l l l l l canning information Use flat-bottomed canners/pans for best results. Some canners have ridged bottoms (porcelain enamel-ware) and are not recommended. They do not make good contact with the surface unit and cause severe overheating which damages the cooktop. For best results, use the largest surface unit. Also, use a canner/pan which can be centered over the surface unit and which does not extend more than one inch outside surface unit area.
For best air circulation The hot air must circulate around the pans in the oven for even heat to reach all parts of the oven. This results in better baking. l Place the pans so that one is not directly over the other. l Allow 1 V2 to 2 inches (4-5 cm) of space around each pan and between pans and oven walls. l Use only one cookie sheet in the oven at one time. Use the following as a guide to determine where to place the pans. One pan Place in the center of the oven rack.
Setting the clock Push in and turn the Minute Timer Knob to set the clock. 1. Push in Minute Timer Knob and turn clockwise until clock shows the correct time of day. 2. Let the Minute Timer Knob pop out. Turn clockwise until Minute Timer hand points to OFF. The clock setting will change if you push in the knob when turning. Using the Minute Timer The Minute Timer does not start or stop the oven. It works like a kitchen timer. Set it in minutes up to an hour.
Baking/roasting 1. Position the rack(s) properly before turning on the oven. To change rack position, lift rack at front and pull out. For further information, see “Positioning racks and pans” on page 9. 2. Set the Oven Selector to BAKE. 3. Set the Oven Temperature Control Knob to the baking/roasting temperature you want. The OVEN HEATING Indicator Light will come on. The oven is preheated when the OVEN HEATING Indicator Light first goes off.
2. Loosen the locking screws inside the control knob. Note the position of the notches. 3. To lower the temperature, hold knob handle firmly and move the tooth a notch counterclockwise. Each notch equals about 5°F (2.5%). 4. To raise the temperature, hold knob handle firmly and move the tooth a notch clockwise. Each notch equals about 5°F (2.5%). Tighten the locking screws and replace the control knob. Locking screw0 Tooth Noicher Broiling 1. Position the rack before turning the oven on.
Broiling rack I RACK POSlTlON FROM BOllOM 2 Broiling l l l position chart TYPE OF FOOD/ I DONENESS Well-done steaks and patties, lamb chops, split chicken, pork steaks and chops, whole fish tips Use the broiler pan and grid for broiling. They are designed to drain excess liquid and fat away from the cooking surface to help prevent spatter, smoke or fire. Refer to a broiling chart in a reliable cookbook for correct broiling times.
Using the automatic MEALTIMER” clock The automatic MEALTIMER clock is designed to turn the oven on and off al times you set ... even when you are not around. Automatic baking/roasting is ideal for foods which do not require a preheated oven, such as meats and casseroles. Do not use the automatic cycle for cakes, cookies, etc. .. . undercooking will result. To delay start automatically: and stop 1. Position the oven rack(s) properly and place the food in the oven. 2.
To start baking/roasting and stop automatically: now 1. Position the oven rack(s) properly and place the food in the oven. 2. Make sure the clock is set to the correct time of day. (See “Setting the clock” on page 11.) 3. Push in and turn the Stop Time Knob clockwie to the time you want the oven to shut off. Make sure the Start Time Knob is not pushed in. 4. Set the Oven Selector to TIME BAKE. 5. Set the Oven Temperature Control Knob to the baking/roasting temperature you want. 6.
The storage drawer The storage drawer is for storing pots and pans. The drawer can be removed to make it easier to clean under the range. Use care when handling the drawer. Removing the storage drawer: 1. Empty drawer of any pots and pans before removing drawer. Pull drawer straight out to the first stop. Lift front and pull out to the second stop. 2. Lift back slightly and slide drawer all the way out. Replacing the storage drawer: 1.
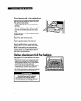
Using The Self-Cleaning Cycle I I In This Section How the cycle works Before Page PWP . . . . . . . . . . . . . . . . . . . . . . . . . . . . . . . . . . . . ..a. 18 you start ..,...........................................*. 18 Setting the conlrols Special . . . . . . . . . . . . . . . . . . . . . . . . . . . . . . . . . . . . . . . . . . 19 tips . . . . . . . . ..~.............................................
2. Remove the broiler pan grid and any pots and pans being stored in the oven. NOTE: The broiler pan (without grid) can be cleaned in the oven if most of the soil is removed first by handcleaning or a dishwasher. If most of the soil is not removed, excessive smoking will occur. The chrome broiler pan grid will discolor if cleaned in the Self-Cleaning cycle. 3. Wipe out any loose soil or grease. This will help reduce smoke during the cleaning cycle. 4.
4. Move the Lock Lever to the right-the Clean position. The OVEN HEATING Indicator Light will come on. 5. When the oven temperature exceeds normal bakingroasting temperatures, the door cannot be opened and the Lock Lever must not be moved. 6. After the Self-Cleaning cycle is completed and the oven has cooled sufficiently, the Lock Lever can be moved back to the left DO NOT FORCE IT. Wait until it moves easily. Turn the Oven Selector and Oven Temperature Control Knob to OFF. 7.
Caring For Your Range In This Section the cooktop Cleaning other range parta .............................. 21 The oven light .................................................. .24 23 Your range is designed for ease of care. Most cleaning can be done with items found around your home. Cleaning your range whenever spills or soiling occurs will help to keep it looking and operating like new. Cleaning Paw Pasw .......................................
Personal Injury Hazard When removing heavy or sugary spills from the hot cooklop, wear oven milts. l Do not use cooktop cleaner on a hot cooktop. The cleaner may produce hazardous fumes or damage the cooktop. . Do not use the range if the cooktop is cracked or broken. Failure to follow these instructions can result in personal injury. l To avoid damaging the cooktop, follow these instructions: l Remove sugary spills before cooktop cools to prevent pitting. l DO NOT USE THE COOKTOP AS A CUTTING BOARD.
Cleaning other range parts Use the following table to help you clean all other parts of your range.
The oven light The oven light will come on when you open the oven door. To turn the light on when the oven door is closed, use the Oven Light Switch on the control panel. l l Electrical Shock and Personal Injury Hazard Make sure oven and light bulb are cool and power to the range has been turned off before replacing the light bulb. Failure to do so could result in electrical shock or burns. The bulb cover must be in place when using the oven.
If You Need Assistance Or Service This section is designed to help you save the cost of a service call. First we outline possible problems, their causes and their solutions. However, you may still need assistance or service. When calling our Consumer Assistance Center for help or calling for service, you will need to provide a complete description of the problem, your appliance’s complete model and serial numbers and the purchase date. (See page 2.
PROBLEM POSSIBLE CAUSE SOLUTION Control knob(s) will not turn. You are not pushing in before trying to turn. Push control knob(s) in before turning to a setting. Self-Cleaning cycle will not operate. The Oven Selector and Oven Temperature Control Knob are not set to CLEAN. The range clock does not show the correct time of day. The Lock Lever is not in the CLEAN positional1 the way to the right. The Start Time Dial does not show the correct time of day or the knob is not all the way out.
2. If you need assistance ... Call Whirlpool Consumer Assistance Center telephone number. Dial free from anywhere in the U.S.: 1-800-253-l 301 and talk with one of our trained consultants. The consuttant can instruct you in how to obtain satisfactory operation from your appliance or, if service is necessary, recommend a qualified service company in your area. If you prefer, write to: Mr.
WHIRLPOOL@ CleanTop” Electric Freestanding Range Warranty EROll LENGTH OF WARRANTY WHIRLPOOL FULL ONE-YEAR WARRANTY From Date of Purchase FSP replacement parts and repair labor to correct defects in materials or workmanship. Service must be provided by an authorized Whirlpools” service company. FULL FIVE-YEAR WARRANTY From Date of Purchase FSP replacement parts and repair labor for CleanTop ceramic cooktop to the original purchaser of this product.