UseAndCare A Note To You 2 lFSE:BfefY 3 Parts And Features 4 E;ttcg Your 5 Using Your Refrigerator 7 Caa;~rr 14 Food Storage Guide 16 If Yqu Need i!irii!Gz 18 Warranty 20 1 WOO-&ROPER Cdl us with questions of comments.
A Note To You Thank you for buying a Roper appliance. You have purchased a quality, worldclass home appliance. Years of engineering experience have gone into its manufacturing. To ensure that you will enjoy many years of trouble-free operation, we have developed this Use and Care Guide. lt is full of valuable information on how to operate and maintain your appliance properly and safety. Please read it carefully. Also, please complete and mail the Ownership Registration Card provided with your appliance.
Important Safety Instructions To reduce the risk of fire, electrical shock, or injury when using your refrigerator, follow these basic precautions: l l Read all instructions before using the refrigerator. Child entrapment and suffocation are not problems of the past. Junked or abandoned refrigerators are still dangerous . . . even if they will “just sit in the garage a few days.” If you are getting rid of your old refrigerator, do it safely.
Parts And Features This section contains captioned illustrations of your appliance. all parts and features are located and what they look like.
Before Using Your Refrigerator In This Section Paw Paw Cleming it . . . .. . . . . . . . . . . . . . . . . . . . . . . . . . . . . . . . . . . . . . . . .. . . . .. . . . . . . .. 5 Inotalling Plugging it in . . . . . . . . . . . . . . . . . . . . . . . . . . . . . . . . . .. . .. . . . . . . . . . . .. . . . . . 5 Leveling it properly .. .... .... .... ... .... .... .... .. ... .. .... 5 it . . . . . . .. . . . .. . . . . . . . . . . . . . . . . . . . . . . . . . . . . . . . . . . . . . . . ..
Leveling it Your refrigerator has 2 front leveling screws-one on the right and one on the left. To adjust one or both of these, follow the directions below. 1. Remove base grille. (See page 12.) 2. To raise front, turn screw clockwise. 3. To lower front, turn screw counterclockwise. 4. Check with level. 5. Replace base grille. (See page 12.
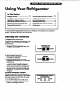
Using Your Refrigerator In This 9ettfng Section the controls Paw 7 ............................................ Changing the control Adjultfng the refrigerator Removing the meat drawer Removing the crirperr Removing the frwzer Ueing the optional Page ice maker.. ...... .l 1 9 Changing the light bulbs ................................. 12 ................... .9 Removing the base grille ................................ .12 and cover.. ........... .9 Reversing the door 8wing .........
Changing the control settings If you need to adjust temperatures in refrigerator or freezer, use the settings listed in the chart below as a guide. If you have questions, call us. (See page 19.) I l l Adjust the Refrigerator Control first. Wait at least 24 hours between adjustments. Then adjust the Freezer Control if nee’ded.
Removing the meat drawer and cover The meat drawer and cover can be removed for cleaning or moved to another shelf, if desired. Remove the meat drawer first. To 1. 2. 3. 4. remove the meat drawer: Slide the drawer straight out to the stop. Lift the front. Slide drawer out the rest of the way. Replace in reverse order. To 1. 2. 3. remove the cover: Remove the meat drawer. Tilt front of cover up. Pull cover up and out. Lift the front, then the back To replace the cover: 1.
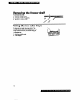
Removing To 1. 2. 3. remove Lift front Lift back Replace Using the freezer the shelf: of shelf slightly. of shelf off supports. in reverse order. the ice cube trays If cubes are not used, they may shrink. The moving cold air starts a slow evaporation. The longer cubes are stored, the smaller they get. To remove ice: 1. Hold tray at both ends. 2. Twist slightly.
Using the optional automatic If you have an automatic ice maker, or if you plan to add one later (Part No. IMKIT), there are a few things you will want to know: l The ON/OFF lever is a wire signal arm. Down . . . to make ice automatically. up . . . to shut off the ice maker. . . . NOTE: Do wnnected to the water hook. to the the e l l l l l l l l l l The dial or lever on the side of the ice maker changes the size of the cubes.
Changing the light bulbs I Electrical Shock Hazard ~ Before removing a light bulb, either unplug the refrigerator or disconnect the electricity I leading to the refrigerator at the main ~ power suppty. , Failure to do so could result in electrical shock or personal injury. To 1. 2. 3. change the refrigerator light: Disconnect refrigerator from power supply. Reach behind Control Panel to remove bulbs. Remove bulb and replace with a 40-watt appliance bulb. 4. Reconnect refrigerator to power supply.
Reversina v the door swina -~~- V You can change the hinges on your refrigerator so the doors open the other way. Refer to the instruction sheet included with your refrigerator. Understanding the sounds Your new refrigerator may make sounds that your old one didn’t. Because the sounds are new to you, you might be concerned about them. Don’t be. Most of the new sounds are normal. Hard surfaces like the floor, walls and cabinets can make the sounds seem louder.
Caring For Your Refrigerator In This Section Paw Cleaning your refrigerator Vacation and moving . . . . . . . . . . . . . . . . . . . . . . . . . . . . . . . 14 PatiP Power interruptions . . . ..*................................. 16 care #. . . . . . . . . . . . . . . . . . . . .. . *. . . . . . 15 Your refrigerator is built to give you many years of dependable service. However, there are a few things you can do to help extend its product life.
PART WHAT TO USE Defrost pan Sponge or cloth with mild detergent and warm water HOW TO CLEAN Remove base grille. (See page 12.) To remove defrost pan, lift pan over wire brace (remove tape; if any). Wash, rinse and dry thoroughly. Replace with notched corner to the rear. Push it in all the way. Make sure defrost pan drain tube is pointing into pan. Replace base grille.
Power interruptions If electricity goes off, call the power company. Ask how long power will be off. 1. If service is to be interrupted 24 hours or less, keep both doors closed. This will help foods stay frozen. 2. If service is to be interrupted longer than 24 hours: (a) Remove all frozen food and store in a frozen food locker. OR (b) Place 2 Ibs. (0.9 kg) of dry ice in freezer for every cubic foot of freezer space. This will keep food frozen for 2 to 4 days.
Butter or margarine Keep opened butter in covered dish or closed compartment. When storing an extra supply, wrap in freezer packaging and freeze. TYPE j -Chicken APPROXIMATE (DAYS) TIME 1 to2 I Cheese Store in the original wrapping until you are ready to use it. Once opened, rewrap tightly in plastic wrap or aluminum foil. Leftovers Cover leftovers with plastic wrap or aluminum foil. Plastic containers with tight lids can also be used.
If You Need Assistance Or Service This section is designed to help you save the cost of a service call. Part 1 of this section outlines possible problems, their causes, and actions you can take to solve each problem. Parts 2 and 3 tell you what to do if you still need assistance or service. When calling our toll-free telephone number for help or calling for service, please provide a detailed description of the problem, your appliance’s complete model and serial numbers and the purchase date. (See page 2.
Remember: Motor running time depends on different things: number of door openings, amount of food stored, temperature of the room, setting of controls, etc. Your new refrigerator may be larger than your old one so it has more space to be cooled. It also has a regular freezer instead of a frozen food compartment. All this means better refrigeration and may require more running time than your old one. 2. If you need assistance ... Call our toll-free telephone number. Dial free from anywhere in the U.S.
ROPER” Refrigerator Warranty LENGTH OF WARRANTY ROPER WILL PAY FOR FULL ONE-YEAR WARRANTY (from date of purchase) Replacement parts and repair labor to correct defects in materials or workmanship. Service must be provided by an authorized Roper service company. FULL FIVE-YEAR WARRANTY (from date of purchase) Replacement parts and repair labor for the sealed refrigeration system (compreSsor, evaporator, condenser, drier or connecting tubing) which we find to be defective in materials or workmanship.