
Manual


ELECTRONICOVENCONTROL
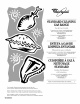
A B C D E
(( i
ii
©@
OVEN CLOCK
LIGH1
®
TIMER
Timer
H
TEMP/HOUR
A. Oven light F. Temp/Hour
B. Clock G. Broil
C.Display H. Bake
D. Start (control lock) L Timer
E. Off/Cancel
0
F
When power is first supplied to the appliance, a flashing time will
appear on the display. Press OFF/CANCEL to clear flashing time
from the display.
If flashing time appears, a power failure has occurred. Press
OFF/CANCEL and reset the Clock if needed.
When the oven is not in use, the display shows the time of day.
When performing a cook or timer function, the display will show
either hours and minutes, or minutes and seconds.
..... _ :_ :. _:
The indicator lights are located on both sides of the display. The
indicator lights light up or flash when the oven is in one of the
following modes: Bake, Broil or Timer,
The START pad begins any oven function. If the START pad is not
pressed within 5 seconds after pressing a function pad, the Push
to Start ("PSH') indicator light will flash and the push to start tone
will sound as a reminder.
If the START pad is not pressed within 1 minute after pressing a
function pad, the oven display will return to the time of day mode
and the programmed function will be canceled.
The OFF/CANCEL pad stops any function except the Clock,
Timer and Control Lock.
This is a 12-hour clock and does not show a.m. or p.m.
To Set:
Before setting, make sure the oven and Timer are off.
1. Press CLOCK.
2. Press the TEMP/HOUR "up" or "down" arrow pads to set the
time of day.
3. Press CLOCK or START.
Tones are audible signals, indicating the following:
One tone
• Valid pad press
• Oven is preheated (long tone)
• Function has been entered
Three tones
• Invalid pad press
• Push to start reminder
Cycling tones
• End of cycle
The temperature is preset at Fahrenheit, but can be changed to
Celsius.
To Change: Press and hold BROIL for 5 seconds. A tone will
sound, and "C" will appear on the display. Repeat to change
back to Fahrenheit. To exit mode, press OFF/CANCEL