Istruzioni per l’uso FORNO Sommario IT Italiano, 1 GB English,21 UA FR Français, 41 IT Installazione, 2-3 Posizionamento Collegamento elettrico Targhetta caratteristiche Descrizione dell’apparecchio, 4 Vista d’insieme Pannello di controllo Display in programmazione Display in cottura Avvio e utilizzo, 5-7 FK 1047LP.20 /HA FK 1047LP.20 X /HA FK 1041LP.20 X /HA FK 104SL P.20 X /HA FK 104SL P.20 /HA UT 104P.20 X /HA UT 104P.20 /HA UT 104LP.20 X /HA UT 104LP.20 /HA FK 104P.20 /HA FK 104P.
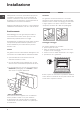
Installazione ! È importante conservare questo libretto per poterlo consultare in ogni momento. In caso di vendita, di cessione o di trasloco, assicurarsi che resti insieme all’apparecchio per informare il nuovo proprietario sul funzionamento e sui relativi avvertimenti. ! Leggere attentamente le istruzioni: ci sono importanti informazioni sull’installazione, sull’uso e sulla sicurezza. Aerazione Per garantire una buona aerazione è necessario eliminare la parete posteriore del vano.
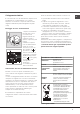
Collegamento elettrico Prima di effettuare l’allacciamento accertarsi che: ! I forni dotati di cavo di alimentazione tripolare sono predisposti per il funzionamento con corrente alternata, con tensione e frequenza indicate nella targhetta caratteristiche posta sull’apparecchio (vedi sotto).
Descrizione dell’apparecchio IT Vista d’insieme GUIDE di scorrimento dei ripiani Pannello di controllo posizione 5 posizione 4 posizione 3 posizione 2 posizione 1 Ripiano GRIGLIA Ripiano LECCARDA Pannello di controllo Icona IMPOSTAZIONI Display Icona PROGRAMMI MANUALI Icona TEMPERATURA Icona BLOCCO PORTA/COMANDI ACCENSIONE PANNELLO AVVIO/ ARRESTO Icona CONFERMA IMPOSTAZIONI Icona PROGRAMMI AUTOMATICI Icona CONTAMINUTI Icona TEMPI Manopola SELEZIONE Display in programmazione Indicazione Menù
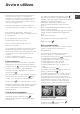
Avvio e utilizzo ! Alla prima accensione fare funzionare il forno a vuoto per almeno un’ora con il termostato al massimo e a porta chiusa. Poi spegnere, aprire la porta del forno e aerare il locale. L’odore che si avverte è dovuto all’evaporazione delle sostanze usate per proteggere il forno. ! Ruotando la manopola è possibile modificare i parametri evidenziati sul display tra i simboli “<“ e “>”.
IT 1. scorrere le voci del menù tramite la manopola, selezionare la voce OROLOGIO e premere l’icona . 2. Regolare l’ora tramite la manopola. 3. Raggiunta l’ora esatta, premere nuovamente . l’icona 4. ripetere i punti 2 e 3 sopra descritti per i minuti. 5. per uscire dalla regolazione premere l’icona oppure scorrere con la manopola fino alla voce ESCI e premere l’icona . ! L’orologio è impostabile anche a forno spento premendo l’icona sopra descritti .
! A fine cottura la ventola rimane attiva finché il forno non è sufficientemente freddo. Luce del forno La luce si accende aprendo la porta del forno o al momento dell’avvio di un programma di cottura (se attiva nel menù impostazioni). Nei modelli dotati di LED INSIDE all’avvio della cottura si accendono i led sulla porta per una migliore illuminazione di tutti i livelli di cottura. Indicatori di calore residuo L’apparecchio è provvisto di un indicatore di calore residuo.
Programmi IT ! Per garantire la perfetta morbidezza e croccantezza dei cibi il forno rilascia sotto forma di vapore acqueo l'umidità che proviene naturalmente dal cibo. In questo modo si possono avere dei risultati di cottura ottimali su tutte le pietanze. ! Ad ogni accensione il forno propone il primo programma di cottura manuale. ! In caso di non perfetta chiusura della porta, il display visualizza “PORTA APERTA”.
più tenera che non necessita di una fase di riposo dopo la cottura. La doratura della carne dovrà essere effettuata prima di infornare. La cottura a bassa temperatura sottovuoto, utilizzata da 30 anni dai più grandi chef, presenta numerose qualità: • gastronomiche: consente di concentrare gli aromi rispettando la caratteristiche gustative dell'alimento e mantenendone la morbidezza e la tenerezza.
IT Processo: • Mescolare la farina ed il sale in un grande recipiente. • Diluire il lievito nell’acqua leggermente tiepida (circa 35 gradi). • Aprite la farina a fontana. • Versare il miscuglio di acqua e lievito • Lavorare fino ad ottenimento di un impasto omogeneo e poco colloso, stirandolo col palmo della mano e ripiegandolo su se stesso per 10 minuti. • Formare una palla, mettere l’impasto in un’insalatiera e ricoprirla con pellicola trasparente per evitare che la superficie dell’impasto si secchi.
• ¼ di peperoncino tagliato a dadini • Chorizo (salsiccia speziata e condita con paprica) a fette • Un cucchiaio di brodo di pesce in polvere • 1 dose di zafferano in polvere • 700 gr di acqua Coprire la leccarda con carta di alluminio. Nella leccarda • 8 porzioni di filetti di merluzzo • 8 (o 16) code di gamberi (o scampi) • 8 Cozze intere per guarnire Coprire la leccarda con carta d'alluminio.
IT partenza, della durata e dell’ora di fine cottura. Programmare la cottura ! La programmazione è possibile solo dopo aver selezionato un programma di cottura. Programmare la durata 1. Premere l’icona 2. ruotare la manopola per impostare la durata; se si mantiene in posizione la manapola i numeri scorrono più velocemente per facilitare l’impostazione. Il display visualizza graficamente lo spostamento sulla barra della durata. 3. Raggiunta la durata desiderata, premere nuovamente l'icona .
Tabella cottura IT Programmi Alimenti Peso (Kg) guide standard Manuali Multilivello* Pizza su 2 ripiani Crostate su 2 ripiani/torte su 2 ripiani Pan di spagna su 2 ripiani (su leccarda) Pollo arrosto + patate Agnello Sgombro Lasagne Bignè su 3 ripiani Biscotti su 3 ripiani Salatini di sfoglia al formaggio su 2 ripiani Torte salate Posizione dei ripiani 1+1 1 1 1 Preriscaldamento Temperatura consigliata (°C) Durata cottura (minuti) guide scorrevoli 2e4 2e4 2e4 1 e 2/3 2 1o2 2 1e 3e5 1e 3e5 2e4
IT Programmi Alimenti Peso (Kg) Automatici** Posizione dei ripiani Preriscaldamento guide standard guide scorrevoli Pane*** Pane (vedi ricetta) 1 2o3 2 no Manzo Arrosto di manzo 1-1,5 2o3 2 no Vitello Arrosto di vitello 1-1,5 2o3 2 no Agnello Coscia d'agnello 1-1,5 2o3 2 no Arrosto di maiale 1,2-1,5 2o3 2 no 1-1,5 2o3 2 no Maiale Pollo Pollo arrosto Filetto di pesce Merluzzo Cernia Trota 0,4-0,5 0,4-0,5 0,4-0,5 2o3 2o3 2o3 2 2 2 no no no Pesce al cartoccio
Precauzioni e consigli ! L’apparecchio è stato progettato e costruito in conformità alle norme internazionali di sicurezza. Queste avvertenze sono fornite per ragioni di sicurezza e devono essere lette attentamente. Sicurezza generale • L’apparecchio è stato concepito per un uso di tipo non professionale all’interno dell’abitazione. • L’apparecchio non va installato all’aperto, nemmeno se lo spazio è riparato, perché è molto pericoloso lasciarlo esposto a pioggia e temporali.
Manutenzione e cura IT Escludere la corrente elettrica Prima di ogni operazione isolare l’apparecchio dalla rete di alimentazione elettrica. F Pulire l’apparecchio • Lievi differenze di colore sul lato anteriore del forno sono dovute a diversi materiali quali vetro, plastica o metallo. • Eventuali ombreggiature sul vetro della porta, simili a striature, sono dovute al riflesso della luce della lampada del forno. • A temperature molto elevate lo smalto viene marcato a fuoco.
Guida sinistra Guida destra B C Ver es so tra d zio i ne 2. Scegliere il ripiano in cui inserire la guida scorrevole. Facendo attenzione al verso di estrazione della guida stessa, posizionare sul telaio prima l’incastro B e poi l’incastro C. 3. Fissare i due telai con le guide montate negli appositi fori posti sulle pareti del forno (vedi figura). I fori per il telaio sinistro sono posizionati in alto, D mentre i fori per quello destro sono in basso. 4. Infine incastrare i telai sui distanzieri A.
IT Per annullare una programmazione premere l'icona . Al termine della pulizia automatica Per poter aprire la porta del forno sarà necessario attendere lo spegnimento dell’icona : indica che temperatura del forno è scesa ad un livello accettabile. A questo punto è possibile constatare la presenza di alcuni depositi di polvere bianca sul fondo e sulle pareti del forno: rimuoverle con una spugna umida a forno freddo.
Anomalie e rimedi Problema Possibile causa Rimedio La programmazione di una cottura non si è avviata. Il display visualizza ECO Mode. C’è stato un black-out. Reimpostare le programmazioni. L’apparecchio è in modalità standby. La temperatura interna nel forno è superiore a quella proposta per il programma scelto. Le posizioni 1 e 5: sono investite direttamente dall’aria calda che potrebbe provocare bruciature sui cibi delicati. Toccare un tasto qualsiasi per uscire dalla modalità standby.
Assistenza IT Attenzione: L’apparecchio è dotato di un sistema di diagnostica automatica che consente di rilevare eventuali malfunzionamenti. Questi vengono comunicati dal display tramite messaggi del tipo: “F--” seguito da numeri. In questi casi è necessario l’intervento dell’assistenza tecnica.
Operating Instructions OVEN Contents IT Italiano, 1 GB English,21 UA FR Français, 41 GB Installation, 22-23 Positioning Electrical connection Data plate Description of the appliance, 24 Overall view Control panel Display in programming mode Display in cooking mode Start-up and use, 25-27 FK 1047LP.20 /HA FK 1047LP.20 X /HA FK 1041LP.20 X /HA FK 104SL P.20 X /HA FK 104SL P.20 /HA UT 104P.20 X /HA UT 104P.20 /HA UT 104LP.20 X /HA UT 104LP.20 /HA FK 104P.20 /HA FK 104P.
Installation ! Please keep this instruction booklet in a safe place for future reference. If the appliance is sold, given away or moved, please make sure the booklet is also passed on to the new owners so that they may benefit from the advice contained within it. ! Please read this instruction manual carefully: it contains important information on installation, operation and safety. Ventilation To ensure adequate ventilation is provided, the back panel of the cabinet must be removed.
Electrical connection ! Ovens equipped with a three-pole power supply cable are designed to operate with alternating current at the voltage and frequency indicated on the data plate located on the appliance (see below). Fitting the power supply cable 1. Open the terminal board by inserting a screwdriver into the side tabs of the cover. Use the screwdriver as a lever by pushing it down to open the cover (see diagram). 2.
Description of the appliance GB Overall view GUIDES for the sliding racks Control panel position 5 position 4 position 3 position 2 position 1 GRILL DRIPPING PAN Control panel SETTINGS icon Display MANUAL COOKING MODES icon TEMPERATURE icon DOOR / CONTROL PANEL LOCK icon CONTROL PANEL POWER BUTTON START / STOP CONFIRM SETTINGS icon MINUTE MINDER icon TIME icon AUTOMATIC COOKING MODES icon SELECTOR control dial Display in programming mode Selected menu indicator Temperature indicator Coo
Start-up and use ! The first time you use your appliance, heat the empty oven with its door closed at its maximum temperature for at least half an hour. Make sure that the room is well ventilated before switching the oven off and opening the oven door. The appliance may emit a slightly unpleasant odour caused by protective substances used during the manufacturing process burning away. ! Turn the control dial to adjust the parameter shown on the display between the “<” and “>” symbols.
GB icon, then press and follow the steps described. 1. Scroll through the menu commands using the . control dial, select CLOCK and press 2. Adjust the time using the control dial. 3. Once you have reached the correct hour value, icon. press the 4. Repeat steps 2 and 3 to set the minutes. 5. To exit adjustment mode, press the icon or use the control dial to scroll through the menu until you reach EXIT, then press .
! Once cooking has been completed, the cooling fan continues to operate until the oven has cooled down sufficiently. Oven light The light comes on when the oven door is opened or when a cooking mode starts (if enabled in the settings menu). When models featuring LED INSIDE technology begin cooking, the LEDs on the door light up for improved illumination of all cooking levels. Residual heat indicators The appliance is fitted with a residual heat indicator.
Modes GB ! In order to guarantee wonderfully soft and crunchy foodstuffs, the oven releases – in the form of water vapour - the humidity naturally withheld in the food itself. In this way, optimal cooking results can be achieved for all types of food. ! Every time the oven is switched on, it suggests the first manual cooking mode. ! If the door is not shut properly, the text “DOOR OPEN” will appear on the display. Make sure the door is shut properly to achieve optimal cooking results.
• as the cooking temperatures are very low (in general they are lower than the temperature required for evaporation), the dispersion of cooking sauces due to evaporation is substantially reduced and the food becomes softer; • when cooking meat, the muscle fibres contract less than they would during a classic cooking cycle. The result is a more tender meat which does not need to be rested after it is cooked. Meat should be browned before it is placed in the oven.
GB • Do not exceed the maximum weight of the dripping pan. • Remember to pour 50g (0,5 dl) of cold water into the baking tray in position 5. • The dough must be left to rise at room temperature for 1 – 1 ½ hours (depending on the room temperature) or until the dough has doubled in size.
• Position: - the deep dripping pan on shelf level 1 (if supplied as an accessory), or place the rack on shelf level 1 and stand a dish measuring approximately 35x30cm (height 5 cm) on it; - the dripping pan on shelf level 3; - the rack on shelf level 5;. Recipe (serves 8): In the deep dripping pan • 1 onion, chopped • 500 g rice • 500 g frozen mixed seafood (shelled prawns, mussels and clams, squid rings, etc.
GB Programming cooking ! A cooking mode must be selected before programming can take place. Programming the duration 1. Press the icon. 2. Turn the control dial to set the duration; hold the dial in this position to scroll through the numbers more quickly and make the setting process easier. The display will show a graphic indicating the duration in bar format. 3. Once you have reached the desired duration, icon again.
Cooking advice table Modes GB Foods Weight (in kg) Standard guide rails Manual Multilevel* Grill* Fan grilling* Roast* Fish* Pizza* Proving* Pasteurisation* Pizza on 2 racks Pies on two racks/cakes on 2 racks Sponge cake on 2 racks (on the dripping pan) Roast chicken + potatoes Lamb Mackerel Lasagne Cream puffs on 3 racks Biscuits on 3 racks Cheese puffs on 2 racks Savoury pies 1+1 1 1 1 Roasts (white or red meat) Bream Fish fillets Sea bass with potatoes Pizza Focaccia bread Rising process for
Modes GB Foods Weight (in kg) Bread (see recipe) Preheating Standard guide rails Sliding guide rails 1 2 or 3 2 no Automatic** Bread*** Rack position Beef Roast beef 1-1,5 2 or 3 2 no Veal Roast veal 1-1,5 2 or 3 2 no Lamb Leg of lamb 1-1,5 2 or 3 2 no Pork Roast pork 1,2-1,5 2 or 3 2 no Chicken Roast chicken 1-1,5 2 or 3 2 no Fish fillet Cod Perch Trout 0,4-0,5 0,4-0,5 0,4-0,5 2 or 3 2 or 3 2 or 3 2 2 2 no no no Fish en papillote Bream Sea bass 0,4-0,5 0,
Precautions and tips ! This appliance has been designed and manufactured in compliance with international safety standards. The following warnings are provided for safety reasons and must be read carefully. General safety • The appliance was designed for domestic use inside the home and is not intended for commercial or industrial use. • The appliance must not be installed outdoors, even in covered areas. It is extremely dangerous to leave the appliance exposed to rain and storms.
Care and maintenance GB Switching the appliance off Disconnect your appliance from the electricity supply before carrying out any work on it. F Cleaning the appliance • Slight differences in colour on the front of the oven are due to the different materials used, i.e. glass, plastic or metal. • Any shady areas resembling grooves on the oven door glass are caused by reflections from the oven light. • The enamel is branded at very high temperatures. This process may cause colour variations.
Left guide rail Right guide rail B C D of irec ex tio tra n ct io n 2. Choose which shelf to use with the sliding rack. Paying attention to the direction in which the sliding rack is to be extracted, position joint B and then joint C on the frame. 3. Secure the two frames with the guide rails using the holes provided on the oven walls (see diagram). The holes for the left frame are situated at the top, while D the holes for the right frame are at the bottom. 4. Finally, fit the frames on the spacers A.
GB To cancel a schedule, press the icon. Once the automatic cleaning cycle is over Before you can open the oven door, you will have to icon to switch off: this indicates the wait for the oven temperature has dropped to an acceptable level. You will notice some white dust deposits on the bottom and the sides of your oven; remove these deposits with a damp sponge once the oven has cooled down completely.
Troubleshooting Problem Possible cause Solution A programmed cooking mode does not start. The display shows ECO Mode. There has been a blackout. Reprogram the cooking mode. The appliance is in standby mode. An automatic mode has been The temperature inside the oven selected. “Hot” appears on the is higher than the suggested display and cooking does not start. value for the selected mode. Fan-assisted cooking has been Positions 1 and 5: the direct selected and the food looks heat could cause burnt.
Assistance GB Warning: The appliance is fitted with an automatic diagnostic system which detects any malfunctions. Malfunctions are signalled through messages of the following type: “F—” followed by numbers. Call for technical assistance in the event of a malfunction. Before calling for Assistance: • Check whether you can fix the problem yourself. • Restart the programme to check whether the malfunction has disappeared. • If it has not, contact the Authorised Technical Assistance Service.
Mode d’emploi FOUR Sommaire IT Italiano, 1 GB English,21 UA FR Français, 41 FR Installation, 42-43 Positionnement Raccordement électrique Plaque signalétique Description de l’appareil, 44 Vue d’ensemble Tableau de bord Afficheur en mode programmation Afficheur en mode cuisson Mise en marche et utilisation, 45-47 FK 1047LP.20 /HA FK 1047LP.20 X /HA FK 1041LP.20 X /HA FK 104SL P.20 X /HA FK 104SL P.20 /HA UT 104P.20 X /HA UT 104P.20 /HA UT 104LP.20 X /HA UT 104LP.20 /HA FK 104P.
Installation ! Important : conserver ce mode d’emploi pour pouvoir le consulter à tout moment. En cas de vente, de cession ou de déménagement, veiller à ce qu’il suive l’appareil pour informer le nouveau propriétaire sur son fonctionnement et lui fournir les conseils correspondants. ! Lire attentivement les instructions : elles contiennent des conseils importants sur l’installation, l’utilisation et la sécurité de l’appareil.
Raccordement électrique Avant de procéder au branchement, s’assurer que : ! Les fours munis d’un câble d’alimentation tripolaire sont prévus pour un fonctionnement au courant alternatif à la tension et à la fréquence indiquées sur la plaque signalétique apposée sur l’appareil (voir cidessous).
Description de l’appareil FR Vue d’ensemble GLISSIERES de coulissement Tableau de bord niveau 5 niveau 4 niveau 3 niveau 2 niveau 1 Support GRILLE Support LECHEFRITE Tableau de bord Icône SÉLECTIONS Afficheur Icône PROGRAMMES MANUELS Icône TEMPÉRATURE Icône VERROUILLAGE PORTE / COMMANDES ALLUMAGE PANNEAU DÉPART/ ARRÊT Icône CONFIRMATION SÉLECTIONS Icône PROGRAMMES AUTOMATIQUES Icône MINUTEUR Icône TEMPS Manette SÉLECTION Afficheur en mode programmation Indication du Menu sélectionné Indic
Mise en marche et utilisation ! Lors de son premier allumage, faire fonctionner le four à vide, porte fermée, pendant au moins une heure en réglant le thermostat sur le maximum. Puis éteindre le four, ouvrir la porte et aérer la pièce. L’odeur qui se dégage est due à l’évaporation des produits utilisés pour protéger le four. ! Il est possible de modifier en tournant la manette les paramètres affichés entre les symboles « < » et « > ».
FR procédure indiquée. 1. faire défiler les paramètres du menu à l’aide de la manette, sélectionner HORLOGE et appuyer sur . l’icône 2. Régler l’heure à l’aide de la manette. 3. Une fois l’heure exacte atteinte, appuyer à . nouveau sur l’icône 4. pour les minutes aussi, procéder comme indiqué plus haut aux points 2 et 3. 5. pour quitter le mode réglage, appuyer sur l’icône ou bien, à l’aide de la manette, faire défiler jusqu’à SORTIE et appuyer sur l’icône .
Ventilation de refroidissement Pour obtenir un abaissement des températures extérieures, un système de refroidissement souffle de l’air à l’extérieur par une fente située entre le tableau de bord, la porte du four et la partie basse de la porte du four. Au début du cycle de nettoyage, le ventilateur fonctionne à faible vitesse. ! Le ventilateur continue à tourner après l’arrêt du four jusqu’à ce que ce dernier se soit suffisamment refroidi.
Programmes FR ! Pour obtenir des aliments parfaitement moelleux et croquants, l’humidité qu’ils dégagent est réutilisée par le four sous forme de vapeur d’eau. Des résultats de cuisson optimaux sont ainsi obtenus pour tous les plats. ! A chaque allumage, le four propose le premier programme de cuisson manuel. ! Si la porte n’est pas parfaitement fermée, l’écran affiche « PORTE OUVERTE ». Supprimer l’obstacle qui empêche la fermeture de la porte pour obtenir de meilleurs résultats de cuisson.
Des avantages à ne pas négliger: • les températures de cuisson étant très basses (inférieures en principe à la température d’évaporation), la dispersion des jus de cuisson est considérablement réduite et l’aliment gagne en moelleux ; • les fibres musculaires des viandes rétrécissent moins par rapport à une cuisson classique. Résultat : la viande est plus tendre et n’a pas besoin de reposer après sa cuisson. Il faut faire dorer la viande avant de l’enfourner.
FR • faire lever la pâte à température ambiante pendant 1 heure ou 1 heure et demie, selon la température de la pièce et jusqu’à ce qu’elle ait pratiquement doublé de volume. Recette du PAIN : 1 Plaque de 1000g Max., niveau du bas 2 Plaques de 1000g Maxi. niveaux du bas et du milieu Recette pour 1000g de pâte : 600g de farine, 360g d’eau, 11g de sel, 25g de levure de boulanger fraîche (ou bien 2 sachets en poudre) Procédé : • Mélanger la farine et le sel dans un grand récipient.
• Il faut choisir un riz qui ne colle pas : du genre spécial salade ou du riz américain. • Le four doit être froid. • Placer : - la lèchefrite profonde au niveau 1 (si elle est disponible comme accessoire) ou bien placer la grille au niveau 1 et poser dessus un plat d’environ 35x30x5cm de haut. - la lèchefrite au niveau 3. - la grille au niveau 5.
FR Programmation de la cuisson ! La programmation n’est possible qu’après avoir sélectionné un programme de cuisson. Programmation de la durée ; 1. Appuyer sur l’icône 2. tourner la manette pour sélectionner la durée ; si la manette est maintenue en place, les chiffres défilent plus rapidement pour simplifier la sélection. L’écran affiche graphiquement le déplacement sur la barre de durée. 3. Une fois la durée voulue atteinte, appuyer à .
Tableau de cuisson Programmes FR Aliments Poids (Kg) Pizza sur 2 niveaux Tartes sur 2 niveaux/gâteaux sur 2 niveaux Génoise sur 2 niveaux (sur plateau émaillé) Poulet rôti + pommes de terre Agneau Maquereau Lasagnes Choux sur 3 niveaux Biscuits sur 3 niveaux Friands au fromage sur 2 niveaux Tartes salées Préchauffage Température préconisée (°C) Durée cuisson (minutes) 210-220 180 160-170 200-210 190-200 180 180-190 190 180 210 190-200 20-25 30-35 20-25 65-75 45-50 30-35 35-40 20-25 10-20 20-25 20-30
FR Programmes Aliments Poids (Kg) Niveau enfournement Préchauffage glissières glissières standard coulissantes Automatiques** Pain*** Pain (voir recette) 1 2 ou 3 2 non Boeuf Rôti de boeuf 1-1,5 2 ou 3 2 non Veau Rôti de veau 1-1,5 2 ou 3 2 non Gigot d’agneau 1-1,5 2 ou 3 2 non 1,2-1,5 2 ou 3 2 non Agneau Porc Rôti de porc Poulet Poulet rôti 1-1,5 2 ou 3 2 non Filets de poisson Cabillaud Mérou Truite 0,4-0,5 0,4-0,5 0,4-0,5 2 ou 3 2 ou 3 2 ou 3 2 2 2 non non no
Précautions et conseils ! Cet appareil a été conçu et fabriqué conformément aux normes internationales de sécurité. Ces consignes de sécurité sont très importantes et doivent être lues attentivement. Sécurité générale • Cet appareil a été conçu pour un usage familial, de type non professionnel. • Cet appareil ne doit pas être installé en extérieur, même dans un endroit à l’abri, il est en effet très dangereux de le laisser exposé à la pluie et aux orages.
Nettoyage et entretien FR Mise hors tension Avant toute opération de nettoyage ou d’entretien, couper l’alimentation électrique de l’appareil. F Nettoyage de l’appareil • De légères différences de couleur à l’avant du four sont dues aux différents matériaux utilisés à savoir verre, plastique ou métal. • Des ombres éventuelles sur la vitre du four, semblables à des stries, sont dues au reflet de la lumière de la lampe du four. • L’émail grand feu est traité à des températures très élevées.
Glissière Glissière gauche droite B C Sen d' s ex tra ct io n 2. Choisir le niveau sur lequel monter la glissière coulissante. Positionner sur le cadre d’abord le dispositif de fixation B puis le C en veillant à bien respecter le sens d’extraction de la glissière. 3. Fixer les deux cadres avec glissières assemblées dans les trous prévus sur les parois du four (voir figure). Les trous pour le cadre de gauche D sont placés en haut tandis que les trous pour celui de droite sont placés en bas. 4.
FR • Exemple : il est 9 h, choix d’une PYROLYSE niveau Economique avec une durée présélectionnée de 1 heure. L’heure finale est fixée à 12h30. Le programme démarre automatiquement à 11h30. Pour annuler une programmation, appuyer sur l’icône . A la fin du nettoyage automatique Pour pouvoir ouvrir la porte du four, il faut attendre que l’icône s’éteigne : Cela signale que la température du four est redescendue à un niveau acceptable.
Anomalies et remèdes Problème Cause possible Remède Le programme de cuisson n'a pas démarré. L’écran affiche ECO Mode. Il y a eu une panne de courant. Reprogrammer. L’appareil est en mode veille (standby). J’ai choisi un programme automatique. La température à l’intérieur du four L’écran affiche « HOT » et la cuisson est supérieure à celle proposée ne démarre pas. pour le programme choisi.
Assistance FR Attention : L’appareil dispose d’un système d’autotest qui permet de détecter toute anomalie de fonctionnement. Ces anomalies sont affichées sous la forme : « F-- » suivi de chiffres. Contacter alors un service d’assistance technique. Avant d’appeler le service de dépannage : • Vérifier s’il est possible de résoudre le problème soi-même ; • Redémarrer le programme pour contrôler si le problème a été résolu ; • Si ce n’est pas le cas, contacter le service d’Assistance technique agréé.
IT Italiano, 1 GB English,21 UA FR Francais, 41 UA FK 1047LP.20 /HA FK 1047LP.20 X /HA FK 1041LP.20 X /HA FK 104SL P.20 X /HA FK 104SL P.20 /HA UT 104P.20 X /HA UT 104P.20 /HA UT 104LP.20 X /HA UT 104LP.
! !
! L
UA НАПРЯМНІ для дек та ґраток Панель керування позиція 5 позиція 4 позиція 3 позиція 2 позиція 1 Рівень ГРИЛЬ Рівень ДЕКО Іконка УСТАНОВКИ ПАРАМЕТРІВ Дисплей Іконка РУЧНИХ ПРОГРАМ Іконка ТЕМПЕРАТУРИ Іконка БЛОКУВАННЯ ДВЕРЦЯТ/КОМАНД УВІМКНЕННЯ ПАНЕЛІ ПУСК / СТОП Іконка ПІДТВЕРДЖЕННЯ УСТАНОВОК Іконка АВТОМАТИЧНИХ ПРОГРАМ Іконка ЧАСУ ГОТУВАННЯ Iконка ТАЙМЕРУ Регулятор ВИБОРУ Індикація обраного меню Індикація темпера
!
UA !
UA ! ! !
UA
UA !
Програми Харчові продукти UA Вага (кг) стандартні напрямні Ручні Баготорівнева* Піцца (на 2 рівнях) Солодкі пироги (на 2 рівнях)/торти (на 2 рівнях) Бісквіти на 2 рівнях (на деко) Курка-гриль + картопля Ягня Скумбрія Лазан'я Еклери (на 3 рівнях) Печиво (на 3 рівнях) Солонi вироби з листкового тiста з сиром (на 2 рівнях) Несолодкі пироги Позиція рівня 1+1 1 1 1 2i4 2i4 2i4 1 i 2/3 2 1 або 2 2 1i3i5 1i3i5 2i4 1i3 Попереднє нагрівання Рекомендована Тривалість температура готуван
UA Програми Харчові продукти Вага (кг) Автоматичні** Хліб*** Яловичина Хліб (див.
!
UA F
Ліва Права напрямна напрямна B C Н ви апр су ям ва ок нн я
UA
Проблема Можлива причина Засіб усунення Не вдається запрограмувати готування. На дисплеї відображається режим "ECO Mode". Мною обрана автоматична програма. На дисплеї відображається “Hot”, і готування не розпочинається. Трапилось випадкове переривання в енергопостачанні. Прилад перебуває в черговому режимі. Внутрішня температура в духовці перевищує рекомендовану температуру для обраної програми. Виконайте повторне програмування.
09/2011 - 195085905.