
Troubleshooting guide

FOR SERVICE TECHNICIAN ONLY - DO NOT REMOVE OR DESTROY
PAGE 3
DIAGNOSTIC: Displaying Inlet Air Flow
(Electric Models Only)
Used todisplay the air flow value at the inlet of the
heater box being measured bythe machinecontrol.
After entering the DiagnosticTest Mode and
selecting the Component Activation option, press
the “Air Flow”button and “Ok” to enter the Inlet
Air Flow Test; press“Start” to begin the test.A 30
or 50 second countdown timer will start and the
dryer will turn on.This test should be performed
on a cold dryer for best results.
If the dryer is cold, the countdown timer will
start at 50 seconds.
NOTE: If the dryer is extremely cold (less than
40°F [4.4°C]), the air flow may not be detected
properly, and “XX”will be displayed.
If the dryer is hot, the countdown timer will
start at 30 seconds (cool down period), followed
by an additional 50 second countdown.
An air flow range will bedisplayed in the center
of the LCD.
■ For air flow readings above 40 cfm,“Air Flow
> 40” will be displayed.
■ For air flow readings between 29 and 40cfm,
“Air flow between 29 and 40” will bedisplayed.
■ For air flow readings less than 29 cfm,“Airflow
< 29” will be displayed.
If air flow is low (less than 29 cfm), check to
make sure the lint screen is clean, the doorseal
isinplace,and the ventisnot obstructed.
DIAGNOSTIC: Displaying Line Voltage
Used to display the line voltage currently being
measured by the machine control.
After entering the DiagnosticTest Mode and
selecting the Component Activation option, press
the “LineVoltage” button to activate the Line
Voltage Test.After pressing“Turn On”, the voltage
will be displayed on the LCD screen.
If the line voltage is not seen,the display will
show “L2”. Go to TEST #1, page 8.
Select the “Back” button until the Diagnostic
Home screen appears, then select the “Exit
Diagnostics”option and press“Ok”.
DEACTIVATING THE DIAGNOSTIC
TEST MODE
MANUAL LOAD TEST
To activate each load independently,the same
component activation option of the Diagnostic Test
Mode can be used.
Manual: Motor
To turn on the Motor, press the “Motor” button
on the LCD, then press “Turn On”on the screen that
appears; the motor will turn onfor 10seconds,
then automaticallyturn off.
Manual: Heater
To turn on the Heater, press the“Heater”button
on the LCD, then press “Turn On”on the screen that
appears; the heater will turn on for 10 seconds,
then automaticallyturn off.
Manual: Steam Valve
To turn on the Steam Valve, press the “Steam
Valve” button on theLCD, then press “Turn On”on
the screen that appears; the steam valve will turn
on for 10 seconds,then automaticallyturn off.
Manual: Sound
To check the Sound, press the “Sound”button
on the LCD; a sound test tone will play. If sound
cannot be heard,ensure volumeis set to“High”
in the“Sound andDisplay” menu.
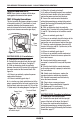
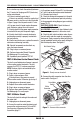
Manual: Drum Light
To check the Drum Light, press the “Drum Light”
button on the LCD and press the“Turn On” button;
the light will turn on.Press the“Turn Off”button to
turn off.