
Owner's Manual
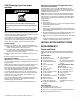
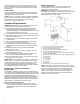
Table Of Contents
- RANGE SAFETY
- Range Safety
- RANGE MAINTENANCE AND CARE
- General Cleaning
- Self-Cleaning Cycle (on some models)
- INSTALLATION INSTRUCTIONS
- REQUIREMENTS
- Tools and Parts
- Location Requirements
- Electrical Requirements
- Gas Supply Requirements
- INSTALLATION
- Unpack Range
- Install Anti-Tip Bracket
- Adjust Leveling Legs
- Level Range
- Make Gas Connection
- Verify Anti-Tip Bracket Is Installed and Engaged
- Electronic Ignition System
- Remove/Replace Drawer
- Oven Door
- Complete Installation
- GAS CONVERSIONS
- Propane Gas Conversion
- Natural Gas Conversion
- Adjust Flame Height
- Moving the Range
- SECURITE DE LA CUISINIERE
- Securite de la cuisiniere
- ENTRETIEN ET REPARATION DE LA CUISINIERE
- Nettoyage general
- Programme d'autonettoyage (sur certains modeles)
- INSTRUCTIONS D'INSTALLATION
- EXIGENCE
- Outils et pieces
- Exigences d'emplacement
- Specifications electriques
- Specifications de l'alimentation en gaz
- INSTALLATION
- Deballage de la cuisiniere
- Installation de la bride antibasculement
- Reglage des pieds de nivellement
- Reglage de l'aplomb de la cuisiniere
- Raccordement au gaz
- Verifier que la bride antibasculement est bien installee et engagee
- Systeme d'allumage electronique
- Depose et reinstallation du tiroir
- Porte du four
- Achever l'installation
- CONVERSIONS POUR CHANGEMENT DE GAZ
- Conversion pour l'alimentation au propane
- Conversion pour l'alimentation au gaz naturel
- Reglage de la taille des flammes
- Deplacement de la cuisiniere

7
Self-Cleaning Cycle (on some
models)
WARNING
Burn Hazard
Do not touch the oven during the Self-Cleaning cycle.
Keep children away from the oven during Self-Cleaning
cycle.
Failure to follow these instructions can result in burns.
IMPORTANT: The health of some birds is extremely sensitive to
the fumes given off during the Self-Cleaning cycle. Exposure to
the fumes may result in death to certain birds. Always move birds
to another closed and well-ventilated room.
Do not block the oven vent(s) during the Self-Cleaning cycle. Air
must be able to move freely. Depending on your model, see the
“Oven Vent” or “Oven Vents” section in the Quick Start Guide.
Do not clean, rub, damage, or move the oven door gasket.
Prepare Range
■ Remove the broiler pan, grid, cookware and bakeware, all
cooking utensils, oven racks, and aluminum foil and, on some
models, the temperature probe from the oven.
■ Use a damp cloth to clean inside door edge and the
1
1
/
2
" (3.8 cm) area around the inside oven cavity frame, being
certain not to move or bend the gasket.
■ Remove plastic items from the cooktop because they may
melt.
■ Remove all items from the storage drawer.
How the Cycle Works
IMPORTANT: The heating and cooling of porcelain on steel in the
oven may result in discoloring, loss of gloss, hairline cracks, and
popping sounds.
Before cleaning, make sure the door is completely closed or the
door will not lock and the Self-Cleaning cycle will not begin.
Once the oven has completely cooled, remove ash with a damp
cloth. To avoid breaking the glass, do not apply a cool damp cloth
to the inner door glass before it has completely cooled.
To stop the Self-Cleaning cycle at any time, press the Cancel
keypad. If the temperature is too high, the oven door will remain
locked and “cool” and “(lock symbol)” will be displayed. The
cooling fan may continue to run.
Once the self-cleaning temperature has been reached, the
electronic control requires a 12 hour delay before another
Self-Cleaning cycle can be started.
The oven light will not function during the Self-Cleaning cycle.
Electronic Oven Control with Adjustable Clean
Time (on some models)
The Self-Cleaning cycle is time adjustable between 2 hours
30 minutes and 4 hours 30 minutes in 30 minute increments. The
suggested clean times are 2 hours 30 minutes for light soil and
4 hours 30 minutes for heavy soil.
NOTE: When cooktop is in use, the Self-Cleaning cycle will be
disabled. An error tone will sound and the Cooktop On indicator
light will flash. If you turn on the cooktop when the Self- Cleaning
cycle is in use, it will disable the Self-Cleaning cycle and “END”
will be displayed.
To Self-Clean:
1. Press CLEAN.
2. Press the Temp/Time “up” or “down” arrow keypad to enter the
desired Self-Cleaning cycle time.
3. Press START.
The oven door will automatically lock. The Door Locked and
Clean indicator lights will be displayed. The time remaining will
also be displayed.
4. When the Self-Cleaning cycle is complete and the oven cools,
the Door Locked and Clean indicator lights will turn off.
5. When the oven is completely cooled, remove ash with a damp
cloth.
To exit the Self-Cleaning cycle before completed, press
CANCEL. The door will unlock once the oven cools.
INSTALLATION INSTRUCTIONS
REQUIREMENTS
Tools and Parts
Gather the required tools and parts before starting installation.
Read and follow the instructions provided with any tools listed
here.
Tools Needed
■ Tape measure
■ Flat-blade screwdriver
■ Phillips screwdriver
■ 1/8" flat-blade screwdriver
■ Level
■ Hand or electric drill
■ Hammer
■ Wrench or pliers
■ Pipe wrench
■ 15/16" combination wrench
■ 1/4" drive ratchet
■ 3/8" nut driver
■ 1/8" drill bit (for wood floors)
■ Marker or pencil
■ Pipe-joint compound
resistant to Propane gas
■ Noncorrosive leak-detection
solution
■ 3/16" carbide-tipped
masonry drill bit
(for concrete/ceramic floors)
(For Slide-in/Front Control
Ranges)
For Propane/Natural Gas
Conversions
■ 3/8" combination wrench
■ 1/2" combination wrench
■ 5/8" combination wrench
■ 9/32" nut driver
■ Quadrex
®
† or Phillips
screwdriver
■ Masking tape
■ 3/8" nut driver
(For Slide-in/Front Control
Ranges)
Parts Supplied
Check that all parts are included.
■ Propane/Natural Gas Conversion Kit
■ #10 x 1
5
/
8
" (4.1 cm) screws (for mounting anti-tip bracket) (2)
■ Anti-tip bracket (inside oven cavity)
†
®
QUADREX is a registered trademark of NLW Holdings, Inc.