
Owner's Manual
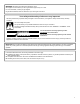


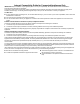

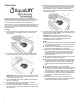


Table Of Contents
- RANGE SAFETY
- Range Safety
- RANGE MAINTENANCE AND CARE
- General Cleaning
- Clean Cycle
- INSTALLATION INSTRUCTIONS
- REQUIREMENTS
- Tools and Parts
- Location Requirements
- Electrical Requirements
- Gas Supply Requirements
- INSTALLATION
- Unpack Range
- Install Anti-Tip Bracket
- Adjust Leveling Legs
- Level Range
- Make Gas Connection
- Install Griddle (on some models)
- Verify Anti-Tip Bracket Is Installed and Engaged
- Electronic Ignition System
- Remove/Replace Drawer (On some models)
- Oven Door
- Complete Installation
- GAS CONVERSIONS
- Propane Gas Conversion
- Natural Gas Conversion
- Adjust Flame Height
- Moving the Range
- SÉCURITÉ DE LA CUISINIÈRE
- Sécurité de la cuisinière
- ENTRETIEN ET RÉPARATION DE LA CUISINIÈRE
- Nettoyage général
- Programme de nettoyage
- INSTRUCTIONS D’INSTALLATION
- EXIGENCE
- Outils et pièces
- Exigences d'emplacement
- Spécifications électriques
- Spécifications de l’alimentation en gaz
- INSTALLATION
- Déballage de la cuisinière
- Installation de la bride antibasculement
- Réglage des pieds de nivellement
- Réglage de l’aplomb de la cuisinière
- Raccordement au gaz
- Installation de la plaque à frire (Sur certains modèles)
- Vérifier que la bride antibasculement est bien installée et engagée
- Système d’allumage électronique
- Dépose et réinstallation du tiroir (Sur certains modèles)
- Porte du four
- Achever l’installation
- CONVERSIONS POUR CHANGEMENT DE GAZ
- Conversion pour l’alimentation au propane
- Conversion pour l’alimentation au gaz naturel
- Réglage de la taille des flammes
- Déplacement de la cuisinière
- SEGURIDAD DE LA ESTUFA
- SEGURIDAD DE LA ESTUFA
- CUIDADO Y MANTENIMIENTO DE LA ESTUFA
- Limpieza General
- Ciclo de limpieza
- INSTRUCCIONES DE INSTALACIÓN
- REQUISITOS
- Herramientas y piezas
- Requisitos de ubicación
- Requisitos eléctricos
- Requisitos del suministro de gas
- INSTALACIÓN
- Desempaque la estufa
- Instalación del soporte anti-vuelco
- Regule las patas niveladoras
- Nivelación de la estufa
- Conexión del suministro de gas
- Instalación de la plancha (En algunos modelos)
- Verifique que el soporte antivuelco esté instalado y enganchado
- Sistema de encendido electrónico
- Quite/vuelva a colocar el cajón (En algunos modelos)
- Puerta del horno
- Completar la instalación
- CONVERSIONES DE GAS
- Conversión a gas propano
- Conversión a gas natural
- Cómo ajustar la altura de la llama
- Cómo mover la estufa

2
RANGE SAFETY
WARNING: If the information in these instructions is not followed exactly, a fire or
explosion may result causing property damage, personal injury or death.
− Do not store gasoline or other flammable vapors and liquids in the vicinity of this or any
other appliance.
− WHAT TO DO IF YOU SMELL GAS
• Do not try to light any appliance.
• Do not touch any electrical switch.
• Do not use any phone in your building.
• Immediately call your gas supplier from a neighbor’s phone. Follow the gas suppliers
instructions.
• If you cannot reach your gas supplier, call the fire department.
− Installation and service must be performed by a qualified installer, service agency or the
gas supplier.
WARNING:
Never Operate the Top Surface Cooking Section of this Appliance Unattended
• Failure to follow this warning statement could result in fire, explosion, or burn hazard that
could cause property damage, personal injury, or death.
• If a fire should occur, keep away from the appliance and immediately call your fire
department.
DO NOT ATTEMPT TO EXTINGUISH AN OIL/GREASE FIRE WITH WATER.
The range will not tip during normal use. However, the range can tip if you apply too much force or weight to the open door without the
anti-tip bracket fastened down properly.
WARNING
Tip Over Hazard
A child or adult can tip the range and be killed.
Install anti-tip bracket to floor or wall per installation instructions.
Slide range back so rear range foot is engaged in the slot of the anti-tip bracket.
Re-engage anti-tip bracket if range is moved.
Do not operate range without anti-tip bracket installed and engaged.
Failure to follow these instructions can result in death or serious burns to children and adults.
To verify the anti-tip bracket is properly installed and engaged:
• Slide range forward.
• Look for the anti-tip bracket securely attached to floor or wall.
• Slide range back so rear range foot is under the anti-tip bracket.
• See Installation Instructions for details.