
Service Manual
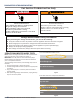
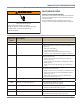
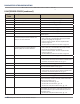
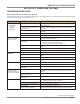
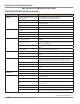

Table Of Contents
- Smart All-In-One Washer/Dryer
- Table of Contents
- Section 1: General Information
- Washer & Dryer Safety
- Introduction
- Features
- Options
- Accessories
- Control Panel & Features
- Control Panel - Tools
- Load & Go Bulk Dispenser
- Theory of Operation - Dry Cycle
- Product Specifications
- Wiring Diagram & Model/Serial Number Location
- Model & Serial Number Nomenclature
- All-In-One Washer/Dryer Maintenance
- Cleaning the Drain Pump Filter/Draining Residual Water
- How to Manually Open a Locked Door
- Section 2: Diagnostics & Troubleshooting
- Section 3: Component Testing
- Component Testing Safety
- Wiring Diagram
- TEST #1: Appliance Control Unit (ACU) Power Check
- TEST #2: Human-Machine Interface (HMI)
- TEST #3: Motor Circuit
- TEST #4: Door Lock System
- TEST #5: Inlet Valve
- TEST #6: Pressure Switch
- TEST #7: Drain/Recirculation Pump
- TEST #8: Wash Heating Element
- TEST #9: Wash Temperature Sensor
- TEST #10a: Dispenser Sensing
- TEST #10b: Dispenser Metering Pumps
- TEST #11: Supply Connections
- TEST #12a: Dry Heating Element
- TEST #12b: Dry Temperature Sensor
- TEST #13: Dry Fan Motor
- Section 4: Component Access
- Removing the Door Assembly
- Removing the Top Panel
- Replacing the Human-Machine Interface (HMI)
- Removing the Front Panel & Bulkhead
- Removing the Rear Access Panel
- Removing the Inlet Valve Assembly
- Removing the Pressure Switch
- Removing the Metering Pumps
- Removing the Detergent Dispenser
- Removing the Dryer Heating Channel Assembly
- Removing the Condenser Duct Assembly
- Removing the RFI Filter
- Removing the Door Lock Assembly
- Removing the Appliance Control Unit (ACU)
- Removing the Motor Control Unit (MCU)
- Removing the Heater & Thermistor
- Removing the Drain & Recirculation Pumps
- Removing the Direct Drive Motor
- Removing the Tub Assembly
- Section 5: Connectivity
- Product Specifications & Warranty Information Sources

DIAGNOSTICS & TROUBLESHOOTING
Whirlpool Smart All-In-One Washer & Dryer
n
2-3
For Service Technician Use Only
ACU: Appliance Control Unit
Human-Machine Interface
Before servicing, check the following:
n Make sure there is power at the wall outlet.
n Has a household fuse blown, or circuit breaker or GFCI
tripped? Was a regular fuse used? Inform customer that a
me-delay fuse is required.
n Is cold water faucet open and water supply hose
unobstructed?
n Make sure drain hose is not sealed into drain pipe, and that
there is an air gap for venlaon.
n All tests/checks should be made with a VOM (volt-
ohm-milliammeter) or DVM (digital-voltmeter) having a
sensivity of 20,000 Ω per volt DC or greater.
n Resistance checks must be made with washer/dryer
unplugged or power disconnected.
n Avoid using large diameter probes when
checking harness connectors as the probes may damage
the connectors upon inseron.
n Check all harnesses and connecons before replacing
components. Look for connectors not fully seated, broken
or loose wires and terminals, pin inseron, or wires not
pressed into connectors far enough to engage metal barbs.
n A potenal cause of a control not funconing is corrosion
or contaminaon on connecons. Use an ohmmeter to
check for connuity across suspected connecons.
n Voltage checks must be made with all
connectors aached to the boards.
Allows service personnel to run the Service Test Cycle to verify
inputs to the washer/dryer and funconality of the washer/
dryer control. You may want to do a quick and overall checkup
of the washer/dryer with this test before going to specic
troubleshoong tests.
Use Service Diagnosc Mode without laundry in
the washer/dryer.
1. Be sure the washer/dryer is in standby mode (plugged in
with all indicators o).
2. Open and close the washer/dryer door.
3. Press and hold POWER unl the washer/dryer display
turns on. Aer approximately 1 minute, the home screen
will display.
4.
Within 8 seconds,
- Press and release the HOME buon (
)
- Press and release the FAVORITES buon (
)
- Press and release the TOOLS buon (
)
- Repeat this 3 buon sequence 2 more mes
The WARNING DIAGNOSTIC MODE screen will display.
Touch ENTER to enter diagnosc mode. The DIAGNOSTIC
HOME screen will be displayed. To connue with the tests
in Service Diagnosc Mode, see below.
a. Press the TOOLS buon -
b. From the TOOLS menu, scroll down to “INFO.”
c. From the INFO menu, select “SERVICE & SUPPORT.”
d. From the SERVICE INFO screen, Press and hold the
DIAGNOSTICS buon unl the “ENTER PASSWORD”
screen is displayed.
e. From the ENTER PASSWORD screen, input “123, 123,
123,” and press “ENTER.”
f.
The WARNING DIAGNOSTIC MODE screen will display.
Touch ENTER to enter diagnosc mode. The DIAGNOSTIC
HOME screen will be displayed. To connue with the tests
in Service Diagnosc Mode, see below.
If there is a saved fault code, the F number will be shown in
the display. Review the Fault/Error Codes beginning on page
2-6 for the recommended procedure and how to display saved
error codes.
To exit Service Diagnosc Mode, scroll to the top of the
DIAGNOSTICS HOME screen, press the < buon in the top le
corner of the screen twice, and then press the buon.
NOTE: Service Diagnosc Mode mes out aer 5 minutes of
user inacvity.
If entry into Service Diagnosc Mode is unsuccessful, refer to
the following indicaons and acons:
The display does not turn on.
Make sure AC power is available to the washer/dryer.
Check user interface operaon (see Test #2, page 3-6).
Display is on, but unable to enter Service
Diagnosc Mode.
Press and hold POWER to turn o the washer/dryer
display. Wait 10 seconds. Press and hold POWER again to turn
on the washer/dryer display. Follow the Acvang Service
Diagnosc Mode instrucons on this page.
NOTE: The Service Diagnosc Mode must be acvated before
performing the tests; see procedure on this page.
All indicators turn on and the display shows acve fault code
“F#E#.”
To exit the Service Test Cycle, scroll to the top of the
DIAGNOSTICS HOME screen, press the < buon in the top le
corner of the screen twice, and then press the buon.