Use and Care Guide and Installation Instructions Guide d’utilisation et d’entretien et Instructions d’installation Smart All-In-One Washer and Dryer Laveuse et sécheuse intelligente combinées Para obtener acceso al Manual de uso y cuidado en español, o para obtener información adicional acerca de su producto, visite: www.whirlpool.com If you have any problems or questions, visit us at www.whirlpool.com. Pour tout problème ou toute question, consulter www.whirlpool.ca.
Table of Contents ALL-IN-ONE WASHER/DRYER SAFETY............................... 2 ACCESSORIES........................................................................ 4 OPERATING INSTRUCTIONS................................................ 5 Control Panel and Features.............................................. 5 Cycle Guides.................................................................... 6 Choosing the Right Detergent...........................................9 Using the Load & Go™ Bulk Dispenser....
ACCESSORIES INSTALLATION & MAINTENANCE ACCESSORIES FACTORY CERTIFIED PARTS – these three words represent quality parts and accessories designed specifically for your appliance. Time tested engineering that meets our strict quality specifications. FACTORY CERTIFIED PARTS Accessories designed for your appliance: Customize your new washer/dryer with the following genuine Whirlpool accessory. For more information on options and ordering, call 1-866-698-2538 or visit us at: www.whirlpool.com.
OPERATING INSTRUCTIONS Control Panel and Features 5 2 4:28 3:15 What to Wash REGULAR Temperature WARM 1 1 Spin Speed EXTRA FAST 3 POWER BUTTON Touch to power up the washer/dryer. 2 HOME BUTTON Touch this button and the LCD screen will show the home screen, where you can select your cycle, settings, and options. 3 FAVORITES BUTTON 4 LCD SCREEN 5 REMOTE ENABLE BUTTON 6 4 7 Load & Go™ Bulk Dispenser The Load & Go™ bulk dispenser holds up to 33.8 oz.
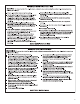
Cycle Guides You can use this washer/dryer to wash only, dry only, or wash and dry. This washer/dryer has a unique user interface to help you select the best wash cycle for your load. The “What to Wash/How to Wash” layout guides you to the optimal cycle in two easy steps: First determine what items are in the load that you are trying to wash. Use that to guide your “What to Wash” selection. Then determine how you want the washer to wash them and select the appropriate “How to Wash” selection.
What How Colors Delicates Whites Towels Basic Settings Additional Options Temperature Spin Speed Dry Mode Set Soil Level Rinses Pre-Soak Tumble Fresh™ Wrinkle Shield™ Normal Warm Cool Cold Extra Fast Fast Medium Slow Off Auto Timed Light Normal Heavy 2 3 4 5 X X X Quick Warm Cool Cold Extra Fast Fast Medium Slow Off Auto Timed Light Normal Heavy 2 3 X X X Cold Wash Cool Cold Extra Fast Fast Medium Slow Off Auto Timed Light Normal Heavy 2 3 4 5 X X X Normal Warm Co
What How Bulky Items Basic Settings Additional Options Temperature Spin Speed Dry Mode Set Soil Level Rinses Pre-Soak Tumble Fresh™ Wrinkle Shield™ Normal Extra Hot Hot Warm Cool Cold Medium Slow Off Auto Timed Light Normal Heavy 2 3 4 5 X X X Quick Extra Hot Hot Warm Cool Cold Medium Slow Off Auto Timed Light Normal Heavy 2 3 X X X Heavy Duty Extra Hot Hot Warm Cool Cold Medium Slow Off Auto Timed Light Normal Heavy 2 3 4 5 X X X Government energy certifications for
Choosing the Right Detergent Use only High Efficiency detergents. The package will be marked “HE” or “High Efficiency.” Low-water washing creates excessive sudsing with a non-HE detergent. Using non-HE detergent will likely result in longer cycle times and reduced rinsing performance. It may also result in component malfunction and, over time, buildup of mold or mildew. HE detergents should be low-sudsing and quick-dispersing to produce the right amount of suds for the best performance.
Using the All-In-One Washer/Dryer First wash cycle without laundry Before washing clothes for the first time, set up the Load & Go™ bulk dispenser (see page 9). Choose the Regular (What to Wash) and Quick (How to Wash) cycle and run it without clothes. Use only HE detergent. This initial cycle serves to ensure the interior is clean and the bulk dispenser is primed and ready for use before washing clothes.
4. Add liquid HE detergent to Load & Go ™ bulk dispenser (if bulk dispenser is not already loaded or if low detergent icon on display is lit), if desired 6. Touch POWER button to turn on washer/dryer Touch until the indicators turn on. 7. Select wash program/cycle 4:28 3:15 See page 9 for instructions on how to fill the liquid detergent bulk dispenser (Dispenser 1). Press the TOOLS button and make sure that the bulk dispenser is active. See Step 11 on page 13.
8. Select temperature and spin speed † 4:28 3:15 What to Wash REGULAR Temperature WARM How to Wash NORMAL Spin Speed EXTRA FAST Auto Dry Dry From the home screen, touch the “Temperature” area of the screen to show the Temperature settings available for the cycle/program chosen in Step 7. Touch the desired setting and touch OKAY to confirm that setting. The recommended wash temperature is preset for each cycle. Some preset temperatures can be changed.
10. Select options, if desired † From the home screen, touch the Options icon (at upper right of screen) and the Options screen will show Soil Level, Extra Rinses, Pre-Soak, Tumble Fresh,™ and Wrinkle Shield™ selections. Previously selected “What to Wash” and “How to Wash” options will be shown on the screen. Touch the screen for each option to change its setting. Soil Level Option The Soil Level option allows you to select a Light, Normal, or Heavy soil level setting.
12. Touch START/PAUSE button to begin cycle Setting a delayed start 4:28 3:15 Touch the START/PAUSE button to start the cycle. To pause a cycle in progress, touch the START/PAUSE button once, then touch again to continue the cycle. To cancel a cycle, touch the “X” on the touch screen to the right of the estimated time remaining. Once you touch the START/PAUSE button, you will hear the door lock. The washer/dryer door will remain locked during a wash cycle. 13.
All-In-One Washer/Dryer Maintenance CLEANING THE WASHER/DRYER LOCATION Keep washer/dryer area clear and free from items that would block the airflow for proper dryer operation. This includes clearing piles of laundry in front of the washer/dryer. WASHER/DRYER CARE Recommendations to Help Keep Your Washer/Dryer Clean and Performing at its Best 1. Always use High Efficiency (HE) detergents and follow the HE detergent manufacturer’s instructions regarding the amount of HE detergent to use.
CLEAN WASHER CYCLE REMINDER NON-USE AND VACATION CARE The Clean Washer with affresh® message will flash at the end of a wash cycle when the washer has run 30 wash cycles. This is a reminder to run the Clean Washer with affresh® cycle. If the Clean Washer with affresh® cycle is not run, the message will stop flashing at the end of a wash cycle after running three more regular wash cycles.
CLEANING THE DRAIN PUMP FILTER/ DRAINING RESIDUAL WATER (cont.) 3. Lay a cotton cloth beneath the drain pump filter to absorb any water still in it. Then remove the drain pump filter by turning it counterclockwise. CLEANING THE DRAIN PUMP FILTER/ DRAINING RESIDUAL WATER NOTE: Perform the following procedure every 6 months. 4. Remove large clumps of lint by hand from the filter and place lint in a suitable waste container. Remove remaining residue from the filter by rinsing with water. 1.
TRANSPORTING YOUR WASHER/DRYER 1. Shut off water faucet. Disconnect and drain water inlet hose. 2. If washer/dryer will be moved during freezing weather, follow “Winter Storage Care” directions before moving. 3. Disconnect drain hose from drain system and from back of washer/dryer. 4. Unplug power cord. 5. Place inlet hose and drain hose inside drum. 6. Bundle power cord with a rubber band or cable tie to keep it from hanging onto the ground. IMPORTANT: Call for service to install new transport bolts.
INSTALLATION INSTRUCTIONS Installation Requirements Optional tools: Tools and Parts Gather required tools and parts before starting installation. Tools needed: Flashlight Adjustable or open-end wrenches 3/8" (10 mm) and 1/2" (13 mm) Level Ruler or measuring tape Pliers that open to 19⁄16" (39.5 mm) Bucket Alternate parts: (Not supplied with washer/dryer) Your installation may require additional parts. To order, please refer to toll-free numbers on the back page of this manual.
Location Requirements 24" (610 mm) Proper installation is your responsibility. Check code requirements. Some codes limit, or do not permit, installing washer/dryer in garages, closets, mobile homes, or sleeping quarters. Contact your local building inspector. 331/4" Min. (845 mm) 333/4" Max. (857 mm) 28" (675 mm) 48 15/16" (1243 mm) You will need: n A separate 30 amp circuit. n A grounded electrical outlet located within 2 ft. (610 mm) of either side of washer/dryer. See “Electrical Requirements.
Location Requirements (cont.) Custom cabinet installation: Closet installation: 12" (305 mm) 3" (76 mm) 48 in.2 min. (310 cm2) 12" 9" (229 (305 mm) 3" (76 mm) 4" (102 mm) 4" (102 mm) 1" (25 mm) 3" (76 mm) NOTE: The 12" minimum space above the washer/dryer is required for use of the Load & Go™ bulk dispenser. 1" (25 mm) 24 in.2 min. (155 cm2) 3" (76 mm) NOTE: The 12" minimum space above the washer/dryer is required for use of the Load & Go™ bulk dispenser.
Drain System Drain system can be installed using a floor drain, wall standpipe, floor standpipe, or laundry tub. Select method you need. IMPORTANT: To avoid siphoning, only 41⁄2" (114 mm) of drain hose should be inside standpipe. Always secure drain hose with cable tie. Floor standpipe drain system 1/2" 44.5" (114 mm) Max. 48" 49" max. (125 cm) (1219 mm) Min. 30" 24" min. (60 cm) (762 mm) Minimum diameter for a standpipe drain: 2" (51 mm). Minimum carry-away capacity: 17 gal. (64 L) per minute.
Unpacking Washer/Dryer 2. Remove four transport bolts from washer/dryer NOTE: To avoid floor damage, set washer/dryer onto cardboard before moving it. 1. Move washer/dryer Loosen the four transport bolts with a 3/8" (10 mm) wrench. Once each bolt is loose, wiggle and completely pull them out of the washer/dryer, along with all four shipping plugs. Transport bolt 48" (1.
Electrical Requirements – U.S.A. Only It is your responsibility: ■■ To contact a qualified electrical installer. ■■ To be sure that the electrical connection is adequate and in conformance with the National Electrical Code, ANSI/ NFPA 70 – latest edition and all local codes and ordinances. The National Electrical Code requires a 4-wire power supply connection for homes built after 1996, dryer circuits involved in remodeling after 1996, and all mobile home installations.
Electrical Requirements – Canada Only Electrical Installation – U.S.A. Only Before you start: disconnect power. 1. Choose electrical connection type Power supply cord 4-wire receptacle (NEMA-Type 14-30R): Go to “Power Supply Cord Connection.” Power supply cord 3-wire receptacle (NEMA Type 10-30R): Go to “Power Supply Cord Connection.” It is your responsibility: ■■ To contact a qualified electrical installer.
Power Supply Cord Connection WARNING Fire Hazard Use a new UL listed 30 amp power supply cord. Use a UL listed strain relief. 4-Wire Power Supply Cord Connection IMPORTANT: A 4-wire connection is required for mobile homes and where local codes do not permit the use of 3-wire connections. 4-wire receptacle (NEMA-type 14-30R) 4 prong plug Spade terminals with upturned ends Ring terminals Disconnect power before making electrical connections.
3-Wire Power Supply Cord Connection 3. Connect ground wire D B Use where local codes permit connecting cabinet-ground conductor to neutral wire. 3-wire receptacle (NEMA-type 10-30R) 3 prong plug Spade terminals with upturned ends Ring terminals Connect ground wire (D) (green or bare) of power supply cord under green external ground conductor screw (B). Tighten screw. 4. Connect remaining wires 1. Connect neutral (center) wire A Connect remaining wires under outer terminal block screws.
Optional External Ground for 3-Wire Connection 3. Connect remaining wires IMPORTANT: You must verify with a qualified electrician that this grounding method is acceptable before connecting. 1. Prepare to connect neutral wire B A Place ends of remaining wires under outer terminal block screws. Tighten screws and tighten strain relief. Remove center terminal block screw (A) and green external ground conductor screw (B). 4. Connect external ground wire D B 2.
Route Drain Hose Proper routing of the drain hose protects your floor from damage due to water leakage. Read and follow these instructions. 3. Place drain hose in standpipe 1. Remove drain hose from washer/dryer Place hose into standpipe (shown in picture) or over side of laundry tub. IMPORTANT: Only 41⁄2" (114 mm) of drain hose should be inside standpipe; do not force excess hose into standpipe or lay on bottom of laundry tub. Drain hose form must be used.
2. Clear water line 5. Secure drain hose Laundry Tub 41/2" 4.5" (114 mm) Run water for a few seconds through hose into a laundry tub, drainpipe, or bucket to avoid clogs. Water should run until clear. 3. Connect inlet hose to washer/dryer Standpipe 41/2" (114 mm) Wall 1/2" 44.5" (113 mm) (114 Secure drain hose to laundry tub leg, drain standpipe, or inlet hose for wall standpipe with cable tie. Level Washer/Dryer Leveling your washer/dryer properly reduces excess noise and vibration. 1.
2. Rock washer/dryer to test foot contact 4. Tighten leveling feet Jam nut Grip washer/dryer from top and rock back and forth, making sure all four feet are firmly on floor. Repeat, rocking washer/ dryer from side to side. If washer rocks, go to Step 3 and adjust leveling feet. If all four feet are in firm contact with floor, go to “Plug In Washer/Dryer.” 3.
Complete Installation Checklist In Canada 1. Plug into a grounded 4 prong outlet q Check electrical requirements. Be sure you have correct electrical supply and recommended grounding method. q q Check that washer/dryer is plugged into a grounded outlet. Check that all parts are now installed. If there is an extra part, go back through steps to see what was skipped. q q q q q Check that washer/dryer is level. q q q q Check that inlet hose is attached and water faucet is on.
TROUBLESHOOTING First try the solutions suggested here or visit our website at www.whirlpool.com/owners (in Canada www.whirlpool.ca/owners) for assistance and to possibly avoid a service call. If you experience Possible Causes Solution Vibration or Off-Balance Vibration, rocking, or “walking” Feet may not be in contact with the floor and locked. Front and rear feet must be in firm contact with floor, and washer/dryer must be level to operate properly.
TROUBLESHOOTING First try the solutions suggested here or visit our website at www.whirlpool.com/owners (in Canada www.whirlpool.ca/owners) for assistance and to possibly avoid a service call. If you experience Possible Causes Solution Water Leaks (cont.) Water or suds leaking from door or rear of cabinet Not using HE detergent or using too much HE detergent. Only use HE detergent. Suds from regular detergents can cause leaking from the door or rear of cabinet.
TROUBLESHOOTING First try the solutions suggested here or visit our website at www.whirlpool.com/owners (in Canada www.whirlpool.ca/owners) for assistance and to possibly avoid a service call. If you experience Possible Causes Solution Wash cycle not performing as expected (cont.) Washer/dryer won’t run or fill; washer/dryer stops working (cont.) Normal washer/dryer operation. Washer/dryer will pause during certain phases of cycle. Do not interrupt cycle.
TROUBLESHOOTING First try the solutions suggested here or visit our website at www.whirlpool.com/owners (in Canada www.whirlpool.ca/owners) for assistance and to possibly avoid a service call. If you experience Possible Causes Solution Wash cycle not performing as expected (cont.) Washer/dryer not draining/spinning; loads are still wet (cont.) Using cycles with a lower spin speed. Cycles with lower spin speeds remove less water than cycles with high spin speeds.
TROUBLESHOOTING First try the solutions suggested here or visit our website at www.whirlpool.com/owners (in Canada www.whirlpool.ca/owners) for assistance and to possibly avoid a service call. If you experience Possible Causes Solution Wash cycle not performing as expected (cont.) Load not rinsed Improper water supply connection. Inlet hose must be attached to both washer/dryer and cold water supply faucet and have water flowing to inlet valve. Cold water faucet must be on.
TROUBLESHOOTING First try the solutions suggested here or visit our website at www.whirlpool.com/owners (in Canada www.whirlpool.ca/owners) for assistance and to possibly avoid a service call. If you experience Possible Causes Solution Wash cycle not performing as expected (cont.) Not cleaning or removing stains (cont.) Not using correct cycle for fabric type. Use a warmer wash temperature to improve cleaning.
TROUBLESHOOTING First try the solutions suggested here or visit our website at www.whirlpool.com/owners (in Canada www.whirlpool.ca/owners) for assistance and to possibly avoid a service call. If you experience Possible Causes Solution Wash cycle not performing as expected (cont.) Gray whites, dingy colors Load not sorted properly. The transfer of dye can occur when mixing whites and colors in a load. Sort dark clothes from whites and lights. Wash temperatures too low.
TROUBLESHOOTING First try the solutions suggested here or visit our website at www.whirlpool.com/owners (in Canada www.whirlpool.ca/owners) for assistance and to possibly avoid a service call. If you experience Possible Causes Solution Drying Operation Drying cycle will not run Door not closed completely. Make sure the washer/dryer door is closed completely. Start/Pause button not touched firmly. Touch the START/PAUSE button firmly. Drain pump filter not in place or clogged.
TROUBLESHOOTING First try the solutions suggested here or visit our website at www.whirlpool.com/owners (in Canada www.whirlpool.ca/owners) for assistance and to possibly avoid a service call. If you experience Possible Causes Solution Lint on load Drain pump filter is clogged with lint. Clean the drain pump filter. See “Cleaning the Drain Pump Filter/ Draining Residual Water.” This procedure should be performed every 6 months.
TROUBLESHOOTING First try the solutions suggested here or visit our website at www.whirlpool.com/owners (in Canada www.whirlpool.ca/owners) for assistance and to possibly avoid a service call. If you experience Possible Causes Solution Error Code Appears in Display Once any possible issues are corrected, touch the POWER button once to clear the code. Re-select and restart the cycle.
TROUBLESHOOTING First try the solutions suggested here or visit our website at www.whirlpool.com/owners (in Canada www.whirlpool.ca/owners) for assistance and to possibly avoid a service call. If you experience Possible Causes Solution Error Code Appears in Display (cont.) Once any possible issues are corrected, touch the POWER button once to clear the code. Re-select and restart the cycle. F5E4 Door not opened between cycles Three consecutive cycles were run without the door being opened.
Manually Unlocking the Door HOW TO MANUALLY OPEN DOOR (cont.) 2. Pull down on the plastic strap located beneath the removed screw. The door can now be opened and the laundry removed, if needed. 3. After removing laundry (if needed), secure the plastic strap by replacing and tightening the Phillips head screw removed in Step 1 through the hole in the strap. HOW TO MANUALLY OPEN DOOR Before opening the door as described below, refer to the failure “Door will not unlock” in the “Troubleshooting” section.
Connected Appliance Regulatory Notices Federal Communications Commission (FCC) Compliance Notice This equipment has been tested and found to comply with the limits for a Class B digital device, pursuant to Part 15 of the FCC Rules. These limits are designed to provide reasonable protection against harmful interference in a residential installation.
Connected Appliance Regulatory Notices (cont.) Open Source License Usage The following statements refer to the portions of this software based in part on FreeRTOS v7.0.2, http://www.freertos.org. The use of this software is governed by the terms of GNU General Public License v. 2, which is available at: http://www.gnu.org/licenses/gpl-2.0.html. A copy of the source code may be obtained by written request for the software by name to opensource@whirlpool.com, along with the address for delivery.
WHIRLPOOL® LAUNDRY LIMITED WARRANTY ATTACH YOUR RECEIPT HERE. PROOF OF PURCHASE IS REQUIRED TO OBTAIN WARRANTY SERVICE. Please have the following information available when you call the Customer eXperience Center: n Name, address, and telephone number n Model number and serial number n A clear, detailed description of the problem n Proof of purchase including dealer or retailer name and address IF YOU NEED SERVICE: 1.
Assistance or Service Before calling for assistance or service, please check “Troubleshooting” or visit www.whirlpool.com/owners. It may save you the cost of a service call. If you still need help, follow the instructions below. When calling, please know the purchase date and the complete model and serial number of your appliance. This information will help us to better respond to your request.