
Installation Guide


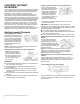
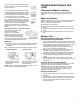

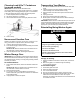

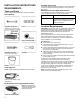
Table Of Contents
- WASHER SAFETY
- Washer Safety
- Internet Connectivity Guide
- CHOOSING THE RIGHT DETERGENT
- Choosing the Right Detergent
- Adding Laundry Products
- WASHER MAINTENANCE AND CARE
- Cleaning the Washer Location
- Water Inlet Hoses
- Washer Care
- Clean Washer Cycle Reminder
- Removing the Dispenser
- Cleaning Load & Go™ Containers (on some models)
- Nonuse and Vacation Care
- Winter Storage Care
- Transporting Your Washer
- Reinstalling/Using Washer Again
- Cleaning the Drain Pump/Draining Residual Water (on some models)
- Additional Cleaning
- INSTALLATION INSTRUCTIONS
- REQUIREMENTS
- Tools and Parts
- Location Requirements
- Drain System
- Electrical Requirements
- INSTALLATION
- Unpacking
- Connect Drain Hose
- Connect Inlet Hoses
- Level WasherComplete Installation Checklist
- Complete Installation Checklist
- SECURITE DE LA LAVEUSE
- Sécurité de la laveuse
- Guide de connexion Internet
- CHOIX DU DETERGENT APPROPRIE
- Choix du détergent approprié
- Ajouter les produits de lessive
- ENTRETIEN ET REPARATION DE LA LAVEUSE
- Nettoyage de l'emplacement de la laveuse
- Tuyaux d’arrivée d’eau
- Entretien de la laveuse
- Rappel de lancement du programme Clean Washer (nettoyage de la laveuse)
- Retrait du distributeur
- Récipients Load & Go (sur certains modèles)
- Non utilisation et entretien avant les vacances
- Entretien pour entreposage hivernalTransport de la laveuse
- Transport de la laveuse
- Réinstallation/réutilisation de la laveuse
- Nettoyage du filtre de la pompe de vidange / Vidange de l'eau résiduelle (sur certains modèles)
- Nettoyage supplémentaire
- INSTRUCTIONS D'INSTALLATION
- SPECIFICATIONS
- Outils et pièces
- Exigences d’emplacement (laveuse)
- Système de vidange
- Spécifications électriques
- INSTALLATION
- Déballage
- Raccordement du tuyau de vidange
- Raccordement des tuyaux d’alimentation
- Établissement de l’aplomb de la laveuseListe de vérification pour installation terminée
- Liste de vérification pour installation terminée
- Untitled

5
Locate the Load & Go
™ bulk dispenser. Gently
pull up on the tab located on the bulk dispenser
lid to lift the fill door.
Fill to the “MAX” line (see illustrations at right)
with HE liquid detergent or liquid fabric softener
(1-liter dispenser only). Close fill door. It will click
into place. Make sure the concentration setting
is correct (see the online “Cycle Guide”).
It is recommended that you rinse out the Load &
Go
™ containers when refilling, when changing
detergent types or concentrations, or when the
washer will not be used for an extended period.
For instructions on cleaning the dispenser
cartridge, see “Washer Care” in the “Washer
Maintenance and Care” section of your Owner’s
Manual.
Adding HE detergent to single-load dispenser:
Pour a measured amount of HE
detergent into detergent
compartment. For powdered
detergent, lift the selector to the high
position. For liquid detergent, push
down the selector to the low position.
Do not overfill; adding too much detergent may cause detergent
to be dispensed into the washer too early.
IMPORTANT:
� Disable the Load & Go™ option before starting a
single load
(on some models). The Optimal Dispense Drawer cannot
be disabled.
� Do not add single-dose laundry packet to dispenser drawer.
Powdered detergent: Liquid detergent:
Lift the selector to the high
position. Add directly to the
compartment.
Push down the selector to the
low position. Add directly to
the compartment.
WASHER MAINTENANCE AND
CARE
Cleaning the Washer Location
Keep washer area clear and free from items that would block
airflow. This includes clearing piles of laundry in front of the
washer.
Water Inlet Hoses
Replace inlet hoses after 5 years of use to reduce the risk of hose
failure. Periodically inspect and replace inlet hoses if bulges,
kinks, cuts, wear, or leaks are found.
When replacing your inlet hoses:
� Mark the date of replacement on the label with a permanent
marker.
� Check that the old washers are not stuck on the washer inlet
valves.
� Use new washers in the new inlet hoses to ensure a proper
seal.
Washer Care
Recommendations to Help Keep Your Washer
Clean and Performing at Its Best
1. Always use High Efficiency (HE) detergents and follow the HE
detergent manufacturer’s instructions regarding the amount of
HE detergent to use. Never use more than the recommended
amount because that may increase the rate at which
detergent and soil residue accumulate inside your washer,
which, in turn, may result in undesirable odor.
2. Use warm or hot water washes sometimes (not exclusively
cold water washes), because they do a better job of
controlling the rate at which soils and detergent accumulate.
3. Always leave the washer lid open between uses to help dry
out the washer and prevent the buildup of odor-causing
residue.
4. Periodically clean residue from all interior surfaces of the
window. For better care, wipe the entire inside of the door with
a damp cloth.
Cleaning Your Front-Loading Washer
Read these instructions completely before beginning the routine
cleaning processes recommended below. This Washer
Maintenance Procedure should be performed, at a minimum,
once per month or every 30 wash cycles, whichever occurs
sooner, to control the rate at which soils and detergent may
otherwise accumulate in your washer.
Cleaning the Door Seal
1. Open the washer door and remove any clothing or items from
the washer.
2. Inspect the gray-colored seal between the door opening and
the drum for stained areas, soil buildup, or lint. Pull back the
seal to inspect all areas under the seal and to check for
foreign objects or lint.
NOTE: Unless the Optimal Dispense Drawer is empty, it is not
recommended to use powdered detergent.