
Manual


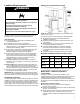

Table Of Contents
- Dryer Safety
- Dryer Safety
- Dryer Maintenance and Care
- Cleaning the Dryer Location
- Cleaning the Dryer Interior
- Removing Accumulated Lint
- Cleaning the Lint Screen
- Changing the Drum Light (on some models)
- Check Your Vent System for Good Airflow
- Maintain Good Airflow
- Nonuse, Storage, and Moving Care
- Special Instructions for Steam Models
- Installation Instructions
- Requirements
- Tools and Parts
- Location Requirements
- Gas Dryer Power Hookup – U.S.A. and Canada
- Gas Supply Requirements
- Installation
- Install Leveling Legs
- Make Gas Connection – U.S.A. and Canada
- Venting Requirements
- Plan Vent System
- Install Vent System
- Connect Inlet Hoses
- Connect Vent
- Level Dryer
- Complete Installation Checklist
- Sécurité de la sécheuse
- Sécurité de la sécheuse
- Entretien et réparation de la sécheuse
- Nettoyage de l’emplacement de la sécheuse
- Nettoyage de l’intérieur de la sécheuse
- Retrait de la charpie accumulée
- Nettoyage du filtre à charpie
- Changement de l’ampoule d’éclairage du tambour (sur certains modèles)
- Vérification d’une circulation d’air adéquate pour le système d’évacuation
- Pour maintenir une bonne circulation d’air
- Précautions à prendre avant des vacances, un entreposage ou un déménagement
- Instructions spécifiques pour les modèles vapeur
- Instructions d’installation
- Spécifications
- Outils et pièces
- Exigences d’emplacement
- Raccordement électrique de la sécheuse à gaz - états-unis et canada
- Spécifications de l’alimentation en gaz
- L’installation
- Exigences d’emplacement
- Raccordement au gaz - états-unis et canada
- Exigences concernant l’évacuation
- Planification des circuits de conduits
- Installation du conduit d’évacuation
- Raccordement des tuyaux d’alimentation
- Raccordement du conduit d’évacuation
- Réglage de l’aplomb de la sécheuse
- Liste de vérification pour installation terminée

5
DRYER MAINTENANCE AND
CARE
Cleaning the Dryer Location
WARNING
Explosion Hazard
Keep flammable materials and vapors, such as gasoline,
away from dryer.
Do not dry anything that has ever had anything
flammable on it (even after washing).
Place dryer at least 18 inches (460 mm) above the floor
for a garage installation.
Failure to do so can result in death, explosion, or fire.
Keep dryer area clear and free from items that would block the
airflow for proper dryer operation. This includes clearing piles of
laundry in front of the dryer.
Cleaning the Dryer Interior
To clean dryer drum:
1. Use a mild hand dish detergent mixed at a low concentration
with nonflammable cleaner or very warm water, and rub with a
soft cloth.
n Rinse well with a wet sponge or towel.
n Tumble a load of clean clothes or towels to dry drum.
2. Use a microfiber cloth and hot water in a spray bottle to clean
the drum and a second microfiber towel to dry.
NOTE: Garments that contain unstable dyes, such as denim blue
jeans or brightly colored cotton items, may discolor the rear of the
dryer interior. These stains are not harmful to your dryer and will
not stain future loads of clothes. Dry unstable dye items inside out
to avoid transfer of dye.
Removing Accumulated Lint
From inside the dryer cabinet:
Lint should be removed every 2 years, or more often, depending
on dryer usage. Cleaning should be done by a qualified appliance
service or ventilation system cleaner.
From the exhaust vent:
Lint should be removed every 2 years, or more often, depending
on dryer usage.
Cleaning the Lint Screen
Every load cleaning:
The lint screen may be located either in the door opening or the
top of the dryer depending on model. A screen blocked by lint can
increase drying time.
To clean:
1. Remove the lint screen. If necessary, press the tab to release
and open the lint screen. Roll lint off the screen with your
fingers. Do not rinse or wash screen to remove lint. Wet lint is
hard to remove.
2. Push the lint screen firmly back into place.
IMPORTANT:
n Do not run the dryer with the lint screen loose, damaged,
blocked, or missing. Doing so can cause overheating and
damage to both the dryer and fabrics.
n If lint falls off the screen into the dryer during removal, check
the exhaust hood and remove the lint. See “Venting
Requirements” in the Installation Instructions.
n Clean space where lint screen is located, as needed. Using a
vacuum, gently remove any lint that has accumulated outside
of the lint screen.
As-needed cleaning:
Laundry detergent and fabric softener residue can build up on the
lint screen. This buildup can cause longer drying times for your
clothes, or cause the dryer to stop before your load is completely
dry. The screen is probably clogged if lint falls off while the screen
is in the dryer. Clean the lint screen with a nylon brush every 6
months, or more frequently, if it becomes clogged due to a residue
buildup.
To wash:
1. Roll lint off the screen with your fingers.
2. Wet both sides of lint screen with hot water.