
Owner's Manual
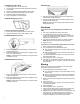
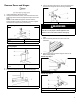

Table Of Contents
- REFRIGERATOR SAFETY
- Refrigerator Safety
- MAINTENANCE AND CARE
- Cleaning
- Changing the Light Bulbs
- Vacations
- Moving
- INSTALLATION INSTRUCTIONS
- Unpack the Refrigerator
- Location Requirements
- Electrical Requirements
- Water Supply Requirements
- Connect the Water Supply
- Install Air Filter
- REFRIGERATOR DOORS
- Door and Handle Instructions
- Remove Doors and Hinges
- Reverse Doors and Hinges (optional)
- Replace Doors and Hinges
- Final Steps
- Reversibility Kit Instructions
- Adjust the Doors
- REFRIGERATOR AND FREEZER FEATURES
- Refrigerator Shelves
- Freezer Shelf
- Door Rails or Trivets
- Can Racks and Bins (on some models)
- Deli or Meat Drawer
- Crisper
- Utility Compartment
- Ice Maker
- SÉCURITÉ DU RÉFRIGÉRATEUR
- Sécurité du réfrigérateur
- ENTRETIEN ET RÉPARATION
- Nettoyage
- Remplacement des ampoules d’éclairage
- Vacances
- Déménagement
- INSTRUCTIONS D’INSTALLATION
- Déballage du réfrigérateur
- Exigences d’emplacement
- Spécifications électriques
- Spécifications de l’alimentation en eau
- Raccordement à la canalisation d’eau
- Installation du filtre à air
- PORTES DU RÉFRIGÉRATEUR
- Instructions pour la porte et la poignée
- Démontage des portes et charnières
- Inversion du sens d’ouverture des portes et d’installation des charnières (facultatif)
- Réinstallation des portes et charnières
- Étapes finales
- Instructions pour l’ensemble d’inversion du sens d’ouverture
- Ajustement des portes
- CARACTÉRISTIQUES DU RÉFRIGÉRATEUR ET DU CONGÉLATEUR
- Tablettes du réfrigérateur
- Tablette de congélateur
- Tringles de la porte ou balconnets
- Cannettes et balconnets de porte (sur certains modèles)
- Tiroir à viande ou à charcuterie
- Bac à légumes
- Compartiment utilitaire
- Machine à glaçons

3
MAINTENANCE AND CARE
Cleaning
WARNING
Explosion Hazard
Risk of Fire or Explosion.
Flammable Refrigerant Used.
Do Not Use Mechanical Devices to Defrost Refrigerator.
Do Not Puncture Refrigerant Tubing.
Both the refrigerator and freezer sections defrost automatically.
However, clean both sections about once a month to avoid
buildup of odors. Wipe up spills immediately.
IMPORTANT:
� Because air circulates between both sections, any odors
formed in one section will transfer to the other. You must
thoroughly clean both sections to eliminate odors. To avoid
odor transfer and drying out of food, wrap or cover foods tightly
� For stainless steel models, stainless steel is corrosion
resistant and not corrosion-proof. To help avoid corrosion of
your stainless steel, keep your surfaces clean by using the
following cleaning instructions
To Clean Your Refrigerator:
NOTE: Do not use abrasive or harsh cleaners such as window
sprays, scouring cleansers, flammable fluids, muriatic acid,
cleaning waxes, concentrated detergents, bleaches or cleansers
containing petroleum products on exterior surfaces (doors and
cabinet), plastic parts, interior and door liners, or gaskets. Do not
use paper towels, scouring pads, or other harsh cleaning tools.
1. Unplug refrigerator or disconnect power.
2. Using a clean sponge or soft cloth and a mild detergent in
warm water, hand-wash, and rinse removable parts and
interior surfaces thoroughly. Dry thoroughly with a soft cloth.
3. Clean the exterior surfaces.
IMPORTANT:
� When cleaning stainless steel, always wipe in the direction
of the grain to avoid cross-grain scratching.
� To keep your stainless steel refrigerator looking like new
and to remove minor scuffs or marks, it is suggested that
you use the manufacture's approved Stainless Steel
Cleaner and Polish. To order, use the following parts:
Affresh
®®
Stainless Steel Cleaner: Part #W10355016
Affresh
®®
Stainless Steel Wipes: Part #W10355049
Affresh
®®
Kitchen & Appliance Cleaner: Part
#W10355010
� Stainless Steel Cleaner and Polish is for stainless steel
only. Do not allow the Stainless Steel Cleaner to come into
contact with any plastic parts such as the trim pieces,
dispenser covers or door gaskets. If unintentional contact
does occur, clean plastic part with a sponge and a mild
detergent in warm water. Dry thoroughly with a soft cloth.
4. There is no need for routine condenser cleaning in normal
home operating environments. If the environment is
particularly greasy or dusty, or there is a significant pet traffic
in the home, the condenser should be cleaned every 2 to 3
months to ensure maximum efficiency.
If you need to clean the condenser:
WARNING
Explosion Hazard
Risk of Fire or Explosion due to Puncture of Refrigerant
Tubing;
Follow Handling Instructions Carefully.
Flammable Refrigerant Used.
� Pull refrigerator out away from the wall. See “Unpack the
Refrigerator.”
� Remove the base grille.
� Vacuum coils when they are dusty or dirty.
� Replace the base grille when finished.
� Roll refrigerator back into place. Make sure to leave 1" (2.5
cm) between the cabinet back and the wall.
� Check to see that the refrigerator is level.
5. Plug in refrigerator or reconnect power.
Changing the Light Bulbs
IMPORTANT: The lights in both the refrigerator and freezer
compartments use LED technology that do not need to be
replaced. If the lights do not illuminate when the door or drawer is
opened, call for assistance or service. Refer to the Quick Start
Guide for contact information. The lighting system in this
appliance may consist of:
� Sealed LED modules
� LED Bulbs
� Incandescent Bulbs
� or a combination of the above.
NOTE: If your product has a sealed LED module, call for
assistance or service . Refer to the Quick Start Guide for contact
information.
IMPORTANT:
� Depending on your model, the light bulb in your new
refrigerator may use LED technology. If your model uses LED
lighting and the light does not illuminate when the refrigerator
door is opened, call for assistance or service.
� Some LED replacement bulbs are not recommended for wet/
damp environments. The refrigerator and freezer
compartments are considered to be wet/dam environments. If
using a brand of LED bulb other than the recommended LED
bulb listed below, before installation, read and follow all
instructions on the LED packaging.
� If an incandescent bulb is used to replace an LED bulb, use
only incandescent bulbs for household appliances with a
maximum of 40 W.