
Installation guide


INSTALLATION
REQUIREMENTS
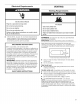
Tools
and
Parts
Gather
the
required
tools
and
parts
before
starting
installation.
Tools
needed
for
all
installations:
C=
S
ec
Flat-blade
screwdriver
#2 Phillips
screwdriver
=ce-—2
1/4"
nut
driver
or
socket
wrench
(recommended)
Tin
snips
(new
vent
installations)
a
Tape
measure
Vent
clamps
=
Level
Pliers
Adjustable
wrench
that
opens
to
1"
(25
mm)
or
hex-head
socket
wrench
Caulking
gun
and
compound
(for
installing
new
exhaust
vent)
Utility
knife
Putty
knife
Tools
needed
for
gas
installations:
—T
fy)
ue
8"
or
10"
pipe
wrench
8"
or
10"
adjustable
wrench
(for
gas
connections)
Pipe-joint
compound
resistant
to
LP
gas
Parts
supplied:
Leveling
legs
(4)
Parts
package
is
located
in
dryer
drum.
Check
that
all
parts
are
included.
Parts
needed:
Check
local
codes.
Check
existing
electrical
supply
and
venting.
See
“Electrical
Requirements”
and
“Venting
Requirements”
before
purchasing
parts.
Check
code
requirements.
Some
codes
limit,
or
do
not
permit,
installing
dryer
in
garages,
closets,
mobile
homes,
or
sleeping
quarters.
Contact
your
local
building
inspector.
Optional
Equipment:
(Not
supplied
with
dryer)
Refer
to
your
“Use
and
Care
Guide”
for
information
about
accessories
available
for
your
dryer.
Location
Requirements
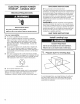
AWARNING
Explosion
Hazard
Keep
flammable
materials
and
vapors,
such
as
gasoline,
away
from
dryer.
Place
dryer
at
least
18
inches
(460
mm)
above
the
floor
for
a
garage
installation.
Failure
to
do
so
can
result
in
death,
explosion,
or
fire.
You
will
need:
@
A
location
allowing
for
proper
exhaust
installation.
See
“Venting
Requirements.”