
Readme Guide


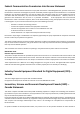
Table Of Contents

STEP 3 - ATTACH & GO
Place pet's collar into part B recess, line up A and B, then snap together.
WHY DOESN’T IT FIT?
The provided collar attachment is designed for flat collars. Doesn’t work with
yours? Visit support.whistle.com.
To secure, insert device into collar attachment and turn clockwise. Your pet is
now ready for their first Whistle adventure!
UNBOX YOUR GOODIES
Charger CableCharger Cable
Collar AttachmentCollar AttachmentWhistle
TM
O ExploreWhistle
TM
O Explore
A
B
LIGHT IT UP
Keep your pup safe on a night walk. Activate Night Light any time
through the Whistle app. Choose from three settings: Slow Flash, High
Flash, Always On.
TIPS & TRICKS
If your device takes a swim, just wipe it down before recharging.
Whistle GO Explore has been IPX8 certified at 2m water submersion
for 30 minutes.
Be sure to charge your Whistle device regularly to keep it running
for all your pet’s adventures.
LET’S GET STARTED
We’ll get you o and running in no time. It’s best to set up your device at home
since you’ll need a Wi-Fi connection.
STEP 1 - CHARGE DEVICE
Plug charger cable into Micro-USB port. Plug the other end into a USB power
outlet (5V recommended). When the LED lights up, device is ready for setup.
Charging can take up to 2 hours.
STEP 2 - DOWNLOAD & SET UP APP
Keep device plugged in during setup. Download Whistle app. The on-screen
instructions will walk you through activating your device. When prompted, pick
a subscription plan.
WHAT IS A SUBSCRIPTION PLAN AND WHY DO I NEED ONE?
The subscription plan covers our connection to the AT&T cellular network to
track and monitor your pet.
LIGHT GUIDE
Orange Charging
Blue Syncing
Green Charged