Operator's Manual Zero Turn Riding Mower 26HP B&S Engine / Side Discharge / 52-inch Wide Model 127.28875 · Español, p. 37 CAUTION: Before using this product, read the manual and follow all its Safety Rules and Operating Instructions For answers to your questions about this product call: 1-800-659-5917 Sears Craftsman Help Line 5am - 5pm, Mon - Sat Sears, Roebuck and Co., Hoffman Estates, IL 60179 U.S.A Visit the Craftsman website: www.sears.com/craftsman MAN 4163202 Rev.
CALIFORNIA WARNING Proposition 65 Warning Diesel engine exhaust and some of its constituents are known to the State of California to cause cancer, birth defects and other reproductive harm. The engine exhaust from this product contains chemicals known to the State of California to cause cancer, birth defects or other reproductive harm.
TABLE OF CONTENTS PAGE SAFETY..........................................................................................................................................................2-8 LABELS........................................................................................................................................................9-13 CONTROLS................................................................................................................................................
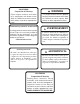
SAFETY NOTICE !!! Unauthorized modifications may present extreme safety hazards to operators and bystanders and could also result in product damage. This symbol means: ATTENTION! BECOME ALERT! Your safety and the safety of others is involved. Craftsman Professionalstrongly warns against, rejects and disclaims any modifications, add-on accessories or product alterations that are not designed, developed, tested and approved by Craftsman Professional Engineering Department.
SAFETY PREPARING FOR SAFE OPERATION WARNING Operator preparation and training Read the Operation & Safety Manual - If an operator or mechanic cannot read English, it is the owner's responsibility to explain this material to them. If any portion of this material is unclear, contact your factory representative for clarification. - Become familiar with the safe operation of the equipment, operator controls and safety signs. Know how to stop the engine and attachments quickly in an emergency.
SAFETY Machine preparation OPERATING SAFELY - Check operator presence interlock system and brake operation. Adjust or repair any problems before using. In general - Use extra care when loading or unloading the machine into a trailer or truck. - Do not tamper with or defeat safety devices. Keep guards, shields and interlock safety devices in place and in proper working condition. They are for your protection. - Slow down and use caution when making turns and crossing roads and sidewalks.
SAFETY Starting Interrupting operation - Start only according to instructions in this manual or on the machine. - - Before attempting to start the engine, make sure: - the parking brake is on; - the PTO is disengaged; - the traction drive is in NEUTRAL. Before leaving the operator's position: - Park on level ground. - Disengage the PTO. - Set the parking brake. - Shut off the engine and remove the key. - - When starting the engine, make sure hands and feet are clear of the blades.
SAFETY MANEUVERING SAFELY In general gradual. Do not make sudden changes in speed or direction. - Slow down before turning. - Do not mow in reverse unless absolutely necessary. Always look behind and down for small children and pets before and during backing. - Do not turn on slopes unless necessary, and then turn slowly and downhill when possible. - Stay away from slopes if the ground is loose or if caught in the rain during mowing.
SAFETY MAINTENANCE SAFETY In general - Maintain machine according to manufacturer's schedule and instructions for maximum safety and best mowing results. - Park machine on level ground. - Never allow untrained personnel to service machine. - Adjust or repair only after the engine has been stopped and the blades have quit rotating. - Inspect grass catcher components regularly. If worn, damaged or deteriorated, they may expose moving parts or allow objects to be thrown.
SAFETY BATTERY WARNING Jump starting Battery acid is caustic and fumes are explosive and can cause serious injury or death. 1. Be sure the jumper cables are in good condition. Turn off the ignition and all electrical accessories on both machines. To reduce the risk of personal injury when working near a battery: 2. Position the machine with a good (charged) battery next to but not touching the machine with the dead battery so jumper cables will reach. - 3.
LABELS 9
LABELS 10
LABELS 11
LABELS 12
LABELS 13
CONTROLS Keyswitch (K) - The keyswitch has three positions: OFF, RUN, and START. Insert the key and turn it clockwise to move the switch from OFF to RUN. Turn it further to START and hold to engage the starter. Release the key and the switch will return to RUN from START. Turn the key counterclockwise to OFF to stop the engine. Throttle (T) - Move the throttle lever forward to increase engine speed until the maximum governed engine RPM is reached.
CONTROLS FUEL SELECTOR VALVE (U) The fuel tank selector valve is located behind the seat. The fuel tank selector valve has three positions: Off: The tank selector is off when the lever points down. The selector should be off whenever the machine is transported or stands unused for any length of time. Shutting off the fuel supply avoids the possibility of flooding should any dirt get under the carburetor float needle.
CONTROLS Reverse movement - To move the machine straight back, pull both traction levers back equally from their neutral position. Reverse speed increases as the levers are moved back farther. Maximum reverse speed is reached when the levers hit the rear of the forward-reverse slot. When moving in reverse, pushing the levers forward slows the machine, and the machine stops when the neutral position is reached. NOTE: Reverse is spring loaded to return to neutral.
CONTROLS Parking brake (R) - Pull the parking brake lever up and back to put the parking brake ON. Push it forward and down to put the parking brake OFF. The parking brake must be ON to start the engine. It must also be ON to keep the engine running if the operator leaves the seat. The parking brake must be OFF to keep the engine running when a traction lever is moved out of neutral lock.
PRE-OPERATION CHECK LIST PRE-OPERATION CHECK LIST (OPERATOR’S RESPONSIBILITY) ___ ___ ___ ___ ___ ___ 18 Review and follow all safety rules and safety decal instructions. Check that all safety decals are installed and in good condition. Replace if damaged. Check to make sure all shields and guards are properly installed and in good condition. Be sure that either the discharge shield or complete vacuum attachment is installed. Check that all hardware is properly installed. and secured.
OPERATION FUELING - Fill fuel tank with good quality, clean, unleaded regular gasoline. Do not use hi-test fuel. Use a funnel to avoid spilling. WARNING OPERATOR PRESENCE Interlock System To start the engine: - The PTO switch must be OFF. - Both traction levers must be in the neutral lock position. - The parking brake must be ON. To operate the machine: 1. The operator must be in the seat or engaging the PTO will kill the engine. TO CHECK OR ADD FUEL: – Do it outdoors 2.
OPERATION OPERATING NOTES Driving - Practice at slow engine and travel speeds with the PTO off until fully familiar with the controls. 1. With the PTO disengaged, move the parking brake to OFF. - For normal cutting the throttle should be set at the full open position. By using the traction levers to speed up or slow down the machine during use, maximum control and cutting efficiency can be maintained. 2. Move both traction levers out of neutral lock. 3.
OPERATION Cutting 1. Place the discharge chute in the down position or correctly fit a grass collector or mulcher plate. 2. Sit in the seat. 3. Start the engine. 4. Turn the blades on by pulling up on the PTO switch. Do not start the blades at full throttle. Instead, use the slowest throttle setting that will allow the engine to pick up the blade load to reduce the wear on the belts and electric clutch. 5. After the blades are rotating, set the throttle to maximum.
MAINTENANCE CHART MAINTENANCE OPERATION Maintenance is an ongoing job. These intervals are maximum times between maintenance operations. Perform more often under severe conditions.
MAINTENANCE RECORD GENERAL DATE HRS DATE HRS DATE HRS DATE HRS D ATE HRS DATE HRS C h ec k T i r e P r es s u r es L u b r i c at e A l l P o i n t s C h ec k N u t s & B o l t s ENGINE Ch ec k Oil L ev el Ch an g e Oil C l ean A i r C l ean er E l em en t C l ean C o o l i n g F i n s R ep l ac e A i r C l ean er E l em en t Clean & Gap S p ar k P l u g s TR A N S A X L E Ch an g e Oil An d Filt er NOTE: Af t er f ir s t 5 h o u r s o f o p er at io n c h an g e en g in e o il an d f ilt er.
MAINTENANCE CHECK DAILY Operator Presence Interlock System - Start Operation For the engine to crank, the parking brake must be on, the PTO (blades) off and traction levers in the neutral lock position. Sit in the seat and check, one by one, if the engine will crank with the parking brake off, the blades on, and either traction lever out of neutral lock.
MAINTENANCE LUBRICATION Every 50 hours of operation, lubricate the following points (1-3) with grease: 1. Deck lift lever (1 point) 2. Deck lift pivots (4 points) 3. Pull arms (2 points located at the front of the cutterdeck) 4. Caster wheel pivots (2 points) (Lubricate every 500 hours or once a year) NOTE ON BLADE SPINDLES - The blade spindles on these machines use a superior sealed bearing that does not require relubrication.
MAINTENANCE ENGINE OIL Perform engine maintenance with the engine off, spark plug wires disconnected and PTO disengaged. AFTER FIRST FIVE (5) HOURS While the engine is warm: 1. Remove drain cap at location D and drain the crankcase. Dispose of used oil in accordance with local requirements. 2. Clean and replace the cap. 3. Change oil filter. 4. Fill the crankcase with fresh oil to the full mark. Do not overfill. See engine manual for oil specifications. OIL CAPACITY DAILY 1.
MAINTENANCE FUEL FILTER An in-line fuel filter is located in the fuel supply line. Inspect at every oil change to make sure it is clean and unobstructed. Replace if dirty. DUAL ELEMENT AIR CLEANER Engines equipped with dual element air cleaners have a paper air cleaner element with an oiled, foam precleaner element on the dirty side of the paper element. Both should be inspected regularly and maintained. Clean and re-oil precleaner element every 25 hours (more often under dusty conditions). 1.
MAINTENANCE ENGINE COOLING Continued operation with a clogged cooling system will cause severe overheating and can result in engine damage. - Daily: Clean air intake screen V. - Every 100 hours: Clean cooling fins beneath blower housing H with reference to information in the engine manufacturer's manual. SPECIFIC TORQUES B LADE BOLTS 70 FT-LBS (95 Nm ) WHEEL HUB NUTS 150 FT-LBS (203 Nm) ENGINE CRANKSHAFT BOLT 50 FT-LBS (68 Nm ) TRANSAXLE PULLEY NUT 28.3 - 41.
MAINTENANCE TRANSAXLES Inattention to proper safety, operation, or maintenance procedures could result in personal injury, or damage to the equipment. Sears recommends returning the machine to your authorized Sears Craftsman Professional for service or repair. Perform transaxle maintenance with the engine off, spark plug wires disconnected and PTO disengaged. TRANSAXLE FLUID CHANGE Change the transaxle fluid every 200 hours of operation.
MAINTENANCE BLADE REMOVAL Follow these instructions to prevent injury during blade removal: 1. Loosen with a box wrench or a socket and long breaker bar. To gain additional leverage, slip a long pipe or thick-walled tube over breaker bar or wrench. 2. Insert wood block A as shown, with grain perpendicular to blade, to prevent blade from turning when loosening. 3. Wear thickly padded gloves. Keep hands clear of blade path. Blades may rotate when bolt releases.
ADJUSTMENTS DECK LEVELING 1. Park the machine on a smooth, level surface. Raise the deck to the transport position. 2. Lower the deck onto a set of equal height blocks under the rear corners of the deck. Place another set of blocks under the front of the deck so that the deck top is pitched forward 1/8". NOTE: The front and rear of the deck are at different heights. 3. Measure the height of the blade cutting edge above the ground. Remove pin B and set the height of cut lever E to that height 4.
ADJUSTMENTS PARKING Brake NOTE: There are 2 brakes, 1 on each transaxle. The parking brake should keep the machine from moving. To check the parking brake, park the machine on a level surface, open the bypass valves and set the parking brake to ON. Attempt to move the machine forward and backward by pushing it. If the machine moves, adjust the parking brake linkage as follows: 1. Move the machine to a flat horizontal surface. 2. Grip the flats on the brake rod A.
ADJUSTMENTS HydrostatIC TRANSAXLE adjustmentS A turnbuckle style hydrostat neutral adjustment is provided. Neutral: 1. Support the machine with the rear wheels off the ground. Use jackstands or equivalent support. Do not rely only on mechanical or hydraulic jacks. 2. Move the traction levers out into the neutral lock position and raise the seat. 3. Disconnect the seat switch wire and temporarily connect the two terminals with jumper wire J as shown. 4. Start the engine and run at low speed. 5.
BELT REPLACEMENT NOTE: Always use Craftsman Professional replacement belts, not general purpose belts. Craftsman Professional belts are specially designed for use on this mower and will normally last longer. Cutterdeck belt 1. Remove floorplate. 2. Set the cutterdeck in a middle height-of-cut position. 3. Use a 3/8" ratchet and extension to back tensioning idler off to remove belt from idler. Remove belt from cutterdeck pulleys. NOTE: Use the 3/8" ratchet in the square hole A on the idler. 4.
Get it fixed, at your home or ours! Your Home For expert troubleshooting and home solutions advice: www.managemyhome.com For repair – in your home – of all major brand appliances, lawn and garden equipment, or heating and cooling systems, no matter who made it, no matter who sold it! For the replacement parts, accessories and owner’s manuals that you need to do-it-yourself. For Sears professional installation of home appliances and items like garage door openers and water heaters.