
Instructions / Assembly


Introduction
Introduction – 5
Please read our instructions before you install and use your heater. This will help you obtain the full value from this heater. If the
answer to the problem is found within this instruction manual, it could help you avoid needless service costs.
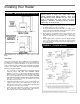
Basic Description
Always consult your local heating or plumbing inspector,
building department or gas company regarding regulations,
codes or ordinances which apply to the installation of a vented
room heater.
No electrical power is required unless furnace is equipped with
an optional blower accessory.
The efficiency rating of this appliance is a product thermal
efficiency rating determined under continuous operating
conditions and was determined independently of any
installation system.
Warmed air is discharged into the room in which the heater is
located. The heater contains a single multi-slot gas burner.
Combustion air is drawn in from the room where the heater is
located and is vented out of the heater vertically through vent
piping to a roof vent top. (Vent equipment is not supplied with
the heater).
The combustion chamber is built of heavy-gauge steel. The
heater cabinet is also constructed of heavy-gauge steel and has a
powder-coat paint finish.
The heater controls are located behind an access door on the side
of the heater. All models are equipped with CSA/AGA listed gas
valves and pilots.
The appliance is equipped with a vent safety shutoff system,
designed to protect against improper venting. Operation of this
room heater when not connected to a properly installed and
maintained venting system or tampering with the vent safety
shutoff system can result in carbon monoxide (CO) poisoning and
possible death.
This heater is design certified in accordance with American
National Standard & CSA Standard Z21.86 and CSA 2.32 as a
vented room heater and must be installed according to these
instructions.
Basic Tools Needed
Hand drill or properly grounded electric drill
1/8 inch and 3/16 inch drill bit (metal)
6 foot folding ruler or tape measure
Screwdriver (Phillips Head)
Pliers (Wire Cutting)
Hammer
Stud locator or small finishing nails
8 inch adjustable wrench
Keyhole saw or saber saw
2-10 inch or 12 inch pipe wrenches
Gloves and safety glasses
Basic Materials Needed
Pipe joint compound resistant to L.P. gases.
Electrical wiring supplied as needed for optional blower.
Pipe and fittings to make connections to the heater.
Helpful Installation Information
The following booklets will help you in making the installation:
ANSI/NFPA 70-1990 or current edition "National Electrical Code". In Canada: CSA C22.1 Canadian Electrical Code.
American National Standard NFPA54/ANSI Z223.1 1988 or current edition "National Fuel Gas Code".
Obtained from: American National Standards Institute, Inc., 1430 Broadway, New York, N Y 10018.
In Canada: CAN/CGA B149.
Optional Accessories
Blower
To increase circulation of warmed air within the heated space, you
may use Blower Accessory Kit 2102, on all models except
2001622A and 2001621A.
Floor Board Model 4163 or 4167
Available in black to match the heater.
Vent Collar Model 9102, 9104 or 9106
Available in black to match the heater.
Unpack Your Heater
Examine all packing material carefully. Look for loose parts
before discarding. Store all parts where they cannot be lost or
damaged before you need them.
NOTE: Check the burner rating plate, located in the burner
compartment, to make sure your heater is equipped to operate on
the type of gas available (either natural or L.P. Gas). DO NOT
convert unit from natural gas to L.P. Gas or from L.P. Gas to
natural gas without the proper manufacturer’s gas conversion kit.