Ducted Split Wine Cellar Cooling Systems Installation, Operation and Maintenance Guide SS025, SS050, SS088, SS200 Manufactured by: www.wineguardian.com Syracuse, NY www.airinnovations.com Wine Guardian reserves the right, without notice, to make changes to this document at its sole discretion. Please visit our web site for the most current version of the Wine Guardian manual and other literature. Wine Guardian is a registered trademark (2,972,262) of Air Innovations, Inc.
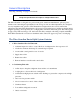
TABLE OF CONTENTS Directory of Terms ...........................................................................................................1 Illustrations .......................................................................................................................2 Receiving, Inspecting and Unpacking the Wine Guardian Unit ........................................3 Review the Packing Slip to Verify ..........................................................................................
Electrical Hazards ............................................................................................................... 19 Electrical Shock Hazards .................................................................................................... 19 Hot Parts Hazards............................................................................................................... 19 Moving Parts Hazards ................................................................................................
Determining the amount of charge ...................................................................................... 36 Procedures for Charging System with Head Pressure Control .............................................. 37 Superheat ........................................................................................................................... 38 Sub-Cooling ........................................................................................................................
Cellar temperature too cold (below 51 degrees) when unit is not running .......................... 57 Humidity too low or supply air is too cold, without optional humidifier................................. 57 Humidity too low, without optional humidifier ...................................................................... 58 Humidity too low, with optional humidifier ........................................................................... 58 Humidity too high when unit is running but not cooling .....
Directory of Terms Ambient Air – The surrounding area outside the wine cellar such as a room, basement, garage or outdoors. BTU/H – British thermal units/hour. A unit of measurement to describe the power of heating and cooling system. CFM – Cubic feet per minute. A unit of measurement for the amount of air handled by the fan. Condensate / Condensation – The water formed out of the air when it is cooled below a certain temperature (called dew point).
Illustrations Overview of the Wine Guardian fan coil ................................................................ 7 Refrigeration Illustration of the Wine Guardian fan coil ......................................... 7 Ducted split system specifications sheet ............................................................... 9 Wiring diagrams for ¼ and ½ ton units ............................................................... 10 Wiring diagram for the 1-ton unit .............................................
Receiving, Inspecting and Unpacking the Wine Guardian Unit NOTE: Wine Guardian units are factory assembled and tested prior to shipment. The Wine Guardian Ducted Split System consists of two separate components, the Wine Guardian fan coil and condensing unit. These ship from separate manufacturing facilities and therefore may not arrive on the same date and time. Each Wine Guardian component is shipped in a corrugated box. A shipment may include one or more boxes containing accessories.
General Description View Fig. 1 and Fig. 2 on page 13 for details IMPORTANT Design and specifications are subject to change without notice The Wine Guardian cooling unit is a professional grade, American-manufactured, split two-piece climate control unit designed specifically for the storage of wine at cellar temperatures. It is designed for easy installation and operation. Wine Guardian uses digital electronic controls and R-134a refrigerant.
Wine Guardian Fan Coil Unit The Wine Guardian fan coil unit meets its rated capacities for total BTU/H and CFM at design cellar conditions and external static pressures. The fan coil unit is capable of rated CFM against the static pressure imposed by recommended ductwork. The fan is a motorized impeller type, statically and dynamically balanced, and uses permanently lubricated direct drive motors requiring no maintenance.
Accessories and Optional Equipment Heating Coils An optional heating coil is built in and requires no additional power source. The electric heating option is factory installed and includes primary and secondary over-temperature protection devices per UL and NEC. Duct Collars and Flexible Ducts Ducting for the Wine Guardian is sold in kits by size for each unit. Each kit contains two adapter collars, one 25 foot length of round flexible duct and two straps.
Overview of the Wine Guardian fan coil Fig. 1 Fig.
Fig. 3 Model Number SS025 SS050 SS088 SS200 Dimensions - Nominal A – Width B – Height C – Length D – Evap. Discharge (OD) DI – Evap. Inlet (OD) E – Outlet opening width F - Outlet opening height G – Drain outlet location AA – Discharge opening height BB – Discharge opening width CC – Inlet opening height DD – Inlet opening width EE – Suction Line (OD) FF – Discharge Line (OD) Weight Inches Inches Inches Inches Inches Inches Inches Inches Inches Inches Inches Inches Inches Inches Lbs. 14.00 14.132 16.
Ducted split system specifications sheet 9
Wiring Diagram for SS025 Fig.
Wiring Diagram for SS088 Units Fig.
Wiring Diagram for SS200 Units Fig.
24-Volt Contactor Detail Sheet Fig.
Condensing Section Wiring Schematic for SS025 14
Condensing Section Wiring Schematic for SS050 15
Condensing Section Wiring Schematic for SS088 16
Condensing Section Wiring Schematic for SS200 17
Safety IMPORTANT The equipment described in this manual uses electricity. When using this equipment, be sure to follow the safety procedures outlined in this manual. Safety Message Conventions Safety messages contained in this manual, DANGER, WARNING, and CAUTION are bold and highlighted in red for quick identification. Danger A Danger message indicates an imminently hazardous situation which, if not avoided, results in death or serious injury.
Lockout/Tagout Procedure 1) Turn off the power switch (indicator light should be off) 2) Unplug the unit from the electrical outlet and cover the outlet to prevent accidently plugging in the unit. 3) Turn off circuit breaker or disconnect switch at condensing unit. Safety Considerations The equipment covered by this manual is designed for safe and reliable operation when installed and operated within its designed specifications.
Rotating Fan Blades are present in the Wine Guardian unit. Sticking a hand into an exposed fan while under power could result in serious injury. Be sure to use the Lockout/Tagout procedure when working in this area or remove the power cord. Equipment Safety Interlocks There are no electrical safety lockouts installed within the unit. The power cord attached to the control box must be disconnected from the power sources prior to working on any part of the electrical system.
CAUTION Clean only with a dry cloth. Never pressurize equipment above specified test pressure. See Wine Guardian Specification sheet on page 13. Do not use the Wine Guardian near water. Do not block any supply or return air register or duct. Install in accordance with the instructions in this manual. Do not defeat the safety purpose of the polarized or grounding type plug. A polarized plug has two blades with one wider than the other.
Installation CAUTION SHARP EDGES RISK OF SERIOUS INJURY Sharp edges are present inside the Wine Guardian system. Pre-installation Test Test the system before installing it to check for non-visible shipping damage. To test the Wine Guardian fan coil section: Set the system on the floor or a sturdy level surface. Plug in the system. Press the on/off switch to see if the control illuminates. This indicates the system has power.
RISK OF PERSONAL INJURY OR DAMAGE TO EQUIPMENT Modification to the equipment may cause injury or damage to the equipment . DANGER This equipment is heavy. Place the unit on the floor or on a level and stable surface that can support the full weight of the unit. Do not modify the equipment. Modifications may cause damage to the equipment and will void the warranty. Never place anything on top of the unit. Never block or cover any of the openings or outlets to the unit.
Planning the Installation IMPORTANT Installation of residential and commercial split systems must be performed by qualified service technicians with proper training in the installation, start up, service, and repair of these systems. Certification to handle refrigerants is also required.
Installing the Fan Coil Unit Wine Guardian fan coil units are typically installed indoors located near the cellar to minimize the duct runs. Each unit is provided with one entering or return air inlet and five possible supply air outlets. A maximum cumulative total length of flexible ductwork, for both supply and return ducts (including bends) of 25 feet is recommended.
Ceiling Mounting Construct a structurally sound, level platform to place the unit on when hanging it from the ceiling joists. The Wine Guardian is NOT designed to be suspended from the top of the unit; it must be supported from the bottom. Angle brackets are available as an option for these types of applications. Place the unit on a platform to ensure that the unit is supported on all four corners. Leave adequate space on the top of the unit to remove the access doors for service.
Rod Mount Fig.2 Shelf Mount Fig. 3 Optional ductwork connection on same wall Fig.
Installing the Ductwork and Grilles Duct Collars One inlet duct collar and one evaporator outlet are supplied with each fan coil unit as standard equipment from the factory. The duct collars are removable. The return air, or inlet duct collar must connect to the return air outlet from the wine cellar. Any of the five supply air outlets on the unit can be used for the ductwork to the supply grille(s) inside the wine cellar.
General Duct Recommendation Support the flexible duct often to prevent sags or bends. Stretch the duct to make for a smoother interior for less air resistance. For a 90 degree bend, insert a metal elbow inside the flexible duct to avoid crimping. Do not squeeze or reduce the inside diameter of the ducts. This restricts the airflow. Use short and straight ductwork.
Installing the Condensate Drain Connection The Wine Guardian unit provides dehumidification for the inside of the wine cellar. It cools the air down to the dew point corresponding to the temperature setpoint of the remote interface controller. If the vapor barrier of the wine cellar is poorly constructed or excess moisture is in the basement, the unit may remove excessive amounts of moisture from the wine cellar. The moisture appears in the condensate drain of the unit.
Wiring the Fan Coil Unit for Power DANGER ELECTRICAL SHOCK HAZARD RISK OF SERIOUS INJURY OR DEATH The electrical outlet and wiring installation must meet the national and local building codes. DO: Match the electrical wiring to the cord provided on the Wine Guardian. Provide dedicated circuit and wiring for the system. Match the wiring and breaker size to the rated load as shown on the serial plate and in this guide. See sample serial plate illustration below.
Installing the Condensing Unit Condensing units are factory assembled with a sheet metal outdoor hood for protection from the elements. A minimum of 12 inches is required around the perimeter of the condensing unit for proper airflow across the coil, and to provide an adequate discharge airflow path through the louver section. Any obstructions to this airflow will result in a decrease in performance, and possibly premature failure due to a buildup of high pressure within the system.
quarter inch, a vibration eliminator should be installed close to the motor compressor in a horizontal parallel to the compressor, crankshaft or in a vertical position 90 degrees to compressor crankshaft. NOTE: The suction line should be clamped near the inlet end of the vibration eliminator. The vibration eliminator is located between the clamp and the compressor. Split System Interconnecting Line Sizing Chart Table 3 Model Liquid Line(OD) Liquid connection at evaporator (OD) Suction line (OD) Min.
Sample Piping Configurations Incorrect Installation Evaporator Correct Installation Evaporator Condenser Condenser Creates an oil trap Evaporator Condenser Evaporator Condenser Creates an oil trap Oil runs away from condenser Condenser Condenser Evaporator Evaporator Condenser Evaporator Soft copper sages and creates an oil trap Condenser Evaporator 34
Leak Checking and Evacuation Process WARNING ALL COMPONENTS CHARGED WITH DRY AIR MUST BE EVACULATED BEFORE CHARGING WITH REFRIGERANT Purge the dry air charge from the unit by opening the liquid line shut-off valve or removing the liquid line outlet fitting or plug, whichever is applicable for your particular unit. Connect the suction and liquid lines to the unit.
Fig. 1 24 volt two position terminal block Fig. 2 Com ports 24 volt contactor enclosure On/Off switch The condensing unit needs to be hard-wired for the rated high voltage to be brought to the field-installed contactor in enclosed plastic housing, from the load side (L1 & L2) of the contactor. Run a ground lead to be connected to the condensing unit Ground lead at the compressor.
Procedures for Charging System with Head Pressure Control (SS025, SS050, SS088) NOTE: When charging any system with head pressure control the outdoor ambient temperature must be known. Charging of Systems with Head Pressure Control in ambients above 70 degrees F (After normal evacuation procedures): 1. Connect refrigerant cylinder to a charging or gauge port on the receiver outlet valve. 2.
With the system started After following instructions on the previous page on initial Charging for Systems with Head Pressure Control, with refrigerant tank now connected to suction line (low side) port to add remaining charge in a gas state, refer to the provided charts for proper system operating points as equated to ambient temperature with wine cellar at normal conditions of 57 degrees F / 55%RH.
Split System Operations Chart OD Ambient (F) 10 40 60 70 80 100 115 Suction (psig) 21 25 31 31 32 34 35 Discharge (psig) Superheat (F) Sub-cooling (F) 86 3 15 102 9 16 105 8 24 106 12 24 120 16 21 164 24 27 198 28 35 Suction (psig) 24 26 28 27 27 27 28 Discharge (psig) Superheat (F) Sub-cooling (F) 86 5 20 102 5 16 109 5 17 114 11 22 134 13 25 179 22 30 215 27 33 Suction (psig) 22 23 25 27 28 30 33 Discharge (psig) Superheat (F) Sub-cooling (F) 98 5 15 95 5 17 108 8 20 130 10 22 146 17 24 193 20 28 23
Installing the Remote interface controller and Communication Cable The Wine Guardian remote interface controller is a combination temperature and humidity controller with single stage cooling, heating and humidifier control. Each Wine Guardian unit is supplied with a remote interface controller and 50 feet of communication cable. It is wired at the factory for testing prior to shipment. In most applications the remote interface controller will be mounted within the wine cellar.
2. Remove the back plate of the controller and mark the mounting points at the desired location. (Fig. 2) Fig. 2 a) Mark the location of the communication cable connection as this area will require sufficient clearance, for instance, a 1½” hole in the wall for flush mounting of the back plate. (Fig. 3) 3. Drill two 1/8” holes and insert anchors (provided) within the mounting surface. Anchors may not be required if securing to a wall stud or racking system. Fig. 3 4.
Installing the Wine Guardian Remote Sensor The remote sensor is a combination temperature and humidity sensor only. It is designed to be mounted within the wine cellar and can be used in combination with the remote interface controller or up to three additional remote sensors to read and control multiple areas within the wine cellar. (Fig. 1 ) Fig. 1 Mounting the Remote Sensor 1. Disconnect the communication cable from the side of the Wine Guardian unit and the remote sensor.
4. Drill two 1/8” holes and insert anchors (provided) within the mounting surface. Anchors may not be required if securing to a wall stud or racking system. (Fig. 3) 5. Plug in the communication cable to the back of the remote sensor and attach to the wall using the two screws provided in the kit. (Fig. 4) 6. Plug the remote sensor cables into the splitter device at the Wine Guardian unit along with the communication cable for the remote interface controller. (Fig.
Joining the Communication Cable IMPORTANT Wine Guardian cooling systems are supplied with 50 feet Cat 3 of 6-wire, twisted pair communication cable with RJ11 type connectors. Caution must be taken when connecting two lengths of communication cable (splicing) to ensure uniform wire color before and after splice. An RJ11 Modular 6 wire STRAIGHT THROUGH type coupler is the ONLY coupler approved for splicing Wine Guardian twisted pair communication cable.
Standard Controller Functions Humidity Up Button Temperature Down Button Alarm Indication Area Mode button (right side) On/Off (left side) Mode Area . How to: Turn system on/off Press the On/Off” button once. Note: There is a five-second time delay before the system turns on or turns off. Change Temperature Press the “Up” arrow once. The display will show the existing temperature set point. Press the “Up” or “Down” arrow buttons to adjust the temperature to the desired setpoint.
Settings – Press and hold the “Mode” button for five (5) seconds to access the following settings. Deg F or Deg C Setting 1 Press the “Down” arrow to change temperature from Deg F to Deg C. Press the “Up” arrow to change temperature from Deg C to Deg F. Low temperature alarm set point Setting 2 Press “Mode” button to advance to Setting 2. Press the “Up” or “Down” arrow buttons to adjust to the desired set point. Factory default is 50 Deg. F.
Advanced Settings-Special access required. Contact Wine Guardian Service Department for access code Setting 8 Press “Mode” button to advance to Setting 8. Press the up or down arrow buttons to adjust number to the access code. Press “Mode” button to continue onto setting 9 through 19. Compressor antishort cycling time Setting 9 WINE GUARDIAN DOES NOT RECOMMEND SETTINGS LOWER THAN FACTORY DEFAULT. Press “Mode” button to advance to Setting 9.
Differential temperature adjustment Setting 16 Press “Mode” button to advance to Setting 16. Press the “Up” or “Down” buttons to adjust to the desired set point. This setting changes the system/compressor and turns on temperature above setpoint. Factory default is set to +1 Example: Sensor reading = 55 Deg F Setting 16 Set to +3 System/compressor turns on at 58 Deg F Deadband setting Setting 17 Press “Mode” button to advance to Setting 17.
Alarm Codes High temperature alarm Press the “Up” or “Down” arrow once to change screen from alarm to normal Temperature and Humidity indication. “Hi Temp” will remain on screen until temperature falls below the High Temperature Alarm set point (Setting 3). Low temperature alarm Press the “Up” or “Down” arrow once to change screen from alarm to normal Temperature and Humidity indication. “Lo Temp” will remain on screen until temperature rises above the Low Temperature Alarm set point (Setting 2).
Inspection and Start Up Checklists Receiving and Inspecting Unit received undamaged Unit received complete as ordered including accessories Handling and Installing Unit mounted on solid level surface Sufficient space allowed for access to unit and accessories Proper electrical service provided Water provided to humidifier Drain lines and trap installed properly Ductwork, fittings and grilles installed properly All cold duct surfaces insulated No obstructions t
Starting-up and Operating the Wine Guardian Split System Now that the installation is complete, check to make sure all ductwork and electrical connections are secure. Replace all panels that were removed during installation. Check that all of the openings in the unit are covered with a blank panel, a ductwork connection or a grille. CAUTION RISK OF PERSONAL INJURY COVER ALL OPENINGS OF THE UNIT TO PREVENT A HAND OR FINGER FROM ACCESS INSIDE THE UNIT. Turn on the Unit Plug in the unit.
Cycling the Unit The fans continue to free-wheel for several minutes when the unit cycles off. This is normal. The unit is furnished with a low ambient control so the condenser fan also cycles on and off during cooling. This maintains the head pressure on the compressor under low ambient conditions, and is normal. The bottom of the compressor stays warm even when the unit is off to keep the lubricating oil warm and separated from the refrigerant.
Maintenance General WARNING BEFORE PERFORMING MAINTENANCE ON THE UNIT, READ AND UNDERSTAND THE SAFETY INFORMATION CONTAINED WITHIN THE SAFETY CHAPTER OF THE WINE GUARDIAN MANUAL. DANGER HIGH VOLTAGE - RISK OF SERIOUS INJURY OR DEATH HIGH VOLTAGES ARE PRESENT IN THE CABINETS. TURN OFF ALL POWER. USE THE LOCKOUT/TAGOUT PROCEDURE BEFORE OPENING PANELS. CAUTION SHARP EDGES RISK OF SEROUS INJURY SHARP EDGES ARE PRESENT ON THE FAN WHEELS, HOUSING, FINS AND COILS.
Cleaning the Condensate Drain System The condensate drain system traps dust and dirt. Clean the drain system once a year. 1. Shut off the rocker switch and unplug the unit. 2. Remove the duct on the evaporator inlet. 3. Inspect the drain pan under the coil. 4. If drain pan appears soiled, pour some hot water mixed with liquid bleach (diluted solution) along the length of the pan to flush the dirt down the drain tube. 5. Continue this treatment until the drain appears clean and free of dirt. 6.
Maintenance Schedule Monthly (or quarterly depending on experience with individual cellar) Check and drain trap – clean if needed. Check for noise or vibration. Check for short-cycling of the unit – a turning on and off of the compressor unit more than eight times/hour. Yearly (in addition to monthly) Check evaporator and condensing unit for dirt – use a vacuum with a brush attachment to clean the coils. Clean condensate pan under the evaporator coil by flushing.
Troubleshooting WARNING BEFORE PROCEEDING, READ AND UNDERSTAND THE SAFETY INFORMATION CONTAINED IN THE SAFETY SECTION OF THE WINE GUARDIAN MANUAL. IMPORTANT This section is intended as a diagnostic aid only. For detailed repair or parts replacement procedures, contact a qualified service company. Check the following table for some solutions before calling a service technician.
Unit is operating and blows evaporator air, but the supply air is not colder than the return air from the cellar Possible Cause Solution Remote interface controller not set up properly Compressor not operating Check remote interface controller setup in the manufactures guide High pressure switch open (button up) Alarm will appear on remote interface controller Remove blockage Clean filter and coil (if needed) Head Pressure (HP) switch is open Reset HP switch See reset instructions on pg.
Humidity too low, without optional humidifier Possible Cause Solution No moisture being added to cellar Add Wine Guardian humidifier or a room humidifier Humidity too low, with optional humidifier Possible Cause Solution Humidifier not operating Check wiring for loose, broken or frayed connections Check humidistat set up Check for water flow and solenoid valve operation Humidifier operating Check for water being hot Check drip pad – replace if scaled No vapor barrier around cellar Humidity too hig
Unit operates but the power switch light is not ON Possible Cause Solution Bulb is burned out Replace bulb Unit is leaking water Possible Cause Solution Piping from unit to drain is trapped Re-pipe to remove external traps Trap plugged Clean trap Condensate pan plugged Remove blockage and clean Unit not level Level with shims Unit is running properly, but the sound of the unit objectionable Possible Cause Solution Noise is from airflow Redirect airflow Add baffles Add insulated ductwork No
Instructions to Reset High Pressure Switch 1. Remove the top and side access panels at the condensing unit 2. Locate the high pressure switch near the compressor 3. Push in the reset button until it locks into position. 4.
Advanced Troubleshooting IMPORTANT This section is intended for qualified refrigeration service technicians only. The technician should repeat all of the previous troubleshooting steps before taking action on these more technical solutions.
Contact and Warranty Information Contact Information Wine Guardian 7000 Performance Drive North Syracuse, NY 13212 Toll free: (800) 825-3268 Service Department: press 3 Direct: (315) 452-7420 Service Department: ext. 7434 Normal business hours are 8 a.m. to 5 p.m. Eastern, Monday-Friday. After hours, contact: (315) 391-8747 Web site: www.airinnovations.com Email: info@airinnovations.
Warranty GENERAL Wine Guardian warrants, to the original buyer, its goods and all parts thereof to be free from defects in material and workmanship for a period of two (2) years from the date of invoicing assuming NORMAL USE AND SERVICE. LIABILITY Wine Guardian liability shall be limited to the repair or replacement (at its option) of any part, which, at our sole discretion, is determined to be defective. The purchaser shall pay all transportation costs.