RC-DT09 Digital to Analog Converter Box Instruction Manual Need More Help? DO NOT RETURN THIS PRODUCT TO THE STORE Please visit online help at http//www.1800customersupport.com -1- IB_English.
SAFETY PRECAUTIONS The lightning flash with an arrowhead symbol, within the equilateral triangle, is intended to alert the user to the presence of uninsulated “dangerous voltage” within the product’s enclosure that may be of sufficient magnitude to cause an electric shock. The exclamation point within the equilateral triangle is intended to alert the user to the presence of important operating and maintenance (servicing) instructions in this owner’s manual.
ACCESSORIES AC Adapter .............................................................................................................................. x 1 Remote Control ........................................................................................................................ x 1 AAA Batteries (for Remote Control) ......................................................................................... x 2 RF Cable ................................................................................
REMOTE CONTROL • Point the remote control at the REMOTE SENSOR located on the unit. • When there is a strong ambient light source, the performance of the infrared REMOTE SENSOR may be degraded, causing unreliable operation. • The recommended effective distance for remote operation is about 16 feet (5 meters). To Install Batteries 1. Open the battery door. 2. Insert two AAA batteries.
QUICK START GUIDE STEP 1: CONNECTIONS Option One: Using the RF Cable to Connect a TV 1. Connect an antenna cable to the RF IN terminal on the rear of the unit. 2. Use the RF cable (included) to connect the unit and TV/Monitor. 3. Use the AC adapter (included) to connect a suitable wall outlet. The supplied 9V adapter operates on AC 120V ~ 60Hz. 4. Turn on your TV and follow the instructions included with it to select the “TV” function. Rear of TV Option Two: Using the AV Cable to Connect a TV 1.
QUICK START GUIDE STEP 2: TURNING ON THE UNIT 1. While the AC adapter is connected and the unit is on standby, power will be consumed and the power indicator is RED. 2. Press the STANDBY/ON button to turn on the unit. The power indicator is GREEN. STEP 3: SETTING THE OSD LANGUAGE 1. Press the MENU button on the remote control. 2. Use the / buttons to select the OPTION menu. 3. Use the button to select Language then press the ENTER button or the button. 4.
CONTROL REFERENCE GUIDE Remote Control 1) 1 7 2 8 3 4 9 5 10 11 6 12 MUTE Button Press to turn off the sound. 2) MENU Button Press to display the on-screen menu or switch back to the previous menu screen. 3) CURSOR ( , , , ) Buttons Use to highlight selections on a menu screen and adjust certain settings. ENTER Button Confirm selection on a menu screen. 4) INFO Button Press to display information on the current channel. 5) VOL + / VOL - Button Press to increase/decrease the volume.
CONTROL REFERENCE GUIDE 1 2 3 4 Front View Back View 5 1) 2) 3) 4) 6 7 Remote Sensor Receives infrared signals from the remote control. CH-/CH+ Buttons Press to select the channel upward or downward. Button Turns the power on or restores the unit to the standby mode. STANDBY/ON Indicator Green: power on Red: standby mode 8 5) 6) 7) 8) ANTENNA RF IN Terminal Connect the AIR antenna. TV RF OUT Terminal Use to connect your TV using a coaxial cable.
CONNECTIONS Connecting a TV (Using the RF Cable) 1. Connect an antenna cable to the RF IN terminal on the rear of the unit. 2. Use the RF cable (included) to connect the unit and TV/Monitor as shown. Note: Make sure to turn on your TV and follow the instructions included with it to select the “TV” function. Rear of TV Connecting a TV (Using the AV Cable) 1. Connect an antenna cable to the RF IN terminal on the rear of the unit. 2. Use the AV Cable (not included) to connect the unit and TV/Monitor as shown.
POWER SUPPLY Using the AC Adapter The supplied 9V adapter operates on AC 120V ~ 60Hz. While the AC adapter is connected and the unit is on standby, power will be consumed and the power indicator is RED. Cautions: • The AC adapter included with this unit is for its use only. Do not use it with other equipment. • When the unit is not going to be used for a long period of time, disconnect the AC adapter from the AC power outlet.
BASIC OPERATION Searching for Channels Automatically 1. Press the MENU button on the remote control. 2. Use the / buttons to select the CHANNEL menu. 3. Use the button to select Channel Scan and press the ENTER button or the button to start scanning. Notes: • The unit MUST be connected to an antenna in order to receive digital TV signals. • If you wish to stop scanning in the middle of the scanning process, press the ENTER button.
ON-SCREEN MENU - CHANNEL Use the menu configuration to set detailed options for each function. Press the MENU button on the remote control to open the menu screen. • To return to the previous menu press the MENU button on the remote control. • To exit the menu screen press the EXIT button on the remote control. Channel Scan See “Searching for Channels Automatically” for details. Channel Add 1. Press the MENU button on the remote control. 2. Use the / buttons to select the CHANNEL menu. 3.
ON-SCREEN MENU - CHANNEL Output Channel You can select NTSC RF output channel. 1. Press the MENU button on the remote control. 2. Use the / buttons to select the CHANNEL menu. 3. Use the button to select Output Channel then press the ENTER button or the button. 4. Use the / buttons to select the channel number. ON-SCREEN MENU - OPTION Clock 1. Press the MENU button on the remote control. 2. Use the / buttons to select the OPTION menu. 3.
ON-SCREEN MENU - OPTION Language 1. Press the MENU button on the remote control. 2. Use the / buttons to select the OPTION menu. 3. Use the button to select Language then press the ENTER button or the button. 4. Use the / buttons to select English / Español (Spanish) / Français (French). DCC View Audio Language When you change the channel on Digital TV, you can listen to the audio in a certain language by selecting one of the audio signals transmitted with video signals.
ON-SCREEN MENU - OPTION DCC View Use this to set the character font. Only DCC is set to Custom, DCC View is activated. 1. Press the MENU button on the remote control. 2. Use the / buttons to select the OPTION menu. 3. Use the button to select DCC View then press the ENTER button or the button. 4. Use the / buttons to select the options, then use the / buttons to make adjustments. Notes: • To activate DCC View, DCC on Caption Select should be set to ‘Custom’.
ON-SCREEN MENU - LOCK Set Password 1. Press the MENU button on the remote control. 2. Use the / buttons to select the LOCK menu. 3. Use the / buttons to select Set Password then press the ENTER button or the button. 4. Enter values (4 digit) for new password and again to confirm password. RRT Notes: • Remember your password if you have changed it. • If you forget the password,enter “8888” to unlock parental control. Block Channel 1. Press the MENU button on the remote control. 2.
ON-SCREEN MENU - LOCK The lock levels are equivalent to the following ratings. TV-Y: TV-Y7: TV-G: All children. Children 7 years and older. General Audience. TV-PG: TV-14: TV-MA: Parental guidance suggested. Parents strongly cautioned. Mature audience only. Movie Rating 1. Press the MENU button on the remote control. 2. Use the / buttons to select the LOCK menu. 3. Use the / buttons to select Movie Rating then press the ENTER button or the button. 4.
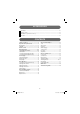
MAINTENANCE Cleaning the Unit • Be sure to turn the unit off and disconnect the AC adapter before maintaining the unit. • Wipe the unit with a dry soft cloth. If the surfaces are extremely dirty, wipe clean with a cloth that has been dipped in a weak soap-and-water solution and wrung out thoroughly. Wipe with a dry cloth. • Never use alcohol, benzine, thinner, cleaning fluid or other chemicals. Do NOT use compressed air to remove dust. TROUBLESHOOTING GUIDE SYMPTOM CAUSE (AND REMEDY) No power.
LIMITED WARRANTY VENTURER ELECTRONICS (“VENTURER”) makes the following limited warranty. This limited warranty extend to the original consumer purchaser and is limited to non-commercial use of the product. Ninety (90) Day Parts & Labor Warranty VENTURER products purchased in the United States are warranted to be free from defects in materials or workmanship for a period of ninety (90) days from the date of their original retail purchase.