TravelNet Internet Only Cellular Router Installation Guide ATTENTION INSTALLER Parts List: • TravelNet Cellular Router (TN-2033, TN-2055) • 110 volt adapter with green connector • Edimax BR-6204WG WiFi Preconfigured Router • 110 volt adapter with plug connector • 3 foot Ethernet Cable • (2)External Antenna (white) • (2)External Antenna mount with 14’ cable • (2)Stainless Antenna Mounts • Cable Entry Cover • Aluminum Ground Plane (7 x 7 ) • Customer Package (clear envelope) o 7 foot Red Ethernet Cable o (2)B
TravelNet’s Cellular Router System is Preconfigured And Ready to Install with these Easy Steps Installation Instructions: 1. Install the TravelNet Router and Edimax Router equipment in a convenient place such as upper cabinet (Velcro works well on the base of the each unit). Mount the unit so that the diagnostic lights can be viewed without moving the TravelNet Router and the Edimax Wireless Router. 2.
Figure 2 Note that the antenna mounts are anchored to the 7” x 7” aluminum ground plane and that everything is well sealed. Figure 3 3. Insert the small end of the cable through the ¾” diameter hole in the stainless antenna mount and feed the cable through. Next screw the brass antenna mount nut to the antenna mount as shown above, with the O-ring down, and attach the Antennas.
Figure 4 4. Route the 2 antenna cables to the cable entry hole in the coach roof. Securely attach the cable entry cover over the cable entry point on the coach roof using screws and caulk (Figure 6) Antenna cables should be directed to the TravelNet Router. Figure 5 5. Attach the 3 foot Ethernet cable to the TravelNet router’s Ethernet port and the Edimax wireless router. Note: there are 5 ports on the Edimax Wireless router, use the WAN port (Figure 19), not the 4 LAN ports. Ver. 1.
Figure 6 6. Carefully attach the antenna cables to the SMA Antenna Mounts on the TravelNet router. Caution should be taken to not over tighten the SMA cable connectors. Figure 7 7. Connect power supplies for both devices to AC source or 12VDC source. When a 12 VDC source, order the appropriate pigtail accessories and please save the 12 volt power supply for the coach owner. Note that if using RV’s DC power, the power inputs are polarity sensitive. NOTE: The lead with the white stripe is +12 VDC. Ver. 1.
Figure 8 8. Check table below for LED status. Light Status Off On On On LINK No Connection (IP address) Green-1XRTT Connection Red— EV-DO Connection SVC No Power LAN No Connection Yellow Blinking-No Signal (RSSI) Yellow Solid— Red-Connected to LAN RSSI < -88 Green Solid -RSSI > -88 9. If you are activating the TravelNet Cellular Router, precede to the activation instructions for the correct TravelNet model. See below: Sprint or Verizon 10.
Activation Instructions for model TN-2055 and TN-2033: (Sprint TN-2033 users skip to page 9) Verizon TN-2055 Activation: 1. Connect an Ethernet Cable directly to the TravelNet Cellular Router and the Laptop. 2. Enable the Local Area Network, when connected, go to the next step. 3. Open a web browser (Internet Explorer, Firefox, Mozilla, Safari) 4. Enter the IP address: 192.168.1.10 Figure 9 Figure 10 5. Enter the user name ‘ctek’ and password ‘ctek’ 6. Click on the Login button. 7.
Figure 11 8. Click on the Over The Air Activation button. 9. If Network Stability is OK For Activation (if Not Ok for Activation, wait 3 minutes.) If Not OK for Activation for 15 additional minutes, contact Support. 10. Click the Activate button. 11. Wait 3 minutes, then check status. If still in progress, wait an additional 3 minutes. If still in progress or ‘failed’, contact support. 12. When ‘Activated’ click Back button 13. Click the Home button. 14.
19. Click on the Status-Wireless button, and verify that there is a Current IP address. This may take several minutes depending on the carrier network. Figure 13 20. Click on the Home button. 21. Click on the Restart button and confirm by clicking the Restart button again, and wait 30 seconds. 22. Do a restart of all network devices in order, first the TravelNet Router, 2nd the Edimax Router, and finally laptop. Sprint TN-2033 Activation: 1.
5. 6. 7. 8. Enter the user name ‘ctek’ and password ‘ctek’ Click the Log In button. Click on the Activation button. Click on the Over the Air Activation button Figure 16 9. If Network Stability is Ok for Activation then go to step 9, if Not Ok, then wait 3 minutes. If still Not Ok, call support. Figure 17 10. Click on the Activate button. 11. Wait 3 minutes, then click the Status button. If still in progress, then wait an additional 3 minutes. If still in progress or ‘failed’, contact support. 12.
Figure 18 15. At the bottom of the page, click the Update button. 16. Ok, then click the Home button. 17. Click on the Restart button and confirm by clicking the Restart button again, and wait 30 seconds. Figure 19 18. Click on the Home button. 19. Click the Status-Wireless button, verify that there is a Current IP address. 20. Click on the Home button. 21. Click on the Restart button and confirm by clicking the Restart button again, and wait 30 seconds. 22.
Figure 20 WEP Key Setup Figure 21 1. 2. 3. 4. 5. 6. 7. 8. 9. Log into the Edimax WiFi Router at 192.168.2.1 Enter the Username ‘admin’ and Password ‘1234’ Go to WIRELESS SETTINGS > SECURITY Encryption type: select WEP Key Length: 64-bit Key Format: Hex (10 Characters) Default Tx Key: Key 1. Encryption Key 1: Enter your 10 Characters Key- see chart below Do not place an “x” in the selection box labeled “Enable 802.1x Authentication” for normal installations.
Figure 22 WEP Key Setup Parameters Default Key Length 64-bit Key Format Description You can select the WEP key length for encryption, 64-bit or 128-bit. Larger WEP key length requires 26 hexadecimal characters Use hexadecimal digits (in the "A-F", "a-f" and "0-9" range) to be the WEP Key. Examples: Hexadecimal Digits: 12345abcde or abcdef0123 10. Write key on piece of paper or on Edimax manual and keep in a safe place with other important documentation. 11.
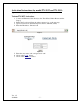
To connect your XP computer to your wireless network Configuring the Windows XP Wireless Clients (With WEP) Configuration of the Windows XP wireless clients for WEP key authentication depends on whether you are using Windows XP with SP2 or Windows XP with SP1 and whether the wireless network adapter driver supports Wireless Auto Configuration.
To connect your Windows Vista computer to your wireless network View and connect to available wireless networks Applies to all editions of Windows Vista. If you have a mobile PC, you can see a list of available wireless networks, and then connect to one of those networks, no matter where you are. The wireless networks appear only if your computer has a wireless network adapter installed and the adapter is turned on. 1. Open Connect to a Network by clicking the Start button Connect to.
QUESTIONS? CALL OUR SUPPORT LINE: 877-475-7771 or visit our website FAQ at http://www.winegard.com TravelNet Winegard Company Support: (877) 475-7771 FAX: 847-991-3328 Ver. 1.