OPERATING INSTRUCTIONS M700DM4 Rugged Tablet Computer Contents 1 Safety Information 1 Handling and Maintenance 2 Chapter 2: Getting Started 3 Unpacking 3 Description Of Parts 4 First-time Operation 6 Turning On / Off 8 9 Using the Touch Screen 9 Using the Home Screen 10 Status and Notification Icons 12 Using the On-Screen Keyboard 13 Display Setting 16 Audio Profile Setting 16 Language & Keyboard Setting 17 USB Debugging Setting 19 About Phone 19 Chapter 4: Connecting to Net
Chapter 1: Read Me First Safety Information Read Me First Follow and adhere to all warnings and instructions in this manual. Forr your safety, please read all safety and operating instructions before using the product. product Keep this manual for future reference. Precaution recaution on Battery Pack Do Not Use This Product With Battery Other Than an the One Specified.
Use only with its transport carriage, stand, tripod, console or table specified by the manufacturer or sold with the product. When using a carriage, move the carriage assembly with the product carefully to avoid damage from falling over. To maximize the life of the backlight in the display, allow backlight to automatically turn off as a result of power management. Avoid using a screen saver or other software that prevents the power management from working.
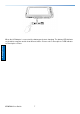
Chapter 2:: Getting Started Congratulations on purchasing this Android rugged Tablet Computer. The rugged design allows you to use it in harsh outdoor environments. This chapter tells you step by step how to get the Tablet Computer Computer up and running.
Description Of Parts Left : Getting Started Front : No 1 2 3 4 5 6 7/ 8 Item Description 7” Touch Screen Displays and act as one of the inputs for the Tablet Computer Home Button Return to home screen Menu Button Open a list of actions that user can do on the current screen Return Button Return to the previous screen Trigger Button If the device was equipped with scanners, this button can be function as a trigger button Light sensor To control screen brightness Battery Status Green light : Indicates
No 16 17 18 Item MicroSD Card Reader SIM card slot Docking connector Front LED Indicators Detail : Description Memory card reader port for MicroSD Card Service window to insert Micro SIM card.
First-time Operation Inserting Battery Pack To insert the included standard battery pack into the Tablet Computer: Removing the Battery Pack 1. 2. 3. 4. 5. Shut down the tablet computer. Disconnect any cords connected to the computer. Turn the tablet computer over, back facing up. Locate the Battery Lock and push it to the “Unlocked” position. Pull back and hold. Lift the battery out using the opening on side of battery compartment. compartment.
Getting Started When the AC Adapter is connected, the battery pack starts charging. The battery LED indicator on the tablet computer would show different states. Please refer to description of LED indicator on Description of Parts.
Turning On / Off Turning On Note: • • Do not press the power switch repeatedly. Do not perform the following operations until the hard drive indicator turns off o Connecting or disconnecting the th AC adapter o Pressing the power switch o Touching the tablet buttons, screen, or external keyboard/mouse Turning Off Perform the following procedure to shutdown the Tablet Computer: 1. Make sure you have closed any programs that are open on the Desktop. 2.
Chapter 3: Using Android 4.2 Operating System This section details how to use Android 4.2 operating system on the tablet for the first time. Wake Up The Tablet If you do not use the tablet for a while, the screen dims and then darkens to conserve the battery. To wake up the tablet: Getting Started 1. Press the Power button on the top of the Tablet PC 2. Drag the lock icon to the right 3. There are several options to choose the screen lock method such as Slide, Voice Lock, Pattern, PIN or Password 4.
• • • • • • • Tap – Simply touch the icon, symbol, or onscreen button using your finger Tap and hold – Touching an item using your finger and not lifting it until an action occurs Drag – Touch and hold an item for some amount of time and then, without lifting your finger, move your finger along the screen until you reach target position Swipe or slide – Quickly move your finger across the surface of the screen, without pausing it when you first touch it. (e.g.
Getting Started To move an item on the Home screen: 1. Tap and hold the item you want to move, until it can be moved. 2. Drag it to a new location on the screen 3. Place the item where you want to put it and lift your finger To move an item on the Home screen: 1. Tap and hold the item you want to remove. The launcher icon will change into a Remove icon 2. Drag the item you want to remove to the Remove icon on the top of the screen 3.
APPS Getting Started WIDGETS Status and Notification Icons The status bar appears at the top right of every screen, along with the current time and on the bottom left are navigation icons. Status Icons The following icons indicate the status of your Tablet PC,, for example if users are connected to a Wi-Fi Fi network that is not connected to the internet, the network icons are appears in white color. User can view the details by touching the clock at the bottom bottom right of the screen.
Notification Icons Getting Started The following icons indicate that you have received notification Using the On-Screen Keyboard User will be able to enter text using the On-Screen Keyboard. Some applications will launch the keyboard automatically. In others, user needs to touch a text field where user wants to enter text to launch the keyboard. Enter text by Typing 1. Open a text field, in this example we used Chrome to create a text, The On-Screen Keyboard opens.
Tap once to capitalize the alphabet Tap and hold for input options If user taps in a text field which already contains text, the insertion point is set where user tap and the cursor appears. User can drag the cursor to pick exactly where you want to add more text. User can also select a word to copy, cut and paste it. See “Editing Text” to erase characters to the left of the cursor 3. Tap to enterr numbers. Tap to return to letters 4.
To Cut or Copy Text 1. Select the text to cut or copy, see “to select text” Getting Started 2. Tap or in the Edit text menu 3. If you select , the selected text is removed from the text field; it is stored in temporary area so that you can paste it into different text field. To Paste Text 1. After Cut or Copy the text, see “To Cut or Copy Text” 2.
Display Setting Use the display settings to configure brightness. 1. Tap and select Settings and then tap Display 2. Tap Brightness: • Tap Automatic Brightness – for adjusting the brightness automatically. • Tap Economical Backlight to save power • Slide the bar to adjust the brightness manually Getting Started For the longest battery life between charges, use the lowest brightness level Use the display settings to configure Font size. 1.
Sound Settings 1. Tap and select Settings and then tap Audio profiles Getting Started 2. Tap General and then tap the Settings (located on the right side of the screen ) user can select to disable or adjust the Music, video games & other media as well as notifications and Alarms Adjust Volume 1.
Spell checker – to improve the text-input text input experience on Android by helping the user quickly identify and correct spelling errors Personal dictionary – to add custom words to a personal dictionary for faster typing The current keyboard language is displayed on the Settings icon and user can switch languages. 1. Tap the keyboard icon located on the top right, there are four four input options Hardwarephysical keyboard, English (US)(US) Android Keyboard, and Google voice typing 2.
USB Debugging Setting To permit debugging tools on a computer to communicate with User’s Tablet via USB Connection. 1. Tap and select Settings and then Tap { } Developer options and then tap USB debugging 2.
Chapter 4: Connecting to Network and Devices Connecting to Wi-Fi Networks Turn On the Wi-Fi and Connect to a Wi-Fi network 1. Tap and then tap Settings 2. Tap Wireless & networks and then select Wi-Fi to turn it on 3. Tap Wi-Fi The device scans for available Wi-Fi networks and displays the list of it. Secured networks are indicated with a lock icon If the phone finds a network that you have connected previously, it connects to it automatically. 4.
Connecting to Bluetooth Bluetoot Devices Turn Bluetooth On or Off 1. Tap and then tap Settings 2. Tap Wireless & networks and then select Bluetooth to turn it on Connect to a Bluetooth device 1. Tap and then tap Settings 2. Tap Wireless & networks, networks and then tap Bluetooth 3. It will automatically scans and displays the IDs of all available Bluetooth devices in range. Tap SEARCH FOR DEVICES to search other Bluetooth devices 4.
When connecting your Tablet PC to a computer and mounting its USB storage or SD card, user must follow the computer’s instructions for connecting and disconnecting USB device, to avoid damaging or corrupting files. To connect your Tablet PC to a computer via USB: 1. Use the e USB cable that came with your Tablet PC to connect the device to a USB port on your computer 2. After received a notification that the USB is connected, tap the notification icon and then tap USB connected 3.
Chapter 5: Using the Camera Winmate M700DM4 equipped with 5 MP on the rear side, which user can use to capture photos or video Open Camera 1. Tap the launcher and then tap Camera Camera opens in Portrait mode, ready to take a picture or shoot a video Make sure the protective lens cover is clean before taking pictures. pictures A lens cover with smudges from fingers can cause blurry picture Take a Picture 1. Adjust the exposure, flash, and other necessary settings. Or leave it automatic. 2.
to share photo to delete photo to view other photo or video in the galleries Swipe right or left to view more Shoot a Video 1. Tap to switch from camera to video mode 2. Point the lens to record the scene where you want to start 3. Tap the On Screen icon to start recording The time remaining to shoot counts down at the left; when less than a minute is left, the countdown turns red 4. Tap the icon again to stop shooting Opening the Gallery Accessories 1. Tap the launcher and then tap Gallery 2.
Chapter 7: Accessories The tablet computer offers the following optional accessories that can be purchased: Vehicle Dock • VESA Mounting support • USB 2.0 x 2 • LAN (10/100) • COM (RS232) • 9-36V DC IN with 3-pin pin terminal block • Easy insert and release with key-lock key Desk Dock • USB 2.
FCC Statement 1. This device complies with Part 15 of the FCC Rules. Operation is subject to the following two conditions: (1) This device may not cause harmful interference. (2) This device must accept any interference received, including interference that may cause undesired operation. 2. Changes or modifications not expressly approved by the party responsible for compliance could void the user's authority to operate the equipment.
Le présent appareil est conforme aux CNR d'Industrie Canada applicables aux appareils radio exempts de licence. L'exploitation est autorisée aux deux conditions suivantes : (1) l'appareil ne doit pas produire de brouillage, et (2) l'utilisateur de l'appareil doit accepter tout brouillage radioélectrique subi, même si le brouillage est susceptible d'en compromettre le fonctionnement.