
User's Manual

7
Set Up Classes
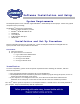
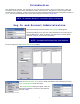
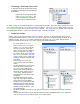
Classes are set up in the Session Setup window after logging in as a new user (shown below). The Classes pane is
located to the right of Session Properties, and Edit Classes is located in the lower right of the window. In these
two panes new classes can be created and deleted, or an existing class can be edited. A step-by-step guide for
entering and editing classes follows. Position the mouse pointer over a toolbar button to display its function.
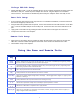
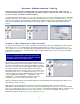
Procedure to Create a New Class:
Click the New button on the Classes pane toolbar. Select Login Type dialog box appears with By PIN or By
Username and Password. Selecting By PIN creates a class where student users log in via PIN number, where By
Username and Password creates a class where student users log in via Username and Password.
Note: Lite Remotes support PIN login only – make sure to select By PIN.
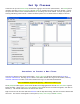
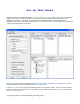
The My iRespond folder appears, and a blank checkbox with a highlighted file entitled New Class Roster* appears
below the folder. Notice in the User Groups and Edit Classes panes the new file name also appears, each with an
asterisk (*). The asterisk indicates the file has not been saved.
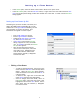
Right click on the new file name and select Rename from the drop-down dialog. Edit the file name as desired and
then enter. The new file name appears in three panes (Classes, User Groups, and Edit Classes).