Owner’s Manual Operation and Maintenance Instructions Wisper 906Alpino January 2010 1st edition Revised August 2010 -1-
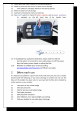
We strongly recommend that you read this entire manual before using your Wisper bike Wisper Limited User Guide Page 3 Introduction Part 1 Caring for your Wisper bike and pre use checks 1 2 3 4 5 6 7 8 Before you set off for the first time Before each use Battery care Recharging your battery Water Maintenance and adjustments Technical specifications and performance Simple trouble shooting Part 2 Controls and Equipment 9 10 11 12 13 14 15 16 17 18 Battery on off and battery lock The LCD functions The
19 20 Chain and drive wheel Gear Hub Page 17 Page 17 Warranty Page 18 Service contacts Page 19 Introduction Thank for choosing a Wisper electric bicycle. By making the decision to use an electric bike you are helping to safeguard our environment by saving our planet’s precious resources and reducing carbon pollution. Before you use your Wisper bike it is important that you read this manual carefully. If there is anything you do not understand completely please contact us.
has been correctly built. You can do this by either taking it to your nearest cycle engineer or if you are proficient in cycle mechanics inspecting it yourself. In particular you must make sure that the pedals, saddle, handle bars and any self assembly items have been correctly fitted. NEVER drink alcohol and ride your electric bike. The use of alcohol greatly reduces reflexes and limits your ability to ride safely. Even a very small amount of alcohol will limit your ability to be safe on the road.
3 Battery care 3.1 Before you use the battery for the first time it is best to give it a full deep charge for 12 hours. To fully condition your new battery give it complete deep charge, discharge cycles for the first three charges. This is achieved by charging your battery for 12 hours and then using the bike until the battery is completely drained. After this “conditioning” process you can then charge and discharge the battery as and when you require for long or short periods. 3.
4.2 When charging the battery always do so in a well ventilated area. 4.3 Do not leave the charger connected to the mains when not in use. 5 Water 5.1 Your electric bicycle is rain and splash proof and can be used in all weathers. 5.2 The electrical components of the vehicle, such as motor, battery, and controller, must not be submerged in water. 6 Maintenance and adjustments 6.
IMPORTANT braking distances increase on wet or icy roads. 6.8 Lubrication: Every three months lubricate the chain with light oil 6.9 Recommended tools for proper maintenance: Torque wrench with lb•in or N•m gradations 2, 4, 5, 6, 8 mm Allen wrenches 9, 10, 15 mm open-end wrenches 15 mm box end wrench Socket wrench, 14, 15, and 19 mm socket T25 Torx wrench No.
Battery specifications Cell Type Capacity Rated voltage Advanced Environmental Lithium Polymer with PCM 8Ah or 14Ah 37V Main Controller specifications Low voltage safeguard 31.5V Overload current safeguard 15A Main hub motor specifications Motor type Hi speed brushless Rated power Aus 200W / NZ Europe 250W / USA Canada 350W Rated voltage 36V Lithium 115 to 230V 36V fan cooled Charger 8 Simple Trouble shooting Problem Possible reasons Trouble shooting Top speed too slow 1. Low battery voltage 2.
04 flashes 05 flashes 07 flashes 08 flashes 09 flashes be loose. Battery voltage is too low. Brake lever cut out function problem. The throttle is faulty. Controller faulty Battery output voltage is too high. Part 2 Controls and Equipment In this section we will describe the functions and any specific maintenance needed on all the main controls and ancillary equipment. 9 Battery on off and battery lock 9.1 Your Wisper bike has 1 set key.
“Unlocking”, raise the seat post to its maximum height. Using the handle on top of the battery lift out the battery. 9.7 To replace the battery reverse the procedure for removing it. 10LCD function description 10.1 The LCD display has the following functions (Refer to picture below). A: Power ON/OFF button. For details refer to the paragraph below. B: Up (increase) adjusting button. For adjusting the pedal assistance strength, and back light brightness. C: Down (decrease) adjusting button. D: Set.
you have turned the bike “off”. When the bike is “off” you will not get any assistance from the battery and motor and the bike is effectively simply an unpowered push bike. To turn the power back on so the pedelec and throttle work again simply press the ON/OFF button once, the capacity indicator will illuminate showing the power is on. 10.3 How to adjust functions: 10.3.1 How to adjust the pedal assistance. Refer 12.2, 12.3 and 12.4 paragraphs. 10.3.2 How to adjust the back light of the LCD.
12.1 12.2 12.3 12.4 When you first ride your 906Alpino you will notice that after one turn of the pedals the motor will start working assisting you ride the bike by adding power to the front wheel. This is the standard or pedelec mode, to continue using the pedelec mode you must keep turning the pedals, if you stop the motor will stop and the bike will slow to a halt. If you start pedaling again after one turn the motor will start again. You will find the ASSIST level shows on the LCD display.
Brakes 14.1 14.2 14.3 Front: Disc Rear: disc The brakes on your Wisper bike are fitted with cut outs which are required by law. This means that when you pull on either the back or front brake lever the motor immediately stops working. Details of how to adjust and maintain your brakes are as follows: Once a month, inspect brake pads and blocks for wear. If they have reached the wear limit then replace the items.
direction to provide more clearance, and anti-clockwise for less clearance. 14.3.2. Removing and installing pads. Caution: The pads and rotor must be kept clean and free from oil or grease based contamination. If the pads become contaminated you must discard them and replace them with a new set. A contaminated rotor should be cleaned with brake cleaning solvent and dried. 14.3.2.1. Unscrew caliper’s two screws fixed in front fork.
14.3.3.3. Use a 3mm Allen wrench(Refer to picture) to adjust the left side caliper’s pad 0.3mm clearance between the rotor. 14.3.4. Removing and installing pads. 14.3.4.1. Unscrew two caliper screws fixed in the rear fork. Remove the clip(Refer 14.3.3.1 picture), and then unscew the bolt shown in the picture. Then manoeuver the pads out of the rotor slot. 14.3.4.2. Holding the pad end-tab, insert it into caliper slot with its metal backing towards the piston.
15.1 15.2 15.3 15.4 14.5 15.6 15.7 Your bike has been fitted with a quick release handlebar clamp that allows you to change the position of the bars quickly and easily to find the most comfortable riding position. The stem and handle bars need to be fitted before you use the bike. To fit, insert the stem into the front tube at least to the position of the “Minimum insertion” mark. Tighten the quill bolt and fix stem. Push in the direction of the arrow slide cap 1 and lift lever 2.
the saddle post are visible above the quick release collar 18 Rims and spokes 18.1 It is essential to have your spokes checked and tightened after 300 miles. This is a free service provided by your supplier. If this service has not been undertaken at the correct time this may cause damage to the wheels and spokes that will not covered under our guarantee. 19Chain and drive wheel 20.1 20.2 The chain and drive wheel are made from rust proof materials.
7 Front and rear axle, chain wheel One year 8 Electro plating, on wheel rims, rack and kickstand Six months 9 Other cases that render the bike unsafe to use. By negotiation 1. If the product has a quality fault within 15 days of delivery the part will be repaired or replaced or in exceptional circumstances we may replace the whole vehicle. 2.
or Wisper Ltd 10 Oakenbrow Sway Hants SO41 6DY Tele:01590 681553 Mobile:07977 185830 douglas.lawson@wisperbikes.com www.wisperbikes.