
Operation Manual


20
▪ Insert the mains plug into the socket and press the On/Off button (5).
▪ Once the start buttons (6–9) light up you can begin the brewing process.
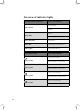
▪ Press the appropriate start button (6–9) depending on the desired coffee
quantity; the preparation process begins:
1 cup of coffee
(6)
2 cups of coffee
(7)
3 cups of coffee
(8)
4 cups of coffee
(9)
▪ After the brewing cycle, the start button goes out, the appliance switches off
automatically and you can remove the cup or the Aroma glass jug (4). A drip-
stop valve effectively prevents coffee from dripping.
Note: The appliance is still hot after use, therefore leave it to cool down for
a few minutes. To dispose of the lter paper and the coffee powder, you can
use the handle to remove the lter insert (2). The used lter paper and coffee
powder are compostable.
Attention: When you remove the lter insert (2), the drip-stop valve is reset
for the next brewing cycle. If you do not remove the lter insert (2), the
appliance will overow during the next brewing cycle.
Note: You can cancel the brewing cycle at any time by pressing the On/Off (5)
button.
In this case, leave the cup or the Aroma glass jug (4) in the appliance until the
remaining coffee in the lter has owed through.
WMF Aroma Perfection
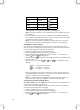
If you would like to prepare a stronger aromatic coffee, you can activate the
aroma function WMF Aroma Perfection for the respective brewing cycle.
To activate the function, press the appropriate start button for the brewing cycle
(6–9) a second time. The start button (6–9) ashes briey three times to conrm
your selection and the preparation begins.
Note: If you wait longer than approximately 2 seconds before pressing the start
button for a second time, a normal brewing cycle starts.
Cleaning and care
Cleaning
Unplug the mains plug and allow the appliance to cool down.
Do not immerse the appliance in water, but instead just use a damp cloth and a
little washing-up liquid to clean its exterior.
Do not use any sharp and abrasive cleaning agents.
Clean the lter insert (2), Aroma glass jug (4) and water tank (3) under running
water.
Rinse cycle
Perform a rinse cycle to clean the appliance if the anti-limescale programme has
been out of operation or not been used for a long period of time.
Also perform a rinse cycle if you notice that the cup ll quantities vary a lot.
▪ Connect the mains plug to an earthed wall socket and press the On/Off button
(5) to switch the appliance on.
▪ Fill the water tank (3) up to the MAX marker.
Note: The rinse cycle can only be started if there is enough water in the water