
Home Theater System User Manual


Wolf Cinema Owner's Manual
3-28
AUTO INPUT LEVEL – Temporarily enter a checkmark only if you are an experienced user and
you have an unusual source that you feel needs further color temperature and/or input level
adjustment. This compensates for incoming out-of-range drives (white) and black levels (black)
that would cause “crushing” of light and dark colors in the image. After entering a checkmark,
wait for the six slide bar values to stabilize, then delete the checkmark and exit. The Auto Input
Level is automatically turned off upon exit from the Input levels Menu.
BLACK LEVELS AND DRIVES - To check your image and adjust these controls:
Make sure overall “Contrast” and “Brightness” settings are both set to near 50. NOTE: Not 1.
required for “Auto” adjustment.
Contrast
•
= 50 (approx.)
Bright
•
= 50 (approx.)
Check the color temperature setup using an internal grayscale test pattern, making sure to 2.
obtain a neutral grayscale.
NOTE: Not required for “Auto” adjustment.
Conrmthatyouareusing an analog sourcenot connectedto INPUT 3 orINPUT4, as3.
Input Levels are not applicable for digital sources or sources going through the decoder. A
grayscale is recommended.
If the blacks and/or whites appear OK, input levels do not need adjustment. If black levels 4.
are too high (and/or whites are too low, which is rare), you likely have a noisy source that is
producing skewed input levels. Continue with Step 5.
Temporarily enable “Auto” in the Input Levels submenu. Wait for all 6 values to stabilize. 5.
Alternatively, do not use “Auto” — reduce blacklevels manually instead. Judge by eye and
change one or more of the six levels as necessary to obtain proper blacks and whites.
You may want to see only a certain color while adjusting — use the “Color Enable” option
(described below).
Delete the “Auto” checkmark and leave the Input Levels menu.6.
IMPORTANT: Do not use Input Levels to adjust color temperature. This will distort Contrast
and Brightness functions as well as color temperature.
AUTO COLOR ENABLE–Whenacheckmarkispresent,selectingaspecicblacklevelordrive
to adjust will automatically enable the corresponding color in the display. Delete the checkmark
toseeallcolors,ortoenableadifferentspeciccolorthroughtheColorEnableControl.
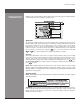
CLAMP LOCATION – This option (formerly known as sync tip clamping)
can brighten the image produced from certain high-resolution high-
frequency graphic sources. The projector automatically selects the best
clamp location for almost all sources. Use the normal Back Porch location if the image is either
sufcientlybrightoroverlybright.SelectSync Tip if the image appears unusually dim, if there are
horizontalstreaksacrosstheimage,orifthereissignicantcolordrift.Thismovestheclamping
pulse from the normal back porch location (which is likely too short) to the tip of the horizontal
sync pulse. Tri Level is typically needed for an HDTV source.
COLOR ENABLE – Select which color or colors you want to see in the display, useful while
working with color temperature white levels or input levels.
Section3►Operation
1. Back Porch
2. Front Porch