Fit and Finish Installation Guide For Siding and Vinyl Carpentry Soffit and Decorative Trim ™
Important Information Warranties Important Fire Safety Information: These instructions describe and illustrate the steps involved in installing Wolverine siding and trim. Their purpose is to provide detailed information and how-to tips that will simplify the installation process. Wolverine shall not accept any liability or responsibility under its written warranty for failure caused by application that does not meet the requirements for proper installation.
Become a Wolverine Master Craftsman The Wolverine Master Craftsman Program is your opportunity to earn valuable rewards while maintaining a leg up on your competition. These rewards are not available to everyone, just to those who have successfully passed the Master Craftsman Education and Development test. As a Master Craftsman, you are entitled to: ■ Receive a personalized Certificate of Completion that you can use to promote your professional services.
TABLE OF CONTENTS SECTION 1 – Introduction ........................................... 5 SECTION 5 – Installing Horizontal Siding SECTION 2 – Materials and Tools Cutting Panels ........................................................................... Overlapping Panels ................................................................... Preparing Wall Surfaces............................................................ STUDfinder™ Installation System ..............................................
Wolverine Fit and Finish Installation Guide 4
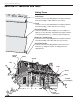
Wolverine Fit and Finish Installation Guide SECTION 1 Introduction Plan your work, then work your plan. That’s the key to success with any project, and it’s doubly true when it comes to installing vinyl siding, soffit, trim and accessories. If you use the right materials and the right tools in the right order, you’ll complete remodeling and new home installations in less time, with less effort, and with far greater satisfaction.
Wolverine Fit and Finish Installation Guide SECTION 2 – Materials and Tools Siding Terms Nail Flange Common to most vinyl siding products (includes horizontal and vertical sidings, soffits and most accessories). Lock Common to most vinyl siding products (includes horizontal and vertical sidings, soffits and some accessories). Panel Projection Common to products with multiple faces (i.e. Double 4 or Triple 3). It is the dimension required for the proper selection of receiving channels (e.g.
Wolverine Fit and Finish Installation Guide Starter Strips 2-1/4" Vinyl Starter Strip Secures the first course of siding to the home. For use with all Wolverine sidings except Restoration Shapes Half-Round Shingles and TrueComfort. 2-1/2" Metal Shingle Starter Strip For use with all Wolverine sidings except TrueComfort, Restoration Shapes Half-Round Shingles, and Rough-Split Shakes.
Wolverine Fit and Finish Installation Guide Corner Starter Strip Secures 3-1/2" and 5" lineals and a corner insert to the outside corner. New Construction Window and Door Starter Butts up against protruding window and door jambs and overhangs for installation of 3-1/2" and 5" lineals. Remodeling Window and Door Starter Holds 3-1/2" and 5" lineals in place around window and door openings. Used in re-siding applications where existing casings have not been removed.
Wolverine Fit and Finish Installation Guide J-channels and F-channels 3/8" J-channel 1/2" J-channel 3/4" J-channel 1" J-channel 1-1/4" J-channel Universal siding and soffit receiving channel for use around utility openings, under eaves, etc. 3/4" Flexible J-channel Specialized 3/4" siding receiving trim; particularly useful around curved windows and ventilation treatments. 5/8", 3/4", and Deluxe F-channel Receive soffit panels. Deluxe F-channel can also be used to receive Cornice Molding.
Wolverine Fit and Finish Installation Guide Utility Trim Undersill Trim Helps secure trimmed siding panels under windows and eaves. Dual Undersill Trim Secures trimmed siding panels under windows and eaves regardless of the profile or where in the panel face the panel has been trimmed. Cornice Molding Receiver Installed under eaves to hold the Cornice Molding in place. Does not receive soffit panels.
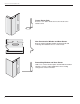
Wolverine Fit and Finish Installation Guide Miscellaneous Accessories Crown Molding Used in conjunction with 5" lineals to create a custom molded window or door header. Can also be used with 3-1/2" lineals and 3/4" pocket J-channels. Crown has a 2-1/4" top exposed edge. Crown Molding Cap Caps the ends of a crown molding with minimal cutting. NOTE: Shown already cut in half – one piece makes a left and right-end cap. Soffit Cove Trim (Shown as if secured to trusses or soffit nailers.
Wolverine Fit and Finish Installation Guide 3/8" H-bar 1/2" H-bar Joins soffit panels. Particularly useful on porch ceilings and hip roof applications. 3-1/2" Double Channel Lineal 5" Double Channel Lineal Exposure matches 3-1/2" window and door surround lineals. Lineal Options 3-1/2" Lineal For use with a New Construction Window and Door Starter around windows and doors as a casing. The 3/4" channel receives siding panels. Can also be used as a cornerpost. 3-1/2" Snap-on Lineal For use with J-channel.
Wolverine Fit and Finish Installation Guide Cornerposts Outside Cornerposts 3/4" Outside Cornerpost – Woodgrain 3/4" Outside Cornerpost – Matte 1" Outside Cornerpost – Woodgrain For use with Restoration Shapes Random Hand-Split Shakes. 3/4" Inside Cornerpost – Matte Used where siding meets at inside corners; provides a finished look. Fluted SuperCorner Fluted corner design with foam insert. Traditional SuperCorner Wide decorative traditional corner treatment with foam backing.
Wolverine Fit and Finish Installation Guide Equipment and Tools Sheathings In new construction, apply sheathing first, then nail accessories over it. In home improvement projects, you can apply sheathing first, as described above, or you can apply accessories first, then fit sheathing and siding into accessory recesses. The application method you choose determines the width of the recess opening required.
Wolverine Fit and Finish Installation Guide For nailing instructions, see page 24. Tools Required Hammer Square Utility knife Tin snips Chalk line Hacksaw Tape measure Level Shears Power circular saw with sharp, fine-tooth plywood blade mounted in reverse direction. Ladders and scaffolds NOTE: If you will be using an extension ladder during installation, be sure to cushion the upper side rails to help prevent damage to installed siding.
Wolverine Fit and Finish Installation Guide Special Tools Nail Slot Punch Punches elongated holes to allow nailing the cut edge of a panel. Also used to enlarge an existing hole to allow proper nailing. Cut off and discard Snap Lock Punch Punches tabs in the cut edge of a panel used as a finishing course at the top of a wall or underneath a window. The tabs lock into undersill trim. For best results, we recommend using an SL5 punch, which is designed specifically for vinyl applications.
Wolverine Fit and Finish Installation Guide SECTION 3 – Estimating Siding Use the illustrations and formulas below and enter totals on the estimating form in this section. These formulas apply for both horizontal and vertical installations. NOTE: When estimating for a large project, you may want to add a waste allowance of 10 percent to the totals for siding, soffit and accessories. Rectangular wall surfaces Measure height (excluding gables). Measure width (including doors and windows).
Wolverine Fit and Finish Installation Guide D Upper wall of gambrel house Divide the upper wall of a gambrel house as shown in the illustration. Then use the following formulas: H C 1/2 (B + C) x H = ____________ 1/2 C x D = ____________ Add these figures to get total area: ____________ B width Repeat for remaining gambrel surfaces. height Dormer sides Measure height of dormer (add 1' to allow for waste).
Wolverine Fit and Finish Installation Guide Measuring Before ordering accessories, you also have to determine the width of the J-channel into which you will fit the vinyl siding. To do this, you must first determine which of two methods you will use to apply sheathings or underlayments. This is covered in more detail under “Sheathings”. Starter strip: Measure along base of building.
Wolverine Fit and Finish Installation Guide Estimating Form Siding Walls Gable ends Dormer sides Upper gambrel walls Total wall surface area Large areas not to be covered: (garage doors/sliding glass doors) Uncovered area Subtract B from A for Total net surface area Soffit Porch Ceiling Accessories Receiving Channel Outside Corners Inside Corners Other Nails 20 Starter strip Window & door lineal starter Four piece corner starter Utility trim J-channel 2-1/2" window & door casing Flexible J-channel
Wolverine Fit and Finish Installation Guide SECTION 4 – Preparation for Horizontal Siding Preparing Wall Surfaces New Construction Make sure all studs are straight and true. Correct any bowed studs. NOTE: Vinyl siding must be applied over a rigid sheathing that provides a smooth, flat surface or an underlayment (such as wood, wood composition, rigid foam or fiber sheathing) that is no more than 1" thick. Vinyl siding cannot be applied directly to studs. Make sure sheathing is fastened securely to studs.
Wolverine Fit and Finish Installation Guide Apply rigid sheathing to existing siding to provide a smooth surface. Nail securely to old siding. Nail evenly to bridge low spots. NOTE: Failure to establish a smooth, solid surface constitutes misapplication under the terms of the warranty. Apply vertical furring to old siding to straighten noticeable surface unevenness. (See “Tips for applying wood furring”. ) Then apply rigid sheathing, following the instructions presented under New Construction.
Wolverine Fit and Finish Installation Guide stucco 16" Applying over stucco When applying vinyl siding over stucco, you first have to be sure you’re working on an even surface. To create that surface, you may have to knock down high spots where furring strips will be applied. Use caution when chipping off these spots – you don’t want to crack or damage the remaining stucco.
Wolverine Fit and Finish Installation Guide Nailing, Stapling and Other Fastening Methods center of all slots upper edge of topmost nailing slot If you want to ensure a quality vinyl siding installation, focus your attention on nailing techniques. Unfortunately, a lot of installers don’t. They feel nailing is a routine task, something everyone knows how to do. But that’s not the case.
Wolverine Fit and Finish Installation Guide Other fastening techniques: Manual nailing is the most common way of fastening vinyl siding to a wall. That’s because it offers greater control, making it easier to learn how to fasten panels securely, but not tightly. You also can use power screwdrivers or pneumatic staplers/nailers to attach vinyl siding to a wall, but you must take the time to develop the proper skills.
Wolverine Fit and Finish Installation Guide 1/4" to 3/8" Expansion and Contraction It’s normal for vinyl building products to expand and contract with temperature changes. To ensure a successful siding installation, you must allow for this movement during application. Use the following guidelines to determine the space required for expansion and contraction between siding and trim: 1/4" at both ends of the panel when the temperature is above 40° F at the time of application.
Wolverine Fit and Finish Installation Guide A water level, a long clear plastic tube 90% filled with water, is useful in marking level points around the house and on opposite sides of openings such as doors. Water will always seek a level state, ensuring the markings will always be at the same level. sheathing NOTE: If after establishing a chalk line you find that your starter strip will be positioned below an easily nailed surface, you may have to apply a nailable base.
Wolverine Fit and Finish Installation Guide Installing Outside Cornerposts 1/4" to 3/8" hang from top nail, center remaining nails flashing nail every 8" to 10" Flash the corners of the home by bending a 10" wide piece of aluminum trim coil 90° so you have two 5" legs. Cover the entire length of the corner, lapping the upper pieces over the lower pieces. NOTE: Traditional, fluted and beaded SuperCorners or four piece corner systems require wider strips of coil for flashing.
Wolverine Fit and Finish Installation Guide 1 pc. outside corner piece Option 2: Cut a 6" length of cornerpost and trim the nail flange, receiving channel, and sides until you have just a 90° bend of vinyl. Using PVC primer and PVC cement, glue the bent piece to the inside of the upper post and lower post. Butt the two posts together. Nail the entire assembly as one post with all nails in the lower post centered in the nail slots.
Wolverine Fit and Finish Installation Guide Extra Wide Corner Posts (Four-Piece Corner System) Extra-wide cornerposts give you a distinctive, easy-to-install method of finishing outside corners. Each cornerpost consists of four parts: Corner starter, two lineals and a 1/4 round snap-in molding. Lineals are available in two board styles: 5" smooth and 3-1/2" smooth. The installation procedure is identical for all lineals and inserts.
Wolverine Fit and Finish Installation Guide Inside Cornerposts There are three options for trimming inside corners: Standard 3/4" inside cornerpost, single J-channel, and two J-channels. To flash the inside corner, bend a 12"-wide piece of aluminum coil stock 90° so you have two 6" legs. Insert the flashing into the corner. If you use more than one piece of flashing, overlap the upper pieces of the flashing over the lower pieces.
Wolverine Fit and Finish Installation Guide “L” shaped flashing Federal Corners To create a federal-style corner, flash the corner with aluminum trim coil or other flashing materials. Hang a new construction starter strip. Position the top nail in the top of the nailing slot. All other nails should be centered in the slots spaced 8" to 10" apart. Position and secure the 3-1/2" lineal. Position and secure an aluminum starter strip. Position and secure the 5" lineal.
Wolverine Fit and Finish Installation Guide “L” shaped flashing Inside Federal Corners Flash the corner with aluminum trim coil or other flashing materials. Position and secure the 5" lineals (or a 3-1/2" lineal) by butting the lineal up to the inside corner. Using a 5" lineal will create a symmetric 3-1/2" exposure in the corner. If two 3-1/2" lineals are used, one exposure will be approximately 2-1/4" and one will be 3-1/2". NOTE: Attaching the second lineal will keep the first lineal in place.
Wolverine Fit and Finish Installation Guide Trimming Bay Window Corners There are several ways to trim the odd angles of bay windows. Here are two of them: for angles less than 45° 1. Install bay window cornerpost. 2. Install J-channel with a quarter-round insert. Before you begin, make sure the corner is properly flashed. Install Bay Window Cornerpost • Cut bay window cornerpost to the proper length.
Wolverine Fit and Finish Installation Guide Decorative Trim Options around Windows and Doors J-channel System requires standard J-channel. • 1/2" J-channel • 3/4" J-channel • 1" J-channel • 1-1/4" J-channel 3-1/2" Snap-On Lineal System requires 1" face J-channel 3-1/2" Lineal System System requires 3-1/2" lineals and starter strips. 5" x 3-1/2" Lineal System System requires 5" lineals, 3-1/2" lineals, and starter strips.
Wolverine Fit and Finish Installation Guide Window Flashing The width of all flashings is determined by the type of accessory surrounding the window and where the final complete course of siding stops below the window (in the case of the flashing under the window). The flashing should extend past the nail flanges of the accessory. The width of the flashing under the window must allow for the diversion of water.
Wolverine Fit and Finish Installation Guide Installing Window and Door Trim rain tab Install J-channel along the top and sides of door casings and around windows. NOTE: When installing J-channel around replacement windows that do not have nail flanges, add flashing for greater protection against water infiltration. For an example of completed flashing, see the previous page. 3/4" There are two methods of joining J-channels at corners. The easiest method is to square cut the corners.
Wolverine Fit and Finish Installation Guide Drip Clip The Drip-Clip is an easy and effective way to create rain tabs for lineals. To install Drip-Clips, miter lineals with a power miter box/chop saw, etc. Apply Drip-Clip to the top cut lineal. Slide the vertical lineal behind the vertical edge of the clip to complete the application.
Wolverine Fit and Finish Installation Guide 3-1/2" Snap-on Lineal Application around Windows and Doors This application works only on 1"-faced J-channel. The installation of J-channel for snap-on lineals is the same procedure as installing lineal starter strip. Measure the openings and cut the J-channel 1/2" less than your measurement. Install the J-channel around the opening, centering the J-channel so that each end of the J-channel is 1/4" from the opening. Nail the J-channel every 8" to 10".
Wolverine Fit and Finish Installation Guide Measure the side casing and add 7". Use a triangle to create a 45˚ angle or measure 3-1/2" in from the edge of the part. Use snips or a miter saw to remove this portion. Flip the part over and remove the locking leg as shown. This should be done to both ends. Snap the lineal over the J-channel as shown. Use the same measurements for both sides. Corner blocks Install J-channel around the perimeter of the window opening.
Wolverine Fit and Finish Installation Guide measure window and subtract 1/2" (leaving 1/4" per side as shown) vertical pieces: place the uppermost nail in top of nail slot (still loose nailed) 1/4" 1/4" Lineal Starter Application for Windows and Door Surrounds When securing window and corner starter strips, outside corner pieces (OSCP), inside corner pieces (ISCP), one piece corners, lineals – basically, any vertically mounted siding product – always place the top nail (or staple) first, and in a manner
Wolverine Fit and Finish Installation Guide 3-1/2" Lineal Application around Windows Measure the top of the opening and add 7" (3-1/2" extra for each side) if the side lineals are also 3-1/2". Add 10" total if using 5" lineals. window or door frame remove 45° 3-1/2" Use a triangle to create a 45° angle or measure 3-1/2" in from the locking leg. NOTE: The nail flange is always the longest part of a surrounding miter. Use snips to remove the part as shown.
Wolverine Fit and Finish Installation Guide 1/2" 3-1/2" Measure the height of the window or door. Add 7" (for the 3-1/2" header and bottom lineal) and cut. NOTE: Add additional material if using 5" lineals. window or door frame 3/4" Trim a minimum of 3/4" from the top end of the side lineals.
Wolverine Fit and Finish Installation Guide Measure the bottom of the opening and add 7" (3-1/2" extra for each side) if the side lineals are also 3-1/2". Add 10" total if using 5" lineals. window frame 3-1/2" 3/4" Trim 3/4" tabs from the lineal as shown. 3/4" view of notching from back side (same on both ends) Snap the lineal in place and secure by nailing (or stapling) it through center of the nail slots.
Wolverine Fit and Finish Installation Guide Blind Miter 3/4" An alternative to a standard blind miter offers support to the corner without adding material. The measurements shown for the fold are for a 5" lineal. The same method can be used with 3-1/2" lineals, but the fold would be changed from 1-1/2" to 1-3/8".
Wolverine Fit and Finish Installation Guide 1/8" per side Corner Blocks make 1" cuts Corner Block Install starter as previously described. Measure and cut the side lineals to the exact size of the window or door opening. Cut the top and bottom lineals 1/4" longer than the window. Using vinyl snips, make two 1" long cuts in the pocket areas on both sides of each lineal. These cuts allow the lineals to connect with the corner block and help provide proper drainage.
Wolverine Fit and Finish Installation Guide 5" Square Header with Endcaps over 3-1/2" Lineals Sides and Bottoms Assemble 5" header and cap. The side 3-1/2" lineals should extend approximately 1" inside the header assembly.
Wolverine Fit and Finish Installation Guide remove 3/4" remove Creating End Caps for 5" Lineals To create the header, first cut a 7" piece of 5" lineal. Measure and trim as shown. 3/4" The resulting piece fits into the end of the 5" lineal. The ends of the 5" lineal also need trimming to receive the end caps. Create a 3/4" rain tab in the pocket area and trim off a 3/4" tab from the bottom.
Wolverine Fit and Finish Installation Guide 5" Angled Header with End Caps over 3-1/2" Lineals Sides and Bottoms Assemble the 5" header and cap. The side 3-1/2" lineals should extend approximately 1" inside the header assembly.
Wolverine Fit and Finish Installation Guide Crown Molding Treatment Options Option 1 (page 51) • Crown molding • (2) crown molding end caps • 3/4" pocket J-channel header and surround Other options are possible with the crown molding: For example, use 3-1/2" lineals vertically and at the window base along with a J-channel and crown molding header. The only requirement for using the crown molding is having receiving channels 3/4" wide.
Wolverine Fit and Finish Installation Guide Crown Molding and Cap for 3/4" Pocket J-channel cut crown molding cap in half To use crown molding with 3/4" pocket J-channels, measure the length of the completed J-channel surround and add 2-1/2" (the crown molding overlaps the J-channels by 1-1/4" per side). Insert crown molding cap into the crown molding and trace the tip shape. Trim as shown. 2" rain tab window flashing Insert 1/2 of the crown molding cap into each end of the crown molding lineal.
Wolverine Fit and Finish Installation Guide Crown Molding with Cap for 5" Header Lineal 5" lineal header Crown molding with 5" header and 3-1/2" surrounds. 1/16" - 1/8" per side Determine the header length by measuring from the outside of both side lineals and adding 1/16"-1/8" per side for overlap. To cut the crown molding, add 2-1/2" to the previously determined header length (1-1/4" added per side).
Wolverine Fit and Finish Installation Guide the crown molding requires a rain tab 2" long – cut from the pocket receiver Insert a crown molding cap into the crown molding and trace the shape. Trim as shown. apply the crown molding to the header with a bead of caulk Insert the header cap. finished assembly Cut the crown molding cap in half. Apply each half to the end of the crown molding and secure it with a bead of caulk.
Wolverine Fit and Finish Installation Guide Installing J-channel as Gable End Trim Install J-channel to receive siding at gable ends, as shown in illustration. To create a clean, professional look, follow these steps: To create an angle template, hold a piece of J-channel against the slope while transferring the angle to another J-channel with a pencil. Next, transfer angle of template to the end of a length of J-channel. Be sure to extend line onto nail flange. Cut away channel face and nail flange.
Wolverine Fit and Finish Installation Guide Using Lineals as Gable Trim You can give gable end trim a more dramatic appearance by using 3-1/2" or 5" lineals instead of J-channel. To install the lineals: Make a pattern duplicating the gable slope. To create an angle template, lock a piece of lineal into the previous course of siding or other gable starter. Hold a second piece of lineal or starter against the slope and transfer the angle with a pencil.
Wolverine Fit and Finish Installation Guide SECTION 5 – Installing Horizontal Siding factory notches Cutting Panels To cut panels to size, follow these procedures: Cross cuts For a precise cut, use a power circular saw equipped with a sharp, fine-tooth plywood blade. For best results, reverse blade direction. Cut one or two panels at a time, carefully advancing the saw through the vinyl. A rule of thumb: The lower the temperature, the slower the feed rate. Panels can also be cut with snips.
Wolverine Fit and Finish Installation Guide Preparing Wall Surfaces The key to successful vinyl siding application is proper preparation of the nailing surface. It is essential that you work over a smooth nailing surface. The more level and even the wall surface, the better the finished installation will look. The steps involved in preparation differ for new homes and old, so choose the instructions (page 21) that pertain to your project.
Wolverine Fit and Finish Installation Guide Installing remaining courses To ensure best appearance, position the laps to avoid unsightly joint patterns. The illustration at left shows a wellplanned staggering of panel joints. Follow these guidelines: Separate joints by at least two courses. Avoid joints above and below windows. Leave at least 3' separating joints on successive courses. Use short cutoff lengths for fitting at narrow openings between windows.
Wolverine Fit and Finish Installation Guide Fitting over windows and doors The procedure for cutting panels for installation over windows and doors is similar to that explained earlier. If necessary to maintain slope angle, install furring above window or door as explained on page 22. Drop panel into position, making certain it fits into undersill trim and J-channel at top and J-channels at sides. Interlock with the siding panels below.
Wolverine Fit and Finish Installation Guide STUDfinder Installation System The STUDfinder™ Installation System combines precisely engineered nail slot locations with graphics to create a siding panel that is designed to help ensure quick, accurate and secure installation. The nail slots are positioned 16" and 24" on center to allow for alignment with studs, with STUDfinder graphics centered directly under each nail slot. Locate the first stud and fasten in the center of the nail slot.
Wolverine Fit and Finish Installation Guide Installing trim at roof line To prevent water infiltration along the intersection of roof and wall, install flashing before installing J-channel. At points where vinyl siding and accessories will meet at a roof line – such as areas where a gable dormer or a second-story side wall intersect with the roof – it’s best to position the J-channel so it’s 3/4" to 1" away from the roof line.
Wolverine Fit and Finish Installation Guide Fitting under soffit When you reach the last course of siding, you will probably have to rip cut panels lengthwise to fit under soffit. NOTE: If necessary to ensure proper panel slope angle, make certain to furr out this area. To cut and install this last course: Install J-channel and undersill trim or dual undersill. distance minus 1/4" Measure from soffit to base of upper lock on previous course of panels. Subtract 1/4".
Wolverine Fit and Finish Installation Guide Completion Attaching objects to siding All external products (downspouts, shutters, and lights, for example) are attached to walls after you’ve applied the vinyl siding. NOTE: All external fixtures must be attached to a solid backing (such as 3/4" exterior grade plywood) to provide a secure mounting surface. Never attach a fixture directly to vinyl siding. When installing external products, you must allow for expansion and contraction of siding.
Wolverine Fit and Finish Installation Guide Shutter Installation (A)The ideal application (shown at the top) has a joint between the two shutters where the shutters are secured to the home. In this way, the siding panel is not “hard nailed” between the two shutters and the siding is allowed free movement. A Enlarge the hole in the siding for securing the shutter – the hole clearance should be approximately 1/8".
Wolverine Fit and Finish Installation Guide SECTION 6 – Installing Vertical Siding Preparing Wall Surfaces upper edge of topmost nailing slot For the most part, the wall preparation instructions given for horizontal siding also apply to vertical siding. The key requirement, of course, is that you start with a smooth, level and rigid substrate (plywood, wood composite, rigid foam or fiber sheathing). NOTE: Never install vinyl siding over open furring strips or studs.
Wolverine Fit and Finish Installation Guide illustration 1a illustration 1b Installing Cornerposts Install outside and inside cornerposts using dimensions and procedures described earlier. NOTE: Unlike the preparation for horizontal siding, do not install a starter strip for vertical siding. Installing Top and Bottom J-channel Apply J-channel along the top and bottom of the walls to receive the siding panels. illustration 2 Install the bottom J-channel (illustration 1a). Overlap J-channels 3/4".
Wolverine Fit and Finish Installation Guide If a wall requires more than one course of siding, you can proceed in one of three ways: vertical siding vertical siding Use two lengths of J-channel, back-to-back, at the joint between the two courses (illlustration a). Use a combination of one length of J-channel and one length of drip cap (illustration b). J-channel Use a double channel lineal and flashing where required.
Wolverine Fit and Finish Installation Guide Installing Window and Door Trim Follow the instructions described earlier under the section “Preparation for Horizontal Siding” beginning on page 21. Plan the panel layout 1/3 Correctly installed vertical siding should have a balanced appearance. This means that if you were to draw a vertical line down the center point of a wall, you’d have an equal number of panels to the right and left.
Wolverine Fit and Finish Installation Guide Installing Wall Panels Cut the first of the partial panels (if partial panels are necessary). Mark the cut line by measuring from the nail hem edge. Rip cut the panel. Do not cut off the nail hem. Use a snap lock punch to create locking tabs along the cut edge. Space the tabs 6" apart. Before installing this partial panel into the outside cornerpost, provide additional support at cut edge (to compensate for the locking channel that was trimmed off).
Wolverine Fit and Finish Installation Guide Installing Gable End Panels When installing vertical siding on a gable end wall, you should try to create a balanced appearance. There are two ways to do this: plumb line You can start from the center of the wall and work toward the sides. Begin by finding the center point of the wall (beneath the peak) and draw a plumb line. Nail two lengths of J-channel, back to back, along this line.
Wolverine Fit and Finish Installation Guide SECTION 7 – Porch Ceilings, Soffit, Fascia Requirements for Proper Soffit Ventilation Proper attic ventilation is important for any home. The 2003 International Building Code (IBC) Section 1203 Ventilation furnishes a basic guide for determining proper ventilation for any home. The information provided here may under certain circumstances not result in enough ventilation. Therefore, the calculation provided should be used as a guide only.
Wolverine Fit and Finish Installation Guide Porch Ceilings The procedures used to install a porch ceiling are in many ways similar to those used to install soffit. These procedures vary slightly, depending on whether you’re working on new construction or a remodeling project. New Construction Projects Begin by installing receiving channels on all four sides of the porch. If you are using F-channel, nail to existing walls. If you are using J-channels, you will have to install a nailing base.
Wolverine Fit and Finish Installation Guide Remodeling Projects Check to be sure the existing ceiling can serve as a solid nailing base. If the existing ceiling is solid, remove all existing moldings and fixtures from ceiling and begin by nailing inverted J-channels along the perimeter of the ceiling area. If you plan to use light blocks to attach external light fixtures, install them to adequate backing. Plan the layout of the ceiling panels to achieve an even balance or to align with adjacent work.
Wolverine Fit and Finish Installation Guide FIGURE 1 fascia cap or coil stock open truss F-channel soffit 16"-24"* FIGURE 2 open truss F-channel J-channel Soffit You can use solid vinyl panels or perforated vinyl panels for soffit installations. Perforated panels provide ventilation, which helps to reduce heat buildup in the summer and ice dams in the winter. In buildings with roof ridge vents, you should install ventilated soffit.
Wolverine Fit and Finish Installation Guide Installing Soffit fascia soffit panels Measure from the wall to the fascia board. Then subtract 1/2" to allow for expansion. Mark this dimension on a soffit panel and cross cut the panel using a power circular saw with a reversed fine-tooth blade. Cut one or two panels at a time, carefully advancing the saw through the vinyl. Insert the panel into the channel on the wall, then into the channel at the fascia board.
Wolverine Fit and Finish Installation Guide FIGURE 5 fascia cap or coil stock enclosed eave soffit nailing strip J-channel FIGURE 6 enclosed eave soffit J-channel 76 Installation over Enclosed Eaves If the existing soffit is rotted or damaged, it’s best to remove it completely before installing vinyl soffit. Then use the instructions for open eaves. If you’re installing perforated soffit panels and the existing soffit doesn’t have openings for ventilation, cut an adequate number of openings.
Wolverine Fit and Finish Installation Guide InvisiVent Soffit Installation over open eaves In most situations, InvisiVent™ Super Ventilated Soffit should be installed like our standard soffit products. However, when InvisiVent is installed over open eaves, follow these installation techniques. Install receiving channels fascia cap or coil stock open rafter F-channel There are two ways to install receiving channels for soffit.
Wolverine Fit and Finish Installation Guide Fascia undersill trim The wooden fascia board that encloses the front of an eave also needs protection from the weather. To provide this protection, you can install vinyl or aluminum fascia panels. vinyl fascia cap fascia board There are two procedures for installing vinyl fascia panels – one for installations that include soffit, one for installations without soffit.
Wolverine Fit and Finish Installation Guide For installations that include soffit 6" snap lock punch Nail undersill trim in place along the top of the fascia board. Then nail F-channel along the bottom outside surface of the fascia board (shown). The fascia panel will have to be rip cut to fit over the fascia board and F-channel. To determine the width of the panel, measure from slot in undersill trim to bottom of F-channel. Deduct 1/4" and cut (shown).
Wolverine Fit and Finish Installation Guide SECTION 8 – Installing Specific Wolverine Products D9 Rough-Split Shakes Installation Important This product is not designed for roof application. It is designed solely for installation on vertical surfaces. Panels must be installed with nails over a solid substrate with nail holding strength such as plywood, oriented strand board, or existing wood siding (minimum 7/16" thick). This product cannot be installed with staples.
Wolverine Fit and Finish Installation Guide If the brighter cell is between the numbered temperature cells, position the panel between the corresponding temperature indicator lines. Example: If the PanelThermometer reads 65, align the second panel to the 65 temperature indicator line on the first panel. If the cell between the 65 and 100 is brighter, position the panel between the 65 and 100 temperature indicator lines.
Wolverine Fit and Finish Installation Guide Second course drill 3/16" dia. hole at midpoint of remaining panel Cut 29" off of the right side of the D9 panel at indicator “B,” which is located above the nail slots, cutting straight through the panel. Drill a 3/16" hole in the center of the nail hem and nail the siding through this hole to control the direction of expansion and contraction. Another option is to nail each end of a nail slot located at the center of the panel.
Wolverine Fit and Finish Installation Guide Finishing the top course cornice receiver 1/4" cornice molding 1/4" To finish the top course of siding, attach cornice receiver to the top of the wall under the eave or soffit. Trim the top panel to within 1/4" of the cornice receiver. Using a nail slot punch, punch nail slots 1/4" from the trimmed edge, 16" apart. Nail off the top course and snap the cornice molding into the cornice receiver.
Wolverine Fit and Finish Installation Guide 30° F 65° F 100° F Restoration Shapes Half-Rounds Installation panel temperature indicator marks use these marks on installed panels for quick alignment of second course – use temperature indicators for final panel adjustments Important This product is not designed for roof application. It is designed solely for installation on vertical surfaces.
Wolverine Fit and Finish Installation Guide illustration 1a illustration 1b First course Strike a level line around the house and install Restoration Shapes Starter (see illustration 1a). An alternative method of starting Half-Rounds is to use J-channel in place of starter strip, to receive the bottom edge of the panel (see illustration 1b). To use this method, the rounded portion of the panel must be removed below the locking leg to create a continuous straight edge.
Wolverine Fit and Finish Installation Guide drill 3/16" diameter hole at midpoint of remaining panel Second course 13-1/4" Remove 13-1/4" of the left side measured from the upper panel, cutting straight through the lower panel course. (Note the small mark on the face of the panel.) Drill a 3/16" hole in the center of the nail hem and nail the siding through this hole to control the direction of expansion and contraction. NOTE: The 13-1/4" spacing provides the farthest separation of overlapping courses.
Wolverine Fit and Finish Installation Guide Installing under a window or opening window Install Restoration Shapes undersill trim. Cut the panel to fit under the window. Drill a 3/16" hole in the center of the nail hem. Using a snap lock punch, raise tab faces on the outside of the panel 1/4" from the trimmed edge, 6" apart. Lock the panel into the previous course, and center nail the siding through the 3/16" hole drilled earlier.
Wolverine Fit and Finish Installation Guide Half-Rounds in Gable Ends NOTE: The following instructions focus on a gable installation. They also are geared towards an enclosed gable, started with a J-channel. Half-Rounds can also be started with starter strip. This is an example only! gable height Installing receiving channels Frame the border area with 3/4" J-channel. Nail in place loosely. Miter joints accordingly. NOTE: You also can use 3-1/2" or 5" lineals to frame gable ends and gable base.
Wolverine Fit and Finish Installation Guide Hanging the starter course To end up with a single “round” centered at the peak of the gable, you must properly locate the first starter panel. 9-3/8" 5-1/2" Begin by marking a vertical plumb line from the peak. Then measure and mark the finished height line. In our example, using a starter course with a 5-1/2" visible height, the finished height is 9-3/8".
Wolverine Fit and Finish Installation Guide If you require an odd number of courses (i.e. five full courses plus starting course), subtract 8" from the distance from the plumb line to the left receiving pocket (remember to allow 1/4" for expansion). If you require an even number of courses (i.e. 6 full courses plus starting course), subtract 18-1/2" from the dimension. plumb line NOTE: The 8" and 18-1/2" dimensions ensure having a full centered scallop at the topmost part of the gable.
Wolverine Fit and Finish Installation Guide Installing Restoration Shapes Half-Rounds on Non-vertical Walls no more than 33' Half-Rounds must never be used as a roofing material. However, they can be used on non-vertical walls that meet the following conditions: The non-vertical wall must not be greater than 10° off the vertical (no less than an 80° angle). no less than 80° The top of the wall cannot be higher than 33' above ground level.
Wolverine Fit and Finish Installation Guide Starting Half-Rounds over Horizontal Siding cut away and discard Cut away nail flange and discard. hand punch slots Hand punch nail slots in panel face and secure panel. center nail in slot of half-rounds starter strip Secure Half-Rounds Starter after hand punching and securing siding piece. Lock Half-Rounds panels into the starter strip and secure.
Wolverine Fit and Finish Installation Guide Starting Half-Rounds with Lineals over Horizontal Siding half-rounds with lower round removed half-rounds panel is inserted into the pocket of the lineal, making sure to leave 1/4" for downward movement 5" lineal 1/4" flashing new construction starter strip dual undersill trim butt dual undersill trim upward against bottom of flashing hand-punched horizontal siding (locking area has been removed); siding panel locks into dual undersill trim 93
Wolverine Fit and Finish Installation Guide Application of Half-Rounds under Soffit The amount of trimming required of a Half-Rounds panel determines the accessory piece required to receive it. See the descriptions below.
Wolverine Fit and Finish Installation Guide Replacing a Damaged Restoration Shapes Panel with the Repair Kit (Option 1) cam clip Included in kit: cam clips, washers and pop rivets. Required tools: hammer, utility knife, chisel, pop rivet gun, and “wonder bar” or “roof snake bar”. washer pop rivet wonder bar roof snake bar Removing the damaged panel Cut a large rectangle out of the damaged panel. Cut or chisel through the sides of the panel and remove lower half.
Wolverine Fit and Finish Installation Guide Push up on the panel to unlock and then pull down to remove the damaged panel. Preparing the new panel Cut off all top locking tabs. Flip panel over and cut 1/8" off the 3 side locking tabs. Notch the side locking tab on a 45˚ angle.
Wolverine Fit and Finish Installation Guide From the back, insert a pop rivet into a nail slot above one of the locking tabs. Then place a cam clip and a washer over the pop rivet. Squeeze the pop rivet gun to set the clip. Repeat over each locking tab area. Now you are ready to install the new panel. Install 4 cam clips in nail slot locations from left to right 3, 13, 18, 28. Installing the new panel Slide the left side of the new panel into the side locking tabs.
Wolverine Fit and Finish Installation Guide Using your Wonder Bar or roof snake bar, drive the nails in by placing the bar on the nail head and hitting the bar with a hammer. While applying pressure to the top panel, pull down on the cam cords. Make sure each cam clip engages the lip of the panel above it. Keep pulling down on the cam cords until they break off.
Wolverine Fit and Finish Installation Guide Replacing a Damaged Restoration Shapes Panel (Option 2) Required tools: hammer, wood chisel and hacksaw or utility knife. Use a wood chisel to remove the lock tabs on the top side of the damaged panel. Lock tabs can be located by using the chisel to slightly lift the panel locked into the upper portion of the damaged panel.
Wolverine Fit and Finish Installation Guide Random Hand-Split Shakes Overview The installation of Random Hand-Split Shake is unique in that the lap joint is hidden in the ribs between the shake patterns. Positioning the laps in the rib area requires that special installation procedures be followed to maintain product performance and aesthetics. Factory Laps: All lap joints are cut at a predetermined point on the panel during the manufacturing process. All laps must be factory cut.
Wolverine Fit and Finish Installation Guide alignment mark Install the next panel to the left of the installed panel. Lap this panel over the installed panel, positioning the right edge of the panel to a vertical “alignment mark” located in the factory notch area (approximately 1" from the left, top edge) of the installed panel. Fasten the panel according to the procedure described earlier. Continue the first course of siding. Start the next course of siding from the right side, repeating the steps above.
Wolverine Fit and Finish Installation Guide Install the next panel to the left of the installed panel. Lap this panel over the installed panel, positioning the right edge of the panel to the vertical “alignment mark” located in the factory notch area (approximately 1" from the left, top edge) of the installed panel. Fasten the panel according the procedure described earlier and continue the first course of siding. Start the next course of siding from the right side, repeating the steps above.
Wolverine Fit and Finish Installation Guide Installing Millennium® Siding Millennium siding, which features the NailTight™ Flexible Hem, attaches tight to the wall and floats from PermaFlex™ suspension cables. The flexible nail hem is woven of tough synthetic fibers. It has red and black threads that form the “strike zone,” the maximum performance target for fastening panels to the wall. Storing Panels Millennium panels can be stored like vinyl siding.
Wolverine Fit and Finish Installation Guide Fastening Millennium siding is different from other vinyl siding in that it is OK to drive the fastener up tight against the flexible hem. The PermaFlex cable system transmits the load to the panel and allows the panel to expand and contract with changes in temperature. strike zone limits Fastener Location Colored strands along the solid band of the flexible nail hem identify the fastener target zone.
Wolverine Fit and Finish Installation Guide Non-Horizontal Applications If installing these panels at 45° or less, hand punch a nail slot in the vinyl or drill a clearance hole just above the lock hoop area in the middle of the panel. You will “hang” the panel from the center pin, so hand nail the center pin as you would a typical vinyl siding panel. Then fasten the flexible hem. For Starburst installation, see pages 109-111.
Wolverine Fit and Finish Installation Guide Installing TrueComfort TrueComfort™ insulated siding will help even out wall surfaces. However, to minimize extremes in the peaks and valleys of uneven walls, you may have to repair the underlayment. Make sure the substrate is smooth and flat. If the surface is significantly uneven, apply 1/4" foam sheathing before installing TrueComfort siding. Starter strips 3" Insulated siding is thicker than hollow vinyl siding.
Wolverine Fit and Finish Installation Guide dual All other accessories should be fitted with foam shims and fillers. These shims will ensure that the accessories are on the same plane as the panels. To fit panels into inside corners, remove 1-1/4" of additional foam from the ends of factory-cut panels. Remove 2" of foam from the ends of field-cut panels.
Wolverine Fit and Finish Installation Guide SECTION 9 – Special Situations Trimming Curved Openings Flexible J-channel simplifies installations around curved objects such as half and full round windows. To install around the top of an arched window, follow these simple steps: Measure the circumference of the arch, then add 1-1/2" to allow for overlap of the bottom J-channel. Place the channel along one side of the window, leaving a 3/4" section below the bottom edge of the window sill (shown).
Wolverine Fit and Finish Installation Guide Frieze Board A frieze-board appearance can be created using the 3-1/2" lineals in combination with new construction window starter or J-channel used as a starter. 1" Materials needed: 3-1/2" or 5" lineals, new construction window starter or J-channel. Position short leg of new construction window starter against the soffit or overhang and nail in place.
Wolverine Fit and Finish Installation Guide J-channel Materials needed: J-channel, starter strip, coil stock and siding. When choosing a siding panel, remember that wider panels install more quickly than narrow panels. In addition, panels with decorative profiles – for example, dutchlap – are impractical for sunburst applications. For best appearance and easiest installation, choose from single exposure or larger face double exposure panels.
Wolverine Fit and Finish Installation Guide Repeat until both sides of the sunburst are completed. NOTE: To install the final panels at the top of the sunburst, bow the panels slightly and slip them under the gable end J-channel. For added protection against high wind, you may have to face nail these panels. Form a sleeve from aluminum coil stock and cover the center J-channels. Secure with pop rivets. Cut an arched section from coil stock to form the “sun” portion of the sunburst.
Wolverine Fit and Finish Installation Guide SECTION 10 – Repair Replacing a Damaged Siding Panel To remove a damaged panel, insert the hook end of a zip tool into the lock between the damaged panel and the panel above. Pull downward. This will allow access to the damaged panel’s nail flange. Remove the nails securing the panel. NOTE: The nails may be allowed to stay in the wall if they are driven flush with the substrate after the damaged panel is removed.
Wolverine Fit and Finish Installation Guide Repairing Buckled Siding at the Joist Vinyl siding sometimes becomes buckled between the first and second floors of a newly built siding installation due to settling and shrinkage of wet lumber and some framing practices. Using “engineered” lumber for the joist greatly reduces the chances of shrinkage and settling and can help prevent buckling of siding.
Wolverine Fit and Finish Installation Guide SECTION 11 – Miscellaneous Cleaning Vinyl Siding Vinyl siding resists most common household stains, but it will become dirty like any product exposed to atmospheric conditions. In areas not exposed to direct sun and rain, periodic washing with a soft bristle brush and clean water from a garden hose may be necessary to remove surface dirt. Chalk may also accumulate on the surface. This is a normal condition for pigmented materials exposed to the elements.
Wolverine Fit and Finish Installation Guide Siding over Asbestos Vinyl siding retrofit over asbestos This is a recommendation from the Vinyl Siding Institute after discussions with Federal EPA officials. Because local regulations supersede federal regulations, local EPA officials should be contacted in the area where the work is being done. The most desirable practice is not to disturb the existing siding on the home.
Wolverine Fit and Finish Installation Guide Exercise every care to retain architectural details wherever possible. Do not remove, cover or add details until you have the building owner’s written approval. Determine that the owner has consulted the local historic society regarding the foregoing. Use siding which closely approximates the appearance of the original siding in color, size and style.