
Installation Guide


R
DG
E
R
WOO
DBRIDGE
R
DG
E
R
WOODBRIDGE
R
DG
E
R
WOODBRIDGE
2
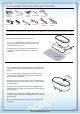
TOOLS REQUIRED FOR INSTALLATION (NOT INCLUDED)
OTHER TOOLS MAY BE REQUIRED
So Cloth
or Blanket
Silicone Tape
Measure
Pencil/Marker
Hammer
Safety Glass LevelKnife Caulk Gun
Adjustable
Wrench
Channel
Lock Pliers
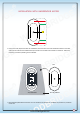
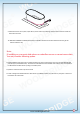
Inspect the bathtub for any damages. If any damage is found please contact your retailer.
SOFT BLANKET
Carefully, remove the tub from it’s crate/box.
Important Note: Bathtub must be carried by a minimum
of 2 adult people in upside down posion only. Do not
carry the bathtub by its panel.
To avoid scratches or damages to the bathtub be sure
to set it on cardboard with so blanket on top of the
cardboard.
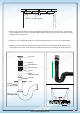
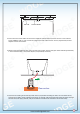
Set your bathtub on two 4x4 pieces of lumber so you can have
access from the boom of the bathtub. Put a tray beneath the
bathtub.
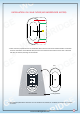
Very Important! Before proceeding with installaon, please
check that push pop-up, drain, and integrated overflow are
properly sealed and ghtened.
Push the pop-up into a close posion and fill the bathtub with
cold water above the overflow level to test for overflow leakage
and drain leakage.
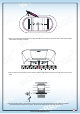
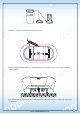
Check for any leaks around the drain and pipe. (NOTE: Due to
surface tension, it is normal for a small amount of water to pool
around the drain)
If a leakage occurs please disassemble the drain line or overflow
assemblies and you can apply a plumbing puy/silicone caulk to
fix the leakage.
Once the leakage test was performed you may proceed to the
installaon.
www.woodbridgebath.com