MOUNTAIN VALLEY SCENERY KIT S928 INSTRUCTION BOOKLET
TABLE OF CONTENTS THE MOUNTAIN VALLEY SCENERY KIT 4 THE MOUNTAIN VALLEY SCENERY KIT CONTENTS 5 LAYOUT OVERVIEW 6 BEGIN YOUR LAYOUT PRIME THE BASE 8 I. INSTALL RAILS AND ROADS 8 1. Lay Roadbed and Track: ...............................................................................8 2. Plan and Lay Streets and Roads: ...............................................................10 3. Ballast the Track: .........................................................................................
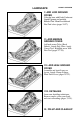
IX. FIX UP, CLEAN UP, START UP TIME 35 1. Paint the Edges: ...........................................................................................35 2. Remove Masks: ............................................................................................35 3. Clean Track: ..................................................................................................
THE MOUNTAIN VALLEY SCENERY KIT MOUNTAIN VALLEY, U.S.A. - WHERE TRAIN SETS BECOME MODEL RAILROADS. We feel confident you will be happy with the layout you are about to build. This kit includes the patterns, materials and instructions you need to add terrain and landscaping to a 4' x 8' layout or any configuration totaling about 32 square feet. In the process of constructing your layout, you will learn about Woodland Scenics SubTerrain, Terrain and Landscape Systems.
LAYOUT OVERVIEW TERRAIN I. INSTALL RAILS AND ROADS Lay and install your roadbed and track. Plan and lay streets and roads, then ballast the track (pages 8-11). II. CONSTRUCT TERRAIN SUBSTRUCTURE Trace and cut out terrain profiles. Attach mountain profiles, tunnel, and tunnel access supports to base. Attach tunnel entrances to tunnel (pages 12-16). III. BUILD MOUNTAIN SHAPES Use newspaper wads to build the mountain shapes (pages 16-19) and Plaster Cloth for a hardshell terrain. IV.
LANDSCAPE LAYOUT OVERVIEW V. ADD LOW GROUND COVER Color the base with Earth Undercoat Liquid Pigment and sprinkle Blended Turf. Blend in additional Fine Turf colors (pages 24-27). VI. ADD MEDIUM GROUND COVER Add and secure Talus (Rock Debris). Attach Poly Fiber. Apply Coarse Turf. Highlight areas with Fine Turf (pages 27-29). VII. ADD HIGH GROUND COVER Assemble and install trees on layout. Attach Clump-Foliage. Plant Field Grass (pages 29-32). VIII. DETAILING Learn new detailing techniques.
BEGIN YOUR LAYOUT Model railroads are generally built to scale which means everything on the layout is built to a specific ratio to what it is in the real world. In model railroading there are a number of common scales; HO scale is the most commonly modeled. HO scale is 1:87 which means an inch on the model represents 87 inches in the real world. The track plan and layout pictured on the box and featured in this kit are in HO scale.
Foam Sheets. Risers and Inclines raise your roadbed off the base, and provide for low-lying areas, hills and mountains. The foam components are lightweight and you can create any terrain you wish. The roadbed we recommend is Woodland Scenics Track-Bed, which costs less, has a quieter, smoother operation and is compatible with cork. Track-Bed comes in strips, sheets and 24-foot continuous rolls for an easy and almost seamless application.
2. PLAN AND LAY STREETS AND ROADS: A. Any buildings you plan to add later will need access by road and/or by rail. Streets and roads for those buildings may be indicated now or may be added later. If you plan to add them later, skip to D. If you wish to indicate where streets and roads will go at this time, see Fig. 2 for an example of road and building placement. This drawing of roads and buildings represents the layout shown in the color photo on the front of this box.
FIG. 3A SPREAD & SMOOTH OUT BALLAST FIG. 3B SECURE BALLAST WITH SCENIC CEMENT 3. BALLAST THE TRACK: A. Cut off one corner of the bag of Ballast and pour Ballast down the center of the track and edges to cover roadbed. Use a dry paintbrush to spread and smooth out the Ballast (Fig. 3A). The entire roadbed should be covered but all of the rails and the tops of the ties should be free of Ballast.
TERRAIN Terrain can be defined as the earth contours or physical features of a tract of land. Terrain can include rolling hills and broad valleys, mountains and narrow canyons, flat plateaus and undulating prairies. The techniques you learn with this kit can be applied to any layout or model. II. CONSTRUCT TERRAIN SUBSTRUCTURE Before beginning this section, lay out pattern sheets 1 and 2. This will make steps 1-4 easy to understand. Read through all instructions in this section before beginning.
model will not be strong enough. Use a pencil or pen to trace around all pattern pieces. D. Use a utility knife or scissors to cut out (on the solid lines) mountain profiles (A-D) made of corrugated cardboard. Lightly score but do not cut all the way through on the dotted lines. If you have cut profile C in two pieces, butt the two pieces together as indicated on pattern pieces and tape on both sides.
GLUE PROFILES IN PLACE FIG. 5 Trim FIG. 5B Gusset FIG. 5A Scored edge to outside GLUE GUSSETS IN PLACE Glue tab C Gusset Pattern H Trim Glue tabs D Side edge of base Masking Tape Mask roads with tape & paper Rear edge of base Gusset Pattern H B A Front edge of base Outside of profile Side edge of base TUNNEL FOLDED AND READY TO PLACE ON LAYOUT FIG. 6A FIG. 6B Outside edge Cuts Gusset (30 total) Scores FIG.
FIG. 8 TUNNEL FOLDED AND PLACED ON LAYOUT 2" from center of track D C Pattern E B A Outside of profile 3. ATTACH TUNNEL AND ACCESS SUPPORT TO BASE: A. Cuts and scores in the corrugated cardboard tunnel (E) will allow you to bend the tunnel into a curved shape (Fig. 6A). B. Place the tunnel in the location indicated in Fig. 7 and 8, making sure that the front edge of the profile material (D) and tunnel (E) line up.
4. ATTACH TUNNEL ENTRANCES: A. Use Scenic Glue or white glue to attach tunnel entrances (G) to ends of tunnel. (Fig. 10.) Be sure each side of an entrance is an equal distance from center of track. B. Roll a piece of rolling stock through the tunnel again to be sure of clearance before proceeding. If it does not clear, adjust as necessary. C. Cover track and roadbed with masking tape to protect them during the next steps. FIG.
This pillow shape wad is the easiest to stack up to create hills and mountains. B. Use masking tape to hold newspaper wads as you form the contours. NOTE: You may want to cut a number of 8" strips of masking tape before this step. C. Check the track for sufficient clearance for the engine and rolling stock you intend to use on your layout. If you have too many newspaper wads, remove some or push them in a little and retape to compact them.
2. PLASTER CLOTH: Next, a hard terrain shell made from Plaster Cloth is applied on top of the newspaper wads. You will cover all of the mountains surfaces, including the corrugated cardboard tunnel entrances, with strips of Plaster Cloth. Plan to work in a systematic way from one side of layout to the other and from rear of layout to the front. PRODUCT TIP: Plaster Cloth is a quick and simple way to create a durable terrain shell.
C. Continue adding 1' to 2' long Plaster Cloth pieces in the same manner, working from one side of the layout to the other side. Each rear, front or side edge of Plaster Cloth that meets the profile or the base should be pressed down firmly. D. Be sure to cover the entire face of corrugated cardboard tunnel entrances with Plaster Cloth strips so they will look like the rest of the mountain when painted.
IV. MAKE & INSTALL ROCK CASTINGS Read through all instructions in this section before beginning. In this section, you will prepare the mold, make rock castings, install them on your layout and color them. This will complete the terrain instructions in this booklet. Contents of Lightweight Hydrocal bag may have settled. Turn bag upside down and gently shake for 30 seconds to mix before using.
WARNING: Do not wash plaster down drains as it will collect in low places in pipes and clog the sewer lines. Suggestion: Use a bucket of water to wash equipment and dispose of waste water outside. D. Release rock castings by carefully turning mold inside out. Break off any “lip” - the extra plaster formed outside of the mold cavity. Wash mold after each use to remove any plaster that has stuck to it.
FIG. 17 FILL IN GAPS WITH LIGHTWEIGHT HYDROCAL MIXTURE D. Add 5 level tablespoons of Lightweight Hydrocal to 2 tablespoons of water and mix well with a craft stick. This should be enough to install three rocks. NOTE: Both the rock castings and the Plaster Cloth terrain shell must be wet for the Lightweight Hydrocal to be effective as an adhesive. E. Briefly soak three rock castings in water. Wet the Plaster Cloth terrain base with water where the casting are to be attached (use a sponge or spray bottle).
C. These washes will be used to create a random leopard spot pattern. Re-stir each wash before each use because pigment will settle to bottom of wash. Dip the foam pad applicator in the Yellow Ocher wash. Dab random spots of Yellow Ocher wash on about 1/3 of each rock casting (Fig. 18). Rinse the foam pad applicator in water and squeeze excess water out. Dip the foam pad in the Burnt Umber wash and dab random spots of Burnt Umber wash on a different 1/3 of each rock casting.
LANDSCAPE After the terrain has been created on the layout, the next step is to add landscaping. This process will add color, texture, and realism to the layout as you model various types of vegetation. We will be using a transparent wash and irregular application of various turf and other products in this section. There is no specific order in which many of the landscape materials must be added to a model or layout.
FIG. 19 LAYOUT IS DIVIDED INTO AREAS APPROXIMATELY 2' X 2' FOR APPLICATION OF TURF, DO NOT WASTE TURF ON ROAD AND TRACK AREAS MASKED OFF. 2' 2' 2' FIG. 20 2' 2' 2' SPRINKLE GREEN BLENDED TURF ON WET EARTH UNDERCOAT PIGMENT WASH E. Next, mix 2 fl. oz. Earth Undercoat Earth Colors Liquid Pigment with 4 fl. oz. water (1:2 ratio). F. Fill half of the furnished 4 oz. cup with Green Blend Blended Turf. G.
of one-half of the furnished cup (2 ounces by volume) of Green Blend Blended Turf per each 2' x 2' mountainous area. (Do not use more than this amount per each 2' x 2' area.) A sparse application of Green Blend Blended Turf with quite a bit of Undercoat Pigment wash showing through is natural looking in these areas. Cover all Plaster Cloth areas with the Undercoat Pigment wash so that no white shows through.
accent colors more sparingly than the basic Green Blend Blended Turf and blend them into each other so you do not have severe splotches of color. If you feel you have added too much of one color, just oversprinkle another color in a salt and pepper fashion. B. Sprinkle some of the leftover Turf colors in a similar manner on the flat part of the layout, following the method previously described. Save remaining Turf colors for use in the section “FINISHING TOUCHES”. C.
FIG. 23A FIG. 23B SPRINKLE TALUS (ROCK DEBRIS) BELOW AND AROUND ROCK OUTCROPPINGS SECURE TALUS (ROCK DEBRIS) WITH SCENIC GLUE OR WHITE GLUE MIXTURE A. Cut off one corner of the bag of Talus and use it as a shaker to sprinkle the Talus (Fig. 23A). Be sure to add Talus below and around the rock outcroppings and cliffs, in erosion ruts and ravines. B. Mix equal parts of Scenic Glue or white glue and water and a drop or two of liquid detergent to make glue flow.
FIG. 24A STRETCH POLY FIBER TO THIN LACY SHEET FIG. 25 FIG. 24B SECURE POLY FIBER WITH SCENIC CEMENT SUGGESTED PLACEMENT OF COARSE TURF Legend Coarse Turf B. The Medium Green Coarse Turf provides texture variations and can indicate weeds, coarse grass, and small plants. See Fig. 25 for suggested placement. Using Scenic Cement, lightly spray area where you will place Coarse Turf. Sprinkle on the Coarse Turf and pat lightly to adhere.
FIG. 26C FIG. 26A FIG. 26B TWIST STEM INTO 3-D SHAPE TWIST & BEND BRANCHES INTO 3-D SHAPE APPLY HOB-E-TAC FIG. 26D DIP IN CLUMP-FOLIAGE VII. ADD HIGH GROUND COVER Read through all instructions in this section before beginning. High ground cover includes bushes, shrubs, tall grass and trees. When you have completed this section, you will be ready to add some finishing touches to your layout. 1. ASSEMBLE AND INSTALL TREES: A. Remove the temporary bases from the Tree Armatures.
C. With the point of a hobby or utility knife, make a small hole in the Plaster Cloth where you want to plant a tree (Fig. 27). See Fig. 28 for suggestions for placement of trees. To plant trees on a plywood or other hardboard base, drill a 1/8" hole in the base. Remove a tree from the temporary base, apply a dab of Hob-e-Tac Adhesive or Scenic Glue to the end of tree pin and plant the tree in the hole (Fig. 27). Repeat with the other trees.
FIG. 30A ROLL FIELD GRASS TO UNEVEN LENGTH FIG. 30B CUT ONE END EVENLY FIG. 30C DIP INTO HOB-E-TAC FIG. 30D PLANT FIELD GRASS 3. FIELD GRASS: A. Remove the Field Grass from the package. Separate a small clump from the batch. Roll a small clump between your thumb and index finger to produce uneven lengths (Fig. 30A). Cut the other end of the clump evenly with scissors to an appropriate length (Fig. 30B). Remember that 1" equals 87" in HO scale, so 3/8" to 3/4" is an appropriate length. B.
FINISHING TOUCHES A model or layout is never truly done because there are always additions or changes you will want to make. It’s fun and challenging. Detailing and finishing touches are the extra steps which provide additional realism and interest to a model. Many of these detailing finishing touches use the same products which have been used earlier, perhaps with a slightly different technique. Allow the layout to dry completely from all previous steps before beginning the detailing. VIII.
FIG. 31 FLYSPECK TURF ONTO SIDE OF ROCKS 4. FLYSPECKING WITH TURF: A. Dirt and soil collects in may areas, including on rock faces. Dirt and soil on rock faces may be indicated with a technique called flyspecking. B. Mist the rock castings with Scenic Cement. Bend a sheet of paper into an “L” or “J” shape. Place a small amount of Soil Turf on the horizontal section of the paper. Hold the paper near the surface to be flyspecked and gently puff air on the vertical section of the paper (Fig. 31).
IX. FIX UP AND CLEAN UP Read through all instructions in this section before beginning. You’re almost there! These last few steps are just good craftsmanship and will not take long. If you have any Scenic Cement left, overspray all landscaping. This will make everything on the layout more permanent. 1. PAINT THE EDGES: If desired, paint the outside of the mountain profiles and edge of the base by spraying or rolling on paint. You may use any color you desire.
A FINAL WORD Now that you have added terrain and landscaping to your layout, you probably will want to add some other features. The enclosed Buyer’s Guide includes all the Woodland Scenics’ products that are available for use on your layout. Look for them at your local hobby shop. Woodland Scenics products you may want to consider adding to your layout: 1. Add SubTerrain Risers, Inclines, Foam Sheets and Profile Boards. 2.
GLOSSARY Ballast: gravel or broken stone graded for size, laid in a railroad bed to give strength and stability to ties and rail, and allow for easy drainage of water. Benchwork: the structure underneath a model railroad that holds it up. Blending: to combine at least two shades of something so that there is a color or size gradation but no exact border between the areas can be distinguished. Styrofoam: a lightweight foam material commonly used for model contouring.
Roadbed: the area directly beneath the ties and rail of a railroad track. Road System: a system created by Woodland Scenics which allows you to add paved areas to any layout. Uses Paving Tape, Smooth-It and Top Coats. Rolling stock: includes all of the freight and passenger cars used by a railroad, See piece of rolling rock. Salt and pepper: a method of applying accent colors of Turf in a fine sprinkle. Begin with as little as possible and add as much as desired.
PRODUCT NUMBER AND DESCRIPTION We hope you have enjoyed using the Woodland Scenics materials included in this kit. The following list gives you the Woodland Scenics product number for the terrain and landscape products in the kit.
TRACK REQUIREMENTS The following is a list of all the track sizes you will need to complete our layout. We recommend sectional track for this layout. NOTE: Any or all of the miscellaneous items may be optional, depending on the type of track. The track plan shows the proper placement for each section of track. If you are installing a section of track and find that it does not fit, you may be using the wrong section. ITEM NUMBER OF PIECES SECTIONAL TRACK 6" Straight Track ..............3 9" Straight Track ..