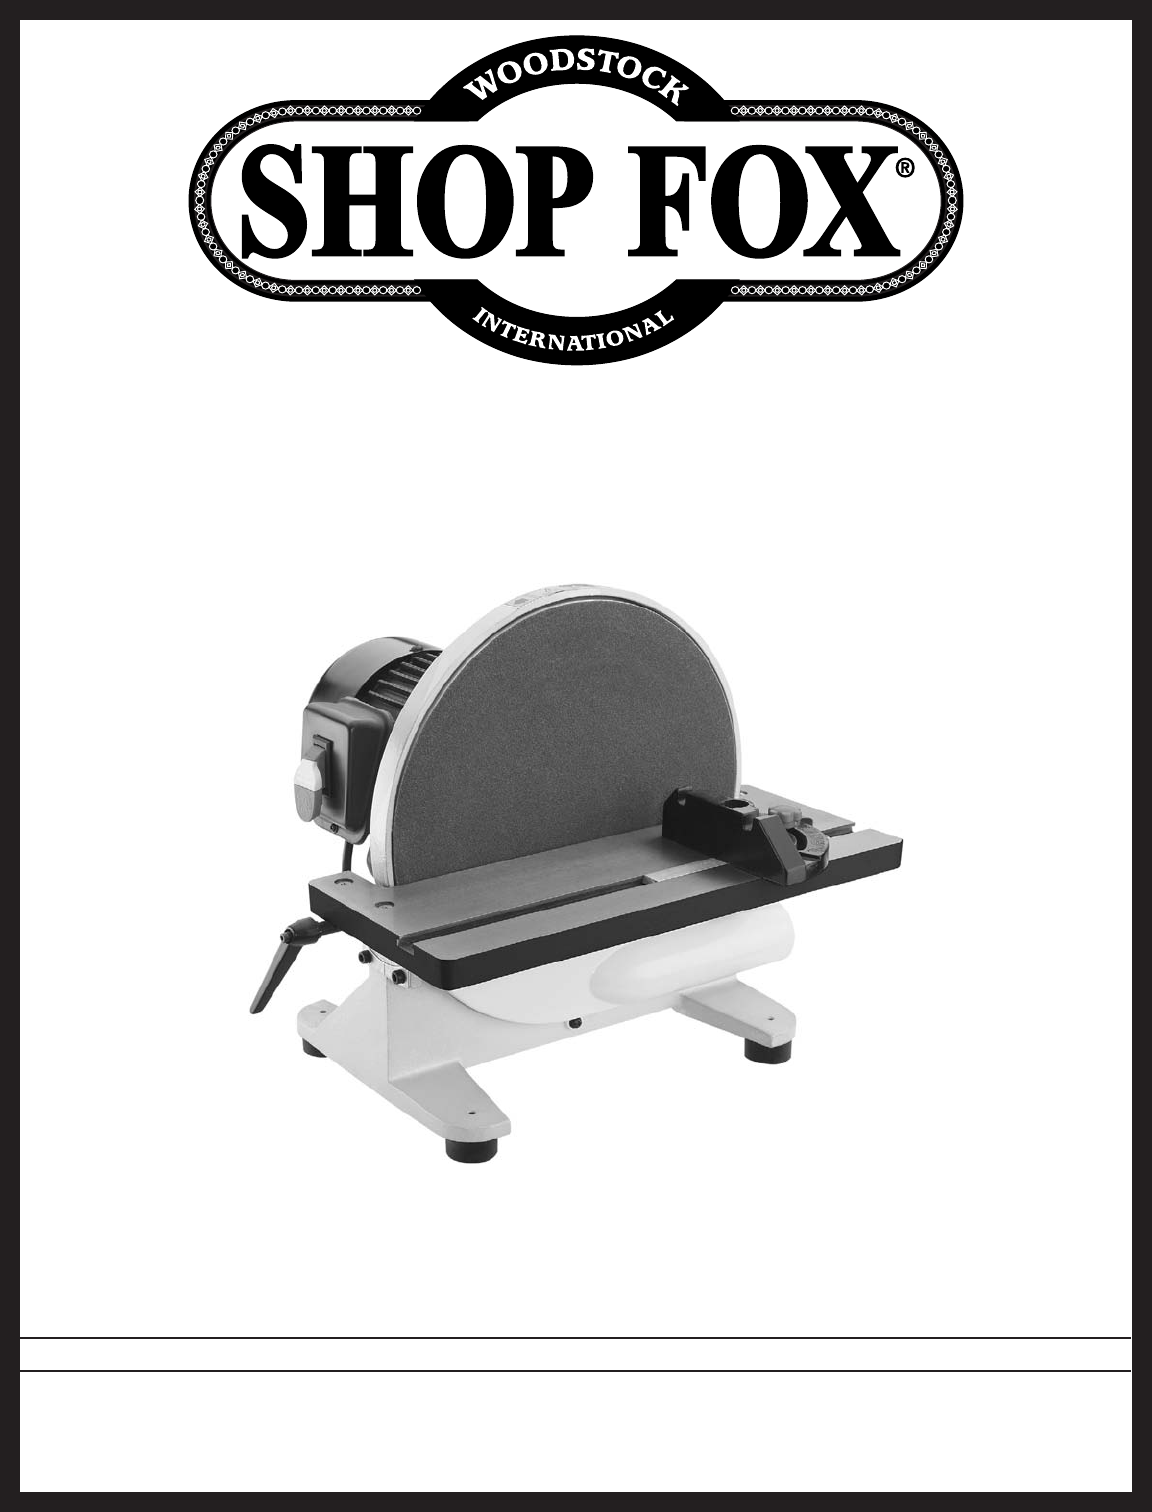
MODEL W1828 12" DISC SANDER OWNER'S MANUAL (FOR MODELS MANUFACTURED SINCE 4/11) Phone: (360) 734-3482 • Online Technical Support: tech-support@shopfox.biz COPYRIGHT © MAY, 2011 BY WOODSTOCK INTERNATIONAL, INC. WARNING: NO PORTION OF THIS MANUAL MAY BE REPRODUCED IN ANY SHAPE OR FORM WITHOUT THE WRITTEN APPROVAL OF WOODSTOCK INTERNATIONAL, INC.
This manual provides critical safety instructions on the proper setup, operation, maintenance, and service of this machine/tool. Save this document, refer to it often, and use it to instruct other operators. Failure to read, understand and follow the instructions in this manual may result in fire or serious personal injury—including amputation, electrocution, or death. The owner of this machine/tool is solely responsible for its safe use.
ELECTRICAL..........................................9 SERVICE............................................. 23 General........................................... 23 Table/Disc Parallelism.......................... 23 Miter Gauge Calibration........................ 24 Table Tilt Calibration........................... 24 Troubleshooting.................................. 25 Electrical Safety Instructions.................. 27 Wiring Diagram.................................. 28 PARTS.............................
INTRODUCTION Model W1828 (For Machines Mfg. Since 4/11) INTRODUCTION Woodstock Technical Support This machine has been specially designed to provide many years of trouble-free service. Close attention to detail, ruggedly built parts and a rigid quality control program assure safe and reliable operation. Woodstock International, Inc. is committed to customer satisfaction. Our intent with this manual is to include the basic information for safety, setup, operation, maintenance, and service of this product.
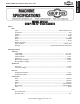
INTRODUCTION Model W1828 (For Machines Mfg. Since 4/11) MODEL W1828 SHOP FOX 12" DISC SANDER Motors Main Type..................................................................................... TEFC Capacitor Start Horsepower................................................................................................. 1 HP Voltage...................................................................................................... 110V Phase...........................................................
INTRODUCTION Model W1828 (For Machines Mfg. Since 4/11) Product Dimensions Weight........................................................................................................... 68 lbs. Width (side-to-side) x Depth (front-to-back) x Height.............................. 18 x 17-3/8 x 14-1/2 in. Footprint (Length x Width).............................................................................. 13 x 10 in. Shipping Dimensions Type................................................................
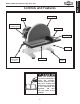
INTRODUCTION Model W1828 (For Machines Mfg. Since 4/11) Controls and Features Sanding Disc Motor ON/OFF Switch w/Disabling Key Work Table Miter Gauge Dust Port Table Tilt Lock Handle (1 of 2) Work Table Figure 1. Model W1828 controls and features. READ and understand this entire manual before using this machine. Serious personal injury may occur if safety and operational information is not understood and followed.
Model W1828 (For Machines Mfg. Since 4/11) SAFETY SAFETY For Your Own Safety, Read Manual Before Operating Machine The purpose of safety symbols is to attract your attention to possible hazardous conditions. This manual uses a series of symbols and signal words intended to convey the level of importance of the safety messages. The progression of symbols is described below.
Model W1828 (For Machines Mfg. Since 4/11) STABLE MACHINE. Unexpected movement during operations greatly increases the risk of injury and loss of control. Verify machines are stable/secure and mobile bases (if used) are locked before starting. FORCING MACHINERY. Do not force machine. It will do the job safer and better at the rate for which it was designed. ONLY USE AS INTENDED. Only use machine for its intended purpose.
Model W1828 (For Machines Mfg. Since 4/11) SAFETY Additional Safety for Disc Sanders DISC DIRECTION. Only sand on the downwardmoving left side of the sanding disc. Sanding on the upward-moving right side of the sanding disc forces the operator to rely only on hands (rather than the table) for support, which increases the risk of workpiece "kickout" and impact/abrasion injuries. WORKPIECE INSPECTION.
Model W1828 (For Machines Mfg. Since 4/11) ELECTRICAL Availability Full-Load Current Rating The full-load current rating is the amperage a machine draws at 100% of the rated output power. On machines with multiple motors, this is the amperage drawn by the largest motor or sum of all motors and electrical devices that might operate at one time during normal operations. Electrocution, fire, or equipment damage may occur if machine is not correctly grounded and connected to the power supply.
Model W1828 (For Machines Mfg. Since 4/11) Grounding & Plug Requirements This machine MUST be grounded. In the event of certain malfunctions or breakdowns, grounding reduces the risk of electric shock by providing a path of least resistance for electric current. ELECTRICAL This machine is equipped with a power cord that has an equipment-grounding wire and a grounding plug (similar to the figure on the right).
Model W1828 (For Machines Mfg. Since 4/11) SETUP Needed for Setup The following are needed to complete the setup process, but are not included with your machine. Description Qty • Safety Glasses...............................................1 • Cleaner/Degreaser............................. As Needed • Disposable Shop Rags.......................... As Needed • Dust Collection System....................................1 • Dust Hose 2" ................................................1 • Dust Hose Clamp 2"...
Model W1828 (For Machines Mfg. Since 4/11) SETUP Machine Placement • Workbench Load: This machine distributes a heavy load in a small footprint. Some workbenches may require additional bracing to support both machine and workpiece. • Working Clearances: Consider existing and anticipated needs, size of material to be processed through the machine, and space for auxiliary stands, work tables or other machinery when establishing a location for your sander (see Figure 4).
Model W1828 (For Machines Mfg. Since 4/11) Bench Mounting We strongly recommend that you mount your sander to a workbench to prevent it from moving during operation. Before doing so, remove the included feet. An unexpected movement could result in an injury or property damage.
Model W1828 (For Machines Mfg. Since 4/11) Power Connection After you have completed all previous setup instructions and circuit requirements, the machine is ready to be connected to the power supply. To avoid unexpected startups or property damage, use the following steps whenever connecting or disconnecting the machine. Connecting Power 1. Turn the machine power switch OFF. 2. Insert the power cord plug into a matching power supply receptacle. The machine is now connected to the power source.
Model W1828 (For Machines Mfg. Since 4/11) Test Run Test run your machine to make sure it runs properly and is ready for regular operation. The test run consists of verifying the following: 1) The motor powers up and runs correctly, and 2) the safety disabling mechanism on the switch works correctly. If, during the test run, you cannot easily locate the source of an unusual noise or vibration, stop using the machine immediately, then review Troubleshooting on Page 25.
Model W1828 (For Machines Mfg. Since 4/11) OPERATIONS General This machine will perform many types of operations that are beyond the scope of this manual. Many of these operations can be dangerous or deadly if performed incorrectly. The instructions in this section are written with the understanding that the operator has the necessary knowledge and skills to operate this machine.
Model W1828 (For Machines Mfg. Since 4/11) Disabling ON/OFF Switch The ON/OFF switch can be disabled by removing the switch disabling key, as shown in Figure 12. Disabling the switch in this manner can prevent unauthorized operation of the machine, which is especially important if the machine is not stored inside an access-restricted building. IMPORTANT: Disabling the switch by removing the key only restricts its function.
Model W1828 (For Machines Mfg. Since 4/11) Choosing Sandpaper Stock Inspection and Requirements The Model W1828 uses a 12" adhesive-backed sanding disc. Some workpieces are not safe or may require modification before they are safe to sand. Before sanding, inspect all workpieces for the following: There are many types of sanding discs to choose from. We recommend aluminum oxide for general workshop environments.
Model W1828 (For Machines Mfg. Since 4/11) Attaching Sandpaper The Model W1828 sander uses 12" diameter pressure sensitive adhesive-backed (PSA) sanding discs. These are available in a variety of grits. The sandpaper can be replaced without removing the table. To attach the sandpaper disc, do these steps: 1. DISCONNECT MACHINE FROM POWER! 2. Peel-off the old sandpaper, and clean the disc surface with mineral spirits, and wipe dry. 3.
Model W1828 (For Machines Mfg. Since 4/11) Disc Sanding Always keep the workpiece on the side of the wheel that is rotating down toward the table. This will keep the workpiece from flying out of your hands from the rotational forces. OPERATIONS To use the sanding disc, do these steps: 1. DISCONNECT SANDER FROM POWER! 2. Set the angle of the table and miter gauge for your operation. Make sure the table is about 1⁄16" away from the sanding disc. 3.
Model W1828 (For Machines Mfg. Since 4/11) ACCESSORIES Disc Sander Accessories The following Disc Sander accessories may be available through your local Woodstock International Inc. Dealer. If you do not have a dealer in your area, these products are also available through online dealers. Please call or e-mail Woodstock International Inc. Customer Service to get a current listing of dealers at: 1-800-840-8420 or at sales@woodstockint.com.
Model W1828 (For Machines Mfg. Since 4/11) MAINTENANCE General Regular periodic maintenance on your machine will ensure its optimum performance. Make a habit of inspecting your machine each time you use it. Check for the following conditions and repair or replace when necessary: • • • • • Loose mounting bolts. Worn switch. Worn or damaged cords and plugs. Worn or damaged sandpaper disc. Any other condition that could hamper the safe operation of this machine.
Model W1828 (For Machines Mfg. Since 4/11) SERVICE General This section covers the most common service adjustments or procedures that may need to be made during the life of your machine. If you require additional machine service not included in this section, please contact Woodstock International Technical Support at (360) 734-3482 or send e-mail to: tech-support@shopfox.biz.
Model W1828 (For Machines Mfg. Since 4/11) Miter Gauge Calibration The miter gauge should be perpendicular to the face of the disc when it is set at 90° and mounted in the table slot. If not, follow this procedure. Tools Needed Qty Try Square or Machinist's Square..............................1 Phillips Screwdriver #1..........................................1 To calibrate the miter gauge, do these steps: 1. DISCONNECT MACHINE FROM POWER! 2.
Model W1828 (For Machines Mfg. Since 4/11) Troubleshooting This section covers the most common problems and corrections with this type of machine. WARNING! DO NOT make any adjustments until power is disconnected and moving parts have come to a complete stop! PROBLEM Machine does not start. POSSIBLE CAUSE corrective action 1. Switch disabling key removed. 2. Break or short in wiring, loose connections, plug or receptacle is corroded or miswired. 3. Power supply switched off/has incorrect voltage. 4.
Model W1828 (For Machines Mfg. Since 4/11) PROBLEM POSSIBLE CAUSE corrective action Sandpaper clogs quickly or 1. Sandpaper grit is too fine for the burns. job. 2. Workpiece is too moist. 3. Sanding depth too aggressive. 4. Paint, varnish, pitch, or other coating is loading up sandpaper. 5. Sanding soft workpiece. 1. Replace with a coarser grit sandpaper. Glossy spots, burning, or streaks on workpiece. 1. Use a coarser grit sandpaper. 1. Sandpaper too fine for the desired finish. 2.
Model W1828 (For Machines Mfg. Since 4/11) Electrical Safety Instructions These pages are current at the time of printing. However, in the spirit of improvement, we may make changes to the electrical systems of future machines. Study this diagram carefully. If you notice differences between your machine and these wiring diagrams, call Woodstock International Technical Support at (360) 734-3482. 1. 2. 3. 4. SHOCK HAZARD. Working on wiring that is connected to a power source is extremely dangerous.
Model W1828 (For Machines Mfg.
-29- PARTS 3 43 16-1 16 4 5-2 15 14 6 10 12 5-1 6 5-4 44 13 38 12 11 22-1 23 22-5 22-4 2 5-3 7 34 22 37 19 24 31 23 5-5 5 34 32 22-2 17 22-3 9 33 30 23 21 40 8 23 39 35 36 23 26 21 26 26 18 19 25 23 32 1 28 29 20 27 27-1 42 41 Model W1828 (For Machines Mfg.
Model W1828 (For Machines Mfg.
Fold along dotted lIne place stamp Here Woodstock international inc. p.o.
WARRANTY WARRANTY Woodstock International, Inc. warrants all Shop Fox machinery to be free of defects from workmanship and materials for a period of two years from the date of original purchase by the original owner. This warranty does not apply to defects due directly or indirectly to misuse, abuse, negligence or accidents, lack of maintenance, or reimbursement of third party expenses incurred. Woodstock International, Inc.
High Quality Machines and Tools Woodstock International, Inc. carries thousands of products designed to meet the needs of today's woodworkers and metalworkers.