MODEL W1822 SLIDING TABLE ATTACHMENT OWNER'S MANUAL (FOR MODELS MANUFACTURED SINCE 9/10) Phone: (360) 734-3482 • Online Technical Support: tech-support@shopfox.biz COPYRIGHT © JULY, 2010 BY WOODSTOCK INTERNATIONAL, INC., REVISED JULY, 2011 (TS) #12868TS WARNING: NO PORTION OF THIS MANUAL MAY BE REPRODUCED IN ANY SHAPE OR FORM WITHOUT THE WRITTEN APPROVAL OF WOODSTOCK INTERNATIONAL, INC.
This manual provides critical safety instructions on the proper setup, operation, maintenance, and service of this machine/tool. Save this document, refer to it often, and use it to instruct other operators. Failure to read, understand and follow the instructions in this manual may result in fire or serious personal injury—including amputation, electrocution, or death. The owner of this machine/tool is solely responsible for its safe use.
SAFETY................................................4 Standard Machinery Safety...................... 4 Additional Safety for Sliding Table Saws...... 6 PARTS............................................... 17 Table.............................................. 17 Fence.............................................. 18 WARRANTY......................................... 21 SETUP SETUP.................................................7 Unpacking.......................................... 7 Inventory..........
INTRODUCTION Model W1822 (For Machines Mfg. Since 9/10) INTRODUCTION Woodstock Technical Support The Model W1822 has been specially designed to provide many years of trouble-free service. Close attention to detail, ruggedly built parts and a rigid quality control program assure safe and reliable operation. Woodstock International, Inc. is committed to customer satisfaction.
Model W1822 (For Machines Mfg. Since 9/10) SAFETY Standard SAFETY Machinery Safety Indicates an imminently hazardous situation which, if not avoided, WILL result in death or serious injury. Indicates a potentially hazardous situation which, if not avoided, COULD result in death or serious injury. Indicates a potentially hazardous situation which, if not avoided, MAY result in minor or moderate injury.
Model W1822 (For Machines Mfg. Since 9/10) 10. NEVER LEAVE WHEN MACHINE IS RUNNING. Turn power OFF and allow all moving parts to come to a complete stop before leaving machine unattended. SAFETY 11. DO NOT USE IN DANGEROUS ENVIRONMENTS. DO NOT use machinery in damp, wet locations, or where any flammable or noxious fumes may exist. 12. KEEP WORK AREA CLEAN AND WELL LIT. Clutter and dark shadows may cause accidents. 13. USE A GROUNDED EXTENSION CORD RATED FOR THE MACHINE AMPERAGE.
Model W1822 (For Machines Mfg. Since 9/10) Additional Safety for Sliding Table Saws Use this and other machinery with caution and respect. Always consider safety first, as it applies to your individual working conditions. No list of safety guidelines can be complete—every shop environment is different. Failure to follow guidelines could result in serious personal injury, damage to equipment or poor work results. KICKBACK.
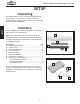
Model W1822 (For Machines Mfg. Since 9/10) SETUP Unpacking SETUP The Model W1822 has been carefully packaged for safe transportation. If you notice the machine has been damaged during shipping, please contact your authorized Shop Fox dealer immediately. Inventory Refer to Figures 1–2 and the listing below to inventory the contents of the shipping box. A Note: If you can't find an item on this list, check the mounting locations or examine the packaging materials carefully.
Model W1822 (For Machines Mfg. Since 9/10) Assembly The assembly process typically requires modifications to your table saw. To make the process easier, we strongly recommend that you have another person help you. Also, if you have to drill new holes, we recommend clamping the components in place when marking or drilling; this will ensure accurate final results. To assemble and install your sliding table attachment, do these steps: 1. DISCONNECT SAW FROM POWER! 2.
Model W1822 (For Machines Mfg. Since 9/10) 3. Thread the foot pad bolts into the bottom of the support legs, as shown in Figure 6. For now, do not tighten the jam nuts against the legs so that you can adjust the height of the legs in a later step. NOTICE If you are using a mobile base with the table saw, use one of the options above when moving the saw and the sliding table attachment: SETUP • • • Attach an extension to the mobile base that will provide support for the sliding table legs.
Model W1822 (For Machines Mfg. Since 9/10) 7. Align the mounting holes, then thread (2) M8-1.25 x 30 cap screws, 8mm lock washers, and 8mm flat washers through the sliding table into the mounting holes of the saw table. 8. Move the sliding table to the right and install the remaining M8-1.25 x 30 cap screw, 8mm lock washer, and 8mm flat washer. 9. Place the straightedge across the saw table and the sliding table at each end to make sure that the combined table surface is flat.
Model W1822 (For Machines Mfg. Since 9/10) 13. Mark the right blade edge that is even with the table, then move the sliding table all the way toward the table saw front. SETUP 14. Use the adjustable square and feeler gauges to measure the distance between the sliding table miter gauge slot and the main saw blade at the mark you made in Step 13. This is distance "A" shown in Figure 11. 15.
Model W1822 (For Machines Mfg. Since 9/10) 17. Remove the T-bolt from the knurled pivot handle of the crosscut fence and set it aside for use in the next steps. 18. Slide the miter gauge bar into the sliding table miter gauge slot, as shown in Figure 13. Forward Set Screw T-Bolt 19. While holding the crosscut fence in position, rotate it slightly so that you can insert the T-bolt you removed from the handle in Step 17 into the fence slot and into the sliding table miter gauge slot, as shown in Figure 13.
Model W1822 (For Machines Mfg. Since 9/10) OPERATIONS Operation Overview The purpose of this overview is to provide the novice woodworker with a basic understanding of how the sliding table attachment is used during a typical operation, so they can more easily understand how to use it. OPERATIONS Note: Due to the generic nature of this overview, it is not intended to be an instruction guide for performing actual machine operations.
Model W1822 (For Machines Mfg. Since 9/10) Crosscut Fence The crosscut fence can be positioned anywhere along the sliding table and at angle between 50° left and 50° right. To position the fence along the sliding table, loosen the two pivot handles, the set screw on the forward end of the miter gauge bar, and the miter gauge lock knob (see Figure 15). Then, move the fence to the desired location and re-tighten the set screw, lock knob, and pivot handles.
Model W1822 (For Machines Mfg. Since 9/10) Flip Stop Use the flip stop to make repetitive cuts of the same dimension. Lock Lever Slide the flip stop T-nut into the fence top T-slot, then secure the assembly in place with the lock lever, as shown in Figure 18. OPERATIONS Figure 18. Flip stop installed. Crosscutting The Model W1822 enables you to use your table saw to crosscut large panels, as shown in Figure 19. Blade To make a crosscut with the sliding table, do these steps: 1.
Model W1822 (For Machines Mfg. Since 9/10) Miter Cutting The crosscut fence can be positioned for miter cuts between 50° the left and 50° right. To perform a miter cut, do these steps: Blade 1. DISCONNECT SAW FROM POWER! 2. Position the fence at the rear of the sliding table and at the correct angle, then lock it in place (see the example illustrations in Figures 20– 21). 3. Position and secure the extension table and extension fence to provide the optimum support for the workpiece. 4.
Model W1822 (For Machines Mfg. Since 9/10) ACCESSORIES Sliding Table Saw Accessories The following sliding table saw accessories may be available through your local Woodstock International Inc. Dealer. If you do not have a dealer in your area, these products are also available through online dealers. Please call or e-mail Woodstock International Inc. Customer Service to get a current listing of dealers at: 1-800-840-8420 or at sales@woodstockint.com.
Model W1822 (For Machines Mfg.
Model W1822 (For Machines Mfg.
Fold along dotted lIne place stamp Here Woodstock international inc. p.o.
WARRANTY WARRANTY Woodstock International, Inc. warrants all Shop Fox machinery to be free of defects from workmanship and materials for a period of two years from the date of original purchase by the original owner. This warranty does not apply to defects due directly or indirectly to misuse, abuse, negligence or accidents, lack of maintenance, or reimbursement of third party expenses incurred. Woodstock International, Inc.
High Quality Machines and Tools Woodstock International, Inc. carries thousands of products designed to meet the needs of today's woodworkers and metalworkers.