Model QTH6000 / QTH7100 QTH7140 / QTH7200 Portable Quartz Infrared Tower Owner's Manual WARNING! IF THE INFORMATION IN THIS MANUAL IS NOT FOLLOWED EXACTLY, A FIRE MAY RESULT CAUSING PROPERTY DAMAGE, PERSONAL INJURY OR LOSS OF LIFE. FOR YOUR SAFETY Comfort Home Products, Inc 12256 William Penn Hwy, Suite A Huntingdon, PA 16652 Made in China COMFORT GLOW PHONE NUMBER (814) 643-1775 http://www.worldmkting.
Thank you for purchasing a Comfort Glow Tower Comfort Furnace. For your safety and to insure that you get the full benefit of this powerful heater please take the time to read this guide completely BEFORE using your heater.
INTENDED USE: This product is intended only for indoor household or office use. It is NOT intended for industrial or commercial use. DO NOT USE OUTDOORS IMPORTANT SAFETY INSTRUCTIONS PLEASE READ AND SAVE THESE IMPORTANT SAFETY INSTRUCTIONS when using electrical appliances, basic precautions should always be followed to reduce the risk of fire, electrical shock, and injury to persons, including the following: 1. Read all instructions before using this heater. 2. This heater is hot when in use.
WHAT TO EXPECT FROM YOUR COMFORT FURNACE The Comfort Glow Tower Comfort Furnace is not intended to replace your central heating system nor is it intended to be a sole heating source. Your comfort furnace is intended as a supplemental zone heating source. The goal of this heater is to reduce the total home heating costs by allowing you to turn back the central heat system and provide supplemental heat to the rooms being occupied. The Comfort Glow Tower Comfort Furnace is not an instant room heater.
Helpful Tips: 1) 2) 3) 4) 5) 6) 7) If heater will not turn on, check main power switch. Check air filter, clean as needed. If your room has minimal heat loss, and is closed off to cooler areas you may be able to reduce the cost of operation by setting the heater to low after the room has reached a comfortable temperature. If remote is lost you can still operate the heater manually. Do not drag your heater across the room by pulling it by the cord. Store cord on cord wrap when not in use.
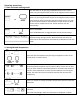
REMOTE OPERATION ON/OFF button: Used for power-on or power-off Temp up button: to make target temperature rise Temp down button: to make target temperature decline Mode button:Used for mode selection °C / °F button: Button for alternating between Fahrenheit and Celsius Timer button: Used for setting timer and adjust time value of timing. PREPARATION Place the heater on a firm, level surface and plug into a grounded 120V 60Hz power outlet. Turn on the power switch in the rear of the unit.
Operating Instructions 1. Start and select working mode Turn the heater on by pressing the ON/OFF button on the control panel or by pressing the Power button on the supplied remote control. Turn the heater off by pressing the ON/OFF button on the control panel or by pressing the Power button on the supplied remote control. OR Note: Powering off the heater will stop the heating process only. The fan will continue to blow for approximately 3 more minutes to allow for the interior components to cool.
3. POWER-OFF TIMER Function Note: The Power-Off-Timer Function will allow for the heater to power OFF after a certain set time, and can only be set while the heater’s display is in the “On” position. Or Turn the heater to the “On” position. Press the Timer button on the heater’s control panel or the remote. The digital display changes from the “temperature” to the “hours” option for the timer.
5. Setting Electro Lock The Electro Lock can help avoid the heater from being accidentally engaged by children. The locking mechanism can be set in both the ON and OFF modes. And Press Temp Up and Temp Down buttons at the same time for 3 seconds. Locking is complete when you hear a beep. When locked, the functions of the control panel and remote will be locked for use. And When you need to unlock it, press Temp Up and Temp Down buttons at the same time for 3 seconds. You will hear a beep.
STORAGE Store the heater in a cool, dry location when not in use. To prevent dust and dirt build-up, use the original packaging to repack the unit. If you do not use the heater for a long time, please take out the remote batteries (to prevent corrosion). TROUBLE SHOOTING PROBLEM 1. Heater does not blow warm air CORRECTIVE ACTION a. The room temperature is higher than the thermostat setting. b. Check to be sure unit is on high setting. c.
LIMITED WARRANTY: A limited warranty is extended to the original purchaser of this heater and warrants against malfunction due to manufacturing defects for a period of (1) one year from the date of retail purchase. Please read and follow all details noted below. CLAIMS HANDLED AS FOLLOWS: - DO NOT RETURN TO PLACE OF PURCHASE - Contact our Customer Service Department at 814-643-1775. You must have the model number, serial number and date of purchase.
LIMITATIONS: This warranty does not imply or assume any responsibility for consequential damages that may result from the use, misuse, or the lack of routine maintenance of this heating appliance. A cleaning fee and the cost of parts may be charged for appliance failures resulting from lack of maintenance. This warranty does not cover claims, which do not involve defective workmanship or materials. FAILURE TO PERFORM GENERAL MAINTENANCE (INCLUDING CLEANING) WILL VOID THIS WARRANTY.
Modelo: QTH6000 / QTH7100 QTH7140 / 7200 Cuarzo portátil Torre de infrarrojos Instrucciones de instalación y el Manual de Propietario ¡ADVERTENCIA! SI LA INFORMACIÓN CONTENIDA EN ESTE MANUAL no se sigue estrictamente, puede ocasionar un incendio, causando daños materiales, LESIONES PERSONALES O LA MUERTE.
Gracias por la compra de un confort torre. Para su seguridad y para asegurar que recibas el beneficio total de este potente calentador por favor tómese el tiempo para leer completamente esta guía antes de usar su calentador.
USO DESTINADO Este producto es pensado sólo para interior de la casa o el uso de la oficina. No es pensado para el valor industrial ni el uso comercial. No UTILICE FUERA INSTRUCCIONES IMPORTANTES LEA POR FAVOR Y SALVO ESTAS INSTRUCCIONES IMPORTANTES de SEGURIDAD cuando se usa electrodomésticos, precauciones básicas siempre deben ser seguidas para reducir el riesgo del fuego, de golpe eléctrico, y de la herida a personas, inclusive lo Siguiente: 1.
QUÉ ESPERAR DE SU CALENTADOR COMFORT El calentador Comfort Glow no tiene como objetivo reemplazar su sistema de calentamiento central ni pretende ser la única fuente de calentamiento. Su calentador comfort pretende ser una fuente de calentamiento suplementaria y de zona. El objetivo del calentador es reducir los costos totales de calentamiento del hogar, al permitirle disminuir el uso de su sistema de calentamiento central y proveyéndole calor suplementario a los cuartos que están siendo ocupados.
Puntas útiles: 1) Si calentadora no prenderá, el cheque principal interruptor del poder 2) El filtro de aire del cheque, limpia como necesitado 3) Si su cuarto tiene pérdida mínima de calor, y es bloqueado a áreas más frías que usted puede poder reducir el costo de operación poniendo la calentadora al punto más bajo después de que el cuarto haya alcanzado una temperatura cómoda. 4) Si telemando le es perdido todavía puede operar la calentadora manualmente.
REMOTE OPERATION Botón ON/OFF: utilizado para el encendido o apagado Temperatura botón: a haga la subida de temperatura Temperatura botón: para hacer la temperatura objetivo disminuir Botón: Usado el modo de selección de modo ° C / ° F: botón para alternar entre Fahrenheit y Celsius Botón Timer: utilizado para el ajuste del temporizador y el ajuste de valor de tiempo de sincronización.
Instrucciones de uso 1. Seleccionar modo de trabajo Encienda el calentador pulsando el botón ON/OFF en el panel de control o presionando el botón de encendido en el control remoto suministrado. O Apague el calentador pulsando el botón ON/OFF en el panel de control o presionando el botón de encendido en el control remoto suministrado. Nota: Apagar el calentador se detendrá el proceso de calentamiento solamente.
Se encenderá el LED indicador de Fahrenheit, cuando se muestre la temperatura en grados Fahrenheit. Se iluminará el LED de Celsio, cuando se muestre la temperatura en grados Celsius. 3. Función de temporizador de apagado Nota: La función Poder-Off-Timer permitirá el calentador se apague después de un cierto tiempo y sólo se puede establecer mientras visualiza la calefacción está en la posición "On". O Gire el calentador a la posición "On".
5. Ajuste Electro cerradura La Electro cerradura puede ayudar a evitar el calentador de accione accidentalmente por los niños. El mecanismo de bloqueo puede establecerse en modos tanto el encendido y apagado. Y Presione los botones Temp sube y baja temperatura al mismo tiempo durante 3 segundos. Bloqueo es completo cuando oyes un pitido. Cuando bloqueado, se bloquearán las funciones del panel de control y mando a distancia para su uso.
1) ¡ ADVERTENCIA! Asegúrese de que el poder está apagado antes de realizar cualquier tarea de mantenimiento. Apague el calentador, utilizando el interruptor de encendido en la parte posterior de la unidad y desenchufe el calentador de la pared. Quitar la rejilla de filtro de la parte trasera del calentador. Retire el filtro. Aspiración generalmente limpiará el filtro en la mayoría de los casos.
GARANTIA ELECTRICA PORTATIL de CALENTADORA La GARANTIA LIMITADA: Una garantía limitada es extendida al comprador original de esta calentadora y autorizaciones contra falla debido a defectos industriales por un período de (1) un año de la fecha de la compra de la venta al por menor. Lea por favor y siga todos los detalles notados abajo. Los RECLAMOS MANEJARON DE LA SIGUIENTE MANERA: - No REGRESA a COLOCAR DE la COMPRA - Contacta nuestro Departamento de Servicio de Costomer en 814-643-1775.
1. 2. 3. 4. 5. El daño causado por maltrato o utiliza al contrario del manual de propietarios y pautas de seguridad. El daño causado por una falta de mantenimiento normal. Repare por una persona no autorizada. El daño causado por conexión a un voltaje impropio. Dañado causado por el uso fuera. Las LIMITACIONES: Esta garantía no implica ni asume responsabilidad para daños consecuentes que pueden resultar del uso, del maltrato, o de la falta de mantenimiento rutinario de este aparato de la calefacción.
La FECHA DE la COMPRA: El LUGAR DE la COMPRA: El NUMERO DE SERIE: NUMERO MODELO: _______________________________________________ Registre su garantía en www.wotldmkting.com Impreso en China Modèle QTH6000 / QTH7100 QTH7140 / QTH7200 Portable Quartz Tour infrarouge Manuel du propriétaire ATTENTION: LE NON-RESPECT DES INFORMATIONS CONTENUES DANS CE MANUEL PEUT RÉSULTER EN UN INCENDIE CAUSANT DES DOMMAGES MATÉRIELS, DES LÉSIONS CORPORELLES OU LA PERTE DE VIES.
Comfort Home Products, Inc 12256 William Penn Hwy, Suite A Huntingdon, PA 16652 Fait en Chine COMFORT GLOW PHONE NUMBER (814) 643-1775 http://www.worldmkting.com ANSI/UL 1278. MOBILE ET MUR-OU PLAFOND A PENDU APPAREILS DE CHAUFFAGE DE PIECE D'ELECTRIQUE NE PAS JETER CE MANUEL - LE LAISSER À L'UTILISATEUR Merci d'avoir acheté un four de confort Glow.
Coffre-fort pour Poignées de transport intégrées Garantie 1 an Ventilateur : 36CFM CARACTÉRISTIQUES DE SÉCURITÉ Dispositif de sécurité de basculement Cet appareil est équipé d'un dispositif de sécurité de basculement. Une fois que le radiateur est renversé, un commutateur interne s'éteint automatiquement l'appareil de chauffage. Une fois que le radiateur est restauré une position verticale, le radiateur se réinitialise.
8. Ne pas faire fonctionner de poêle dont le cordon ou la prise sont endommagés ou en état de disfonctionnement causé par la chute ou dommage de l'appareil. Renvoyer le poêle au centre de service pour tout examination, ajustement méchanique ou technique ou réparation. 9. Toujours brancher le poêle directement dans une prise électrique ou réceptacle mural. Ne jamais utiliser avec une corde d'extension ou une multi-prise. 10. Ne pas faire passer le cordon sous un tapis.
Fonction timer : Utilisateur pouvez programmer radiateur à sa mise en marche ou de mise hors tension de 1 à 12 heures. Position Eco : Dans ce mode l'élément chauffant cycleront entre 500w / 1500w paramètres pour maintenir une température au dispositif de chauffage de 20 ° C/68 ° F. Refroidir par Cycle : ventilateur continue de fonctionner pour environ 3 minutes après éléments chauffants ont éteint.
1) 2) 3) 4) 5) 6) 7) 8) 9) 10) 11) 12) 13) 14) 15) Affichage numérique : indique la température ambiante théorique ou valeur d'heure selon la minuterie. Témoin d'indication de mode élevé : voyant est allumé quand en mode élevé. Témoin d'indication de mode faible : voyant est allumé quand en mode faible... Indication de puissance lumière : indique quand l'appareil est raccordé à l'alimentation. Mode Eco : voyant est allumé quand en mode Eco.
PRÉPARATION Placer l'appareil sur une surface ferme et plane et brancher dans une prise de courant reliée à la terre de 120 v 60Hz. Allumez l'interrupteur à l'arrière de l'appareil. Faire fonctionner le radiateur en position verticale uniquement. Insérez les 2 piles AAA dans la télécommande avant d'utiliser (piles non incluses) Les photos sont à titre indicatif. Votre appareil peut varier. Mode d'emploi 1.
Sélectionnez un Mode de chaleur. OU Appuyez sur le bouton MODE pour basculer entre les paramètres de trois chaleur. Mode haute utilise 1500W. Mode faible utilise 1000W. Le mode ECO est une fonction d'économie énergétique économique. Lorsque le mode ECO est choisi, le radiateur définira la température automatiquement à 68° F (20° C) sous ce mode 2. Réglage de la température désirée OU Ajuster la température désirée en appuyant sur les flèches haut/bas sur le panneau de configuration ou de la télécommande.
heures. (Par incréments de 1 heure). Les incréments d'heure sélectionnée clignote pendant quelques secondes et puis revenir à la température désirée. Le voyant Timer resteront allumé tant que la minuterie est réglée. Le radiateur se mettre en arrêt quand l'horloge de l'élément chauffant interne compte à rebours les incréments d'heure que vous définissez. 4.
Et Lorsque vous avez besoin de le débloquer, appuyez sur les touches Temp Up et Temp vers le bas en même temps pendant 3 secondes. Vous entendrez un bip. Le panneau de commande et de contrôle à distance redeviendra fonctionnels. MAINTENANCE 1. 2. 3. 4. 5. 6. 7. Turn off the power switch in the rear of the unit. Unplug the unit and let it cool completely. To keep the heater clean, the outer shell may be cleaned with a soft, damp cloth. You may use a mild detergent if necessary.
pas a. La température de la pièce est plus haute que le paramètre de thermostat. b. Le contrôle pour être unité sûr que l'est sur haut réglant. c. Si le bouton d'alimentation sur le devant de l'appareil est rouge mais le chauffage ne fonctionne pas surchauffer la fonction de sécurité peut avoir été déclenchée. Essayez d'appuyer sur le bouton d'alimentation. Si le chauffage ne s'allume pas, dégager tout blocage de l'avant et à l'arrière de l'appareil qui aurait pu causer une surchauffe interne.
- Contactez notre Service Client au 814-643-1775. Se munir du numéro du modèle, du numéro de série et de la date d'achat. - Ils vous fourniront de plus amples informations, concernant par exemple le remplacement de pièces, la réparation ou le remplacement du poêle si necessaire. APPELEZ LE 814-643-1775 (9h00-18h00 LUN.-VEN.) ou ENVOYEZ UN EMAIL À info@worldmkting.com DEVOIRS DU PROPRIÉTAIRE: Cet appareil de chauffage doit fonctionner en accord avec les instructions fournies avec le poêle.
ET DE NON-CONTREFACON. LA SOLUTION FOURNIE PAR CETTE GARANTIE EST EXCLUSIVE ET EST CONFÉRÉE EN GUISE DE TOUT AUTRE SOLUTION. EN AUCUN CAS LE MONDE DU MARKETING D'AMÉRIQUE NE SERA RESPONSABLE DES DOMMAGES CIRCONSTANCIELS OU COLLATÉRAUX. Certains états n'autorisent aucune limitation quant à la durée d'une garantie implicite. Dans ce cas, la limitation cidessus ne s'appliquera pas. Certains états n'autorisent pas l'exclusion ou la limitation de dommages circonstanciels ou collatéraux.