
User's Manual


1
Chapter 1
Installation
Components
The components in your R/F Terminal system will vary according to the
configuration of your system. Your R/F Terminal shipment should contain at least:
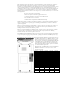
An R/F Terminal T7001 or LT7001 (unit includes keypad and
display). If the R/F Terminal is an LT7001 model, it will have an
integrated laser scanner built-in to the body of the terminal. Each
terminal is shipped with a shoulder strap, boot, and Setup Menu.
An optional Scanner – if you ordered the T7001 model instead of the
LT7001 model with the built-in laser scanner.
USB Cable – for programming and voice prompt upload.
5V Power Supply – battery charger with adapter cable.
Utilities CD ROM – demo programs, DLL, and firmware loader program
If Base Stations were ordered with your system, you should receive at least:
A Base Station (B5001) including a 5v power adapter for each.
A Serial Cable (F34 or F36) or USB cable.
Keep the shipping box for the R/F Terminal in the event it is necessary to
return equipment for repair later.
Installation Sequence
1. Start with one Terminal and Base Station. Get everything working
with the single terminal and base and then add other terminals, being
certain that all terminals have unique Terminal IDs.
2. All equipment is shipped with the default setting of Channel 0, Terminal
ID 0. Unless you have other Terminal/Base configurations already
operating on that channel, you probably don’t need to change the
channel.
3. Without attaching the Base Station to the computer, and with only the
power supply plugged in the base, you can perform a site test to be sure
you have adequate coverage and the radios are working perfectly. (See
Chapter 4).
4. Now connect the Base Station to the computer’s serial or USB port. Be
sure to turn OFF all handshaking on the COM port used; in Windows, go