
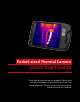
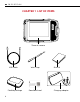
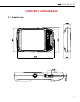
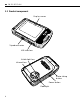
Quick Start Guide

9
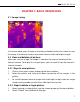
2. Selectthepaletteicon,aswellaswhiteheat,blackheat,ironoxidered,hot
iron, medical, and Arctic ribbons as needed.
3.6 Turn on floodlight and flashlight
Steps:
1. Click on the camera screen to pop up the menu toolbar.
2. Clickononeofthefollowings:
• Flash(usethethermalcameralightasflashwhentakingpictures).
• Floodlight(turnonthethermalcameralightanduseitasaflashlight).
3.7 Set emissivity
Emissivityparametersetaccordingtothetypeofmeasuredobjectsurface
Steps:
1. Click on the camera screen to pop up the menu toolbar.
2. Select “Setting” to enter the setup menu.
3. Selecttheemissivityanddisplaythefollowingtwoways:
Custom:Displayalistofparametervalues,andyoucanselectoneofthem.
Material:Emissivityofcommonobjects.
3.8 Set reflective temperature
This parameter is used to compensate for the radiation reflected by the object.
Steps:
1. Click on the camera screen to pop up the menu toolbar.
2. Select “Setting” to enter the setup menu.
3. Select“ReflectiveTemperature”andthecorrespondingvalues.
3.9 Change distance
Thisparameterreferstothedistancebetweenthetargetandthecameralens.
Steps:
1. Click on the camera screen to pop up the menu toolbar.
2. Select “Setting” to enter the setup menu.
3. Select the distance and set it according to the target object.
GB CN ES DE FR RU