
User's Manual
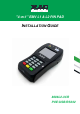
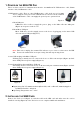
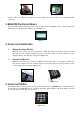
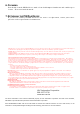

Figure 7 Figure 8
Caution:
The cover (Figure 7) shall be provided with a means to keep it closed during normal
operation.
3. 8006 PIN PAD DEVICE READY
The unit automatically starts up when connected the power on Ethernet cable. Upon startup, the
PIN Pad device displays the default screen as Figure 9.
Figure 9
4. USING THE CARD READER
¾ M agnetic Stripe Reader
Find the card reader slot at the right side of PIN Pad. Slide the card in either direction
through the slot w ithout stopping. If the card swipe fails, check the position of the
magnetic stripe and slide the card again. (Figure 10)
¾ Smart Card Reader
Find the card reader slot on bottom of PIN Pad. Please insert the card completely and make
sure that it cannot be moved forward anymore. If inserted failed, check the position of the
card and insert the card again. (Figure 11)
Figure 10 Figure 11
5. USING THE PIN PAD
Press numeral key to enter password if needed. Then press green [ENTER] key to finish passw ord
key-in. Press red [CANCEL] key to exit from presently status (Figure 12). If the PIN is entered
incorrectly, press yellow key and reenter it
Figure 12