ALL IN ONE PAY YMENT TER RMINAL INSTTALLATIO ON GUIDE E MODE EL: xAPT T-103PUW xAPT T-103PU
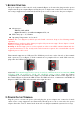
1. BEFORE STARTING The power input is on the left side of the terminal (Figure 1). Connect the plug from the power adapter into the power input (Figure 2). Plug the power adapter into a 120-volt electrical outlet or into a surge suppressor (recommended) after the power cord is connected to the power adapter. Figure 1 Figure 2 Adapter spec: DELTA_ADP-36JH B Input: 100-240Vac, 50/ 60Hz 1A Output: 12Vdc, 3A RTC battery spec.
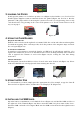
Figure 8 3. LOADING THE PAPER Gently pop the printer cover’s latch to open the cover (Figure 9); then lift the cover. Load a roll of thermal paper (Appleton 1012 recommended) into the printer (Figure 10). Load it so that the print-side of the paper will feed out facing the operator. Close the cover by pressing down evenly on both side tabs, or by pressing on the center of the printer cover. Use the serrated bar to tear off any excess paper. Figure 9 Figure 10 4.
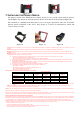
Figure 15 Figure 16 7. INSTALLING THE PRIVACY SHIELD The privacy shield of the T103P shows as figure 18. We need to tear the tap around the privacy shield (Figure 19), and please stick the privacy shield on around the 15-key keypad (Figure 20). The terminal is compliant with PCI privacy screen design requirement when the detachable privacy shield is installed on the device. Any change to or removal of this privacy shield will cause security concerns.
FCC Caution: Any changes or modifications not expressly approved by the party responsible for compliance could void the user's authority to operate this equipment. IMPORTANT NOTE: FCC Radiation Exposure Statement: This equipment complies with FCC radiation exposure limits set forth for an uncontrolled environment. This equipment should be installed and operated with minimum distance 20cm between the radiator & your body.