Chapter 1 - Introduction Chapter Overview The Accel-a-Writer 3 Series Printers .............................................. 1-3 About this Manual ........................................................................... 1-4 Manual Conventions ................................................................. 1-5 Printer Features ............................................................................... 1-6 Printer Configuration ......................................................................
Notes 1-2 Introductionbb ________________________________________
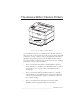
The Accel-a-Writer 3 Series Printers Fig. 1.1 Accel-a-Writer 3 Series Printer Accel-a-Writer 3 printers are available in three models designed to meet the needs of a broad user base from corporate offices and small workgroups, to large volume producers, through high-end desktop publishers and graphics professionals. XANTÉ’s flexible design provides the ability to upgrade from one model to the next, allowing your printer to grow with your business.
About this Manual This user’s guide covers installation, setup, and operation of Accel-aWriter 3 series printers. Chapter 1—Introduction summarizes this manual, printer features, model configurations, and the printer warranty. Chapter 2—Installation covers printer setup and connection to its Macintosh, PC, and Ethernet interfaces. Chapter 3—Macintosh Setup describes the contents and use of the XANTÉ Utilities CD-ROM for the Macintosh.
Chapter 11—Troubleshooting provides troubleshooting tips and XANTÉ Technical Support options. Appendix A—HP PCL5 and HP-GL 7475A Commands lists supported HP PCL5 and HP-GL 7475A commands. Appendix B—Application Notes and Page Design details using the printer with some applications and offers page design tips. Glossary—defines terms related to your printer, XANTÉ utilities, and the printing industry.
(model) indicates when a feature is available only on the listed model(s) and if that feature is optional on the listed model(s). Examples: (3G) = available only on the 3G (3G; 3DN and 3N optional) = standard on the 3G; optional on the 3DN and 3N Printer Features The printers feature true Adobe PostScript 3, allowing you to work from virtually any software or hardware environment.
Paper weights from 16 - 28 lb bond (60 - 105 g/m2) can be used in the paper cassettes and from 16 - 36 lb bond (60 - 135 g/m2) in the multipurpose feeder. You can feed transparencies, labels, envelopes, and Myriad film (3G) from the multipurpose feeder. The optional envelope cassette allows you to feed multiple envelopes and postcards. XANTÉ’s optional patented NEIT upgrade can be added to the Accel-a-Writer 3G.
Printer Configuration Accel-a-Writer Models Features 3N 3DN 3G NEC VR 4310 166 MHz Processor RAM: Standard (in MB) Maximum (in MB) Adobe PostScript 3 HP PCL 5e and HP-GL 7475A Emulation (with 8 scalable, 7 bitmap HP PCL compatible fonts) 136 PostScript Fonts Resolution: 600 x 600 dpi 1200 x 1200 dpi 2400 x 2400 dpi† Engine Speed (letter/A4): 20 ppm up to 1200 dpi 10 ppm with 2400 dpi upgrade Interfaces: LocalTalk Serial Parallel Ethernet Paper Sizes: Up to 13.00" x 18.50" (330 mm x 470 mm) Up to 13.
Accel-a-Writer Models Features (continued) 3N 3DN 3G Media Handling: Multipurpose Feeder Built in Paper Feeder Second Paper Feeder 2,000 Sheet Paper Feeder§ Duplexer§ Std. Std. Opt Opt. Opt. Std. Std. Std. Opt. Std. Std. Std. Opt. Opt. Opt. Mirror Print Std. Std. Std. Negative Print Std. Std. Std. XANTÉ Utilities (PC and Macintosh) Std. Std. Std. Internal IDE Hard disk Opt. Opt. Opt. Spooling* Std. Std. Std. Font Accelerator* Std. Std. Std. N/A N/A Opt.
Warranty and Product Registration Chapter 9 contains your printer’s warranty. Please return the warranty sheet included with your printer to register your printer and to receive a free subscription to XANTÉ’s Accel-a-Writing newsletter. Our publication features articles on printing, new options, and tips for using your printer effectively. Other Helpful Documentation Please visit our Web site at www.xante.com for the latest information about XANTÉ products and services.
Chapter 2 - Installation Chapter Overview Introduction ..................................................................................... 2-3 Printer Location .............................................................................. 2-3 Printer Package ............................................................................... 2-4 Accel-a-Writer 3 Series Printer Overview ...................................... 2-5 Toner Cartridge ...................................................................
Notes 2-2 Installationbb _________________________________________
Introduction This chapter describes selecting a printer location; installing toner and paper; connecting the printer to Macintosh, PC, and network hardware; and connecting the power supply. Printer Location Set up your printer in a location that can support its weight and provide sufficient operation and maintenance clearance. To prevent overheating, allow at least 8.0" (200 mm) clearance for the printer’s vent. Fig. 2.
Printer Package Unpack the printer, saving the packing materials. 1. Remove the items packed on top of the printer. Warning! 2. The printer weighs approximately 58.5 lb (26.5 kg) without the toner, cassettes, and media installed. • Always have two people lift the printer. • Only lift the printer using the recessed grip areas on the right and left sides. Remove the shipping stabilizer on top of the printer; then, lift the printer out of the box (fig. 2.2). Fig. 2.2 Lifting the Printer 3.
• XANTÉ Utilities CD-ROM • Toner cartridge The following items are packaged separately. • Additional paper cassettes and feeders • Duplexer RAM, internal hard disk, resolution, 10/100BaseT, and NEIT upgrades ordered with your printer are installed at the factory before shipping. If you do not receive your full shipment or if anything is damaged, call XANTÉ Customer Support at 800-926-8393 (US and Canada) or your XANTÉ vendor. Accel-a-Writer 3 Series Printer Overview Use Figures 2.3, 2.4, and 2.
Fig. 2.4 Rear View of the Printer Fig. 2.
Toner Cartridge The printer’s toner cartridge combines the toner and drum. This cartridge can print approximately 14,000 sheets of letter/A4 size pages at 5% coverage. Quality and reliability of refilled toner cartridges vary; XANTÉ recommends not using them. Printer damage caused by these products is not covered by your printer warranty.
Removing and Installing the Toner Cartridge 1. Remove all media from the output tray. 2. Squeeze the top cover latch to release the lock (fig. 2.6). Fig. 2.6 Release the Top Cover Latch 3. Lift the top cover. The multipurpose feeder opens automatically as you open the top cover (fig. 2.7). Caution: Do not touch any parts inside the printer. Fig. 2.
4. Remove the toner cartridge if it is in the printer by grasping its handles and pulling it slowly out of the printer (fig. 2.8). Caution: Once you begin pulling the cartridge out of the printer, remove it completely. The cartridge’s shutter may not open properly or be damaged if the cartridge is pulled partially and then pushed back in the printer. Fig. 2.8 Remove the Toner Cartridge 5. Remove the new toner cartridge from the package.
6. Gently shake the toner cartridge several times to distribute toner throughout the cartridge (fig. 2.9). Caution: Shake the cartridge enough to free any compacted toner. Turning on the printer with toner still compacted may damage the cartridge. Fig. 2.9 Shake the Toner Cartridge 7. Place the toner cartridge on a flat surface, holding it in place with one hand. Grasp the sealing tape’s end tab and pull the tape straight out (fig. 2.10).
8. Insert the pins on both sides of the cartridge into the guide channels in the printer (fig. 2.11). Fig. 2.11 Insert the Pins into the Guide Channels 9. Slide the cartridge into the printer until it stops and is seated properly (fig. 2.12). Fig. 2.
10. Close the top cover by pressing down on the center section until the latch engages (fig. 2.13). Fig. 2.13 Close the Top Cover 11. Close the multipurpose feeder (fig. 2.14). Fig. 2.
Paper Cassette The standard universal paper cassette feeds up to 500 sheets of 20 lb bond/60 lb text weight (65 g/m2) paper or other paper to a stack height of 2.13" (54 mm). This cassette can handle media weights from 16 28 lb (60 to 105 g/m2). Note: An envelope cassette designed to feed up to 75 envelopes can be purchased as an option for your printer. This section describes loading and installing the standard paper cassette.
b. Lift up slightly on the cassette; then pull it from the printer (fig. 2.16). Fig. 2.16 Remove the Cassette from the Printer 2. Place the cassette on a flat surface and remove the cassette cover (fig. 2.17). Fig. 2.
3. Lift the paper length guide to release it. Slide it forward (fig. 2.18). Fig. 2.18 Move the Length Guide 4. Squeeze the sides of the paper width guide to release it. Slide it to the outside of the cassette (fig. 2.19). Fig. 2.
5. Align the paper stack and load it into the cassette print side up, leading edge to the back. See “Media Sources” in chapter 7 to determine whether to load media short or long edge first (fig. 2.20). Fig. 2.20 Load the Paper 6. Adjust media guides to the size of the paper stack. Caution: To prevent paper jams, make sure the paper fits between the paper guides and under the cassette’s retaining clips (fig. 2.20). 7. Replace the cassette cover. 8.
9. Pull out the output tray extension and turn up the paper stop for paper sizes larger than letter/A4 (fig. 2.21). Fig. 2.21 Adjust the Output Tray Extension Multipurpose Feeder The printer’s multipurpose feeder feeds up to 150 sheets of 20 lb bond/ 60 lb text weight (65 g/m2) paper or media such as Myriad Film, labels, and transparencies to a stack height of about .70" (18 mm). The multipurpose feeder supports non-standard size media, including envelopes from 3.94" x 5.83" (100 mm x 148 mm) to 13.
1. Open the multipurpose feeder by grasping the cover’s top center handle and pulling down (fig. 2.22). Caution: The multipurpose feeder does not open to a 90° angle. To prevent damage, do not exert strong pressure or place heavy objects on the feeder. Fig. 2.22 Open the Multipurpose Feeder 2. Pull out the tray extension for media larger than letter/A4 size (fig. 2.23). Fig. 2.
3. Align the edges of the paper stack and load it into the cassette print side up, leading edge toward the back of the printer (fig. 2.24). See “Media Sources” in chapter 7 to determine whether to load media short or long edge first. Caution: To prevent jams, make sure the media stack fits under the media guide’s retaining clips (fig. 2.24). Fig. 2.24 Load the Paper 4. Adjust the media guide to the size of the media stack (fig. 2.25). Fig. 2.
5. Close the multipurpose feeder if the media fits completely inside the printer (fig. 2.14). Multipurpose Feeder Tip Occasionally, in a Macintosh environment if media is in the multipurpose feeder, the system’s Print Monitor sends a prompt message to put paper into the manual feed tray and click OK. To disable this prompt Note: This prompt can only be turned off in Print Monitor. You cannot turn the manual feed message off on the Desktop Print Monitor. 1. Go to System Folder: Extensions: PrintMonitor.
Printer Ports All the Accel-a-Writer 3 series printers have standard LocalTalk, serial, parallel, and Ethernet ports. These simultaneously active interfaces can receive jobs from different operating environments without hardware switching. (UTP) (Coaxial) Fig. 2.27 Printer Ports Selecting the Printer Interface Connect to the printer interface that is appropriate for your host computer or network environment: Macintosh without Ethernet LocalTalk Port PC without Ethernet PC/Printer distance < 10 ft.
• Two terminating resistors DIN-8 Connector RJ-11 Cable Connector Box Terminating Resistor Connector Box Fig. 2.28 LocalTalk Connector Boxes, Resistors, and Cable 1. Turn off your printer and your computer. 2. Plug the DIN-8 connector on one LocalTalk connector box into the printer’s 8-pin LocalTalk port. 3. Plug the DIN-8 connector on the second LocalTalk connector box into the Macintosh’s printer port (refer to your Apple Macintosh manual). 4.
8. Verify that the printer’s LocalTalk interface is enabled and configured properly. See “Interface Control” in chapter 6 and “XANTÉ Command Center” in chapter 3. Before using your printer, install and configure the Adobe PostScript printer driver and your printer’s PPD. See “Xinstaller” and “Adobe PostScript Printer Drivers” in chapter 3. Connecting to the Parallel Port Use a standard parallel cable to connect your PC and printer (fig. 2.29) via the parallel port.
Connecting to the Serial Port Use a standard serial cable (fig. 2.30) with either a 9-pin or 25-pin female connector to attach to the computer and a 9-pin male connector to attach to the printer. Connector to Printer: 9-pin Connector to PC: 25-pin or 9-pin Fig. 2.30 Serial Cables 1. Turn off your printer and PC. 2. Plug the serial cable’s 9-pin male connector into the printer’s serial port. 3. Plug the other connector (either a 25-pin or a 9-pin female connector) into the computer’s serial port.
Before using your printer, install and configure the Adobe PostScript printer driver and your printer’s PPD. See “XANTÉ Utilities Installer” and “Adobe PostScript Printer Drivers” in chapter 4. Connecting to the Ethernet Port With the Ethernet feature, you can connect to a network using unshielded twisted pair or coaxial cable. Unshielded Twisted Pair (10BaseT, Optional 10/100BaseT) Each device in a network installation using UTP cable must be connected to a hub.
2. Connect the printer to the appropriate port for the cable used on your network. Fig. 2.31 Connect to the UTP Port Fig. 2.32 Connect to the Coaxial Port Before using your printer, set it up for your network environment and configure the Ethernet interface. See chapter 5 for details. Connecting the Power Cord 1. Make sure the printer’s power switch is off (the O is pressed in). 2.
Fig. 2.33 Connect the Power Cord to the Printer Warning: Never use a power cord that is damaged. Check the cord and plug monthly and replace immediately if you find any damage. Turning the Printer On Press the | on the power switch to turn on the printer (fig. 2.34). Fig. 2.
Printer initialization takes approximately 60 seconds. When READY/ IDLE displays, the printer is ready to accept print jobs. Note: Due to movement during shipping, XANTÉ recommends that you calibrate your printer after setup. For procedures, see “Accurate Calibration Technology (X-ACT)” in chapter 3 (Macintosh) or 4 (PC). Following initialization, a start-up page prints if that feature is enabled.
Chapter 3 - Macintosh Setup Chapter Overview Introduction ..................................................................................... 3-3 XANTÉ Utilities CD-ROM ............................................................ 3-3 Adobe Acrobat Reader 3.0 .............................................................. 3-5 XInstaller ......................................................................................... 3-5 Adobe PostScript Printer Drivers ..............................................
Notes 3-2 Macintosh Setupbb ____________________________________
Introduction This chapter describes the Macintosh setup procedures for your printer, including installation and configuration of the Adobe PostScript printer driver, your printer’s PPD (PostScript Printer Description) file, XANTÉ Command Center, and the Adobe Downloader. The last section describes procedures using XANTÉ Command Center and Adobe Downloader. Note: Before beginning this setup, you should be familiar with standard Macintosh procedures.
The NetPeeks folder contains self-extracting files for two network utility programs and associated documentation. Use EtherHelp 3.1 and LocalHelp 2.0 to capture packets on an Ethernet network or on a LocalTalk network respectively. Double-click on each icon to install that utility on your Macintosh. Read all documentation installed with the software before using these programs.
The XANTÉ Utilities folder contains XANTÉ Command Center, Adobe Downloader, a Downloader readme file, and the XD-1 (densitometer) software. See “XInstaller,” “XANTÉ Command Center,” “Adobe Downloader,” and “Calibration with a Densitometer (Gamma)” later in this chapter to load and ;use these files.
3. Read the welcome note; then, click Continue. The XInstaller window appears (fig. 3.1). Fig. 3.1 The XInstaller Window 4. 5. Select either XANTÉ Utilities to install only the utilities or select the appropriate PPD(s) for your printer(s) and the utilities will be included during installation; then, click Install (or stop installation by clicking Quit). • XANTÉ Utilities installs Adobe Downloader, XANTÉ Command Center, and the XD-1 software for Accel-a-Writer, PlateMaker, and ScreenWriter printers.
• 6. If you chose one or more individual printers, go to step 6 to proceed with the AdobePS installation. Click Continue in the AdobePS introduction screen. Note: On most systems, the AdobePS 8.6 program automatically launches unless this version is installed already. If not, you can open it manually by doubleclicking Adobe 8.6 Installer in the Printer Drivers:AdobePS 8.6 folder. 7. Read the license agreement and select Continue (or Accept) to bring up the AdobePS Installer window (fig. 3.2). Fig. 3.
Adobe PostScript Printer Drivers The XANTÉ CD-ROM contains the Adobe PSPrinter drivers and printer PPDs. Before using your printer, install and configure your printer’s Adobe PostScript printer driver and PPD. Selecting the Adobe PostScript Printer Driver Select the driver that best fits your needs and system configuration. If the chosen driver is not compatible with your system, try one of the other two drivers. AdobePS 8.6 The AdobePS 8.
• Poster printing of enlarged pages on multiple sheets that can be combined to create a poster • Manual duplexing to split a print job into two segments: one for printing one side of the document; the second to print the other side • Booklet printing to create brochure-like printouts AdobePS 8.5.1 The AdobePS 8.5.1 printer driver requires the following system setup: • Macintosh running System 7.
• At least 700 K of hard disk space and space required for the PPDs • Chooser version 7.3 or later (supplied with the PSPrinter installation) PSPrinter 8.3.1 provides • Adobe PostScript Level 2 support • Full ColorSync 2.0 support • Improved speed when printing JPEG compressed images • Ability to save print options for subsequent jobs AdobePS 8.6 Following installation of the XANTÉ Utilities and your printer’s PPD, AdobePS launches automatically.
Installing the PPD for AdobePS 8.6 1. Insert the XANTÉ Utilities CD-ROM into your Macintosh. 2. Double-click the XANTÉ Utilities 4.X icon. 3. Select your printer’s PPD in the Printer Descriptions folder. 4. Drag the PPD to the System Folder: Extensions: Printer Descriptions folder on you Macintosh. The AdobePS printer driver and your printer’s PPD are installed. See “Configuring the PPD” later in this chapter to complete the driver setup. AdobePS 8.5.
4. Follow steps 6 through 9 in “XInstaller” earlier in this chapter; then, after your Macintosh restarts, install the PPD (see the next section). Installing the PPD for AdobePS 8.5.1 1. Insert the XANTÉ Utilities CD-ROM into your Macintosh. 2. Double-click the XANTÉ Utilities 4.X icon. 3. Select your printer’s PPD in the Printer Descriptions folder. 4. Drag the PPD to the System Folder: Extensions: Printer Descriptions folder on your Macintosh.
Fig. 3.3 PSPrinter Installation Window 5. Click Install to load the files listed in the Easy Install box. To load only specific components, click Customize. Select the files to load; then, click Install. 6. Read the license agreement; then, select Accept to bring up the installation screen (or select Decline to terminate installation). 7. Follow instructions on screen to complete installation. 8. Read the Congratulations box; then click OK. 9. Click Quit to close the installation program.
Mac Watermark Plug-in Folder Each language directory in the PSPrinter 8.3 folder has a Mac Watermark Plug-in folder. This folder contains the Adobe PSPrinter 8.3 Watermark plug-in for the Macintosh and a user guide. These files allow you to customize your output with underlying watermarks. The plug-in requires the following system setup: • PSPrinter 8.3.1 (does not work with AdobePS 8.5.1) • Macintosh running System 7.
Fig. 3.4 AdobePS Chooser Window 3. Highlight your printer and double-click. If the setup reminder dialog box appears, click OK. The Adobe PostScript printer driver automatically selects and configures the correct PPD for your printer. Note: If multiple PPDs are installed for your printer, select the correct PPD when prompted. 4. If you are using PSPrinter, select Off for Background printing (to maximize processing performance) when the Chooser window reappears.
6. Click OK in the Autosetup failed dialog box; the Installable Options window appears (fig. 3.6). Fig. 3.6 Installable Options Window 7. Configure the printer’s options. a. Select Installed for the upgrades installed on your printer. Note: If your printer has two cassette trays, select Upper Optional Tray: Installed. If it has three cassettes, select Upper Optional Tray: Installed and Lower Optional Tray: Installed. b.
Note: When you add a printer from the network, go through either the Auto Setup or manual setup procedure to ensure that the printer is recognized by the network. Configuring the Printer If necessary, configure the printer’s communication interface using the front panel. See Chapter 6, “Configuration,” for details. 1. Select the SETUP:I/F menu. 2. Select the menu for the printer interface connected to your computer (LTALK or ETALK). 3. Select the ENABLE menu. Then, select YES. 4.
App Drivers Folder Some Aldus PageMaker and FreeHand versions, QuarkXPress, and ScenicSoft Preps applications require special files in addition to the standard PPD supplied for your printer. These files are in the CDROM’s App Drivers folder. See “Application Notes and Page Design” in appendix B for additional information. Note: Some advanced XANTÉ printer features may not be available when using older application versions. Also, APD (Aldus Printer Description) files for PageMaker version 4.
QuarkXPress PDF Folder The APP Drivers: QuarkXPress PDF folder contain PDFs (Printer Description Files) for each XANTÉ printer. QuarkXPress versions 3.3.X and earlier require these files in addition to the PPD to ensure the highest quality output from your printer and QuarkXPress. XInstaller loads the QuarkXPress PDF if you choose an individual printer installation. To load these PDFs manually 1.
ScenicSoft Preps The App Drivers: ScenicSoft Preps folder contains PPD and PDX files for XANTÉ Accel-a-Writer 3 series, PlateMaker 3, and ScreenWriter 3 printers. XInstaller installs these files automatically if you have the ScenicSoft Preps application on your system. Downloads Folder The Downloads folder contains Adobe PostScript files and Overview.pdf, which describes these files. Download the PostScript files to your printer using the Adobe Downloader or XANTÉ Command Center. CLEAN.
You must initialize a hard disk before it can be used to store downloaded fonts or to set up a spooling queue. Initializing a disk erases all information stored on that disk. NOVELL34.PS prints instructions for setting up a XANTÉ printer on a Novell network. PARMDUMP.PS prints a list of the settings for communication devices currently configured for your printer. SETZONE.PS allows you to set your printer’s EtherTalk zone name.
Features and options are for all printer models unless otherwise indicated. Also, File and Edit menus are similar to other Macintosh applications and are not described in detail in this section. General Menu The General menu allows you to communicate with the printer to perform margin and line length calibrations, get printer settings and status, control printer spooling, download PostScript files to the printer, and change some printer default settings (fig. 3.7). Fig. 3.
Spooling This option allows you to enable and control printer hard drive spooling. Spooling frees up the communication channel between your Macintosh and printer which permits your computer to return to other processing quickly. Spooling can be enabled for each interface independently using this menu or the printer’s front panel Interface menus. See “Spooler” later in this chapter. Margin Adjustment This option (3G) allows you to adjust the printer margin.
See “Downloads Folder” earlier in this chapter and “Start-up Page” in chapter 6 for other methods to control the start-up page feature. Networking Menu The Networking menu allows you to configure your printer’s Ethernet interface for Novell Print Server emulation, AppleTalk, and the TCP/IP communication (fig. 3.8). Only the System Administrator should use these options. See chapter 5, “Ethernet Setup” for details. Fig. 3.
AppleTalk The AppleTalk menu allows you to configure the AppleTalk protocol on your printer’s Ethernet interface. • Printer Name—allows you to set the name your printer advertises on the network. • EtherTalk Zone Name—allows you to change your printer’s default zone assigned by the network router. TCP/IP The TCP/IP menu allows you to enable the TCP/IP protocol and set the TCP/IP address on your printer’s Ethernet interface.
Linearization This menu (3G) allows you to create and download custom curves to your printer. These curves can be selected for a specific job from the Print dialog box or set as the default from the printer’s front panel. See “Calibration with a Densitometer (Gamma)” later in this chapter. Adobe Downloader Use Adobe Downloader to load and manage font files on your printer’s hard drive and to send PostScript files to your printer. Fig. 3.
Download PostScript File This option allows you to select a PostScript file on your Macintosh and send it to the printer. XANTÉ Command Center’s General menu also has this option. Special Menu The Special menu allows you to check printer status and manage fonts downloaded to your printer. Printer Status This option allows you to check current printer status. XANTÉ Command Center’s General menu also has this option.
Spooler If your printer has an optional hard drive, you can use the spooler to place print jobs into a queue on that drive. This reduces return to application time by freeing the communications channel between the computer and printer. The Save Spooled Job feature allows you to save up to 250 print jobs on the hard drive for reprinting later. See “Spooler” in chapter 6 for details.
1. Open XANTÉ Command Center; then, choose General: Spooling. The Spooling window appears (fig. 3.11). Fig. 3.11 Spooling Window 2. Select Devices from the Configure box. The Select Spool Device window appears (fig. 3.12). Fig. 3.12 Select Spool Device Window 3. Select the disk to use to store the spooled jobs or select NONE to disable spooling; then, click Ok. The Spooling Window reappears (fig. 3.11).
4. Select Interfaces from the Configure box. The Select I/O Interfaces to Spool window appears (fig. 3.13). Fig. 3.13 Select I/O Interfaces to Spool Window 5. Select the interface that you use to send files to the printer; then, click Ok. The Spooling window reappears (fig. 3.11). 6. Click Ok. The Spooling Window closes. Choose File: Quit to close Command Center. To manage jobs in the spooler’s job queue The spooler’s job queue can store up to 250 jobs.
1. Open XANTÉ Command Center; then choose General: Spooling. The Spooling window appears (fig. 3.14). Fig. 3.14 Job Queue in the Spooling Window The Job queue lists the ID, status, title, spool device, and file size of all jobs in the spooling queue. Job status can be W (waiting to be processed), P (currently processing), or H (already processed and held using the Save Spooled Job feature). 2. Use the Control buttons to manage the jobs in the queue.
Calibration with a Densitometer (Gamma) Densitometer support (3G) allows you to use gamma curves to adjust your printer’s performance to eliminate inconsistencies due to equipment age, different toners, press inks, and media, and environmental conditions. The XD-1 (XANTÉ Densitometer), combined with XANTÉ Command Center software, measures grayscale output for calibration and proofing. This affordable, easy-to-use densitometer will be used in this manual for example purposes.
Fig. 3.15 Linearization Window 2. Change the Linearization window LPI setting in the Print box (fig. 3.15) to achieve 256 levels of gray for the resolution at which you are printing. Note: For 600 dpi, select 85 lpi; for 1200 dpi, select 106 lpi; for 2400 dpi, select 133 to 150 lpi. Any lpi may be used; measure the lpi that is to be used for final output. 3. Print a Calibration Page to measure the printer’s current performance as a basis for the calibration.
Note: Always print the calibration page using the same media and toner or press ink as used for the final copy. When calibrating film media, you must select Man Feed using the Tray Select key and select the media size through the front panel MISC: MAN FEED menu. Universal is the largest size available in the front panel. If you have larger media, you need to cut it down to 13" x 18.5" (330 mm x 470 mm). Also, when possible, calibrate from the final output.
e. Click Print Calibration Page (fig. 3.15). The calibration page shows the printer’s performance using no gamma curve correction (fig. 3.16). Note: Print only one calibration page (using the Print Calibration Page button) at the beginning of the calibration process. Printing this page again later in the process resets the calibration, cancelling any linearization you have already done. Fig. 3.
After calibrating the densitometer, use it to get density measurements for the calibration page you printed. Linearizing the Densitometer Data Enter the densitometer measurements to calculate the adjustments necessary to correct printer performance to a linear standard. 1. Click Enter Curve/Linearize in the Linearization window (fig. 3.15). The Densitometer Data Entry window appears (fig. 3.17). Fig. 3.17 Densitometer Data Entry Window 2.
3. Make sure to enter the solid black (1) and solid white (2) measurements first. Enter the number of the patch whose densitometer measurement most closely matches (within ± 2%) the corresponding percentage in the Enter Coverage Values section. For example, when you are reading for 2%, if the box labeled 7 measures 2%, enter the number 7 in the corresponding box. Note: The calibration page blocks are numbered from 0 to 255.
Advance Gamma Curve Control If you are an expert user, you may want to adjust image lowlights, midtones, highlights and details in a gamma curve using the Advanced option in the Linearization window. Note: You cannot see advanced window adjustments on screen. Unless you are an expert user, you always should make these adjustments thorough an application. 1. Select the gamma curve to update from Update Gamma Curve in the Linearization window. 2. Click Advanced.
• To save a custom gamma curve to your Macintosh, retrieve it from the printer, and click Save to Disk. • To save a custom gamma curve to your printer, retrieve it from your system; select the curve to be updated from the Update Transfer Curve list; and click Save to printer. Resetting Custom Curve Defaults To reset a custom gamma curve to the factory default (a copy of the standard Gamma 0 curve) or to reset all gamma curves to the factory defaults 1.
Accurate Calibration Technology (X-ACT) Use XANTÉ’s patented X-ACT (3G) feature to calibrate your printer in two ways, through the front panel MISC: XACT menu or through XANTÉ Command Center’s More X-ACT menu. Front Panel X-ACT Your printer’s front panel MISC: XACT menu allows you to make 1/2 mm line length adjustments using the following procedure. Note: To use the front panel XACT, you need a metric ruler with 1/2 millimeter rule markings.
c. 6. Press the Menu key until the amount which would most closely adjust the line to the desired length appears. Then, press the Enter key. For example, if Line A is 250.46 mm instead of 251.46 mm, select 1.00 mm to add one mm to make the line the correct length. Measure Line B. Use the following procedures to adjust the printer for the correct line length. a. Note the amount Line B is over or under 388.61 mms. b. Press the Menu key until LINE B appears. Then, press the Enter key. c.
1. Open XANTÉ Command Center if necessary; then, select General: X-ACT. The More X-ACT Calibration window appears (fig. 3.19). Fig. 3.19 More X-ACT Calibration Window 2. Make sure that the same type of media you will use for final printing is loaded in the printer. 3. Select a setting for the media type you are using from the Media Type drop-down menu (fig. 3.20). Fig. 3.
Note: Each media type can have only one set of options. For example, if you calibrate for 8 1/2 x 11 (letter) paper, you can choose Paper as the media type. If you need to calibrate for 11 x 17 (tabloid) paper, you need to select another media type such as User-defined 1 so that the first calibration for letter size paper is not overwritten. 4. Check Options to make sure the paper (media) source and print settings are correct.
5. b. Under Manual Feed Options, if you are using standard size media, click Standard Paper Size and select the size from the drop-down menu. If you are using a custom size, click Custom Paper Size and enter the size and select the unit of measure (inch, millimeter, or centimeter). c. Under Print Settings, select the resolution from the drop-down menu. Click the Negative Film box if you are printing negative output. d. Click OK. The More X-ACT window reappears. Click Print Calibration Page.
6. Make the measurements indicated on the calibration page next to boxes A through F, I, and J, recording each measurement in its corresponding box on the calibration page. The values in boxes G and H are fixed values and do not require you to make any measurements. 7. Compare the following pairs: A to F B to D C to H E to G I to J For example: A = 25 B = 61 C = 190 E = 253 I = 39 F = 25.5 D = 61 H = 190.5 G = 254 J = 39.5 The numbers in each pair should be the same or within a 0.5 mm difference.
Printer Margin Adjustment Use Margin Adjustment (3G) to adjust the position of the imageable area on the media. Note: Use the standard paper size (letter or A4) for your paper cassette with the Margin Adjustment function. 1. Open XANTÉ Command Center. Select General: Margin Adjustment. The Printer Margin Control window appears. Fig. 3.23 Printer Margin Control Window 2. Select Standard to use 1/32 inch units or Metric for 1 mm units for adjustments. 3. Select Set & Print. Click Send to Printer.
4. Turn the test page so that -x is to the left and -y is at the top of the crossed lines. 5. Check the current settings printed near the crossed lines. The factory default is x = 0, y = 0, which should cause each line to print 1" (25.4 mm) from the edge of the page. Coordinates listed on the alignment test page indicate change from the factory default in dots per inch. Because these measurements are rounded for display, adjustments should be based on careful measurements, not the printed coordinates.
9. Measure the -x and -y lines on the new test page. If the lines are not each 1" (25.4 mm) from the edge of the paper, go back to step 5 and repeat the process. 10. When the -x and -y lines are set correctly, click Close. Choose File: Quit to close Command Center. Downloaded Fonts Fonts downloaded to your printer are considered resident, which means applications do not have to bundle these fonts with print jobs. You can download fonts to your printer’s optional hard disk or to printer memory.
2. Select the folder on your Macintosh that contains the font files from the drop down menu on the top left of the window (fig. 3.25). The large box on the left displays the fonts in the selected folder. 3. Select Memory or Disk from the Device menu as the destination for the downloaded fonts. Note: 4. If more than one optional hard disk is attached to your printer, select the target disk from the drop-down menu.
2. Choose Printer or Screen and then click OK. If you select Printer, a list prints of fonts in the printer cartridge ROM and on the hard disks; if you select Screen, the Font Directory window appears (fig. 3.27). Fig. 3.27 Font Directory Window 3. Select the font storage area from the Device menu to view the fonts present in that area. 4. Remove a font from printer memory or a hard disk by highlighting the font and clicking Delete. 5.
Chapter 4 - PC Setup Chapter Overview Introduction ..................................................................................... 4-3 XANTÉ Utilities CD-ROM (PC) .................................................... 4-3 Adobe Acrobat Reader 3.0 .............................................................. 4-5 XANTÉ Utilities Installer ............................................................... 4-5 XANTÉ Utilities and Application Drivers ...............................
Notes 4-2 PC Setupbb __________________________________________
Introduction This chapter describes the contents of the PC XANTÉ Utilities as well as installing and configuring the Adobe PostScript printer driver and your printer’s PPD (PostScript Printer Description) file. The procedures section covers your printer’s features and options. Note: Before beginning this setup, you should be familiar with all standard PC and Windows procedures. XANTÉ Utilities CD-ROM (PC) This section describes PC files and folders on the utilities CD-ROM.
The Pdfs folder contains printer drivers required by QuarkXPress. See “XANTÉ Utilities Installer” and “PDFs Folder” later in this chapter. The Ppds folder contains XANTÉ PPDs for Roman font printers. See the CD-ROM’s Readme.PDF file and “Adobe PostScript Printer Drivers” later in this chapter. The Ps_files folder contains PostScript files that can be downloaded to your printer using XANTÉ Command Center. See the Overview.pdf file in the CD-ROM’s Ps_files folder and “Ps_files Folder” later in this chapter.
Always check the CD-ROM’s Readme files for information not available at the time this manual was printed. Adobe Acrobat Reader 3.0 XANTÉ Utilities CD-ROM documentation is in Adobe Acrobat Portable Document Format (PDF). You can install Adobe Acrobat Reader 3.0 from the CD-ROM. Windows NT 3.5.X users should install the Windows 3.1 version; Windows NT 4.0 users should install the Windows 95 version. 1. Insert the XANTÉ Utilities CD-ROM into your PC. With Windows 95, 98, or NT 4.
XANTÉ Utilities Installer runs properly only on an Intel based computer running Windows 95, 98, or NT. To load the Adobe PostScript printer drivers manually, see the CD-ROM’s Readme.pdf and “Adobe PostScript Printer Drivers” later in this chapter. To load QuarkXPress PDFs manually see “PDFs Folder” later in this chapter. To install XANTÉ Command Center manually, run the CD-ROM’s Setup.exe file in the Xutils folder. XANTÉ Utilities and Application Drivers Note: To do the NT 4.
Fig. 4.1 Select Your Printer Model(s) b. Select the application version that you use. Note: If you are not using a listed application for Windows 95 and 98, select Next and go to step 3.d. For NT 4.X, select None and Next and go to step 3.e. Fig. 4.2 Select Your Printer Application(s) c. Select the destination directory for the application, if you specified an application and click Next.
f. Select the AdobePS printer driver (fig. 4.3) for Windows 95 or 98, and click Next. This window does not appear for Windows NT 4.X because only the AdobePS 5.X driver (which supports both PostScript Level 2 and 3) is available. For NT 4.X skip to step 3 in “Installing the AdobePS Printer Driver and Printer PPD” in the “Windows 95, 98, and NT 4.0 Drivers” section later in this chapter. Fig. 4.3 Select the AdobePS Printer Driver Windows 95 or Windows 98: 4. • AdobePS 4.
Fig. 4.4 Start Copying Files Window 5. Click Next to install XANTÉ Utilities and any applicationspecific PPD that you selected. Then use the following appropriate procedure depending on which AdobePS driver version you selected: For AdobePS 4.1: Skip to “Installing AdobePS 4.1, 4.2, or 5.X and the Printer PPD.” For AdobePS 4.2: Skip to step 3 in “Installing the AdobePS Printer Driver and Printer PPD.” For AdobePS 4.3: When, the following screen appears, continue to step 6. Fig. 4.
6. Click Finish on the Setup Complete window (this is the window behind the AdobePS screen in figure 4.5). Then, wait approximately 10 seconds and click Yes in the AdobePS window (fig. 4.6). The Adobe PostScript Installer automatically launches. Fig. 4.6 AdobePS Window 7. Go to the appropriate section for your operating system in “Adobe PostScript Printer Drivers” to continue the installation.
Deleting Previous Driver Versions Normally, you do not have to delete previous Adobe PostScript printer drivers or any previously installed Adobe PostScript printers. However, if you suspect installation problems, first remove your installed printers from the Printers dialog box in the Windows Control Panel and reinstall them via the Adobe PostScript Printers dialog box which is also in the Windows Control panel.
3. Delete each of the following four files on your C drive using the following procedure. Adobeps4.drv Adobeps4.hlp Defprtr2.ppd Adfonts.mfm a. Enter the name of the file to be deleted in the Name field (Fig. 4.7). b. Select Include subfolders. c. Make sure C:\ is selected under “Look in.” d. Click Find Now. The file name should appear in the bottom of the window. e. Highlight the file name and press the Delete key.
8. Restart your computer and install the desired AdobePS driver. See “Windows 95, 98, and NT 4.0 Drivers” later in this chapter. Deleting AdobePS 4.0 and Earlier To delete AdobePS 4.0 and earlier versions of the driver 1. Exit Windows and go to DOS. 2. Delete the following files from both your Windows and Windows: System directories. Note: Your configuration may not include all these files, but you need to delete the ones that are there. *.EBF *.PPB *.PPD *.PFM (delete the *.
4. Use Notepad or another ASCII text editor to delete the following entries from the Win.ini file in the Windows directory. Only delete the lines indicated by notes in the right column; the other lines are to help you locate the entries.
c. Use Windows Explorer to go the CD-ROM’s Drivers: Win95_98: Ps41 or Ps42 folder and open the appropriate language folder; then, check the Readme file for updates before beginning installation. d. Double-click the Setup.exe icon in the CD-ROM’s Ps41 or Ps42 folder’s appropriate language folder to begin installation. e. Go to step 2 (AdobePS 4.3) or step 3 (AdobePS 4.2 or 4.1) to continue installation. 2. Read the Welcome window and click Next for AdobePS Driver 4.3.
2. Select Yes or No in the Install Setup Program window; then click Next. If you select Yes, go to step 3. If you select No, skip to step 4 after the driver files load. 3. Click Next to copy the AdobePS printer driver files and setup program to the default directory on your PC. Then, click Next. The Printer Type screen appears. Note: If an Existing Files On Local Disk window appears, click Next to install the files again or Skip to not reinstall the files. 4.
6. Click Next to bring up the Install PostScript Printer from PPD window (fig. 4.10). With a networked printer for AdobePS 4.1, go to step 7 or for AdobePS 4.2, skip to step 9. Note: Check with your system administrator if you have questions about the correct network information. Fig. 4.10 Select the XANTÉ PPD 7. Select the drive containing the CD-ROM (fig. 4.
9. Select the port through which your PC is connected to the printer from the Available Ports box in the Local Port Selection window (fig. 4.11); then for Windows 95 and 98 click Next and go to step 11. For Windows NT 4.0, select LPT1; then, click Next and go to step 10. (The actual port configuration is done in “Configuring the PPD for Windows 95, 98, or NT 4.X,” later in this chapter.) Note: Click Configure Port to change port configuration. Fig. 4.11 Local Port Selection Window 10.
a. Use the default printer name or type in a name you prefer. b. Check Yes to set the printer as the default. c. Select either Yes or No to print a test page for Windows 95 or 98. Select No to skip the test page print for Windows NT 4.0 because the port has not been set up at this point. d. Click Next. Note: If you get an attempt to install an older version message, with AdobePS 4.2 click Continue or with AdobePS 4.1, delete the older file. 12. Click OK. The Printer Properties window closes. 13.
Note: If you use Browse, go to the drive containing the XANTÉ CD-ROM. Open PPDs:level 3:Win 95_98 and choose your printer from the list. Click OK and then Next. 4. Select the port to use with your printer. Then, click Next. The Printer Information window appears. Note: If you want to view or change the selected port’s parameters click Configure Port. 5. Use the default Printer name or enter another name in the Printer Name field. Select Yes to use the new printer as the default printer.
3. Click the Device Options tab (Windows 95 or 98) or the Device Settings tab (Windows NT 4.X). Then, make the following changes for options installed on your printer (fig. 4.13) using the appropriate following procedure. Windows 95 and 98—highlight the option in the Installable Options section; then select the setting under Change Setting. Windows NT 4.X—highlight the option in the top half of the Device Settings window; then, select the setting in the bottom half of the window. Fig. 4.
Note: c. This does not enable the Spooler on your printer. The Spooler must be enabled using either the front panel Interface menus or XANTÉ Command Center. See “Spooler” in chapter 6 and “Spooler” later in this chapter for details. Select the amount of RAM installed on your printer. For Windows 95 and 98, use the VMOption and then go to step 4. For Windows NT 4.X, use Installable Options:InstalledMemory and then skip to step 8. 4.
Fig. 4.14 PostScript Tab a. In the PostScript output format box, select PostScript (optimized for speed) if you have a Pentium processor. If not, select PostScript (optimized for portability-ADSC). b. Under PostScript header, select Download header with each print job. c. Under PostScript timeout values, make sure the setting are • Job timeout: 0 • Wait timeout: 240 7. Click the General tab if you want to print a test page; then, click Apply and then Print Test Page. Then, skip to step 9. 8.
9. Click OK. The Printer Properties window closes. 10. Select File: Close. The Printers window closes. After the AdobePS printer driver and PPD are installed and configured, you need to do one of the following: Windows 95 or 98—to verify that printer interfaces are properly configured, see “Configuring the Printer” later in this chapter. Windows NT 4.X—to set up your printer for TCP/IP or AppleTalk, continue to either “LPR Port Setup for TCP/IP” or “AppleTalk Setup for EtherTalk” in chapter 5.
PDFs Folder This folder contains PDFs (Printer Description Files) for each XANTÉ printer. QuarkXPress versions prior to 3.3.2 require these files in addition to the PPD. Use these PDFs to ensure the highest quality output from your printer and QuarkXPress. The XANTÉ Utilities Installer loads the QuarkXPress PDF. To load these PDFs manually 1. Load and configure the Adobe PostScript printer driver and your printer’s PPD following instructions in “Adobe PostScript Printer Drivers” earlier in this chapter.
D.ps contains a Control-D (PostScript’s end-of-job marker) for use with applications that do not send a PostScript end-of-file. Fonts.ps3 prints a list of Adobe PostScript 3 fonts resident on XANTÉ PostScript 3 printers. Fontsamp.ps3 prints samples of Adobe PostScript 3 fonts resident on XANTÉ PostScript 3 printers. Ftp.ps prints instructions for uploading and downloading files to XANTÉ’s FTP (File Transfer Protocol) site. InitdskX.
Setzone.ps allows you to set your printer’s EtherTalk zone namer. Open the file in a text editor and change “name of zone” in the parentheses to the name of your EtherTalk zone. Save the file, and download it to your printer. The printer must be restarted before the change is effective. Startpg.off disables the printer’s start-up page feature, which prevents it from printing automatically each time the printer is restarted. See “Start-up Page” in chapter 6 for details. Startpg.
Controller Menu This menu allows you to perform page and line length calibrations, get printer settings and status information, download PostScript files to the printer, set network parameters, and change some printer default settings (fig. 4.15). Fig. 4.15 Controller Menu General General menu options (fig. 4.16) allow you to access printer status information, perform diagnostics and troubleshooting, and set some network parameters. Fig. 4.
– The General screen gives the product name, the PostScript version, the amount of RAM installed, the margin (Page Align) settings, and the size and status of storage devices configured on the printer. – The Diagnostic screen provides an EEPROM status update. – Your Product Information screen lists the product name.
• Update PPD Fonts allows you to add all of your downloaded fonts to your current PPD (PostScript Printer Driver). Your PPD should be updated using this menu anytime you download fonts to the printer. This allows you to use the downloaded fonts as printer resident and to avoid packaging these font files with print jobs. • I/O Buffer Clear allows you to empty the I/O buffer before sending any data to it. This makes communication more reliable.
Spooler This option allows you to enable and control printer hard drive spooling. Spooling frees up the communication channel between your PC and printer which permits your computer to return to other processing quickly. Spooling can be enabled for each interface independently using this menu or printer front panel Interface menus. See “Spooler” later in this chapter for details. Novell The Novell menu (fig. 4.
Set Print Server Login Name—allows you to set the name your printer uses when logging into a Novell file server. Set Print Server Password—allows you to set the password your printer uses to login to a Novell file server. Test Directory This option is not for use with laser printers. More X-ACT This option allows you to calibrate printer line length to a standard and to correct inaccuracies in printing width, height, skew, and angle.
Spooler If your printer has an optional hard drive, you can use the spooler to place print jobs into a queue on the hard drive. These jobs then can be reprinted from the queue, eliminating the time required to process and send the file to the printer. The Save Spooled Job feature allows you to save up to 250 print jobs on the hard drive for reprinting later. See “Spooler” in chapter 6 for details.
To Enable the Spooler 1. Open XANTÉ Command Center and select Controller: Spooler. The Spooler window appears. Fig. 4.19 Configure Menu in the Spooler Window 2. Choose Configure: Spool Device). The Select Spool Device window appears (fig. 4.20). Fig. 4.20 Select Spool Device Window 3. Select the disk to store the spooled jobs (or select NONE to disable spooling); then click OK. The Spooler window reappears (fig. 4.19).
4. Choose Configure: I/O Interfaces to Spool. The Select I/O Interfaces to Spool window appears (fig. 4.21). Fig. 4.21 Select I/O Interfaces to Spool Window 5. Select the interface that you use to send files to the printer; then click OK. The Spooler window reappears (fig. 4.19). 6. Click Close to exit the Spooler menu; then select File: Exit to close Command Center. Managing Jobs in the Spooler’s Job Queue The spooler’s job queue can store up to 250 jobs.
Note: The Job queue lists the ID, status, title, spool device, and file size of all jobs in the spooling queue. Job status can be W (waiting to be processed), P (currently processing), or H (already processed and held using the Save Spooled Job feature). 2. Use the Control buttons to manage the jobs in the queue. Print Prints the highlighted job Delete Deletes the highlighted job Delete All Deletes all jobs in the queue Move to Front Moves highlighted job to the top of queue Refresh 3.
• Printing a Calibration Page • Using the Densitometer • Linearizing the Densitometer Data Printing a Calibration Page To begin calibrating your printer, print a calibration page to measure the printer’s current performance as a basis for the calibration. 1. Open XANTÉ Command Center and choose Controller: Linearize. The Linearization window appears (fig. 4.23). Fig. 4.23 Linearization Window 2. Change the Linearization window LPI setting in the Print box (fig. 4.
Note: Always print the calibration page using the same media and toner or press ink as used for the final copy. When calibrating plate or film media, you must select Man Feed using the Tray Select key and select the media size through the front panel MISC: MAN FEED menu. Universal is the largest size available in the front panel. If you have larger media, you need to cut it down to 13" x 18.5" (330 mm x 470 mm). Also, when possible, calibrate from the final output.
e. Click Print Calibration Page (fig. 4.23). The calibration page shows the printer’s performance using no gamma curve correction (fig. 4.24). Note: Print only one calibration page (using the Print Calibration Page button) at the beginning of the calibration process. Printing this page again later in the process resets the calibration, cancelling any linearization you have already done. Fig. 4.
Like any other precision instrument, the densitometer must be calibrated before each use. Refer to its documentation for instructions on calibrating and using the densitometer. After calibrating the densitometer, use it to get density measurements for the calibration page you printed. Linearizing the Densitometer Data Enter the densitometer measurements to calculate the adjustments necessary to correct printer performance to a linear standard. 1. Click Enter Curve/Linearize (fig. 4.23).
3. Make sure to enter the solid black (1) and solid white (2) measurements first. Enter the number of the patch whose densitometer measurement most closely matches (within ± 2%) the corresponding percentage in the enter the box numbers section (3). For example, when you are reading for 2%, if the box labeled 7 measures 2%, enter the number 7 in the corresponding box. Note: The calibration page blocks are numbered from 0 to 255.
Advanced Gamma Control If you are an expert user, you may want to adjust image lowlights, midtones, highlights and details in a gamma curve using the Advanced option in the Linearization window. Note: You cannot see advanced window adjustments on screen. Unless you are an advanced user, you should make these adjustments through an application. 1. Select the gamma curve to update from Update Transfer Curve in the Linearization window (fig. 4.23). 2. Click Advanced.
5. Click Close; the Linearization window closes. Then, select File: Exit to close Command Center. Managing Custom Gamma Curves You can retrieve custom gamma curves (that you created or downloaded using the densitometer and Command Center) from your printer and save them on your system. These files can be downloaded to the printer again as needed. To manage custom gamma curves, open XANTÉ Command Center and select Graphics: Linearization. The Linearization window appears (fig. 4.23).
Fig. 4.27 Reset Curves Window 2. Choose either Reset Custom Gamma X to factory setting (the X will be replaced by the number of the curve you highlighted in step 1) or choose Reset all to factory settings. Then, select Negative Film if the final printed output will be a negative print. 3. Click Ok. After the curve or curves are reset, the Linearization window reappears. 4. Click Close; the Linearization window closes. Then, select File: Exit to close Command Center.
Note: To use the front panel XACT menu, you need a ruler with 1/2 millimeter rule. Also, you must use the paper cassette, not the multipurpose feeder, when making X-ACT adjustments. Adjustments for one size media apply to every media size, so you do not have to make individual adjustments for each size. 1. Make sure the printer is on and idle. Then, make sure that media the size of your final output is loaded in the printer’s paper cassette and the cassette is selected as the media source. 2.
a. Note the amount Line B is over or under 388.61 mm. b. Press the Menu key until LINE B appears. Then, press the Enter key. c. Press the Menu key until the amount which would most closely adjust the line to the desired length appears. Then, press the Enter key. For example, if Line B is 389 mm instead of 388.61 mm as it should be, select -0.50 mm to shorten the line to 388.50. 7. Press the Reset key to return to the previous menu level.
Fig. 4.28 More X-ACT Window 2. Make sure that the same type of media you will use for final printing is loaded in the printer. 3. Select the media type you are using from the Media Type drop-down menu. Note: Each media type can have only one set of options. For example, if you calibrate for 8 1/2 x 11 (letter) paper, choose Paper as your media type. If you also calibrate for 11 x 17 (tabloid) paper, choose User-defined 1 as your media type.
4. Check Options to make sure the paper (media) source and print settings are correct. If any of the settings are incorrect, click Change Options; when the More X-ACT Advanced Setup window appears (fig. 4.29), make the necessary changes. Fig. 4.29 More X-ACT Advanced Setup Window a. Under Paper Source, if you select Manual feed go to step 4.b; if not, skip to 4.c. b. Under Manual Feed Options, if you are using standard size media, click Standard Paper Size and select the size from the drop-down menu.
5. Click Print Calibration Page. A test page similar to the one shown in the Calibration Page section prints. A A Measure dashed line from left edge of paper to top arrow tip; enter results in millimeters in box A. B D C E B C Measure dashed line from top edge of paper to left arrow tip; enter results in millimeters in box B. Measure solid horizontal line from left arrow tip to right arrow tip; enter results in millimeters in box C. This should be close to the value shown in box H.
9. Repeat steps 5 through 8 until the measurements in the corresponding boxes are within .5 mm of each other. Note: Your application printer properties must match your calibration settings. For example, if you chose Userdefined 1 as your media type in the More X-ACT calibration window for 11 x 17 (tabloid) paper, you must choose User-defined 1 as your Media Weight in your application printer properties when printing on 11 x 17 paper. 10. Click Close. The More X-ACT window closes.
2. Click Update/Print to print an alignment test page. Click OK in the Alignment message box. 3. Turn the test page so that -x is to the left and -y is at the top of the crossed lines (fig. 4.31). 4. Check the current settings printed near the crossed lines. The factory default is x = 0, y = 0, which should cause each line to print 1" (25.4 mm) from the edge of the page. Coordinates listed indicate the change from the factory default in dots per inch.
8. Measure the -x and -y lines on the new test page. If the lines are not each 1" (25.4 mm) from the edge of the paper, go back to step 4 and repeat the process. 9. When the -x and -y lines are set correctly, click Close. Then, select File: Exit to close Command Center. Managing Fonts on an Optional Hard Disk Fonts downloaded to your printer are considered resident, which means applications do not have to bundle these fonts with print jobs.
Chapter 5 - Ethernet Setup Chapter Overview Introduction ..................................................................................... 5-3 EtherTalk Network Configuration .................................................. 5-3 Select the EtherTalk Phase 2 Driver ......................................... 5-3 Change the EtherTalk Zone Name ........................................... 5-4 Novell NetWare Configuration .......................................................
Notes 5-2 Ethernet Setupbb ______________________________________
Introduction This chapter covers configuration for the EtherTalk, Novell Print Server, and Line Printer protocols on the printer’s Ethernet interface using printer front panel menus, XANTÉ Command Center, and specific network software. It also covers NetBEUI configuration in a PC environment. EtherTalk Network Configuration Ethernet, a multiple protocol medium, allows you to run several network protocols concurrently.
• Select the Phase 2 driver through the Network Control Panel under Apple menu: Control Panels on a Macintosh with an older operating system (System 6.X and earlier). • Select Ethernet from the drop down menu in the AppleTalk Control Panel under Apple menu: Control Panels on a Macintosh with an operating system that supports Open Transport (System 7.5 and later and some versions between 6.X and 7.5).
5. Choose File: Quit to close Command Center. 6. Restart the Printer to make the new zone name effective. Novell NetWare Configuration The Ethernet upgrade allows your printer to support EtherTalk, Novell NetWare print server, NetBEUI, and TCP/IP protocols concurrently. In a Novell network, users send print jobs to a queue on a server. The print server monitors these queues and submits the jobs to the appropriate network printer. Your printer can service multiple print queues on up to four file servers.
Selecting the Novell Names Certain characters are invalid for use in Novell names (fig. 5.2). The Novell utility automatically replaces any of these characters in the printer’s default name with an underscore (_) character and changes all characters in the name to uppercase. space ( ) double quote (") asterisk (*) plus sign (+) less-than sign (<) equals sign (=) greater-than sign (>) question mark (?) comma (,) forward slash (/) colon (:) semi-colon (;) left bracket ([) backward slash (\) right bracket (
To configure the Novell server for NetWare versions 3.X or 4.X see the next section; for version 5.X, skip to “Configure the Novell Server (NetWare 5.X)” later in this chapter. Configure the Novell Server (NetWare 3.X and 4.X) This section covers setup for Novell NetWare Version 3.X and 4.X using PConsole. 1. Check the AUTOEXEC.NCF file on the Novell file server from the server console. If the following statement is not in the file, add it using a text editor. Set allow unencrypted passwords = on 2.
d. 5. 6. Press Escape until you return to the Available Options menu. Set up the Print Queue name. a. Select Available Options: Print Queue Information (version 3.X) or Available Options: Print Queues (version 4.X) and press Enter. b. Press Insert and type in a queue name. XANTÉ recommends that the name be twelve characters or less. Link the Print server name to the Print Queue name. a. b. For version 3.X: 1) Highlight the print queue name that you entered in step 5.b and press Enter.
Now that the Novell server is configured for NetWare 3.X and 4.X, skip to “Configure the Print Server Emulation” later in this chapter. Configure the Novell Server (NetWare 5.X) Use XANTÉ Command Center to setup the Novell print server name, the file server name of the Novell server and the Printer AppleTalk name if it is different. (See “Selecting the Novell Names” earlier in this chapter for details.) Also use Command Center to enable login and printing. To configure the Novell server for NetWare 5.X 1.
3. Highlight the main organization where the printer will be installed (fig. 5.3). Then, select Object: Create (fig. 5.3). The New Object Window appears (fig. 5.4). Fig. 5.4 New Object Window 4. Select Print Queue and then click OK (fig. 5.4). The Create Print Queue window appears (fig. 5.5). Fig. 5.
5. Select Directory Service Queue and under Print Queue Name enter the desired queue name (such as XANTE_Q). 6. Click the Browse button to the right of the Print Queue Volume field (fig. 5.5). The Select Object window appears (fig. 5.6). Fig. 5.6 Select Object Window 7. Highlight the print server volume in the left side of the Select Object window. This will be the file server name_sys. Then click OK; the Create Print Queue window reappears (fig. 5.
10. Select Printer under Class of new object (fig. 5.4). Then, click OK. The Create Printer window appears (fig. 5.7). Fig. 5.7 Create Printer Window 11. Enter the printer name as it appears on the printer’s start-up page (for example PlateMaker 3). Note: In a Macintosh environment, the printer can be renamed using XANTÉ Command Center. See “Networking Menu” in chapter 3. 12. Select Define additional properties; then, click Create. A window for your printer appears (fig. 5.8). Fig. 5.
13. Click Assignments; then, click Add (fig. 5.8). The following Select Object window appears. Fig. 5.9 Select Object Window 14. Highlight the print queue name in the left of the Select Object window. Then, click OK. The Network Administrator window reappears (fig. 5. 3). 15. Highlight the main organization where the printer will be installed. Then, select Object: Create. The New Object window reappears (fig. 5. 4). 16. Highlight Print Server in the Class of new object list. Then, click OK.
17. Enter the printer server name. This name must match the Novell Printer Server Name from the printer start-up page. Then, click Create. The following Print Server window appears (fig. 5.11). Fig. 5.11 Print Server Window 18. Click Assignments and then click Add. The Select Object window reappears (fig. 5.9). 19. Highlight your printer’s name in the left side of the window. Then, click OK. The Network Administrator window reappears with three new icons on the list (fig. 5.12). Fig. 5.
20. Enable Novell Print Server on the printer’s front panel using the following procedure. a. Press the Online key once to take the printer offline. b. Press the Menu key until SETUP:I/F appears; then, press the Enter key. c. Press the Menu key until I/F:NVL PSRV appears; then press the Enter key. NVL PSRV:ENABLE appears. d. Press the Enter key. Then, press the Menu key until ENABLE:yes appears. e. Press the Enter key. Then press the Online key.
Fig. 5.13 Add File Server Window 3. Type in the name of the Novell file server that your printer will poll for print jobs exactly as it appears in PConsole; then click OK to return to the main menu. Note: The printer enters a waiting state while it saves the file server name. Do not proceed until the printer displays the READY/IDLE message. 4. If you did not use the printer’s default Novell print server name in the file server configuration with PConsole (in “Configure the Novell Server (NetWare 3.
Note: The printer enters a waiting state while it saves the file server name. Do not proceed until the printer displays the READY/IDLE message. 5. If a password is required to access the file server, change the print server password to agree with the password set up on the file server. Note: If no password is required to access the Novell server, this step is not required. a. Choose Controller: Novell: Set Print Server Password. b. Type in the password exactly as it was entered on the file server.
Fig. 5.15 New File Server Window 3. Type in the name of the Novell file server that your printer will poll for print jobs exactly as it appears in PConsole; then click OK to return to the main menu. Note: The printer enters a waiting state while it saves the file server name. Do not proceed until the printer displays the READY/IDLE message. 4. If you did not use the printer’s default Novell print server name in file server configuration with PConsole (in “Configure the Novell Server (NetWare 3.X and 4.
Note: The printer enters a waiting state while it saves the file server name. Do not proceed until the printer displays READY/IDLE. 5. If a password is required to access the file server, change the print server password to agree with the password set up on the file server. Note: If no password is required to access the Novell server, this step is not required. a. Choose Networking: Novell Print Server: Set Print Server Password. b.
• To enable the Ethernet Interface, which directs the printer to login to listed file servers and begin printing jobs from assigned print queues, use either Command Center or printer front panel menus. • To configure the frame type used on your network, use either Command Center’s Macintosh version or printer front panel menus.
2. Choose Networking: Novell Print Server: Login & Printing. Fig. 5.17 Print Server Login and Printing Control Window 3. Click the option buttons for Enable Login and Enable Printing. Click Ok to save the changes and return to the main menu. This directs the printer to login to the assigned file servers and begin printing jobs from the assigned print queues. 4. Choose Networking: Novell Print Server: Network Protocol. Fig. 5.18 Network Protocol Window 5.
Line Printer Configuration The Ethernet interface’s Line Printer option allows you to configure your printer to communicate using TCP/IP (Transmission Control Protocol/Internet Protocol). TCP/IP provides a method of communication between different types of networks. It is the Internet’s basis for data transmission and is becoming more widely used on all types of computers and operating systems.
TCP/IP addresses are divided into classes based on the network’s size. The TCP/IP address assigned depends on the class and includes the network ID and the host (individual computer or peripheral) ID. A: 1 Class 1 Bit Net ID 7 Bits Host ID 24 Bits Network Address B: 1 0 Class 2 Bits Net ID 14 Bits Host ID 16 Bits Network Address C: 1 1 0 Class 3 Bits Net ID 21 Bits Host ID 8 Bits Network Address XANTÉ Printer Default TCP/IP Address: 192.9.200.
Note: The actual number of usable host IDs is smaller than the calculated number listed above, because some addresses are reserved, by convention, for specific uses. See the list in the next section, “Reserved IP Addresses.” Reserved IP Addresses The addresses in the following table are reserved, by convention, and should not be used as a device address.
Broadcast Addresses The server uses a broadcast address to send information to all network workstations. In the absence of subnetting, the broadcast address is created by using the network ID address octets and 255 (all 1s) for the host ID octets. XANTÉ printer default addresses On a class C network, the broadcast address is 192.9.200.255 On a class B network, the broadcast address is 192.9.255.255 On a class A network, the broadcast address is 192.255.255.
Using XANTÉ Command Center (PC) Note: Your PC must be directly connected to the printer through a parallel or serial cable to use XANTÉ Command Center. You cannot set the commands through a network. 1. If necessary, enable the Line Printer interface using printer front panel menus. See “Interface Control” in chapter 6. 2. Open XANTÉ Command Center by double-clicking its icon. 3. Choose Controller: General: TCP/IP Address. Fig. 5.20 PC TCP/IP Address Window 4.
2. Choose Networking: TCP/IP: Address. Fig. 5.21 Macintosh TCP/IP Address Control Window 3. Change the printer’s default TCP/IP address to the address assigned by your System Supervisor, using the tab key to move to the next octet. 4. Click Ok. Command Center’s main menu reappears. 5. If necessary, enable the printer’s Line Printer interface. The Line Printer interface is enabled as the factory default. a. Choose Networking: TCP/IP: LPR Enable. Fig. 5.
6. Choose File: Quit. Command Center closes. 7. Restart the printer to make the new TCP/IP address take effect. Configure the Printer Setup on the Network There are several UNIX operating systems, including System V (SYSV), Berkeley Standard Distribution (BSD), and Solaris. Each system handles line printer modes differently. Your System Supervisor must configure the print queue, communications, and spool settings for your specific network environment. Windows NT 4.
Fig. 5.23 Printer Ports Window 4. Select LPR Port; then, click New Port to bring up the Add LPR Compatible Printer window (fig. 5.24). Note: If LPR is not an option, you must log in as the Administrator and select Control Panel: Network: Services and make sure that Microsoft TCP/IP Printing is installed. If not, click Add and select this feature. Then, restart your PC and LPR will appear as an option for this procedure. (You may need the Microsoft NT CD to load this service.) Fig. 5.
6. Select the General tab; then, click Print Test Page and check the printer to see if the Windows NT Test Page printed correctly. 7. Click OK. The Printer Properties window closes. 8. Select File: Close. The Printers window closes. After installing and configuring the AdobePS printer driver and PPD, see “Configuring the Printer” in chapter 4 to verify that printer interfaces are configured properly.
5. Click on your printer’s name. When a prompt appears asking “Do you want to capture AppleTalk printing device,” click Yes to make NT a print server for your network. Note: If you select Yes, NT hides the AppleTalk name from the Macintosh Chooser. If you select No, the Macintosh can still print directly. 6. Select the General tab; then, click Print Test Page and check the printer to see if the Windows NT Test Page printed correctly. 7. Click OK. The Printer Properties window closes. 8.
• NetBEUI allows only one PC to send a print job at a time. • There is a time limit for each NetBEUI job to be processed by the printer and for printing to begin. Once printing begins, the printer cannot accept jobs from other sources. • Such things as printer errors, jams, open covers, etc. can cause the print job to be lost. For example, an error must be cleared within 3 1/2 minutes after the NetBEUI job begins. Once started, data flow must be constant.
Note: If you already have NetBEUI installed as a protocol, skip step 4. 4. Click Add, Protocol, Microsoft, and NetBEUI. Then, press OK. You may need the Window 95/98 OS CD to install the necessary drivers. If so, insert the CD in your CD-ROM drive and click OK. Note: If you already have Client for Microsoft Networks installed as a client, skip step 5. 5. Click Add, Client, Microsoft, and Client for Microsoft Networks. Then, click OK. 6. Click NetBEUI under Network Configuration and click Properties.
5. Select the appropriate printer and click “+” next to the selected printer. Highlight the print queue and click OK. 6. Continue through the remaining instructions and select the correct PPD for your printer. A test page will verify that your system is configured correctly. Your XANTÉ printer is added to the list of available printers. Default Printer Setup To select the XANTÉ printer as the default printer 1. Click Start and select Settings and Printer. 2.
Chapter 6 - Configuration Chapter Overview Introduction ..................................................................................... 6-3 Front Panel ...................................................................................... 6-3 Window .................................................................................... 6-3 Status Lights ............................................................................. 6-4 Control Keys ..........................................................
PCL Emulation Control .......................................................... 6-31 Power Save ............................................................................. 6-33 Print Job Offset (Jog) .............................................................. 6-33 Printer Timeout ....................................................................... 6-34 RAM Disk .............................................................................. 6-34 Resolution Options ....................................
Introduction This chapter describes configuring printer features. Included are manual settings available through the front panel and advanced features available through PPD options and XANTÉ Command Center. Note: PPD options override printer default settings for a specific job or for all jobs sent to the printer from your host. Front Panel The printer’s front panel provides printer status information and allows you to configure some printer features (fig. 6.1).
Status Lights Printer front panel status lights, or LEDs (Light Emitting Diodes), indicate printer status (fig. 6.1). ONLINE/ READY Online/Ready LED is on when the printer is ready to receive data. It is off when an engine error occurs or the printer cover is opened. DATA Data LED is on and does not blink when the printer is receiving data. Blinking indicates that the printer is processing data. Manual LED is on when the multipurpose feeder is selected.
TRAY SELECT Tray Select key allows you to change the default paper tray. Press once to display the current tray selection. Press the Tray Select key to toggle between the available trays. Note: DUPLEX Tray options do not appear in all capital letters in the window. Duplex key is used to toggle between single-sided, edge-duplex, or tumble-duplex printing. The Duplex LED is lit when duplexing is active. RESET Reset key allows you to return to the previous menu level when using configuration menus.
Configuration Menus Use configuration menus to set printer features and interfaces defaults. This section describes using the configuration menus. The three-fold quick reference sheet in the back of this manual illustrates the configuration menu structure. Note: PPD options override printer default settings for a specific job or for all jobs sent to the printer from your host.
Level 1 Reset Level 1 resets all printer options to factory default settings. To do a level 1 reset, turn off the printer, hold in the Online, Tray Select, and Test keys, turn on the printer. Release the keys after RESET 1 appears in the window. Level 2 Reset Level 2 resets printer options to factory default settings except for printer margins, gamma settings, Novell network print server parameters, IP network parameters, and More X-ACT settings.
READY/IDLE MENU TEST SETUP:MISC ENTER MISC:DPI MISC:FONT ACCEL† MISC:GAMMA* MISC:IDIOMREC MISC:INITIAL JOB MISC:JAM RECOVER MISC:JOG MISC:LANG MISC:LPI MISC:MAN FEED MISC:MEDIA MISC:PAPER MODE MISC:POWER SAVE MISC:RAM DISK MISC:SCREEN ∞ MISC:SOFTERROR MISC:STRTUP PAGE MISC:TIMEOUT MISC:TONER PAGE MISC:TRAY SWITCH MISC: XACT** MISC: CLEAN MENU SETUP: I/F ENTER I/F:IP ADDRESS I/F:RS232 I/F:PARALLEL I/F:LTALK I/F:ETALK I/F:LPR I/F:NETBEUI I/F:NVL PSRV SETUP: PCL5 ENTER PCL5:COPIES PCL5:LINES/INCH P
For these options to be available, the Adobe PostScript printer driver and your printer’s PPD must be installed and configured properly. See chapter 3 (Macintosh) or 4 (PC) for details. In most applications, printer specific options in the PPD are accessed through the Device Options tab in Windows 95 and 98, and the Printer Specific Options menu on a Macintosh. Selecting PPD Options (Macintosh) To configure a printer feature from the Print dialog box 1.
4. Choose Printer Specific Options. The printer option menus appear (fig. 6.4). Fig. 6.4 Printer Specific Options Menu 5. Use the right scroll bar to locate the option; then, use the option’s drop down menu to select its setting. Repeat to configure other printer options. 6. Click Save Settings to save the Print dialog box settings as the defaults for all jobs sent to the selected printer. 7. Click Print to send the file to the printer.
Fig. 6.5 Windows 95 and 98 Print Dialog Box 3. Make sure your printer is selected in the Name box (fig. 6.5); then, click Properties. 4. Click the Graphics tab to set the Resolution option. 5. Click the Device Options tab to set other printer options.
Fig. 6.6 Windows 95 and 98 Device Options Tab a. Use the right scroll bar to locate the feature in the Printer features box. Highlight the feature to display the options in the Change Setting for box (fig. 6.6). b. Select the setting from the drop down menu in the Change Setting for box. c. Click Apply after you have made the desired changes. Note: For example, to change the printer memory setting, scroll through the Installable options until you see VMOption.
6. Click OK. The Print dialog box reappears. 7. Click OK to send the file to the printer. Selecting PPD Options (Windows NT 4.0) To configure a printer feature from the Print dialog box 1. Install and configure the AdobePS printer driver and your printer’s PPD following the instructions in chapter 4. 2. Choose File: Print. The Print dialog box appears (fig. 6.7). Fig. 6.7 Windows NT 4.0 Print Dialog Box 3.
Fig. 6.8 Windows NT 4.0 Advanced Tab 5. Highlight the feature in the top box; then select the setting from the options in the bottom box (fig. 6.8). 6. Click OK. The Print dialog box reappears. Then, click OK to send the file to the printer. PPD Menus PPD settings override printer default settings. The AdobePS printer driver and your printer’s PPD must be installed and configured properly for PPD options to appear in your application’s Print dialog box.
On a Macintosh, use the Chooser’s Auto Setup feature to set installable options to agree with the printer’s configuration. To change PPD menu defaults, use the Print dialog box Save Settings button. See “Selecting PPD Options (Macintosh),” earlier in this chapter. On a PC, PPD menu defaults and the installable options are set during PPD configuration. See “Configuring the PPD for Windows 95, 98, or NT 4.X” in chapter 4. The following chart lists features that can be configured from the Print dialog box.
Accurate Calibration Technology (X-ACT) X-ACT (XANTÉ’s patented Accurate Calibration Technology) allows you to calibrate your printer in two ways. You can calibrate printer line lengths using the front panel MISC:XACT menu. You also can use XANTÉ Command Center’s More X-ACT menu to calibrate line lengths as well as correct inaccuracies in printing width, height, skew, and angle. X-ACT is part of the Accel-a-Writer 3G’s Graphic Software package.
Clean (Transfer Roller Cleaning) Use the MISC:CLEAN menu to have the printer perform an approximately 25 second cleaning of the transfer roller. Make sure READY/IDLE displays before selecting START from the Clean menu. CLEANING displays during the cleaning cycle; at the end of the cycle, a blank page prints. When READY/IDLE appears again, the cleaning process is complete and the printer is ready to accept a new job.
The duplexer must be configured as an option in the PPD before you can select it through the Print dialog box. See chapter 3 (Macintosh) or 4 (PC) for details. Note: The duplexer option is not available on the Accel-a-Writer 3G if a 2400 dpi resolution or NEIT upgrade is installed. Also, duplexing RAM requirements vary according to media size. See “Printer Memory Requirements” in chapter 9.
• None, the factory default, prints at normal speed and with no data compression. • Optimized for Quality compresses image data for faster printing than normal but with some (usually not noticeable) loss of image quality. • Optimized for Speed implements a greater degree of data compression to provide the fastest print time but with the possibility of a noticeable loss of data quality.
XANTÉ provides seven standard gamma correction curves and you can create up to seven custom curves. Use the MISC:GAMMA configuration menu or the Print dialog box Gamma menu to select the desired curve. XANTÉ Gamma curves 1 through 5 progressively lighten midrange grayscale values in an image. Gamma 0, the factory default, makes no change to the image and Gamma 6 produces a reverse (negative) image without changing the image in the application. The graphs in figure 6.
Gamma 0 Black Output Levels White 1 0 1 White 1 Gamma 2 Black Black Output Levels White Gamma 1 Black 1 Input Levels 1 0 White Black 1 Input Levels 1 White Gamma 4 Black Black Output Levels White Gamma 3 Output Levels White 0 Black 1 Input Levels 1 0 White Gamma 5 Black 1 Input Levels 1 White Output Levels Gamma 6 Black Black Output Levels White 0 White 1 Input Levels Output Levels White Black 0 Black Input Levels 1 White 0 Black Input Level
Idiom Recognition Idiom Recognition allows you to use newer, more efficient PostScript 3 commands in place of older PostScript commands for the same action. This feature recognizes the older commands and substitutes the newer more efficient ones for processing. Set Idiom Recognition using the MISC:IDIOMREC configuration menu. Yes, the factory default, enables this feature; No disables it.
SETUP:I/F ENTER TEST I/F:IP ADDRESS I/F:RS232 ENTER ENTER 192.009.200.
Spool Menu Use Spool menus to enable (YES) or disable (NO) the spooling feature on each interface. Spool menus only appear if an optional IDE disk is installed. The factory default is No for all interfaces. See “Spooler” in chapter 3 (Macintosh) or 4 (PC) for spooling details. RS232 Configuration When using the RS232 port, you must configure the printer and PC to use the same baud rate, parity, flow control, data bit, and stop bit settings.
The Protocol Menu allows you to select 802.3, which is the default packet type for NetWare versions 3.12 and up, or 802.2 (NO SNAP), which is the default packet type for NetWare versions prior to 3.12, as the Novell protocol frame type used on your network. The factory default is 802.3. The Timeout menu allows you to set a timeout for the Novell Print Server emulation. If the printer cannot locate an assigned file server during the selected time, the Novell Print Server emulation is disabled.
Set Jam Recover from the MISC:JAM RECOVER configuration menu. Options are Yes to enable and No (the factory default) to disable this feature. Note: If you must turn off the printer to clear a paper jam, Jam Recover is not effective because all print job information in RAM is lost. Language Options Language options allow you to select the language for the printer’s front panel window. Set the display language from the MISC:LANG configuration menu.
Note: Throughout this document, all references to media are shown as PAPER (the factory default). The same menu settings apply to Film, Hvypaper (heavy paper), Hvyfilm (heavy film), and five user-defined types of media. The MEDIA:CONFIG menu allows you to select media types and choose submenus to configure that media’s Density (Positive Film Technology), EP1 (toner control), EP2 (humidity control), Fuser Temperature, and NEIT (if available).
Fuser Temperature Control The PAPER:FUSER menu allows you to control your printer’s fuser temperature for different media types. Select Cool, the factory default, when printing to Myriad film, paper, envelopes, labels, and transparencies. Select Warm for heavy paper and heavy film. Negative Enhanced Imaging Technology (NEIT) Traditionally laser printers were designed to print positive images.
Media Weight Media Weight allows you to designate the type of media used and to access correct temperatures for that media. Set Media Weight from your application Print dialog box. Options are Paper, Hvypaper (heavy paper), Film, Hvyfilm (heavy film), and five user defined media weights. Note: You can create custom gamma curves to calibrate or adjust your printer for specific media weights.
Multipurpose Feeder Media Sizes Set the media size used in the multipurpose feeder from the MISC: MAN FEED (Manual Feed) configuration menu. The factory default media size is Letter; other options are Legal 11 x 17 Monarch Envelope A4 A3 DL Envelope B5 Executive C5 Envelope B4 Com10 Envelope Universal (13 x 18.5) To print on a media size not listed in the Manual Feed menu, select the paper size through the application. See “Media Sizes” in chapter 7 for a description of these media sizes.
Paper Mode The paper cassette media guides activate cams which notify the printer of the paper size. Because some international and North American paper sizes are very similar in size, the MISC:PAPER MODE configuration menu specifies whether the cassette setting is for North American paper sizes (US) or for International paper sizes (Euro). PCL Emulation Control Set HP PCL5 emulation options using the PCL5 menus.
Use the Test ← key to lower or the Menu → key to raise the value to the desired amount. Then, press the Enter ↓ key to confirm the selection. Lines/Inch Use the Lines/Inch menu, PCL5:LINES/INCH to select from 1 to 48 lines per inch (lpi) to print. The factory default is 6. Use the Test ← key to lower or the Menu → key to raise the value to the desired amount. Then, press the Enter ↓ key to confirm the selection. Orient Use the Orient Menu to select the page orientation.
Sym Set Use the Sym Set menu to select the symbol set for the desired font from the following list. The factory default is ROMAN-8. ROMAN–8 em 94 l1 em 94 l2 em 94 l5 pc-8 PC-8 dn PC-850 PC-852 PC6tk win l1 win l2 win l5 desktop ps text vn intl vn us ms publ math-8 ps math vn math pi-font legal iso-4 iso-6 iso-11 iso-15 iso-17 iso-21 iso-60 iso-69 windows Power Save Power Save conserves power when the printer is not in use.
Printer Timeout The Timeout feature allows you to select the number of seconds the printer waits for additional data before cancelling a job and returning to the READY/IDLE state. Set Timeout from the MISC:TIMEOUT configuration menu. The factory default of 40 seconds (40 Sec) is an average setting. Set timeout according to the type of files you send. Use a low setting for small, simple files to prevent an indefinite tie-up on one job.
Note: See “Printer Memory Requirements” in chapter 9 about the RAM required to print at higher resolutions. Set available resolutions using either the MISC:DPI configuration menu or the Print dialog box’s Resolution menu. If the resolution upgrade is installed and adequate RAM is available, but the upgrade cannot be selected in your application Print dialog box (it is grayed out), RAM may not be configured properly in the PPD.
Spooler If your printer has an optional hard drive, you can use the spooler to place up to 250 print jobs into a queue on that drive. The spooler reduces return to application time for a print job by freeing the communications channel between the computer and the printer. Save Spooled Job allows you to retain print jobs in the spooler’s queue indefinitely. These jobs can be reprinted from the queue, eliminating the time required to process the file and send it to the printer.
Start-up Page The Start-up Page feature prints a page that lists the selected resolution, installed RAM, hard disk identities, page count, enabled interfaces, and network information (if the Ethernet upgrade is installed) each time the printer is turned on. Set Start-up Page from the MISC:STRTUP PAGE configuration menu, from XANTÉ Command Center on a Macintosh, or by downloading Adobe PostScript files to the printer.
Adjusting Print Density You can increase or decrease the amount of toner laid down by the printer using the print density dial. Note: The amount of toner used increases as printer dial settings move from low (L) to high (H). Printing with too high a setting shortens the life of the toner cartridge and may degrade print quality. To adjust the print density dial 1. Open the multipurpose feeder by grasping the handle in the top center of the cover and pulling down (fig. 6.16).
Fig. 6.17 Adjust the Print Density Dial 3. Close the Multipurpose Feeder. Note: Check the print density dial when you replace a toner cartridge. The setting required for the previous cartridge may be too high or too low for the new cartridge. Toner Page The Toner Page feature automatically prints a toner reorder form when the cartridge needs to be replaced. To order a new cartridge, fill out the form and return it to XANTÉ or to your XANTÉ vendor.
Tray Selection Options You can select a specific tray as the default media source or you can use tray chaining to automatically switch to another source for media when the current source is empty. Selecting a Specific Tray Use the Tray Select control key or your application’s options to select a specific tray as the media source. The Tray Select key allows you to scroll through tray options in the window.
• All selected media sources must contain the same size media. If the printer detects a different size media when it switches to a new tray, a PAPER OUT message appears. • All trays must be properly inserted. When tray chaining is enabled, an incorrectly positioned tray prevents the printer from printing. Use the MISC:TRAY SWITCH configuration menu to change the printer’s default tray chaining option. Normal enables tray chaining to all installed paper cassettes.
Selecting PostScript or Emulation Modes The printer’s front panel allows you to select modes (Adobe PostScript or an emulation) through the Interface menu, SETUP:I/F. For details on selecting the interface, see “Selecting Menu Options” earlier in this chapter. Then see “Interface Control” in this chapter for listings of modes available for each interface port.
Chapter 7 - Media Options Chapter Overview Introduction ..................................................................................... 7-3 Media Specifications ....................................................................... 7-3 Guidelines for Selecting and Storing Media ............................ 7-3 Media Sizes .............................................................................. 7-4 Media Types .............................................................................
Notes 7-2 Media Optionsbb ______________________________________
Introduction This chapter describes selecting and using various media types and sizes and creating double-sided output. Media Specifications To ensure that your job prints correctly, always use appropriate media. Store and handle it carefully to prevent damage to the media and printer. This section provides guidelines for selecting media and describes media types and sizes for use in your printer.
Caution: Using media that does not meet these guidelines may void your printer warranty. XANTÉ is not responsible for damages caused by media. Repair will be at the user’s expense. To prevent damage to media, store media • in small, flat stacks (not set on its side or end). • in the original wrapper in a location with a temperature range from 50 to 86˚ F (10 to 30˚ C) and a stable relative humidity from 30 to 65%. • in a dark area; do not expose it to direct sunlight.
Media Sizes Imageable Areas Letter 8.50" x 11.00" (215 mm x 279 mm) 8.34" x 10.82" (212 mm x 275 mm) Legal 8.50" x 14.00" (215 mm x 355 mm) 8.30" x 13.89" (211 mm x 353 mm) A4 8.26" x 11.69" (210 mm x 297 mm) 8.14" x 11.49" (207 mm x 292 mm) A3 11.69" x 16.53" (297 mm x 420 mm) 11.49" x 16.45" (292 mm x 418 mm) B5 7.16" x 10.11" (182 mm x 257 mm) 7.04" x 9.96" (179 mm x 253 mm) B4 10.11" x 14.33" (257 mm x 364 mm) 9.96" x 14.13" (253 mm x 359 mm) Ledger (11 x 17) 11.00" x 17.
Printing on Custom Sized Media Always use the appropriate feed source for the size and type media you are using, following the procedure in chapter 2 or in “Media Sources” later in this chapter. Set the custom page size through your application. Make sure that paper size selections in the page or document setup section agree with those in the Print dialog box to ensure that the page prints correctly. Caution: Do not use the optional duplexer when printing on custom sized media.
Media Handling This section describes available options for feeding media to the printer. It summarizes the media path and covers using the paper cassettes, the optional paper feeders, the multipurpose feeder, and the duplexer. Media Path Figure 7.1 illustrates the media path in your printer.
2. The image is transferred to the media from the drum. 3. Toner is fixed on the media by the fuser. 4. If the image is two-sided and the duplexer is installed, paper passes through the duplexer, reverses, and goes through steps 2 and 3 again. 5. The paper is delivered into the output tray.
Paper Cassettes The universal cassette included with the printer handles paper sizes from 5.50" x 8.50" (140 mm x 216 mm) up to 13.00" x 18.50" (330 mm x 470 mm) and paper weights from 16 - 28 lb bond (60 - 105 g/ m2). For a 20 lb bond/60 lb text weight (65 g/m2) paper, you can load approximately 500 sheets of paper or to a stack height of 2.13" (54 mm). The optional envelope cassette handles Com-10, Monarch, DL, and C5 sized envelopes with the same paper weight range as the universal cassette.
Load envelopes short edge first in the envelope cassette and the multipurpose feeder. Load envelopes flap closed in the envelope cassette or flap open in the multipurpose feeder to provide a flatter address area print surface. Load media in the cassettes and multipurpose feeder print side up, leading edge to the back of the printer. Most media packages indicate the print side. Use the following chart to determine alignment for standard paper sizes in the universal cassette and multipurpose feeder.
Use the following guidelines and the procedure in “Tray Selection Options” in chapter 6 when tray chaining. • All selected media sources must contain the same size media. If the printer detects a different size media when it switches to a new tray, a PAPER OUT message appears. • All trays must be properly inserted. When tray chaining is enabled, an incorrectly positioned tray will prevent the printer from printing.
Optional Duplexer The optional duplexer allows you to print double-sided copy automatically, rather than by feeding pages manually. Guidelines for using the Duplexer Follow these guidelines when using the duplexer to prevent paper jams and ensure the highest quality output. • Use the duplexer for A3, A4, B4, letter, legal, and ledger size of 16 - 28 lb bond (60 - 105 g/m2) weight paper. • Do not use the duplexer for media other than paper or for A5, B5, executive, statement or oversized (larger than 11.
Chapter 8 - Printing with Various Media Types Chapter Overview Introduction ..................................................................................... 8-3 Printing Computer-to-Film ............................................................. 8-3 Printing Envelopes .......................................................................... 8-5 Printing Labels ................................................................................ 8-5 Printing Transparencies ...............................
Notes 8-2 Printing with Various Media Types ________________________
Introduction This chapter covers printing on computer-to-film, envelopes, labels, and transparencies. It also lists Myriad film sizes. For additional information and troubleshooting procedures, see chapters 2 and 11. Printing Computer-to-Film You can print directly to XANTÉ’s Myriad film (3G) to create an image that can be used to burn metal plates and silk-screen emulsions, bypassing the camera and darkroom steps. Myriad film is a specially designed, semitransparent film with low UV blockage.
• Use the Cool fuser temperature setting for regular weight film and Warm for heavy film. Myriad film is regular weight film. The following chart lists Myriad film sizes. To order Myriad film, call your preferred XANTÉ dealer or your XANTÉ Consumables Sales Representative at 800-540-7091 (US and Canada). Myriad Film Part Number Myriad Film Size 200-100001 8.50" x 11.00" (215 mm x 279 mm) 200-100002 8.26" x 11.69" (210 mm x 297 mm) 200-100003 11.00" x 17.00" (279 mm x 431 mm) 200-100004 11.
Printing Envelopes Use the multipurpose feeder or the envelope cassette, following the procedures in chapter 2, the media specifications in chapter 7, and these guidelines when printing envelopes. • Do not use gummed envelopes or envelopes with adhesive tape. • Before loading the envelope, place it on a flat surface and press it smooth to make the corners and folds as flat as possible. • Feed envelopes print side up, short edge first.
Printing Transparencies Always use the multipurpose feeder, following the procedure in chapter 2, the media specifications in chapter 7, and these guidelines when printing transparencies. • Avoid handling transparencies excessively to prevent fingerprints and scratches. • Keep the paper path clean (see chapter 9); dust or dirt can scratch transparencies and reduce print quality. • Load fewer transparencies if jams occur. The weight of a stack of transparencies could cause the sheets to stick together.
Chapter 9 - Maintenance and Specifications Chapter Overview Introduction ..................................................................................... 9-3 Maintenance .................................................................................... 9-3 Handling the Printer ................................................................. 9-3 Storing the Printer .................................................................... 9-4 Moving the Printer .............................................
Notes 9-2 Maintenance and Specificationsbb ________________________
Introduction Your Accel-a-Writer 3 series printer requires minimal maintenance. This chapter describes how to handle, store, move, and clean your printer and contains technical specifications and warranty information. Maintenance Proper care will extend the printer’s life. Use the guidelines in this section to maintain your printer in optimum working condition and to ensure the highest quality output. Handling the Printer Use the following guidelines when handling or using your printer.
• Allow the printer side vent at least 8.0" (200 mm) clearance to prevent overheating. Never insert anything into the vent. • Make sure the output tray does not overfill. Overfilling can block media as it comes out and cause a printer jam. • Check the power cord and plug monthly and replace it immediately if you find any damage. Storing the Printer Use the following procedure when storing the printer for an extended period. 1. Turn off the printer. Unplug the power cord from the power source. 2.
1. Turn off the printer; then unplug the power cord from the power source. 2. Remove all media from the multipurpose feeder and close it and, if necessary, the top cover. See chapter 2 for instructions. 3. Remove any installed optional feeder or duplexer (see chapter 10, “Options,” for details). Never move the printer with an optional feeder or the optional duplexer installed. 4. Remove the toner cartridge following the procedure in chapter 2. Never move the printer with the cartridge installed. a.
Warning! 2. Allow fuser assembly to cool before removing. Open the fuser cover assembly (fig. 9.1). Fig. 9.1 Fuser Assembly 3. Loosen but do not remove the two thumb screws located on the right side of the printer. 4. Lift up on the right side of the fuser assembly, using the orange tab. Pull the right side of the fuser toward you, while sliding the entire unit to the right. Then lift the assembly out of the printer using the orange tabs. 5.
7. Vacuum the area using a soft brush attachment or blow compressed air into the printer. Warning! Wear protective safety glasses when using compressed air. Caution: Do not pull out any wires while performing this step. 8. Slide the left side of the fuser assembly under the metal bracket and lower into place. 9. Tighten the two screws. 10. Close the fuser cover assembly. Transfer Roller Cleaning 1. Turn off and unplug the printer. 2. Remove the toner cartridge. 3.
4. Clean toner from the transfer roller with a soft bristle brush. 5. Vacuum the area using a soft brush attachment or blow it with compressed air. Warning! Wear protective safety glasses when using compressed air. Caution: Do not pull out wires while performing this step. 6. Lower the roller back into place with the gear end to the left. Make sure the lever protruding below the transfer roller fits inside the small opening on the door. 7. Push the roller into its holding clips.
Fig. 9.3 Toner and Manual Feed Area Cleaning 3. Reassemble the printer and reconnect it to the power source. Exterior Cleaning 1. Turn off your printer and disconnect it from the power source. Caution: 2. Use only water or mild detergent for cleaning. To prevent discoloration, cracking, and deformation of the case, do not use alcohol, ammonia-based cleaners, or other volatile cleaners on or around the printer. Never spray or pour solutions directly on the printer.
3. Give the printer a few minutes to dry thoroughly. Then, reconnect the printer to the power source. Technical Specifications Type: Laser printer; NEC V4310 166 MHz processor Engine Speed: 20 ppm (600 and 1200 dpi) 10 ppm (with 2400 dpi or NEIT upgrade installed) Power Supply: 100/120 V Version- 100/120 VAC (90-132 V) 50/60 Hz (47-63 Hz); 6.5 Amps 220/240 V Version- 220/240 VAC (198-264 V) 50/60 Hz (47-63 Hz); 3.
Language: Adobe PostScript 3 Typefaces: 136 PostScript fonts Types 1, 3, 4, 5, and 6 PostScript download font support Interfaces: Standard: LocalTalk, parallel, RS232 serial, Ethernet (EtherTalk, Novell NetWare, NetBEUI, and TCP/IP) Resolutions: 600 x 600 dpi standard and 1200 x 1200 dpi optional on 3N and 3DN 600 x 600 dpi and 1200 x 1200 dpi standard and 2400 x 2400 optional on 3G Memory: 16 MB RAM standard on 3N 32 MB RAM standard on 3DN 64 MB RAM standard on 3G All upgradeable to 256 MB Media
Printer Memory Requirements Memory requirements vary depending on the print resolution, media size, and duplexing mode. The following chart lists the minimum available memory required to print typical configurations. Available memory is equal to the total RAM installed minus the amount of RAM Disk enabled (see “RAM Disk” in chapter 6). Complex files, large files, or those with heavy graphics may require more than the standard memory to print.
XANTÉ provides a one year limited warranty against defects in material and workmanship on your printer. See “Limited Warranty” later in this chapter. To obtain warranty service, call customer support for an RMA (Return Material Authorization) number and return your printer to the XANTÉ Customer Repair Center, freight prepaid. For locations within the United States and Canada, XANTÉ repairs your printer within five business days.
XANTÉ CORPORATION IS NOT RESPONSIBLE FOR SPECIAL, INCIDENTAL, OR CONSEQUENTIAL DAMAGES RESULTING FROM ANY BREACH OF WARRANTY, OR UNDER ANY OTHER LEGAL THEORY, INCLUDING LOST PROFITS, DOWNTIME, GOODWILL, DAMAGE TO OR REPLACEMENT OF EQUIPMENT AND PROPERTY, AND ANY COSTS OF RECOVERING, REPROGRAMMING, OR REPRODUCING ANY PROGRAM OR DATA STORED IN OR USED WITH XANTÉ CORPORATION PRODUCTS.
Chapter 10 - Options Chapter Overview Introduction ................................................................................... 10-3 Printer Options .............................................................................. 10-3 Paper Handling Options ................................................................ 10-4 Paper Cassette Feeder ............................................................. 10-4 2,000 Sheet Feeder .................................................................
Notes 10-2 Optionsbb __________________________________________
Introduction This chapter describes available printer options and covers installation for those that are user installable. Printer Options You can order controller board upgrades and paper handling options to enhance your printer’s performance. The following chart lists options and their types of installation.
To order options call XANTÉ at 800-926-8839 (US and Canada) from 7:00 a.m. until 7:00 p.m. Central Standard time Monday through Thursday or 7:00 a.m. to 6:00 p.m. on Friday, or call your XANTÉ vendor. If it is a factory upgrade, you will be given an RMA (Return Material Authorization) number and shipping instructions.
Installing the Paper Cassette Feeder 1. Unpack the paper cassette feeder from the shipping carton. Remove all plastic, tape, and stabilizing material. Save the carton and packing material to use for storing the feeder. The package should contain the following items: • Feeder unit • Paper Cassette with cover • 2 IOT screws (fig. 10.3) 2. Place the feeder on a level, sturdy surface that meets the guidelines in “Printer Location” in chapter 2. Fig. 10.1 Paper Cassette Feeder 3.
Warning! 6. The printer weighs approximately 58.5 lbs (26.5 kg) without the toner, cassettes, and media installed. Always have two people lift the printer using the recessed grip areas on the right and left sides. Lift the printer over the feeder and align the two stubs on the feeder with the holes on the bottom of the printer (fig. 10.2). Fig. 10.2 Align the Printer over the Feeder 7. Lower the printer onto the feeder. The feeder’s stubs should fit easily into the holes on the printer.
8. Insert the screws supplied with the feeder into the holes on the bottom of the printer (fig. 10.3). Tighten the screws to secure the feeder to the printer. Fig. 10.3 Secure the Printer to the Feeder 9. Unpack the cassette, load it with paper, and install the first and second cassettes according to procedures in chapter 2 (fig. 10.4). Fig. 10.
Removing the Paper Cassette Feeder 1. Make sure the printer displays a PLEASE WAIT or READY/IDLE message. Then, turn off the printer and disconnect the power cord from the power supply (fig. 2.6). 2. Remove media from the multipurpose feeder and the output tray; then, close the multipurpose feeder. 3. Remove all paper cassettes from the printer. Pull each cassette out until it stops. Lift up slightly and remove it from the printer (figs. 2.16 and 2.17). 4.
Note: The optional 2,000 sheet paper feeder is available only for 20 ppm printers. It cannot be used on printers that have the 2400 dpi or NEIT upgrade installed. Installing the 2,000 Sheet Feeder 1. Unpack the 2,000 sheet feeder from the shipping carton. Remove all plastic, tape, and stabilizing materials. Save the carton and packing material to use for storing the feeder. The package should contain the following items: • Feeder unit • 2 Footers • 4 Allen screws (fig. 10.8) 2. • 2 IOT screws (fig. 10.
Warning: a. To ensure the stability of the 2,000 sheet feeder, do not use the feeder without first installing the footers. Place the footer next to the feeder (fig. 10.6). Fig. 10.6 Align the Footer with the Feeder b. Lift the footer slightly and slide the tabs on the footer into the slots on the feeder (fig. 10.7). Fig. 10.
c. Use the Allen screws and screwdriver to secure the footer to the feeder (fig. 10.8). Fig. 10.8 Attach the Footer to the Feeder 4. Turn the locking key on the top of the feeder counterclockwise to release the lock (fig. 10.9). Fig. 10.
5. Make sure the printer displays a PLEASE WAIT or READY/IDLE message; then, turn off the printer and disconnect the power cord from the power supply (fig. 2.6). 6. Remove all media from the multipurpose feeder and the output tray. Then, close the multipurpose feeder. 7. Remove all paper cassettes from the printer. Pull each cassette out until it stops; then lift up slightly and remove it from the printer (figures 2.16 and 2.17). Warning! 8. The printer weighs approximately 58.5 lbs (26.
Fig. 10.10 Align the Printer over the Feeder b. Lower the printer onto the feeder. The feeder’s stubs should fit easily into the holes on the printer. c. Insert the screws supplied with the feeder into the holes on the bottom of the printer (fig. 10.11). Tighten the screws to secure the feeder to the printer. Fig. 10.
9. Connect the feeder’s built-in power cord to the power receptacle on the back of the printer (fig. 10.12). Fig. 10.12 Connect the Power between the Feeder and the Printer 10. Plug the AC power cord into the sheet feeder’s power receptacle and into a properly grounded AC outlet. 11. Insert all paper cassettes into the printer (figs. 2.16 and 2.17). 12. Turn on the feeder (fig. 10.13) and the printer. Fig. 10.
Loading the 2,000 Sheet Feeder 1. Open the paper drawer in the 2,000 sheet feeder and wait for the tray to lower (fig. 10.14). Fig. 10.14 Open the Paper Drawer Warning! 2. Do not reach into the paper drawer until the tray is completely lowered (approximately 20 seconds). Adjust both paper guides to the size of the paper, if necessary, using the following procedure (fig. 10.15). Fig. 10.
a. Turn the knob on top of the paper guide counterclockwise to align it with the slot in the paper guide (fig. 10.15). b. Lift the paper guide to release it from the knob and the stubs on the side of the drawer (fig. 10.15). c. Align the bottom of the paper guide with the mark in the bottom of the drawer for the correct paper size. Reinsert the paper guide with the knob on the drawer top in the paper guide slot for the correct paper size. d.
Fig. 10.17 Load the Paper Drawer 4. Close the paper drawer. Removing the 2,000 Sheet Feeder 1. Make sure the printer displays a PLEASE WAIT or READY/IDLE message. Then, turn off the printer and disconnect the power cord from the power supply (fig. 2.6). 2. Remove all media from the multipurpose feeder and output tray. Then, close the multipurpose feeder. 3. Remove all paper from the 2,000 sheet feeder drawer. See the previous section, “Loading the 2,000 Sheet Feeder.” 4.
Warning! 7. The printer weighs approximately 58.5 lbs (26.5 kg) without toner, cassettes, and media installed. Always have two people lift the printer using the recessed grip areas on the right and left sides. Remove the printer from the 2,000 sheet feeder using the following procedure. Note: If a paper cassette feeder is used in addition to the 2,000 sheet feeder: First, remove the printer from the cassette feeder. See “Removing the Paper Cassette Feeder” earlier in this chapter.
10. Repack the 2,000 sheet feeder in the original box and store it in a location that meets the guidelines in “Printer Location” in chapter 2. 11. Set the printer up again following the instructions in chapter 2. Duplexer This section describes installing and removing the optional duplexer. The duplexer is used to create double-sided copy automatically and to separate print jobs with an offset. See “Duplexer” and “Print Job Offset Feature” in chapter 6 and “Optional Duplexer” in chapter 7.
1. Make sure the printer displays a PLEASE WAIT or READY/IDLE message. Then, turn off the printer and disconnect the power cord from the power supply (fig. 2.6). 2. Remove all media from the multipurpose feeder and output tray. 3. Unpack the duplexer from its shipping carton and remove all plastic, tape, and stabilizing material. Save the carton and packing material to use for storing the duplexer. 4. Open the fuser cover after the fuser has cooled (fig. 10.20). Fig. 10.
5. Push on the two tabs holding the duplex access panel to the fuser cover; then remove the panel (fig. 10.21). Caution: Do not use the printer with the duplex access panel removed unless the duplexer is installed. Fig. 10.21 Remove the Duplex Access Panel 6. Close the fuser cover completely to prevent paper jams (fig. 10.22). Fig. 10.
7. Place the duplexer over the access slot, setting the duplexer’s side triangular protrusions onto the L shaped shelves at the top of the vertical slots in the access panel (fig. 10.23). Fig. 10.23 Place the Duplexer on the Printer 8. Attach the duplexer to the printer using the two screws on the back of the duplexer (fig. 10.24). Fig. 10.
9. Plug the duplexer cable into the printer’s duplexer connector and tighten the screws to secure the connection (fig. 10.25). Fig. 10.25 Connect the Duplexer Cable 10. Attach the paper guide to the front of the duplexer (fig. 10.26). Fig. 10.
Removing the Duplexer Warning: The fuser becomes very hot during operation. To avoid burns, turn the printer off and allow it to cool for at least 40 minutes before touching any area with a high-temperature warning label (fig. 10.19). 1. Make sure the printer displays a PLEASE WAIT or READY/IDLE message. Then, turn off the printer and disconnect the power cord from the power supply (fig. 2.6). 2. Remove all media from the multipurpose feeder and output tray. 3. Remove the paper guide (fig. 10.26).
Fig. 10.27 Replace the Duplexer Panel 8. Store the duplexer in its original packing carton. Controller Board Upgrades RAM, 2400 dpi resolution, NEIT, 10/100BaseT, and internal IDE hard disk upgrades are controller board modifications. This section covers installing SODIMM (Small outline Dual Insertion Memory Module), firmware (flash ROM), and Ethernet upgrades. To install a Controller board upgrade 1. Remove the controller board panel. 2. Install the upgrade(s). 3. Replace the controller board panel.
Removing the Controller Board Panel 1. Make sure the printer displays a PLEASE WAIT or READY/IDLE message. Then, turn off the printer and disconnect the power cord from the power supply (fig. 2.6). 2. Remove any media in the multipurpose feeder and output tray. 3. Loosen the two screws on the back of the printer that secure the controller board access panel to the printer (fig. 10.28). Fig. 10.28 Loosen the Panel Screws 4. Slide the panel toward the back of the printer until it stops.
Figure 10.30 shows upgrade installation locations. Fig 10.30 Controller Board Installing SODIMM and Firmware Upgrades SODIMMs are used for RAM upgrades. NEIT and resolution upgrades are firmware (flash ROM) changes. RAM Upgrades (SODIMMs) Standard RAM configuration is 16 MB for the Accel-a-Writer 3N, 32 MB for the 3DN, and 64 MB for the 3G. Your printer features interleaved DRAM for faster processing and better buffering capabilities.
Bank 0/0 16 MB 16 MB 64 MB 64 MB 64 MB Bank 0/1 16 MB 16 MB 64 MB 64 MB 64 MB Bank 1/0 16 MB 16 MB 64 MB Bank 1/1 16 MB 16 MB 64 MB 64 MB 128 MB 160 MB 256 MB Total RAM 32 MB The following are SODIMM specifications for you printer. Note: If you purchase SODIMMs from a vendor other than XANTÉ, you should test the RAM before purchasing large quantities. XANTÉ tests show some vendor’s RAM, manufactured to specifications, is incompatible with our printers.
Other Firmware Upgrades NEIT and 2400 dpi resolution SIMM based upgrades require that your printer engine be reset to operate at 10 ppm (letter/A4 output). Although the first of these two upgrades, which changes your printer engine speed, must be done at the factory, the other upgrade may be installed on site. The 2400 dpi upgrade consists of a Flash SIMM, a FIFO SIMM, and, possibly, a SODIMM RAM upgrade. The NEIT upgrade consists of a replacement flash SIMM. These upgrades can be installed on site.
1. Remove the controller board panel following the instructions earlier in this section. 2. Unpack the SIMM or SODIMM. 3. Remove the existing SIMM(s) or SODIMM if necessary using the following procedure (fig. 10.32). a. Pull open the latches on each end of the SIMM or SODIMM bank. Note: As the SIMM is released by the latches, it tilts out of the bank (fig. 10.32). A SODIMM does not tilt (fig. 10.33) b. Pull the SIMM out at a 45° angle or a SODIMM straight up and out of the bank. Fig. 10.
Fig. 10.33 Remove the SODIMM 4. Install the new SIMM or SODIMM using the following steps. Note: Install the DRAM SIMM closest to the back of the printer first. a. Align the SIMM or SODIMM over its bank using the following appropriate step. 1) Flash ROM SIMM—tilt the SIMM 45° toward the back of the board (toward the interfaces) with the notched corner toward the top of its bank. 2) FIFO SIMM—tilt the SIMM 45° toward the top of the board with the notched corner to the left of its bank.
b. Push the SIMM or SODIMM into its bank using the following appropriate step. 1) Flash ROM or FIFO SIMM—tilt the SIMM up in its bank until it is positioned at a 90° angle with the controller board making sure the bank latch snaps into place (fig. 10.34). 2) SODIMM—push the SODDIM straight down into its bank until the bank latch snaps into place. Caution: Do not force a SIMM or SODIMM into place.
2. Align tabs on the front of the controller board panel with the slots in the front of the opening; then slide the panel forward into place (fig. 10.29). 3. Secure the controller board panel to the printer by tightening the screws on the back of the panel (fig. 10.28). 4. Reconnect all interface cables and reconnect the power cable to the printer and the AC power supply.
10-34 Optionsbb __________________________________________
Chapter 11 - Troubleshooting Chapter Overview Introduction ................................................................................... 11-3 Status Messages ............................................................................ 11-3 Power and Setup Issues ................................................................. 11-6 Print Quality Issues ..................................................................... 11-10 Mechanical Issues .........................................................
Notes 11-2 Troubleshootingbb ____________________________________
Introduction This chapter describes the status messages that can direct you to the source of a problem, suggests solutions for some typical printer setup and print quality problems, and provides information about preventing and clearing paper jams. Status Messages Printer front panel window messages provide printer status information and can help you determine the source of a problem or paper jam. Accel-a-Writer 3X Appears when the printer is first turned on, before the initialization process begins.
E:MOTOR There is a hardware problem with the motor. EXIT PAPER JAM A media jam has occurred after the paper has been printed but before it has been deposited in the output tray. FRONT COVER OPEN The multipurpose feeder cover is open. FRONT PAPER JAM A media jam has occurred caused by the media not being pulled from the tray properly. FULL STACK The output tray is full. FUSER COVER OPEN The fuser cover is not closed properly.
OFFLINE The printer is off line. It cannot receive or process data. PAPER JAM A media jam has occurred along the paper path. PAPER OUT There is no paper in the selected cassette or 2,000 sheet feeder, the selected cassette or feeder is not properly installed, or tray chaining is selected and all trays do not contain the same size media. PROCESSING The printer is processing a job to print. READY/FONT ACCEL Font Accelerator is updating the RAM disk at runtime with the most recently used fonts.
Power and Setup Issues This section provides tips for resolving problems concerning power to the printer and host or concerning printer setup. My printer has no power. • Make sure the power cord is plugged into the printer and the power source. See “Connecting the Power Cord” in chapter 2. • Make sure the printer is turned on. See “Turning the Printer On” in chapter 2. • Make sure the power source is grounded, working, and rated for 100 V, 15 A. The printer has power but no start-up page prints.
• Make sure the Macintosh is setup to communicate using LocalTalk. See “Connecting to the LocalTalk Port” in chapter 2. • Make sure the correct Adobe PostScript printer driver and your printer’s PPD are installed and configured properly. See “Adobe PostScript Printer Drivers” in chapter 3. • Make sure the correct Adobe PostScript printer driver and your printer are selected in the Chooser. See “Adobe PostScript Printer Drivers” in chapter 3. • Make sure the AppleTalk button is active in the Chooser.
• Set the data format to ASCII in your application. My printer does not respond properly to my PC using a serial connection. • Make sure all cables are connected and seated properly. See “Connecting to the Serial Port” in chapter 2. • Make sure the correct Adobe PostScript printer driver and your printer’s PPD are installed and configured properly. See “Adobe PostScript Printer Drivers” in chapter 4. • Make sure the parallel port is enabled on the printer. See “Interface Control” in chapter 6.
Note: If your printer is configured as a Novell Print Server and the Novell network becomes unavailable, the printer may disable the Novell Print Server interface. When the Novell network is available, re-enable the interface using the front panel configuration menus or XANTÉ Command Center. • Make sure the Macintosh or PC is configured properly to communicate using the Ethernet connection. See chapter 5. • Make sure the printer is on line. See “Interface Control” in chapter 6.
For example, for a line screen of 95, set the scanner resolution 190 dpi (95 x 2). To print the same image at 75% of original size, set the scanner resolution to 142 dpi (95 x 2 x .75). Scanning the image at a lower than optimum resolution results in less detail. Scanning at a higher resolution increases file size and processing time, and it may only slightly increase the amount of detail. Print Quality Issues This section provides tips for resolving output quality problems.
Random black dots appear on the printed media. • Media may not meet the requirements in “Media Specifications” in chapter 7. If necessary, replace the media. See “Paper Cassette” and “Multipurpose Feeder” in chapter 2. • The toner cartridge may need replacing. See “Toner Cartridge ” in chapter 2. Vertical black streaks appear on the printed media. • The toner cartridge may need replacing. See “Toner Cartridge” in chapter 2. Repetitive defects appear on the printed media.
Some characters are missing or only partially printed. • Media may not meet the requirements in “Media Specifications” in chapter 7. If necessary, replace the media. See “Paper Cassette” and “Multipurpose Feeder” in chapter 2. • The toner cartridge may need replacing. See “Toner Cartridge” in chapter 2. Toner on the printed media smears when rubbed. • Media may be damp or otherwise damaged. Make sure media meets the requirements in “Media Specifications” in chapter 7. If necessary, replace the media.
Instead of my image (or text), the output is a solid black page. • The density setting may need adjusting. See “Adjusting Print Density” in chapter 6. • The toner cartridge may need replacing. See “Toner Cartridge” in chapter 2. Blank areas appear in my image (or text). • Media may be damp or otherwise damaged. Make sure the media meets the requirements in “Media Specifications” in chapter 7. If necessary, replace the media. See “Paper Cassette” and “Multipurpose Feeder” in chapter 2.
Print is smudged or small spaces are plugged. • Media may be damp or otherwise damaged. Make sure the media meets the requirements in “Media Specifications” in chapter 7. If necessary, replace the media. See “Paper Cassette” and “Multipurpose Feeder” in chapter 2. • The toner cartridge may need replacing. See “Toner Cartridge” in chapter 2. Vertical blanks appear on my image (or text). • The toner cartridge may not be properly installed. Reinstall it. See “Toner Cartridge” in chapter 2.
Bold print appears shaded on the output. • The density setting may need adjusting. See “Adjusting Print Density” in chapter 6. • The toner cartridge may need replacing. See “Toner Cartridge” in chapter 2. Horizontal banding appears on the printed image. • Paper, dust, and toner may have accumulated inside the printer. Clean it. See “Cleaning the Printer” in chapter 9. Use the cassette cover to prevent dust and debris from settling on the paper and getting into the printer.
- The resolution may need to be adjusted. Raising the resolution (at a set line screen) produces more levels of gray, which results in a more accurate image representation. When I use the duplexer, the paper wrinkles and the corners fold over. • Media may not meet the requirements in “Media Specifications” in chapter 7. If necessary, replace the media. See “Paper Cassette” and “Multipurpose Feeder” in chapter 2. • Media my be loaded improperly.
• Make sure all paper cassettes are seated properly. See “Paper Cassette” in chapter 2. • If the optional duplexer is installed, make sure it is connected properly. See “Duplexer” in chapter 10. • There may be a foreign object in the printer. Turn off the printer and remove the object. See chapter 2 for the basic printer setup and chapter 10 for the optional paper feeder and duplexer setup. I can’t remove the paper cassette. • Do not remove the cassette by force.
• Make sure media is loaded properly in the selected cassette or multipurpose feeder. - Make sure the correct size media is loaded in the selected cassette or multipurpose feeder. - Follow the guidelines for the type of media you are using. See “Media Types” in chapter 7. - Make sure media is loaded according to the procedures and guidelines in “Paper Cassette” and “Multipurpose Feeder” in chapter 2 and “Media Sources” in chapter 7. • Make sure the output tray does not become overfilled.
D E C B A Fig. 11.1 The Printer Paper Path • In the media source (either a paper cassette or the multipurpose feeder) and the toner cartridge (A) • In the back of the paper feeder (B) • Around the toner cartridge (C) • In the paper exit area under the fuser cover (D) • In the optional duplexer (E). Use one of the following two procedures to locate a paper jam; then see “Clearing Paper Jams” for details on removing the jam. Locating Jams on a Printer without the Duplexer 1.
3. Check for paper jams around the toner cartridge. 4. Check for paper jams in the back of the paper feeder from which the media was fed. 5. Reassemble the printer. Locating Jams on a Printer with the Duplexer 1. Check for paper jams in the optional duplexer. 2. Check for paper jams in the paper cassette or multipurpose feeder from which the media was fed. 3. Check for paper jams around the toner cartridge. 4. Check for paper jams in the back of the paper feeder from which the media was fed.
Fig. 11.2 Release the Top Cover Latch 2. Lift the top cover. The multipurpose feeder opens automatically as you open the top cover (fig. 11.3). Caution: The multipurpose feeder does not open to a 90° angle. To prevent damage, do not exert strong pressure or place heavy objects on the feeder. Fig. 11.
3. Remove all media from the multipurpose feeder (fig. 11.4). Fig. 11.4 Remove Media from the Multipurpose Feeder 4. Remove any jammed paper from the multipurpose feeder (fig. 11.5). Fig. 11.
5. Remove the cassette from the printer. a. Pull the cassette straight out until it stops (fig. 11.6). Fig. 11.6 Pull out the Cassette b. Lift up slightly; then pull the cassette from the printer (fig. 11.7). Fig. 11.
6. Remove any crumpled paper from the cassette (fig. 11.8). Fig. 11.8 Remove Media Jam from the Cassette 7. Remove any jammed paper from inside the paper feeder (fig. 11.9). Fig. 11.
Clearing a Back of Paper Feeder Jam 1. Open the feeder‘s back cover by grasping the notch on the top side of the cover and pulling down (fig. 11.10). Caution: The cover may be held in place by two strong springs or by magnets. If so, hold it open with one hand to avoid pinching your fingers. Fig. 11.10 Open the Back Cover 2. Remove any jammed paper in the back of the paper feeder (fig. 11.11). Fig. 11.
3. Close the feeder’s back cover (fig. 11.12). Fig. 11.12 Close the Back Cover Clearing a Toner Cartridge Area Jam Warning: The inside of the printer becomes very hot during operation. Do not touch any area with a high-temperature warning label (fig. 11.13) without first turning off the printer and allowing it to cool for at least 40 minutes. Note: When the printer is turned off, all print job information still in memory is lost; the Jam Recover feature cannot print the last page processed.
1. Remove the toner cartridge from the printer by grasping it by the handles on the top and pulling it slowly out of the printer (fig. 11.14). Caution: Once you begin pulling the toner cartridge out of the printer, remove it completely. The drum shutter may not open properly if the cartridge is partially pulled out of the printer and then pushed back in. This can damage the cartridge or result in a malfunction. Fig. 11.
2. Remove any jammed paper from the back of the multipurpose feeder and from the toner cartridge area (fig. 11.15). Fig. 11.15 Remove Media Jam from the Toner Cartridge Area Clearing a Paper Exit Area Jam Warning: The fuser becomes very hot during operation. Do not touch any area with a high-temperature warning label (fig. 11.16) without first turning off the printer and allowing it to cool for at least 40 minutes.
CAUTION HIGH TEMPERATURE VORSICHT HEIZUNGSROLLEN SEHR HEISS ADVERTENCIA TEMPERATURA ELEVADA 0 ATTENTION TEMPERATURE ELEVEE CUIDADO ALTA TEMPERATURA 40 Fig. 11.16 Fuser High-Temperature Warning Label Note: 1. If the duplexer unit is installed, you must remove it before you can perform these steps. See “Duplexer” in chapter 10. Open the fuser cover by pulling it toward the back of the printer (fig. 11.17). Fig. 11.
2. Open the fuser drum cover using the colored tabs on each side of the cover (fig. 11.18). Fig. 11.18 Open the Fuser Drum Cover 3. Remove any jammed paper from the fuser area (fig. 11.19). Fig. 11.
4. Close the fuser drum cover using the colored tabs on each side of the cover (fig. 11.20). Fig. 11.20 Close the Fuser Drum Cover 5. Close the fuser cover (fig. 11.21). Note: Make sure the fuser cover is closed properly to prevent print quality problems. Fig. 11.
Note: If the duplexer unit was installed on the printer, reinstall it after removing the media jam from the paper exit area. See “Duplexer” in chapter 10. Clearing a Duplexer Jam 1. Open the duplexer’s top cover by pulling it toward the back of the printer (fig. 11.22). Fig. 11.22 Open the Duplexer Top Cover 2. Remove any jammed paper from the top of the duplexer (fig. 11.23). Note: Be careful with the jammed paper. Since the toner has not been fixed properly, it may rub off.
Fig. 11.23 Remove Media Jam from the Top of the Duplexer 3. Close the duplexer’s top cover (fig. 11.24). Note: Make sure the cover is completely closed to prevent printing and paper jam problems. Fig. 11.
4. Open the duplexer’s bottom cover by pulling it up from the bottom (fig. 11.25). Note: There is a catch to hold the bottom cover open. You will feel a slight resistance as the catch is enabled when you open the cover. Fig. 11.25 Open the Duplexer Bottom Cover 5. Remove any jammed paper from the bottom of the duplexer (fig. 11.26). Note: Be careful with the jammed paper. Since the toner has not been fixed properly, it may rub off. Fig. 11.
6. Close the duplexer’s bottom cover (fig. 11.27). Note: Make sure the cover is closed completely to prevent printing and paper jam problems. Fig. 11.27 Close the Duplexer Bottom Cover Reassembling the Printer 1. Insert the toner cartridge’s pins into the printer’s guide channels. Slide the cartridge into the printer until it stops, making sure it is seated properly (fig. 11.28). See “Toner Cartridge” in chapter 2. Fig. 11.
2. Reload the paper cassette(s), if necessary, and reinsert into the paper feeder(s) (fig. 11.29). See “Paper Cassette” in chapter 2. Fig. 11.29 Reinstall the Paper Cassette(s) 3. Close and latch the top cover (fig. 11.30). Fig. 11.
4. Reload the multipurpose feeder, if necessary. Close the multipurpose feeder cover if the media fits completely inside the tray. See “Multipurpose Feeder” in chapter 2. Note: If the printer was turned off to clear paper jam, turn on the printer before loading the multipurpose feeder. 5. Verify that READY/IDLE appears in the front panel window.
• Your computer type and operating system (version number) • Configuration menu settings for your printer interface • Amount of printer memory (shown on start-up page) • Applications (including version numbers) you are using • Full description of the problem • List of error or status messages if applicable You can fax questions to XANTÉ’s Technical Support at 334-342-4635 or email questions to techsupport@xante.com.