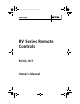
RC-GS_manual.
RC-GS_manual.
RC-GS_manual.
RC-GS_manual.book Page ii Friday, May 20, 2005 4:57 PM About Xantrex Xantrex Technology Inc. is a world-leading supplier of advanced power electronics and controls with products from 50 watt mobile units to one MW utility-scale systems for wind, solar, batteries, fuel cells, microturbines, and backup power applications in both grid-connected and stand-alone systems.
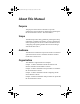
RC-GS_manual.book Page iii Friday, May 20, 2005 4:57 PM About This Manual Purpose The purpose of this Owner’s Manual is to provide explanations and procedures for installing and operating the RV Series Remote Controls—RC/GS and RC7. Scope The Manual provides safety guidelines, planning and setup information, installation procedures, as well as information about operating the unit. It also contains information about configuring and operating the RV Series Inverter/Charger with the RC/GS or RC7.
RC-GS_manual.book Page iv Friday, May 20, 2005 4:57 PM About This Manual Conventions Used The following conventions are used in this guide. WARNING Warnings identify conditions or practices that could result in personal injury or loss of life. CAUTION Cautions identify conditions or practices that could result in damage to the unit or to other equipment. Important: These notes describe an important action item or an item that you must pay attention to.
RC-GS_manual.book Page v Friday, May 20, 2005 4:57 PM Important Safety Instructions WARNING: Save these instructions This Owner’s Manual contains important safety and operating instructions. Before using your RV Series Remote Control, be sure to read, understand, and save these safety instructions. WARNING: Restrictions on use The RC/GS or RC7 shall not be used in connection with life support systems or other medical equipment or devices. General Precautions 1.
RC-GS_manual.book Page vi Friday, May 20, 2005 4:57 PM Safety Explosive gas precautions WARNING: Explosion hazard This equipment is not ignition protected. To prevent fire or explosion, do not install the RC/GS or RC7 in compartments containing flammable materials or in locations that require ignitionprotected equipment. This includes any space containing gasolinepowered machinery, fuel tanks, as well as joints, fittings, or other connections between components of the fuel system.
RC-GS_manual.
RC-GS_manual.
RC-GS_manual.
RC-GS_manual.
RC-GS_manual.book Page 1 Friday, May 20, 2005 4:57 PM 1 Introduction Chapter 1 contains information about the function and features of the RV Series Remote Controls. Topics in this chapter are organized as follows: • “Features” on page 2 • “Indicators and Controls” on page 4.
RC-GS_manual.book Page 2 Friday, May 20, 2005 4:57 PM Introduction Features The RC/GS and RC7 are control panels that allow remote operation of a RV Series Inverter/Charger.
RC-GS_manual.book Page 3 Friday, May 20, 2005 4:57 PM Features Connection cable requirements The RC7 and RC/GS use a telephone-style cord to connect to the RV Series Inverter/Charger (models RV2012GS, RV2012GS-15/20B, RV2012GS-20B, RV2512GS, and RV3012GS). Use only Xantrex-recommended accessories: Part number Cable Length 31-6257-00 25 feet 31-6262-00 50 feet 31-6275-00 70 feet To connect the RC/GS or RC7 to a non-GS series RV Series Inverter/Charger, use a data-standard RJ11 cable.
RC-GS_manual.book Page 4 Friday, May 20, 2005 4:57 PM Introduction Indicators and Controls All operating controls and indicators are located on the front panel of the remote control. ON/OFF Control The inverter portion of the inverter/ charger can be switched OFF or ON using the remote control. The standby charger in the inverter is automatic and always ready and available for charging whenever AC power is applied.
RC-GS_manual.book Page 5 Friday, May 20, 2005 4:57 PM 2 Installation Chapter 2 contains information and procedures to install the RV Series Remote Controls. Topic in this chapter are organized as follows: • “Materials and tools required” on page 6 • “Choosing a location” on page 7 • “Mounting and Connecting” on page 7.
RC-GS_manual.book Page 6 Friday, May 20, 2005 4:57 PM Installation Installing the RC/GS and RC7 The RC/GS and RC7 are designed to be flush mounted through an opening in a wall and secured with four screws. The RC/GS and RC7 require no connections other than one cable that plugs into the back of the unit. Because you cannot access the cable jack once the unit is mounted, the cable needs to be routed through the wall before securing the remote.
RC-GS_manual.book Page 7 Friday, May 20, 2005 4:57 PM Installing the RC/GS and RC7 Choosing a location Choose a location that is easily accessible. The RC/GS and RC7 should be mounted where they are clearly visible, with unobstructed access to the screen and buttons. The location should be indoors, dry, and free from corrosive or explosive fumes. Mounting and Connecting WARNING: Fire hazard The RC/GS and RC7 are not ignition protected. Do not install in areas requiring ignition-protected equipment.
RC-GS_manual.book Page 8 Friday, May 20, 2005 4:57 PM Installation 3. Run the cable between the remote and the RV Series Inverter/Charger. 4. Place the ON/OFF switch on the RV Series Inverter/ Charger to the OFF position and disconnect the AC power. 5. Connect the communications cable into the RJ11 port on the inverter/charger marked “Remote Control” (Figure 2-2). Remote Control port ON/OFF switch Figure 2-2 RV Series Inverter/Charger Front Panel 6.
RC-GS_manual.book Page 9 Friday, May 20, 2005 4:57 PM Installing the RC/GS and RC7 8. Wait for the screen to show the message “Waiting for AC.” 9. Place the ON/OFF switch on the RV Series Inverter/ Charger to the ON position. Important: The remote will not operate the RV Series Inverter/ Charger if the ON/OFF switch is in the OFF position. 10. Reconnect the RV Series Inverter/Charger to the AC source. After a brief delay, the remote will display a system status message similar to Figure 2-4.
RC-GS_manual.
RC-GS_manual.book Page 11 Friday, May 20, 2005 4:57 PM 3 Configuration Chapter 3 contains information about configuring the RV Series Remote Controls. The topics in this chapter are organized as follows: • “Viewing the Setup Menu” on page 12 • “Changing Settings” on page 12 • “Configuring the RC/GS and RC7” on page 13 • “RC/GS and RC7 Setup Menu Summary” on page 23.
RC-GS_manual.book Page 12 Friday, May 20, 2005 4:57 PM Configuration Viewing the Setup Menu You can use the RV Series Remote Controls to configure the RV Series Inverter/Charger and the remote itself. Configuration is performed using the Setup menu. You can view the Setup menu and configure settings by using the Setup/Menu Item buttons and the Settings button.
RC-GS_manual.book Page 13 Friday, May 20, 2005 4:57 PM Configuring the RC/GS and RC7 Configuring the RC/GS and RC7 The following menu items appear in the sequence they appear on the RC/GS and RC7. See “RC/GS and RC7 Setup Menu Summary” on page 23 for the complete menu structure. Set Idle Set Idle enables or disables the power-saving “search sense” mode feature. Refer to the RV Series Inverter/Charger Owner’s Manual for a complete description of the search sense mode.
RC-GS_manual.book Page 14 Friday, May 20, 2005 4:57 PM Configuration Table 3-1 Battery Capacity Settings Bat Capacity: Auto Setting Absorption Charge Time Auto 110 minutes (1.8 hours) 125 A-hrs 60 minutes (1 hour) 250 A-hrs 90 minutes (1.5 hours) 375 A-hrs 120 minutes (2 hours) 500 A-hrs 150 minutes (2.
RC-GS_manual.book Page 15 Friday, May 20, 2005 4:57 PM Configuring the RC/GS and RC7 Max Charge Rate The battery charger’s maximum output current can be specified using the Max Charge Rate menu. The default is 100% of the maximum charge rate. Refer to the RV Series Inverter/Charger Owner’s Manual for model-specific adjustable charge rates in amps.
RC-GS_manual.book Page 16 Friday, May 20, 2005 4:57 PM Configuration Set Shore Power: 30A or more Set Shore Power: 25 Amps Set Shore Power: 10 Amps Set Shore Power: 5 Amps Figure 3-7 Set Shore Power menu items Remote Setup The Remote Setup screen displays system status and error messages that occur during normal operation. From the Setup menu you can select: • • • Last Key (default) to display the last system status message displayed after exiting the Setup menu.
RC-GS_manual.book Page 17 Friday, May 20, 2005 4:57 PM Configuring the RC/GS and RC7 LCD Contrast: Max Contrast LCD Contrast: 87% LCD Contrast: 62% LCD Contrast: Min Contrast Figure 3-9 LCD Contrast menu items Set Clock (RC/GS Only) Some RC/GS automatic generator start functions are based on the time of day. The clock must be properly set to ensure the programmed function will perform at the correct time. The clock uses 24-hour time and ranges from 00:00 to 23:59.
RC-GS_manual.book Page 18 Friday, May 20, 2005 4:57 PM Configuration Select Genset: Onan QuietDiesel Select Genset: PowerTech Diesel Select Genset: Generac Diesel Figure 3-11 Select Genset menu items Generator Start (RC/GS Only) After setting the clock and selecting a generator, set the parameters for automatically starting the generator based upon a battery voltage. Press the up arrow and scroll through the menus to view the Generator Start menu.
RC-GS_manual.book Page 19 Friday, May 20, 2005 4:57 PM Configuring the RC/GS and RC7 The generator can be started or stopped at any time by pressing the down arrow button until the Gen Start/Stop menu is displayed. Press and hold the On/Off button until you hear a beep from the RC/GS. Release the button after the beep sounds. If the inverter/charger senses an AC supply and the battery voltage is below the automatic start setting, the generator does not start.
RC-GS_manual.book Page 20 Friday, May 20, 2005 4:57 PM Configuration The generator can be stopped at any time by accessing the user menu until the “Gen Start/Stop: Press (On/Off)” menu is displayed. Press and hold the On/Off button until you hear a beep from the RC/GS. Release the button after the beep sounds. Note: Manually stopping the generator will set the Generator Start selection to Manual (Push On), disabling any automatic start settings.
RC-GS_manual.book Page 21 Friday, May 20, 2005 4:57 PM Configuring the RC/GS and RC7 Begin Gen Quiet and End Gen Quiet (RC/GS Only) The period of time during which the generator is prevented from starting automatically can be defined using the RC/GS. To specify the begin quiet time, scroll to the Begin Gen Quiet: 00:00 by using the Up and Down arrow buttons. Set the Begin Gen Quiet start time.
RC-GS_manual.book Page 22 Friday, May 20, 2005 4:57 PM Configuration Saving Setup Choices Once the setup options are complete, press and hold the Setup/Menu Item buttons (see Figure 3-19) for approximately five seconds or until the screen clears. The setup choices will be saved in the inverter/charger’s non-volatile memory 20 seconds after exiting the Setup menu if no other actions are taken. These settings will be preserved until changed.
RC-GS_manual.book Page 23 Friday, May 20, 2005 4:57 PM RC/GS and RC7 Setup Menu Summary RC/GS and RC7 Setup Menu Summary RV Series Inverter/Charger and RC/GS and RC7 Setup Set Idle: Defeat Set Idle: About..20W load Set Idle: ...30W Set Idle: ...
RC-GS_manual.book Page 24 Friday, May 20, 2005 4:57 PM Configuration Auto Gen Start Setup (RC/GS Only) Generator Start: Manual (Push ON) Generator Start: Auto at 11.0 VDC Generator Start: Auto at 11.5 VDC Generator Stop: Manual (Push OFF) Generator Stop: Auto at Absorb Generator Stop: Auto at Float Gen Start/Stop: Therm Disabled Gen Start/Stop: Therm Enabled Generator Start: Auto at 11.8 VDC Generator Start: Auto at 12.0 VDC Generator Start: Auto at 12.
RC-GS_manual.book Page 25 Friday, May 20, 2005 4:57 PM 4 Operation Chapter 4 contains information and procedures to operate the RV Series Remote Control.
RC-GS_manual.book Page 26 Friday, May 20, 2005 4:57 PM Operation Indicators and Controls The RC/GS and RC7 feature LEDs, a display screen, and buttons for viewing operating status. Status LEDs Four indicator lights (LEDs) light up or flash during operation to indicate the system’s status. When the inverter is powered on, all LEDs flash as the unit goes through a selftest. After the self-test completes, the LEDs indicate the current state of the inverter and charger.
RC-GS_manual.book Page 27 Friday, May 20, 2005 4:57 PM Indicators and Controls Inverter LED The green Inverter LED indicates the inverter is on and ready to provide power from the batteries. If AC power is connected to the inverter/charger, the LED flashes. When no AC power is connected, the inverter LED is on solid, indicating that the inverter/charger is inverting (providing power from the batteries).
RC-GS_manual.book Page 28 Friday, May 20, 2005 4:57 PM Operation Batt. Full LED The yellow Batt. Full LED indicates the state of charge on the batteries. This LED will not illuminate until the batteries have charged up to at least 90% (according to the inverter/charger’s estimate). The duration of the LED’s on time will increase until the batteries reach 100%, at which time the LED will be on solid.
RC-GS_manual.book Page 29 Friday, May 20, 2005 4:57 PM Indicators and Controls Buttons There are four buttons on the front panel of the RC/GS and RC7 used to control the inverter and enter system operating parameters. On / Off Menu Item Settings Meter Mode Setup Figure 4-3 Button Controls On/Off The On/Off button controls the inverter section of the inverter/charger. Press this button once to turn the inverter on or off.
RC-GS_manual.book Page 30 Friday, May 20, 2005 4:57 PM Operation System Status Displays The RC/GS and RC7 remote controls display the operating mode and system status by lighting one or more LEDs and/or by displaying a message on the screen. The four LEDs reflect the same information as the single tricolored LED on the RV Series Inverter/Charger. There are four types of system messages: • • • • AC source messages Inverter messages Charger messages Error messages.
RC-GS_manual.book Page 31 Friday, May 20, 2005 4:57 PM System Status Displays When the initiating condition (battery voltage or thermostat signal) has occurred, the Pending Genstart message is displayed for approximately two minutes, awaiting a change in the condition or a manual override. If neither condition occurs, the inverter/charger attempts to start the generator and the RC/ GS displays “Cranking Genset.
RC-GS_manual.book Page 32 Friday, May 20, 2005 4:57 PM Operation Genset Error Messages (RC/GS Only) Gen Won’t Start If the generator does not start after the three attempts, the RC/ GS displays the message “Gen won’t Start” and the red Error LED on the front panel lights. After displaying this message, the RC/GS automatically sets the Generator Start menu to “Manual (Push ON)” and no further attempts to start the generator will occur.
RC-GS_manual.book Page 33 Friday, May 20, 2005 4:57 PM System Status Displays Inverter ; Genset Status: Gen Quiet Fault Charge Batt. Full Error Buzzer sounds 822-4A-001 Red Error LED lights and error message appears in the screen Figure 4-5 Gen Quiet Fault Error Message Note: If the generator is manually started from the RC/GS, the generator will not shut down automatically. “Man Stop Only” (Figure 4-6) is displayed. Shut down the generator manually.
RC-GS_manual.book Page 34 Friday, May 20, 2005 4:57 PM Operation Inverter Mode Messages When the inverter is on (no AC present), it is either inverting or searching the AC output circuits for a load meeting the specifications set up in the Set Idle menu selection (see Figure 3-3 on page 13), if the search sense mode is selected. When the inverter is in the search sense mode, “Searching” appears in the screen and the Inverter LED will slowly flash. Inverter System Status: Searching Charge Batt.
RC-GS_manual.book Page 35 Friday, May 20, 2005 4:57 PM System Status Displays Charger Mode Messages When AC (shore power or generator power) is available, the inverter/charger automatically switches to the charger mode. There are four separate charger modes: Bulk, Absorption, Float and Equalization. Refer to the inverter/charger Owner’s Manual for details on charger modes. Bulk Charging When the charger is charging in the Bulk mode, the screen displays “Bulk Charging” and the charge LED is on solid.
RC-GS_manual.book Page 36 Friday, May 20, 2005 4:57 PM Operation Float Charging When the charger is in the Float mode, the screen shows “Float Charging” and the Charge LED quickly flashes. At this point the batteries are fully charged (100%) and the Batt. Full LED is on solid. Inverter System Status: Float Charging Charge Batt. Full Error 822-4A-001 Charge LED quickly flashes. Batt Full LED is on solid.
RC-GS_manual.book Page 37 Friday, May 20, 2005 4:57 PM System Status Displays CAUTION Only flooded lead acid or AGM batteries should be equalize charged. Running an equalize charge on batteries other than flooded lead acid or AGM types could permanently damage them. CAUTION Do not attempt to remove vent caps on AGM batteries. Doing so may void the warranty.
RC-GS_manual.book Page 38 Friday, May 20, 2005 4:57 PM Operation Over Temperature The “Otemp/Less Load” System Status message indicates the inverter/charger transformer and power components have exceeded a safe operating temperature. Reduce the load on the inverter. When the unit cools, it automatically resets and resumes operation. If this condition occurs often, make sure the inverter is in a cool location, has adequate ventilation, and the cooling fan is operational. Inverter Batt.
RC-GS_manual.book Page 39 Friday, May 20, 2005 4:57 PM System Status Displays High Battery Voltage The “Hibat/Stop Chrg” System Status message appears when the battery voltage rises above 15.7 V. This condition usually occurs only when a charging source other than the RV Series Inverter/Charger is used to charge the battery bank. Switch off any charging sources other than the RV Series Inverter/ Charger to allow the voltage level to drop.
RC-GS_manual.book Page 40 Friday, May 20, 2005 4:57 PM Operation Charger Fault The “Charger Fault” System Status message appears when an internal error is detected in the inverter/charger during charging. In addition, the red Error LED is on and the buzzer sounds. After 15 minutes, the charge relay disconnects and the inverter section shuts down. The screen shows “System Status: Overload.” This fault indicates a hardware failure in the charger circuitry of the inverter/charger.
RC-GS_manual.book Page 41 Friday, May 20, 2005 4:57 PM System Status Displays Meters Display The RC/GS and RC7 have built-in meters that monitor inverter/charger activities. To view these meters, press and hold the Meter Mode button (up arrow) for five seconds until the screen clears. Use the down arrow button to scroll through the meter displays. The information contained in these displays can be useful for troubleshooting the system.
RC-GS_manual.book Page 42 Friday, May 20, 2005 4:57 PM Operation Inverter/Charger Current This meter displays the actual DC current supplied to the batteries when the RV Series Inverter/Charger is charging (+) and current drawn from the batteries when the inverter/ charger is inverting (–). Inv/Chg Current: +/- 0 Amps DC AC Output Voltage This meter displays the actual inverter AC output voltage measured at the AC output. When in the charger mode (or when the inverter is off), the meter will read “0 VAC.
RC-GS_manual.book Page 43 Friday, May 20, 2005 4:57 PM System Status Displays System Status Messages After installing the RC/GS and RC7, the LCD screen displays operating system status messages which is the default screen after exiting all other setting or meter functions. Operating parameters include Battery State-of-charge and Set Shorepower. The Gen Start-Stop switch is also available from these displays. Press the down arrow to scroll through each display.
RC-GS_manual.book Page 44 Friday, May 20, 2005 4:57 PM Operation Set Shore Power This display has the same function as “Set Shore Power” on page 15. You can set the shore power input (from 5 to 30 amps) so the total current draw from the charger does not exceed the circuit breaker rating, to provide the maximum current to the AC loads. Use the Settings button to change this setting to match the circuit breaker rating of the AC power source.
RC-GS_manual.book Page 45 Friday, May 20, 2005 4:57 PM Storage Checklist Storage Checklist Proper storage procedures extend the life of the batteries and ensure that your vehicle’s power system is ready for operation when needed. The following checklist is for battery-related storage activities. Preparation for Storage • • • • • • Check that all batteries are fully charged. Disable the Auto Gen Start feature (RC/GS only). Configure the RV to the correct shore service settings.
RC-GS_manual.
RC-GS_manual.book Page 47 Friday, May 20, 2005 4:57 PM RC/GS and RC7 User’s Menu Summary System Status Display Batt State of Charge: E --------- F Set Shore Power: x.x Amps Gen Start/Stop: Press (ON/OFF)* *RC/GS only Meters Display Avg Shunt Amps: +/- 0 Amps DC Battery: 00.
RC-GS_manual.
RC-GS_manual.book Page 49 Friday, May 20, 2005 4:57 PM Warranty and Return Information Warranty What does this warranty cover? This Limited Warranty is provided by Xantrex Technology Inc. ("Xantrex") and covers defects in workmanship and materials in your RC7 or RC/GS Remote Control. This warranty period lasts for 36 months from the date of purchase at the point of sale to you, the original end user customer. You require proof of purchase to make warranty claims.
RC-GS_manual.book Page 50 Friday, May 20, 2005 4:57 PM Warranty and Return What proof of purchase is required? In any warranty claim, dated proof of purchase must accompany the product and the product must not have been disassembled or modified without prior written authorization by Xantrex.
RC-GS_manual.
RC-GS_manual.book Page 52 Friday, May 20, 2005 4:57 PM Warranty and Return Return Material Authorization Policy Before returning a product directly to Xantrex you must obtain a Return Material Authorization (RMA) number and the correct factory "Ship To" address. Products must also be shipped prepaid.
RC-GS_manual.book Page 53 Friday, May 20, 2005 4:57 PM Warranty and Return Out of Warranty Service If the warranty period for your RC7 or RC/GS Remote Control has expired, if the unit was damaged by misuse or incorrect installation, if other conditions of the warranty have not been met, or if no dated proof of purchase is available, your unit may be serviced or replaced for a flat fee.
RC-GS_manual.book Page 54 Friday, May 20, 2005 4:57 PM Warranty and Return Information About Your System As soon as you open your RC/GS Remote Control package, record the following information and be sure to keep your proof of purchase. ❐ Serial Number _______________________________ ❐ Purchased From _______________________________ ❐ Purchase Date _______________________________ If you need to contact Customer Service, please record the following details before calling.
RC-GS_manual.
RC-GS_manual.book Page 56 Friday, May 20, 2005 4:57 PM Xantrex Technology Inc. 1 800 670 0707 Tel toll free NA 1 360 925 5097 Tel direct 1 360 925 5143 Fax direct customerservice@xantrex.com www.xantrex.