
One Touch scanner Installation and User Guide 4800, 2400
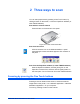


Three ways to scan
2-2 4800/2400 Series Installation and User Guide
1. Place an item to scan on the glass, face down, and align the
edge of the item with the arrow marker at the lower left corner
of the glass.
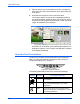
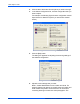
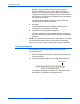
2. Close the lid and press one of the scanner buttons.
The scanner starts scanning the item. Messages just above
the Windows taskbar shows the status of the scanning. During
scanning, the scan progress window shows a small copy of the
image, as illustrated by this example:
Figure 2-3 Scan progress and image in PaperPort
When the scan is complete, the scanned image appears in the
destination software. In this example, the destination software
is the PaperPort Desktop.
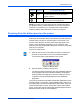
About the One Touch buttons
The One Touch buttons are preconfigured for typical scanning
tasks. To change the settings for the buttons, see “About the
Configuration dialog box” on page 2-4.
Figure 2-4 Scanner buttons
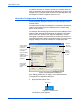
The following table lists the scanner’s preconfigured settings:
Button Function Preconfigured Settings
Scan Scans the item as a color page and displays in
in PaperPort.
Email Scans the item as a color photo and attaches
it to a new email message in your email
application.
OCR Converts the item’s text to black and white
word processing text, and displays it in a word
processing application.