Xerox 4110/4590 Copier/Printer Xerox 4110/4590 Getting Started 701P44041 Version 2.
Xerox Corporation Global Knowledge & Language Services 800 Phillips Road Building 845 Webster, New York 14580 © Copyright 2005 by Xerox Corporation. All Rights Reserved. Copyright protection claimed includes all forms and matters of copyrighted material and information now allowed by statutory or judicial law or hereinafter granted, including without limitation, material generated from the software programs that are displayed on the screen such as styles, templates, icons, screen displays, looks, etc.
Table of contents 1. Before Using the Machine 1-1 Symbols used in this guide . . . . . . . . . . . . . . . . . . . . . . . . . . . . 1-1 Other symbols or conventions used in this guide . . . . . . . . 1-2 Safety notices . . . . . . . . . . . . . . . . . . . . . . . . . . . . . . . . . . . . . . 1-3 Electrical safety. . . . . . . . . . . . . . . . . . . . . . . . . . . . . . . . . . 1-3 Disconnect device. . . . . . . . . . . . . . . . . . . . . . . . . . . . . . . . 1-4 Laser safety . . . . . . . . . . .
Ta b l e o f c o n t e n ts 2. Product Overview 2-1 Machine components . . . . . . . . . . . . . . . . . . . . . . . . . . . . . . . . Power on/off . . . . . . . . . . . . . . . . . . . . . . . . . . . . . . . . . . . . . . . Power on. . . . . . . . . . . . . . . . . . . . . . . . . . . . . . . . . . . . . . . Power off. . . . . . . . . . . . . . . . . . . . . . . . . . . . . . . . . . . . . . . About the circuit breaker. . . . . . . . . . . . . . . . . . . . . . . . . . . . . . Power Saver mode . . . .
1. Before Using the Machine This guide provides all the necessary operating procedures and maintenance information, including how to clear paper jams, daily care, setting various items, and precautions. Please read this guide thoroughly to obtain the best performance on this product. After reading this guide, be sure to keep it handy for quick reference. It will be useful in case you forget how to perform operations or if a problem occurs with the machine.
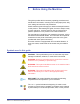
1. Before Using the Machine NOTE: This symbol calls your attention to information that is helpful, but not essential to complete a procedure or task. This symbol indicates that there is additional information from another source, such as a web site or manual. Other symbols or conventions used in this guide • In this document, "Computer" refers to a personal computer or workstation.
1. Before Using the Machine Safety notices This Xerox product and the recommended supplies are designed and tested to meet strict safety requirements. These include safety agency approval and compliance to established environmental standards. Please read the following instructions carefully before operating the product, and refer to them as needed to ensure the continued safe operation of your product.
1. Before Using the Machine • Do not place the machine where people may step or trip on the power cord. Do not place objects on the power cord. • Do not override or disable electrical or mechanical interlocks. • Do not obstruct the ventilation openings. These openings prevent overheating of the machine. WARNING: Never push objects of any kind into slots or openings on this equipment. Making a contact with a voltage point or shorting out a part may result in fire or electrical shock.
1. Before Using the Machine Laser safety North America This product complies with safety standards and is certified as a Class 1 Laser product under the Center for Devices and Radiological Health (CDRH) of the United States Food and Drug Administration (FDA) implemented regulations for laser products. This product complies with FDA 21 CFR 1940.10 and 1040.11 except for deviations pursuant to Laser Notice No. 50, dated July 26, 2001. These regulations apply to laser products marketed in the United States.
1. Before Using the Machine Europe and other markets This product complies with IEC60825, Laser Safety Products. The equipment complies with laser product performance standards set by governmental, national, and international agencies as a Class 1 Laser Product. It does not emit hazardous radiation as the beam is totally enclosed during all phases of customer operation and maintenance.
1. Before Using the Machine Safety standards North America This Xerox product is safety certified by Underwriters Laboratories Incorporated to Standards UL60950-1 (first edition), and CSA International CAN/CSA C22.2 No. 60950-1-03 (First Edition). Europe and other markets This Xerox product is safety certified by Underwriters Laboratories Incorporated to publication IEC60950-1 (2001) First Edition.
1. Before Using the Machine Operational safety Your Xerox equipment and supplies were designed and tested to meet strict safety requirements. These include safety agency examination, approval, and compliance with established environmental standards. Your attention to the following safety guidelines will help ensure the continued safe operation of your product: • Use the materials and supplies specifically designed for your product.
1. Before Using the Machine Ozone safety This product produces ozone during normal operation. The ozone is heavier than air, and the quantity is dependent on print volume. Providing the correct environmental parameters, as specified in the Xerox installation procedures, ensures that concentration levels meet safe limits. If you need additional information about ozone, request the Xerox publication, OZONE by calling 1-800-828-6571 in the USA.
1. Before Using the Machine In Canada (ICES-003) This Class “A” digital apparatus complies with Canadian ICES003. Cet appareil numérique de la classe “A” est conforme á la norme NMB-003 du Canada. Regulatory information for RFID This product generates 13.56 MHz using an Inductive Loop System as a Radio Frequency IDentification system device (RFID). This system is certified in compliance with European Council Directive 99/5/EC and applicable local laws or regulations as applicable.
1. Before Using the Machine Certifications in Europe The CE marking that is applied to this product symbolizes Xerox Declaration of Conformity with the following applicable Directives of the European Union as of the dates indicated: January 1, 1995: Council Directive 73/23/EEC amended by Council Directive 93/68/ EEC, approximation of the laws of the member states related to low voltage equipment.
1. Before Using the Machine It’s illegal... In the USA Congress, by statute, has forbidden the reproduction of the following subjects under certain circumstances. Penalties of fine or imprisonment may be imposed on those guilty of making such reproductions. 1.
1. Before Using the Machine Stamps and other representatives of value, of whatever denomination, which have been or may be issued under any Act of Congress. 2. Adjusted Compensation Certificates for Veterans of the World Wars. 3. Obligations or Securities of any Foreign Government, Bank, or Corporation. 4. Copyrighted material, unless permission of the copyright owner has been obtained or the reproduction falls within the “fair use” or library reproduction rights provisions of the copyright law.
1. Before Using the Machine In Canada Parliament, by statute, has forbidden the reproduction of the following subjects under certain circumstances. Penalties of fines or imprisonment may be imposed on those guilty of making such copies. 1. Current bank notes or current paper money. 2. Obligations or securities of a government or bank. 3. Exchequer bill paper or revenue paper. 4. The public seal of Canada or of a province, or the seal of a public body or authority in Canada, or of a court of law.
1. Before Using the Machine In other countries Copying certain documents may be illegal in your country.
1. Before Using the Machine Environmental notices for Canada Terra Choice Environmental Services, Inc. of Canada has verified that this Xerox product conforms to all applicable Environmental Choice EcoLogo requirements for minimized impact to the environment. As a participant in the Environmental Choice program, Xerox Corporation has determined that this product model meets the Environmental Choice guidelines for energy efficiency.
1. Before Using the Machine Product recycling and disposal If you are managing the disposal of your Xerox product, please note that the product contains lead and other materials whose disposal may be regulated due to environmental considerations. The presence of lead is fully consistent with global regulations applicable at the time that the product was placed on the market. North America Xerox operates a worldwide equipment take-back and reuse/ recycle program.
1. Before Using the Machine Related information sources This section describes the guides provided with this machine. • User Guide: This guide describes all the necessary steps for copy/print/scan jobs, clearing paper jams, daily care, and safety information. • Administrator Guide: System Administrators use this guide to set up the machine defaults/settings and the network environment.
2. Product Overview KEY POINT: The User Interface (UI) screens shown in this guide may or may not reflect the screens displayed on your 4110/4590 system. The UI screens vary from system to system and from marketplace to marketplace. Therefore, the UI screens in this guide are a representation of the type of screens that may be seen on your particular system.
2. Product Overview Machine components WARNING: To prevent personal injury, do not touch any labeled area that indicates High Temperature. No. Component Function 1 DADF Duplex Automatic Document Feeder 2 Document cover Holds a document in place on the document glass. 3 User Interface The User Interface (UI) consists of the Control Panel and the Touch Screen. Refer to “User Interface (UI)” on page 2-8. 4 Document glass Place a document here in order to copy it.
2. Product Overview No. Component Function 14 Left cover Open to access the top cover and to remove paper jams. 15 Front cover Open to remove paper jams. 16 indicator This lights when a document is loaded correctly. 17 Document guides Use these guides to align the edges of the document. 18 Document feeder tray Load documents here. 19 Document output tray Retrieve scanned documents here. 20 Document Stopper Holds large document, such as 11 x 17 in./A3, in place.
2. Product Overview No. Component Function 27 Interposer (Cover/ Transparency separator tray) Load paper for cover or transparency separators. Paper loaded here is not used for copying. 28 Decurl button Press this button to decurl copied paper. 29 Output tray Copies are delivered here when specific output features are selected, such as Automatic sorting, Collated, Uncollated, or Normal. 30 Finisher tray Receives copies when you select stapled, punched, and Z-folded copies.
2. Product Overview No. Component Function 36 Punch scrap container Collects the scraps from the puncher. Open to remove the scraps. 37 Tri-Fold output tray Receives copies when you select Tri-Fold In or Tri-Fold out. 38 Tri-Fold output tray button Press this button to open tri-Fold output tray. 39 Left cover. Open this cover to access the machine and to clear paper jams. 40 Staple cartridge storage space Staple cartridge for replacement can be stored.
2. Product Overview Power off Perform the following to power off the machine: 1. Before switching off the power ensure that all copy or print jobs have completely finished. Furthermore, ensure that the indicator is not lit. KEY POINT 1: Switching off the power before copy/print jobs are complete loses any data that is being processed. KEY POINT 2: Never switch off the power while: – While data is being received – While jobs are being printed.
2. Product Overview Power Saver mode The machine is equipped with a Power Saver feature that automatically reduces power consumption after a period of time of inactivity. The Power Saver feature has two modes, a Low Power mode and Sleep mode. The machine enters the Low Power mode after the machine remains inactive for a preset time period. Once activated, the machine remains in the Low Power mode until activity occurs or until it a second period of time elapses.
2. Product Overview User Interface (UI) The User Interface (UI) consists of the Control Panel and Touch Screen. The following describes the names and functions of components on the control panel. No. Component Function 1 Control panel Allows keypad selection of features. 2 Touch Screen Allows selections to be made simply by touching a button on the screen. 3 2-8 Copy, Custom 2, Custom 3 Use for the copy feature or for a custom feature.
2. Product Overview No. 4 5 6 7 8 9 Component All Services 12 13 14 15 16 17 18 2-9 Displays the menu screen. Power Saver Lights when the machine is in the Power Saver mode. To cancel the Power Saver mode, press this button. Clear All Clears all programming and returns the machine to its default settings. Interrupts the printing or copy process to allow another job a higher priority. The Interrupt indicator lamp lights.
2.
3.
3. Basic Operation Basic copying and scanning Copying: Scanning: This function and its related features copies original documents and does one of the following: • Immediately prints output copies of the original document. • Prints copies and saves the scanned original for future use. • Saves the scanned original for future use and does not print a copy now.
3. Basic Operation The DADF accepts the following. Document type (weight) Number of sheets Lightweight paper (38-49 g/m2) 250 sheets Plain paper (50-80g/m2) 250 sheets Heavyweight paper (81-128g/m2) 150 sheets Heavyweight paper (129-200g/m2) 100 sheets Document Glass The Document Glass accepts single-sheet or book-form documents up to a maximum of 11 x 17 in./A3 size.
3. Basic Operation c. When the documents are loaded correctly, the Confirmation indicator lights. d. Move the document guide until it just touches the edge of the documents. NOTE: When loading documents in the DADF, the timing for lifting up the document feeder tray may be set. e. Proceed to Step 3. 2. To use the Document Glass, open the document cover. a. Place the document face down and align it against the inside, left corner of the document glass.
3. Basic Operation b. Close the document cover. NOTE: The size of the document on the glass is displayed on the Message Area of the Touch Screen, if the document is standard size; c. Proceed to Step 3. 3. Press the All Services button, or press the Copy button (if it is available): The following screen is displayed: NOTE: The features displayed on the screen depend on the configuration of your machine.
3. Basic Operation 4. Select Copy. If the previous settings still remain, press the Clear All button.
3. Basic Operation 5. Select one of the copy buttons (circled in red below). • Copy: This feature copies scanned documents. • Copy & Save: This feature copies scanned documents and save them as data to the mailbox on the machine You can print saved data from the Mailbox or change settings. • Save Only: This feature saves scanned documents as data to the mailbox on the machine. You can print saved data from the Mailbox or change settings.
3. Basic Operation 7. Enter the desired number of copies by pressing the corresponding numbers on the keypad. 3-8 • A maximum quantity of 9999 can be entered. • The entered number appears on the upper right of the display. • If you enter an incorrect value, press the C button and reenter the correct value. • Proceed to Step 12.
3. Basic Operation 8. Select the desired scanning function. • E-mail: This feature scans the original documents and sends the scanned data as an e-mail attachment to the designated address. • Scan to Mailbox: This feature scans the original documents and saves the scanned data to the machine’s mailbox. • Network Scanning (Job Template): This feature scans the original documents and saves the scanned data to the server as a Job Template.
3. Basic Operation If the previous settings still remain, press the Clear All button. 10. Select a mailbox to which the data will be saved. 11. If appropriate, select desired features from the various tabs. Proceed to the next step. 12. Press the Start button to copy or scan the job. NOTE 1: If a problem occurs, an error message appears in the display of the Touch Screen. Follow the instructions on the screen to correct the problem. NOTE 2: At this time, you can program your next copy or scan job.
3. Basic Operation Canceling a copy or scan job To cancel a copy or scan job, follow the procedure below. 1. Press Stop either on the touch screen or the Stop button on the Control Panel. 2. As the copy or scan job stops, the screen displays a Clear button. Touch the Clear button to stop the job. 3. If the screen in Step 2. does not appear, press the Job Status button on the Control Panel.
3. Basic Operation 4. From the Job Status screen, choose the job to cancel, and then select Stop. Printing Use the following procedure when printing from your client workstation. NOTE: The printing steps and screens may vary depending on the application software you are using. For specific information, refer to the documentation provided with each application. 1. Select File and Print from the application’s menu. 2. Confirm the Printer Name and click Properties, if necessary. 3.
3. Basic Operation Print Copy & Print Jobs documents procedure Use the following procedure when printing Copy & print Jobs documents at the machine. NOTE: Features and screens may vary depending on your machine’s configuration. 1. Press the All Services button. 2. Select Check Mailbox.
3. Basic Operation 3. Select Copy & Print Jobs. 4. Select a mailbox. 5. Select Document List.
3. Basic Operation 6. Select a document. NOTE: Up to 100 copied, printed, and scanned documents may be stored. 7. Select the Change Settings / Print button. 8. Select the desired item or items. 9. Select Print.
3.
4. Loading Paper This section describes how to load paper in the trays. About paper Paper types in the trays The machine automatically detects the size and orientation of loaded paper in trays. The paper type, however, must be set. Normally, plain paper type is set for each tray. If you load paper that is different from plain, you must change the paper type settings. You may also specifically name the paper and give it a user-defined type. A maximum five paper types can be set as user-defined paper.
4. Loading Paper NOTE 2: If the machine runs out of paper during a copy or print job, you must refill the tray that the machine chose for your print job. Ensure that the tray is set for the same size and orientation as it was before paper was depleted. Loading paper in Trays 1 and 2 Use the following procedure for loading paper in trays 1 and 2. NOTE: When the machine runs out of paper during a copy or print job, the UI displays a message.
4. Loa din g Pa per Loading paper in Trays 3 and 4 Use the following procedure for loading paper in trays 3 and 4. NOTE: When the machine runs out of paper during a copy or print job, the UI displays a message. Follow the instructions on the UI for adding paper to the appropriate tray or trays. The copy or print job automatically resumes once paper is added. 1. Slowly pull out the tray until it stops. 2. Remove any paper from the tray. 3. Expand the two paper guide levers to the desired paper size. 4.
4. Loading Paper b. Ensure that the paper guides are adjusted to the same size as the paper in the tray. KEY POINT: Do not load paper above the MAX line. 6. Gently push the tray in until it stops. Loading paper in tray 5 (Bypass) If you copy or print to a paper size that is different from the paper loaded in the trays, use Tray 5, the Bypass for your copy or print job. Use the following procedure for loading paper in Tray 5 (Bypass). 1. Open Tray 5.
4. Loa din g Pa per KEY POINT: Do not load paper above the MAX line. Do not load more than one size into the tray. 4. When loading nonstandard paper size, move the paper guides to accommodate the paper. 5. Complete your copy or print job. Loading paper in Trays 6 and 7 If you have the optional Trays 6 and 7, use the following procedure for loading paper into them. NOTE: When the machine runs out of paper during a copy or print job, the UI displays a message.
4. Loading Paper Loading paper in Tray 8 (Interposer) If you have an optional Interposer (Tray 8), use the following procedure for loading paper into it. KEY POINT: The Interposer (Tray 8) is used when your desired output includes separators, or covers; therefore, it cannot have an image copied on to it. Your separator or cover paper may be blank or with an image already copied onto it. 1. Hold the center of the paper guides and slide to the desired paper size. 2.
4.
4.
5. Maintenance Refer to your User Guide for information and step-by-step instructions for replacing or maintaining the following consumables: • Replacing the Dry Ink/Toner Cartridge • Replacing the Dry Ink/Toner Waste Container • Replacing the Staple Cartridge • Replacing the Staple Cartridge for an optional Booklet Maker • Emptying the Punch Scrap Container Supply items Supply item Supply number Supply unit Approximate yield/ carton Dry Ink - Black 6R01237 1 unit per carton 81.
5. Maintenance Customer Replaceable Units (Cruse) Supply item Dry Ink/Toner Waste Container Reorder number 8R13001 Impressions/unit 210,000 Call 1-800-821-2797 to order a new Dry Ink/Toner Waste Container. KEY POINT: Please have your machine serial number and your Xerox 4110/4590 customer number ready when you call to order supplies.
6. Problem Solving This section information about various problem solving situations. Most times, instructions for solving problems are provided on the User Interface, in the User Guide, or a combination of both. Fault clearance If a fault or problem occurs, there are several ways you can identify the type of fault. Once a fault or problem is identified, establish the probable cause, and then apply the appropriate solution.
6. Problem Solving Paper jams When a paper jams occurs, the machine stops and an alarm sounds. The UI displays a message. Follow the instructions for removing the jammed paper. If the paper tears while attempting to remove it, ensure that you remove any torn pieces from the machine. If the UI continues to display a paper jam message after you have initially removed the jam, the paper is probably jammed at another location. Continue to follow the instructions on the UI for removing all paper jam areas.
701P44041