Version 5.
©2006 by Xerox Corporation. All rights reserved. Xerox®, FreeFlow ™and all identifying numbers used in connection with the products mentioned in this publication are trademarks of XEROX CORPORATION. GlossMark® is a Registered Trademark of XEROX CORPORATION.
Table of contents Using VI PDF Originator 7 VI PDF Originator ................................................................................................................ 8 The VIPO Server and Client ................................................................................................. 9 Using the VIPO Local Server .............................................................................................. 10 File menu options .............................................................
Table of contents Using VIPO Web 35 Accessing VIPO via your web browser................................................................................. 35 Job Submission/View/Retrieval ........................................................................................... 37 Job Submission - upper frame................................................................................. 37 Job Submission - lower frame .................................................................................
Table of contents Using VIPO Dispatch 65 Dispatch filters .................................................................................................................. 66 Dispatch Rule files............................................................................................................. 67 System built-in macros ........................................................................................... 74 Rule file variable references......................................................
Table of contents VIPO-6 VI PDF Originator User’s Guide FreeFlow Variable Information Suite 5.
Using VI PDF Originator This User’s Guide is designed to provide information about how to use a properly installed version of the FreeFlow VI PDF Originator (VIPO). For information about installing or updating the software refer to the Variable Information Suite Installation Guide (VISInstallation.pdf) provided as a part of the FreeFlow VI Suite Documentation CD included in the VI Suite Ship kit.
NOTE This book, which is part of the FreeFlow VI Suite Documentation, describes the VI PDF Originator and provides information on using VI PDF Originator and its features. For instructions on installing VI PDF Originator or any other VI Suite information, refer to the appropriate book, which can be located from the FreeFlow VI Suite Documentation “Master Table of Contents.
The VIPO Server and Client A VIPO Server must be running and accessible by the Job Submission Client in order for VIPP jobs to be processed via VIPO. Each VIPO Server automatically starts when the workstation on which it is installed boots, and it subsequently runs as a background process. You can tell a VIPO Server is running by the presence of its icon in the Windows task bar (by default, this is in the lower-right corner of the desktop).
Using the VIPO Local Server The VI PDF Originator Local Server window provides access to the File, Job Selection, and Help drop-down menu options.
File menu options These options are available from the File drop-down menu: • Hide Server — Returns the VIPO Local Server window to a task-bar icon. • Pause Server — Pauses/unpauses the Server. You must pause the Server before dumping an accounting file. • Save Logfile — Used when reporting software problems. • Clear Logfile — Used when diagnosing software problems. • Dump Accounting File — Saves accounting information to a file, then clears.
In addition to the standard Server Accounting file created when you select Dump Accounting File from the File menu on the VIPO Local Server window, a corresponding XML-formatted Accounting file is also created automatically. Both accounting files have the same filename except for the file extension (*.acct and *.xml). The following is an example of an XML-formatted Accounting file. PAGE 13Using the VIPO Job Submission Client You can use the VI PDF Originator Job Submission Client window, shown below, to select and configure a job for submission. Window elements The VI PDF Originator Job Submission Client window consists of these elements: Title bar Displays the product name. Menu bar Provides access to the File and Help menus. The File drop-down menu provides access to the Exit option. Select this option to close the Job Submission Client window.
Job creation area Contains the fields necessary to select and configure a job for submission. See “Job creation area field descriptions” for a description of each of the fields. VIPO job status area Provides the status of each job submitted, including the number of pages distilled and/or split, and the number of files split.
NOTE Job cancellation requests are only submitted by the client; in order for jobs to be cancelled they must be processed by the VIPO Server. A cancellation request submitted by the client while the Server is not running, or is in a paused state, will not be processed until the Server is executing a VIPO job. • Job Name and Job Status column headers — Left-click either of these headers to sort the list of jobs.
the current VIPO user (as selected in the Job Submission Client dialog). However, you may browse any other directories on the VIPO Client system for loading or saving profiles, including the virtual printers profile directory located in the VIPO/Profiles folder. For more information, see “Profile files.” Job Type Select one of these job types: • Distill Only • Distill and Split into Pages — Requires that bookmarks be present in the VIPP job (via the BOOKMARK command).
Output Filename Template Select a pre-defined Output Filename template from a drop down list or create an Output Filename template using the Output Filename template wizard. The template you select will be applied to the job being processed. The output file name of the PDF files being produced will be controlled via this Output Filename template. This option is only available when the VI PDF Originator Job Type option is set to “Distill and Split into Pages” or “Split into Pages Only.
Profile files A Profile file must contain the necessary job parameters for the VIPO job submitted via lpr. The table below lists the valid job parameters. Job parameter Parameter default Parameter description InitFile=text No default (Optional) VIPP startup file that prepends to the submitted data file. JobType=text distill_only Valid values are: • • • distill_only distill_and_split into PDF files split_only into PDF files OutputFolderName=text Default Folder location of the VIPO job output.
Specifying PDF output file names You can use a template to specify how PDF file names are formatted during the PDF split operation. To create a template, click Create Template next to the Output Filename Template field on the VIPO Job Submission Client window. The Create an Output Filename Template window appears. Template syntax Template syntax must be enclosed within matching < >.
By setting the value to false, these invalid characters will be considered valid literals in the filename template: []{}()%#=+@ NOTE The square brackets, [ ] , must be “escaped” (preceded by a backslash character “\”) to be valid literals in the template syntax (for example: “filename_\[OK\].pdf”). Use the other characters without the “escape” backslash. Uses the data file name. [x..y] and [Fn] are optional. When producing multiple files, this is the first part of the file name.
Indicates that the resulting PDF file will go through the split process without actually being split into smaller PDF child files. However, the corresponding CSV/XML index files will be generated, which then allows the job to be processed by the VIPO Dispatch server. You can submit a “Distill Only” VIPP job with the non-split option to generate the job index files needed to process the distilled PDF file with the Dispatch module.
Add Bookmark Adds to the displayed template at the current insertion point, if legal; otherwise adds it at the most logical insertion point. Add File Split Count Adds to the displayed template at the current insertion point, if legal; otherwise adds it at the most logical insertion point. n is specified in the box to the right of the button.
Specifying an index file During the PDF splitting process, two index files are automatically created: an ASCII file formatted in Comma Separated Values (CSV) and a corresponding XML-formatted index file. Both have the same file name, except for the file extension (*.csv and *.xml). This is a sample of output for an automatically generated XML-formatted index file: credit000000.pdf credit.
You can also use a template to specify the contents of the index file header and index file record. To create a template, click Create Template next to the Index File Template field on the VIPO Job Submission Client window. The Create an Index File Template window appears; the default template appears in the display window. Additional checks are made when creating and supplying an Index File Template to make sure the field names have the appropriate syntax for XML tag creation.
The bookmark field (the eighth field) can be replaced with as many field names as needed, each separated by the defined field separator. For more information, see “Bookmark field.” NOTE All fields in the index file header and index file record are enclosed in double quotes. This feature cannot be turned off. Field separator A field separator is a single character that separates the index file fields and bookmark fields.
A bookmark field separator (BFS) that must be specified if [Fn] is used. Valid values for c are any printable ASCII character except: [ ] < >. You can use more than one BFS designation. If used within [ ], it only has an effect within those [ ]. If used outside of the [ ], it takes effect until the next BFS is encountered outside of the [ ].
Template field descriptions Use the buttons on the Create an Index File Template window to build your template; your selections appear in the display window. The default template is: FileName:InputFile:EndSplitDate:EndSplitTime:OutputDir: Pages:FileSequence:Bookmark NOTE You can manually edit the template shown in the display window; just make sure you follow the template syntax rules.
Help Provides access to the online help facility. Cancel Closes the template window without saving any changes. Using the VIPO Watched Folders Client The VIPO Watched Folders Client (WFC) allows you to specify one or more directories where VIPP jobs can be placed for automatic submission to VIPO. A VIPO user (remote or local) and an optional profile are associated with each watched folder, which controls the processing of all jobs submitted from that folder.
The VI PDF Originator Watched Folders Client window is used to control and monitor watched folders. NOTE When the Client is invoked, the watch process is inactive. VI PDF Originator User’s Guide FreeFlow Variable Information Suite 5.
Window elements The VIPO Watched Folders Client window consists of these elements: Title bar Displays the product name (VI PDF Originator Watched Folders Client). Menu bar Provides access to the File and Help menus. These options are available from the File drop-down menu: • Hide Watched Folders Client — Returns the VIPO Watched Folders Client window to a task-bar icon. • Input File Disposition — Controls what happens to watched jobs after they are submitted to VIPO.
Function buttons These buttons appear on the right side of the VIPO Watched Folders window: • Add Watch — Allows you to add a folder to the watched list. • Delete Watch — Allows you to delete the selected folder from the watched list. • Browse — Allows you to browse for the folder you want to add to the watched list. • Save Changes — Saves the current changes for the selected folder. • Resume/Pause — Resume starts or resumes watched folder processing; Pause pauses processing.
File ready check The file ready check feature allows you to choose the method you want VIPO to use to determine if a file is ready for use in a VIPO application. Using this feature prevents problems that may occur when the WFC encounters a file that may not be ready for submission. For example, a very large file that is still being transferred or copied from a remote location or files being built “on the fly” by an automated process.
When using the Check for File Size Changes option, if very large files are transferred or copied from a remote location to the watched folder, and the time it takes for the file transfer to be completed is longer than the current watch interval, the file size changes during the transfer are monitored and the file will not be picked up for job submission until file size growth is not detected within the specified time.
Bulk Processing Bulk Processing allows a VIPO user to direct the PDF output of multiple jobs to a single “bulk” directory, typically to facilitate batch or other automated post-processing of the VIPO-generated output. The VIPO system administrator must ensure that your system is upgraded to a VIPO software version that supports Bulk Processing.
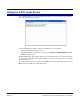
Using VIPO Web VIPO Web allows you to use your web browser to: • • • • Submit VIPP jobs Create new or additional VIPO user accounts Administer VIPO Servers remotely Administer VIPO Web passwords and other security functions Instructions are based on sessions using Internet Explorer; you may have to make adjustments to the instructions if you are using Netscape or other web browser.
VIPO Web finds your server and opens a session. The Welcome to VI PDF Originator Server page provides these options: • Job Submission/View/Retrieval — Provides access to VIPO jobs and functions. • Change Password — Allows you to change your password.
Job Submission/View/Retrieval The Job Submission/View/Retrieval page provides access to the VIPO job submission functions. The page contains two frames. The upper frame provides access to the VIPO functions you will need to submit your job. The lower frame contains system-generated information about the jobs you have submitted. Job Submission - upper frame For descriptions of the files and templates found on this page, see “Job creation area field descriptions.
Data File Allows you to Browse for the file to be submitted to VIPO. When you click Browse, the Choose File window will open. Use this window to browse for and select the file or job for submission. Retrieved files are pulled from VIPO Web as the result of dynamic queries, and NOT by direct links to files on the VIPO Server. This means that if your browser prompts you with a choice to either open or save a file, you should always choose to open the file rather than save it.
User Name Select the user name appropriate for this job. If you have administrative privileges, all user names will appear, as the job can be submitted for another user. Output Folder Choose one of the available directories as a repository for your completed job files. Job Type Click one of these three options for your job type: • • • Distill Only Distill and Split into Pages Split into Pages only These options are discussed in “Job creation area field descriptions.
Job Submission - lower frame When a job is submitted to the VIPO Server, the table on the lower frame of the Job Submission page is filled with information on the submitted job. This information is produced for each submitted job: Action You will be able to Cancel a pending job or Delete a completed job using the option displayed in this column. Clicking Delete deletes the entire job, including the output and the folder. VIPO-40 VI PDF Originator User’s Guide FreeFlow Variable Information Suite 5.
Job Name The name of the job you submitted. When the job is complete, you can display the job files generated via VIPO Web by clicking the Job Name link for the desired job. Clicking a displayed file link causes the file to be displayed on your system; how it is displayed depends on how your system is configured to handle the various file types. Job Status The Job Status of your submitted job is displayed in this part of the table.
Change Password The Change Password option allows you to change your password, the password associated with the user name under which you logged into the system. Use the “User Administration” option to change passwords other than your own.
User Administration VIPO Web allows the creation of new or additional VIPO user accounts. The default incoming folders produced for each user are: • • • • alt1 alt2 bulk (mandatory) default (mandatory) Additional incoming folders can be added manually for any user on the User Administration page, or the VIPO Web administrator can add an additional line to the X:\Winnt\xvtp.ini file in the following format: vtpw_addtl_user_folders=first_directory_name|second_directory_name|...
Changing passwords To change a user’s password, double-click the user name on the left frame, then click the Set/Reset Password button. Enter the new password in the New Password window, then enter the same password in the Repeat new password window. Once entered, click the Set Password button. A message giving the status of the password change will be generated in the right frame of the page. Adding new users To enter a new user, click the Add New User link in the left frame of the page.
Server Administration The Server Administration feature of VIPO Web allows you to set preferences for the Servers that are part of the cluster of servers accessible from your VIPO Web Server. The primary Server Administration page contains this information: • Server Instance — the names of the servers in the cluster. • Selection Method — the way job submission order is determined on each server. • State — usually idle or active, the activity state of each server.
To view information specific to a Server in the cluster, click the Server name link in the Server Instance field. A new Server Administration page will open. From the Server Administration page, you can: • View the VIPO Server Log. • View the accounting file in CSV or XML format. • Cancel the current job.
Cluster Administration The VIPO Web Cluster Administration window allows you to register the paths of drives that have been mapped or mounted in order to allow access to the root path(s) of VIPO Servers. VIPO Web displays these additional Cluster Servers on the VIPO Web Server Administration window, where they can be administered in the same way as the primary VIPO Server administered by VIPO Web.
Assume that you have a two-node cluster set up as follows: In this configuration, both VIPO Servers service a common job pool resident on a disk, which is shared over a network. Before VIPO Web, administering the VIPO Server nodes (server pause, server resume, examining logs, etc.) required physical access to the individual VIPO Servers. With the addition of VIPO Web, VIPO Server A can now be administered via your web browser: VIPO-48 VI PDF Originator User’s Guide FreeFlow Variable Information Suite 5.
Without Cluster Administration, however, the only way to remotely administer VIPO Server B is to run an additional VIPO Web Server where: This configuration is inconvenient for several reasons: • • • VIPO Web administration with regard to SSH Certificates User account passwords Multiple access points to monitor with regard to network security, etc. The complexity and issues multiply in direct proportion to the number of additional nodes added to the cluster.
Then, from the Cluster Administration window of the VIPO Web web server hosted by VIPO Server A, VIPO Server B is added to the Cluster Server Root list of the VIPO Web web server hosted by VIPO Server A, which results in: VIPO Server B can be remotely administered over the HTTP connection to the VIPO Web web server hosted by VIPO Server A, which acts as an intermediary and interacts with VIPO Server B on behalf of the client browser session.
Even if additional nodes are added to the cluster, as long as their server root paths are accessible by the VIPO web server hosted by VIPO Server A, and added to its cluster server root list, they can all be administered remotely from the single client browser session: Basic Authentication Quick Step The Basic Authentication Quick Step process allows user-account level security with user passwords, as well as group security on an area-by-area basis.
Web browser notes When using Internet Explorer, be aware of these notes: • PDF files — When Acrobat Reader is installed, clicking on a PDF file link causes the PDF file to be displayed in Acrobat Reader. PDFs encountered as the result of dynamic queries disable the Save As option in Acrobat.
Using VIPO and Adobe Distiller “Using VIPO and Adobe Distiller” explains how to use VIPO with Acrobat Distiller. These topics are covered: • • PDF security options Adobe Distiller and fonts PDF security options The PDF Splitter module supports PDF Security features. You can set one of these password options in PDF documents generated with Acrobat Distiller: • • User passwords Owner or Master passwords A User password “locks” the file and restricts file open and read access.
If you choose not to set any passwords in Acrobat Distiller but define an Owner/Master password in the VIPO Configuration file, VIPO will still transfer this password to all files generated during the split process. This means that while the original file may not have an Owner/Master password set, all the split files generated will. However, in order to transfer the Owner/Master password, the original PDF file must have at least one of the other security options set.
Adobe Distiller and fonts All the fonts required for your VIPP job must be in a location where Distiller can find them. Failure to do so will result in font substitution warnings in the VIPO Server log and console display. Example: Run job 'billb.lm': distill Distill Warning: Helvetica-Condensed not found, using Font Substitution. Font cannot be embedded. 'billb.
Assigning a Distiller job options file You can assign a particular Distiller job options file to be used for generating a PDF document when submitting a VIPP job to the VI PDF Originator. The DistillJobOptions entry found in a Profile file is set by default to use whatever job options file has been set as the default in the Distiller GUI.
Using BOOKMARK, PDF features, and Project Containers Descriptions of using VIPO with the BOOKMARK command and Project Containers are found in these sections: • • • Using the VIPP BOOKMARK command Using VIPP PDF interactive features Using VI Project Containers Using the VIPP BOOKMARK command The VIPP BOOKMARK command can be used in any VIPP mode to generate a bookmark on the PDF document.
Extended bookmarks An extended bookmark is a transparent PDF note, which is usually visible from the “Comment” section of the completed PDF only. Extended bookmarks are only used with the Dispatch function of VIPO. Extended bookmarks can contain information up to 64K in size, regular bookmarks contain up to 256 characters.
Using VIPP PDF interactive features A complete set of VIPP PDF Interactive Features (PIF), available in VIPP 4.0 and later, allow you to create interactive elements when the VIPP job is rendered into a PDF document. For an overview of VIPP PIF and details about each related command, refer to the VIPP Language Reference Manual. Using VI Project Containers VI Project Containers (VPC or .vpc) are a convenient way to archive, exchange, and deploy VIPP applications. VPCs are created with VI Designer.
VIPO-60 VI PDF Originator User’s Guide FreeFlow Variable Information Suite 5.
Using lpr to submit VIPO jobs “Using lpr to submit VIPO jobs” provides the lpr command syntax for Windows 2000. Also included are: • • • Parameter definitions Parameter defaults Example lpr job submissions NOTE Job files to be submitted through an lpr command cannot contain blank spaces, pound signs (#), equal signs (=), or colons (:) in their names. NOTE In order to use lpr printing, the TCP/IP Print Server must be installed and started.
Parameter definitions VIPO_user [:local|remote] Defines the scope of the VIPO user, either local or remote. • VIPO_user :local — a local-scope VIPO user defined on the lpd print server associated with printername. • VIPO_user :remote — a remote-scope VIPO user reachable from the lpd print server associated with printername. • If neither local nor remote is specified, local scope is searched first; if the user is not found, then remote scope is searched.
Parameter defaults If any or all of the –T or –C parameters are omitted from the lpr command, the following defaults are used: • If user= is undefined in the lpr command, then the VIPO_user defaults to default_user (local-scope) on the lpd server associated with printername. • If profile= is undefined in the lpr command, the following defaults are tried in this order: 1. The user defined default lpr profile (lpr_default.
VIPO-64 VI PDF Originator User’s Guide FreeFlow Variable Information Suite 5.
Using VIPO Dispatch VIPO Dispatch (VIPOD) is the generic mechanism by which VIPO jobs that have been distilled and split, or split into pages are sent, or dispatched, to other programs or functions such as: • • • E-mail Fax DocuShare repository VIPOD monitors VIPO output and performs post-processing via a customer-specified back-end.
Dispatch filters A filter file can have up to 100 user/folder pair entries, with a maximum of 2048 characters for each entry. Only one AutoRun filter and one IncomingFolders filter can be active during a current invocation of the application. The active filter(s) can be set with the Set Active Filter button found in the Editing dialog panel. This button is greyed out when the currently active filter is displayed. All filter files must have a file extension of .
Dispatch Rule files All rule files must have a file extension of .rule and must be placed in the X:\xvtp\dispatch\rules\ directory for the application to find them and for editing. X is the disk drive where VIPO was initially installed. To edit Dispatch Rule files, click the Edit drop-down menu and select the Dispatch Rules option. Some sample rule files are provided with this installation and can be used as a template to create your own customized rule files.
Key name Factory defaults Maximum length or value CommandTemplate NO default and NOT optional (must be defined by user) 1024 characters TimeOut 0 (ZERO=infinite wait) 32,400 sec. (~9.
Dispatch Rule entries are defined as follows: RuleName The user-specified name by which the rule is identified to the user. Examples might be “E-mail via Exchange” or “Submit to DocuShare.” RuleVars A set of name-value pair definitions that define the specified field names for use in the CommandTemplate. When a RuleVars name is the same as a field name encountered in a VIPOD job's splitfile index record, the field name contents of the splitfile index record takes precedence over the RuleVars value.
CommandTemplate The template from which the command (passed to the operating system representing the execution of the subtask) is derived. An example: blat c:\xvtp\bin\bodytemp.txt -t $mailto where mailto is a field of the splitfile index record or RuleVars name having the value jones@ip.com would result in the file c:\xvtp\bin\bodytemp.txt being mailed to jones@ip.com via the SMTP batch tool, blat, (assuming that blat.exe was somewhere on the execution path of the VIPOD process).
FailOnError A boolean (.INI false: 0. or true: 1) indicating whether detection of an error during execution of the OS command should cause the VIPOD job to halt processing (transition from “current” to “complete,” with a status of “failure”) at the record that generated the error. RetValTriggerTrumpsStdoutStderr If true (.INI true: 1), indicates that the RetValTrigger value takes precedence over any return value indication returned by either StdOutTrigger or StdErrTrigger.
If RetValTrumpsStdOutStdErr is false, the RetValTrigger return value indication is trumped by those detected via either a StdOutTrigger or a StdErrTrigger. A trumped RetValTrigger return value indication should not preclude the RetValTrigger value from being considered for inclusion in the log file. StdOutTrigger The definition of substring value(s) whose presence in the stdout stream emitted by the executed OS command are interpreted in the context of success, warning, or failure.
Another example: StdErrTrigger=(; "Warning:" ; "Error:" | "Fatal:") means that the presence of the substring “Warning:” in stderr indicates a warning, while the presence of either “Error:” or “Fatal:” indicates an error. A StdErrTrigger definition may be empty, indicating that the contents of the stderr stream is ignored for purposes of determining the return status of the OS command.
System built-in macros Use these built-in macros as variables in a rule file for DataFileTemplate and CommandTemplate definitions: • PDF_DIR_PATH — Full path of the directory location where the distilled PDF file associated with the job can be found. • PDF_FILE_PATH — Full path of the individual split PDF file associated with the index file record currently being processed. • PDF_FILE_NAME — File name only of the individual split PDF file associated with the index file record currently being processed.
Special Character Sequences in CSV and XML Index Files All new line characters ( and ) found in bookmark fields extracted from the distilled PDF file are first converted to a special sequence of characters before placing the bookmark string in the CSV and XML index files.The character sequence
is used to replace all new line characters found in the bookmark fields.
VIPO Dispatch window The VI PDF Originator Dispatch window provides access to dispatch functions. The upper portion of the Dispatch window consists of these elements: Title bar Displays the name of the program and your computer’s name. It also contains the standard minimize, maximize, and cancel buttons.
• Trace menu — — — • Clear Display Job Selection Loop Job Selection Trace Help menu — — Help About Current Job Lists the job currently being processed. Hold Places the current job on hold. Cancel Cancels processing of the current job. Log file window Contains the logged information for the VIPO jobs being processed.
Move Down Moves the selected file down one position on the Pending Jobs list. This affects the processing order of your jobs. Move to Bottom Moves the selected file to the end of the Pending Jobs list. The selected job will be the last job processed. Hold Job Holds the selected job. Once placed on hold, the job appears on the Held Jobs window until you choose to release or cancel that job. Cancel Job Cancels the selected job.
Conflict Jobs When the Conflict Jobs tab is selected, VIPO produces a window containing a list of all VIPO jobs with conflicts. Conflict jobs are jobs where more than one Dispatch Rule can be applied. When any entry in the Conflict Jobs list is highlighted, these buttons can be used to alter how the selected job will be processed: Select Dispatch Rule Allows you to select the appropriate Dispatch Rule from a list.
Held Jobs When the Held Jobs tab is selected, VIPO produces a window containing a list of all VIPO jobs on hold. When any entry in the Held Jobs list is highlighted, these buttons can be used to alter how the selected job will be processed: Release Job Releases the selected job from the “Hold” status. The job’s eligibility is re-evaluated against the current set of Dispatch Rules, which may result in the job moving to the “Ineligible,” “Eligible,” or “Conflict” state. Cancel Job Cancels the selected job.
File menu The File menu provides drop-down access to these functions: Hide Dispatcher Minimizes the VIPO Dispatch window. The window can be reopened by double-clicking the VIPO Dispatch icon on the lower right menu bar. Pause Dispatcher Pauses the VIPO Dispatch program. To restart VIPO Dispatch, remove the check mark. The status of the program is displayed in the upper logfile window. Save Logfile Saves the current logfile to your disk.
Edit menu The Edit menu provides drop-down access to the following functions. IncomingFolders Filters Selecting this option produces a pop-up window that allows you to select and edit the IncomingFolders Filters. These filters are used to decide which VIPO jobs will make it into the VIPO Dispatch for evaluation against the Dispatch Rules.
Edit Produces a dialog that lists user names and incoming folder names for the selected filter file. Use the entries to select new users and/or folder file names. When the correct settings for your filter appear in the Filter entry field, select OK to edit the selected entry and store it in memory; it will not alter the filter file on the disk. The filter file is only modified and stored on the disk when the Save or Save As buttons are pressed. Add Adds new users and folders for processing.
OK/Cancel Approves or cancels your changes. Unless you select Save or Save As, the changes are stored in memory only, not to the filter file saved on disk. Pressing OK after making changes to filter entries without saving them invokes a pop-up window prompting you to approve all changes and then to confirm overwriting the file with the modified entries. Pressing Yes will store the changes into the file on disk. Pressing No aborts all changes from memory and leaves filter file unchanged.
Delete File Deletes the selected filter file from the list and from the disk. Edit Select a filter file name and click Edit to produce a dialog that lists user names and incoming folder names. Use the entries to select new users and/or folder file names. When the correct settings for your filter appear in the Filter entry field, select OK to save the setting to memory without altering the actual filter file. Add Adds new users and folders for processing.
Reset Resets the values of the selected entries to their original state (not the factory defaults). OK/Cancel Approves or cancels your changes. Pressing OK after making changes to filter entries without saving them invokes a pop-up window prompting you to approve all changes and then to confirm overwriting the file with the modified entries. Pressing Yes will store the changes into the file on disk. Pressing No aborts all changes from memory and leaves filter file unchanged.
These options are available on the Entries in Dispatch Rule File window: Edit When a Rule file name is selected, a key name is highlighted. Click Edit to produce a dialog where you can edit the saved values for the selected key name. Each dialog varies according to the type of key name (string, boolean, value, etc.).
Trace menu Trace menu options allow you to see more detailed information regarding the job selection process. It can be especially useful to determine why a job is ineligible for processing. The Trace menu has three options: Clear Display Clears the log console window of all current messages. It does not delete messages placed in the log file.
Using VIPO Dispatch - a simple example Acme Telephone company (a fictitious company) uses VIPO to generate their delinquent account notices in PDF format. They want to have the notices e-mailed to their delinquent customers, as well as to the lawyer at the collection agency nearest the customer's location. Acme uses a batch file interface to their e-mail program called mymailprog.bat.
The first step in using VIPOD is to add some additional fields (like e-mail addresses, and other things that may be useful as their application becomes more sophisticated) to their .dbf file: %! XGF [(vtpdispatch) (example0)] SETPROJECT 500 SETBUFSIZE (:) SETDBSEP (example0.dbm) STARTDBM NAME:ACCOUNTNUMBER:AMOUNTDUE:EMAIL:LAWYERNAME:LAWFIRM:LAWYEREMAIL:WEBADDRESS TSMGR Brian:0001:12.95:brian@hotmail.com:Phil:CollectionsRUs :phil@collectionsrus.com:www.youoweus.com:Susie Gretta:0002:3.27:gretta@yahoo.
Start up VIPO Dispatch to build a Dispatch Rule that will handle the job. Begin editing a new rule by selecting Edit>Distpatch Rules from the top menu. Edit one of the sample rules by selecting it in the Rule Filename drop-down box. The contents of the “mailtext” field for each record needs to be placed into a temporary file so that mymailprog can read it, therefore, double-click on the DataFileTemplate line and add a new entry: Field Name: mailtext Destination File Path: c:\temp\temp.
-cc is a flag indicating that the next entry is the e-mail address of the person being carbon-copied. "$cc" indicates that the “cc” field of the record will be placed here. -s is a flag indicating that the next entry is the subject line of the e-mail. "$subject" indicates that the “subject” field of the record will be placed here. -a is a flag indicating that the next entry is the path of the PDF file to be attached.
The job is almost ready to submit to VIPO. The next step is to start up the VIPO Job Submission Client and create the index file template for the job: FileName,InputFile,EndSplitDate,EndSplitTime,OutputDir,Pages, FileSequence,mailto|[F0],subject|[F1],cc[F2],mailtext[F3] After entering the information shown above, click OK to submit the job for Distill and Split: VI PDF Originator User’s Guide FreeFlow Variable Information Suite 5.
VIPO Dispatch, meanwhile, is monitoring VIPO jobs for those that complete and match a Dispatch Rule; because of this, VIPO Dispatch picks up the job and indicates that it is eligible for processing. Click the Eligible Jobs tab on the VI PDF Originator Dispatch window to show the list of eligible jobs: VIPO-94 VI PDF Originator User’s Guide FreeFlow Variable Information Suite 5.
Highlight the job and then click to select it: Finally, click the Submit Job button to submit the job. The job is processed and displayed in the dialog. The display allows you to verify that the arguments were passed to mymailprog correctly. VI PDF Originator User’s Guide FreeFlow Variable Information Suite 5.
Click on the Completed Jobs tab to see that the job is now in the “Completed” category. Had mymailprog been a real e-mail front-end, the PDF's would have been e-mailed as attachments to each delinquent account holder and the appropriate collection agencies. The body of each e-mail, its subject, and all other information would have been generated from within the VIPP application itself.
Using VIPO Services VIPO and VIPO Servers can be initiated from a Windows Service, which allows the various servers to be initiated and to perform operations without requiring a manual logon. Launching and activating VIPO and VIPO servers when the system is booted up allows a “hands-off” VIPO system. Use of VIPO Services depends entirely upon the proper installation of the functionality.
VI PDF Originator Service A VI PDF Originator Service is one of the following service components: • • • • • FreeFlow FreeFlow FreeFlow FreeFlow FreeFlow VI VI VI VI VI PDF PDF PDF PDF PDF Originator Originator Originator Originator Originator Service Watched Folders Service Dispatch Service Secure Web Service Web Service These components are Windows Services, which in turn are responsible for starting and stopping their associated VI Originator Servers.
Index A BOOKMARK command, VIPO-57 bookmark field examples, VIPO-26 specifying, VIPO-25 Bookmark Field Separator, VIPO-27 bookmarks extended, VIPO-58 built-in macros JOB_NAME_ID, VIPO-74 PDF_DIR_PATH, VIPO-74 PDF_FILE_NAME, VIPO-74 PDF_FILE_PATH, VIPO-74 USER_NAME_ID, VIPO-74 Bulk Processing, VIPO-34 Dispatch filters, VIPO-66 AutoRun, VIPO-73 RunPostProcessCmd, VIPO-73 window, VIPO-76 Edit menu, VIPO-82 File menu, VIPO-81 Dispatch Rules, VIPO-67, VIPO-86 CommandTemplate, VIPO-70 DataFileTemplate, VIPO-69
Index fonts, VIPO-55 H Header Field Separator, VIPO-27 held jobs, VIPO-80 I index file bookmarks, VIPO-25 creating a template for, VIPO-24 field separator, VIPO-25 Index File Template, VIPO-17 Add Start/End Index, VIPO-27 bookmark field, VIPO-25 Bookmark Field Separator, VIPO-27 field descriptions, VIPO-27 field separator, VIPO-25 Header Field Separator, VIPO-27 template syntax, VIPO-24 ineligible jobs, VIPO-79 Init (Nub) File, VIPO-15 J Job Server, VIPO-16 Job Submission Current Profile, VIPO-15 Data F
Index StdErrTrigger, VIPO-72 StdOutTrigger, VIPO-72 submitting VIPO jobs using lpr, VIPO-61 T TimeOut, VIPO-70 U User Name, VIPO-16 USER_NAME_ID, VIPO-74 using lpr to submit VIPO jobs, VIPO-61 using VIPO, VIPO-7 V VI PDF Originator Server, VIPO-97 VI PDF Originator Service, VIPO-98 VIPO description, VIPO-8 VIPO Dispatch (VIPOD) filters, VIPO-66 AutoRun, VIPO-84 IncomingFolders, VIPO-82 Rules, VIPO-67 window, VIPO-76 Edit menu, VIPO-82 File menu, VIPO-81 VI PDF Originator User’s Guide FreeFlow Variable
Index VIPO-102 VI PDF Originator User’s Guide FreeFlow Variable Information Suite 5.