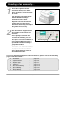
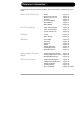
Xerox FaxCentre F12 Quick Start Guide 602E97930 Document Output Tray Control Panel Automatic Document Feeder Document Input Tray Document Guides Side Cover Bypass tray Tray 1 Front Cover Release Lever Tray 2
Welcome to your FaxCentre F12.... Thank you for choosing the Xerox FaxCentre F12. To support the delivery of your new machine please refer to the following: ½ Quick Start Guide ½ Installation Sheet ½ User Guide The following pages contain an overview of the main features to help you get started.
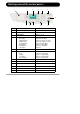
Working around the control panel....
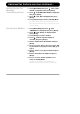
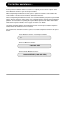
Making copies.... 1 Ensure the LCD displays ‘READY TO COPY’. If not, press the [Copy] Key on the control panel. Copy Key 2 Insert the originals into the document feeder, face down. Up to 50 sheets can be inserted at a time. The first page should be at the bottom with the headings towards the left or back. Align the stack to the left and against the rear edge of the document feeder tray and adjust the guides if necessary.
Sending a fax manually.... 1 Insert the originals into the document feeder, face down. Up to 50 sheets can be inserted at a time. The first page should be at the bottom with the headings towards the left or back. Align the stack to the left and against the rear edge of the document feeder tray and adjust the guides if necessary. 2 Use the numeric keypad to dial the number of the remote fax machine. Press [Start] to send the fax.
Advanced fax features overview.... Setting the Date & Time 1. Press [Menu/Exit] then press until ‘6:MACHINE SETUP’ is displayed, then press [Enter]. 2. Press until ‘DATE & TIME’ is displayed then press [Enter]. 3. Enter the date in the following format MM-DDYYYY e.g. 08-12-2002. 4. Enter the time in the following format HH-MM. If AM or PM is shown then the clock is set for 12 Hour and you will need to choose one or the other using the cursor key. 5. Press [Stop/Clear] to return to Standby Mode.
Advanced fax features overview continued.... Setting Up the Fax Message Confirmation Sheet 1. Press [Menu/Exit] then press until ‘7:FAX SETUP’ is displayed, then press [Enter]. 2. Press until ‘MESSAGE CONF.’ is displayed then press [Enter]. 3. Press until ‘ON’ is displayed then press [Enter]. 4. Press [Stop/Clear] to return to Standby Mode. For further information about Setting up the Fax Message Confirmation Sheet, refer to page 9-6 of the User Guide. Setting Up a Mailbox 1.
Reference information....
For further assistance.... If after product installation further assistance is required, please call our experts at the Xerox Welcome Centre or your local representative. When telephoning the Welcome Centre, please quote the machine serial number.The serial number is located on the machine, behind the front door. Prior to telephoning the Welcome Centre, it is recommended that you print a System Data report. This list shows the status of the user-selectable options and may help to identify a problem.
Page 10