FreeFlow Scanner 665E Operator Manual For the DocuColor 8000/7000 Digital Press 701P44148 Version 1.
Xerox Corporation Global Knowledge & Language Services 800 Phillips Road Building 845 Webster, New York 14580 © Copyright 2005 by Xerox Corporation. All Rights Reserved. Printed in the U.S.A.
Table of contents Conventions vii Symbols . . . . . . . . . . . . . . . . . . . . . . . . . . . . . . . . . . . . . . . . . . . vii Writing style conventions . . . . . . . . . . . . . . . . . . . . . . . . . . . . . . viii Safety notices ix Electrical safety. . . . . . . . . . . . . . . . . . . . . . . . . . . . . . . . . . . . . . .ix Disconnect device. . . . . . . . . . . . . . . . . . . . . . . . . . . . . . . . . . x Laser safety . . . . . . . . . . . . . . . . . . . . . . . . . . . . . . . . . . .
Tab l e o f c on te n ts Product recycling and disposal . . . . . . . . . . . . . . . . . . . . . . . . . xxiv North America . . . . . . . . . . . . . . . . . . . . . . . . . . . . . . . . . . . xxiv European union . . . . . . . . . . . . . . . . . . . . . . . . . . . . . . . . . xxiv Other countries . . . . . . . . . . . . . . . . . . . . . . . . . . . . . . . . . . xxiv 1. Overview 1-1 Hardware overview . . . . . . . . . . . . . . . . . . . . . . . . . . . . . . . . . . 1-2 Scanner components . . . . .
Tab l e of c o n te nts 3. Scan and Print 3-1 Input document information . . . . . . . . . . . . . . . . . . . . . . . . . . . 3-1 Input document type . . . . . . . . . . . . . . . . . . . . . . . . . . . . . . 3-1 Determine the condition of the hardcopy . . . . . . . . . . . . . . 3-2 Opening the Scan and Print application . . . . . . . . . . . . . . . . . . 3-3 Scan and print an original . . . . . . . . . . . . . . . . . . . . . . . . . . . . . 3-4 Scan and print a large job. . . . . . . . . . . . . .
Tab l e o f c on te n ts Settings tabs . . . . . . . . . . . . . . . . . . . . . . . . . . . . . . . . . . . . . . Basic Features . . . . . . . . . . . . . . . . . . . . . . . . . . . . . . . . . Scan ticket . . . . . . . . . . . . . . . . . . . . . . . . . . . . . . . . . Original input. . . . . . . . . . . . . . . . . . . . . . . . . . . . . . . . Output image . . . . . . . . . . . . . . . . . . . . . . . . . . . . . . . Image Mode . . . . . . . . . . . . . . . . . . . . . . . . . . . . . Resolution . .
Tab l e of c o n te nts Color/Image Quality . . . . . . . . . . . . . . . . . . . . . . . . . . . . . Preferences . . . . . . . . . . . . . . . . . . . . . . . . . . . . . . . . . . . More Options . . . . . . . . . . . . . . . . . . . . . . . . . . . . . . . Job Setup buttons. . . . . . . . . . . . . . . . . . . . . . . . . . . . . . . . . . 5-14 5-15 5-16 5-17 6. Quick Print 6-1 Printing a single file. . . . . . . . . . . . . . . . . . . . . . . . . . . . . . . . . .
Tab l e o f c on te n ts Understanding Resolution . . . . . . . . . . . . . . . . . . . . . . . . . . . . 9-3 The two faces of resolution . . . . . . . . . . . . . . . . . . . . . . . . . 9-4 The difference between pixel count resolution & embedded resolution . . . . . . . . . . . . . . . . . . . . . . . . . . . . . 9-4 What is the difference between ppi and dpi? . . . . . . . . . . . 9-5 What resolution should I use to scan an image? . . . . . . . .
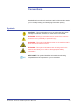
Conventions Standardized conventions have been used in this manual to assist you in visually locating and identifying information quickly. Symbols CAUTION: This symbol alerts you to an action that may cause damage to hardware, software, or result in the loss of data. WARNING: Warnings mark alert users to areas of the machine where there is a possibility of personal injury. WARNING: This symbol identifies an area on the machine that is HOT and should not be touched.
Co n v en ti o ns The 1 2 3... symbol indicates the beginning of a task or work process you should use to complete a procedure and is followed by the first step of a numbered procedure, task, or work process. NOTE: This symbol calls your attention to information that is helpful, but not essential to complete a procedure or task. This symbol indicates that there is additional information from another source, such as a web site or manual.
Safety notices This Xerox product and the recommended supplies are designed and tested to meet strict safety requirements. These include safety agency approval and compliance to established environmental standards. Please read the following instructions carefully before operating the product, and refer to them as needed to ensure the continued safe operation of your product. KEY POINT: The safety testing and performance of this product have been verified using Xerox materials only.
S af et y n o ti c e s WARNING: Never push objects of any kind into slots or openings on this equipment. Making a contact with a voltage point or shorting out a part may result in fire or electrical shock. If any of the following conditions occur, immediately switch off the power to the machine and disconnect the power cord from the electrical outlet. Call an authorized Xerox service representative to correct the problem. • The machine emits unusual noises or odors.
S a fe ty n o ti c e s Laser safety North America This product complies with safety standards and is certified as a Class 1 Laser product under the Center for Devices and Radiological Health (CDRH) of the United States Food and Drug Administration (FDA) implemented regulations for laser products. This product complies with FDA 21 CFR 1940.10 and 1040.11 except for deviations pursuant to Laser Notice No. 50, dated July 26, 2001. These regulations apply to laser products marketed in the United States.
S af et y n o ti c e s Europe (EU) and other markets This product complies with IEC’s safety standard 60825-1 (Edition 1.2) issued August 2001. The equipment complies with laser product performance standards set by governmental, national, and international agencies as a Class 1 Laser Product. It does not emit hazardous radiation as the beam is totally enclosed during all phases of customer operation and maintenance.
S a fe ty n o ti c e s Maintenance safety • Do not attempt any maintenance procedure that is not specifically described in the documentation supplied with your product. • Do not use aerosol cleaners. The use of supplies that are not approved may cause poor performance of the press and could create a dangerous condition. • Use the supplies and cleaning materials only as directed in this manual. Keep all materials out of the reach of children.
S af et y n o ti c e s • Do not set up the machine in line with the cold air flow from an air conditioning system. • Do not place containers of coffee or other liquid on the machine. • Do not block or cover the slots and openings on the machine. • Do not attempt to override any electrical or mechanical interlock devices. WARNING: Be careful when working in areas identified with this warning symbol. These areas may be very hot and should not be touched.
Notices Radio frequency emissions FCC in the USA This equipment has been tested and found to comply with the limits for a Class A digital device, pursuant to Part 15 of the Federal Communications Commission (FCC) Rules. These limits are designed to provide reasonable protection against harmful interference when the equipment is operated in a commercial environment.
No ti c e s Regulatory information for RFID This product generates 13.56 MHz using an Inductive Loop System as a Radio Frequency IDentification system device (RFID). This system is certified in compliance with European Council Directive 99/5/EC and applicable local laws or regulations as applicable. Safety extra low voltage approval This Xerox product is in compliance with various governmental agencies and national safety regulations.
Certifications in Europe The CE marking that is applied to this product symbolizes Xerox Declaration of Conformity with the following applicable Directives of the European Union as of the dates indicated: January 1, 1995: Council Directive 73/23/EEC amended by Council Directive 93/68/ EEC, approximation of the laws of the member states related to low voltage equipment. January 1, 1996: Council Directive 89/336/EEC, approximation of the laws of the member states related to electromagnetic compatibility.
No ti c e s WARNING: In order to allow this equipment to operate in proximity to Industrial, Scientific, and Medical (ISM) equipment, the external radiation from the ISM equipment may have limited or special mitigation measures taken. WARNING: This is a Class A product in a domestic environment. This product may cause radio frequency interference in which case the user may be required to take adequate measures.
Notices Bonds. (U.S. Savings Bonds may be photographed only for publicity purposes in connection with the campaign for the sale of such bonds.) Internal Revenue Stamps. (If it is necessary to reproduce a legal document on which there is a canceled revenue stamp, this may be done provided the reproduction of the document is performed for lawful purposes.) Postage Stamps, canceled or uncanceled.
No ti c e s 6. Passports. (Foreign Passports may be photographed.) 7. Immigration Papers. 8. Draft Registration Cards. 9. Selective Service Induction Papers that bear any of the following Registrant’s information: Earnings or Income Court Record Dependency Status Previous military service Physical or mental condition Exception: United States military discharge certificates may be photographed. 10.
Notices It’s illegal in Canada Parliament, by statute, has forbidden the reproduction of the following subjects under certain circumstances. Penalties of fines or imprisonment may be imposed on those guilty of making such copies. 1. Current bank notes or current paper money. 2. Obligations or securities of a government or bank. 3. Exchequer bill paper or revenue paper. 4. The public seal of Canada or of a province, or the seal of a public body or authority in Canada, or of a court of law. 5.
No ti c e s Environmental notices for the USA As an ENERGY STAR® partner, Xerox Corporation has determined that this product meets the ENERGY STAR guidelines for energy efficiency. The ENERGY STAR and ENERGY STAR MARK are registered United Stated trademarks. The ENERGY STAR Office Equipment Program is a team effort between U.S.
Notices Environmental notices for Canada Terra Choice Environmental Services, Inc. of Canada has verified that this Xerox product conforms to all applicable Environmental Choice EcoLogo requirements for minimized impact to the environment. As a participant in the Environmental Choice program, Xerox Corporation has determined that this product model meets the Environmental Choice guidelines for energy efficiency.
No ti c e s Product recycling and disposal If you are managing the disposal of your Xerox product, please note that the product contains lead and other materials whose disposal may be regulated due to environmental considerations. The presence of lead is fully consistent with global regulations applicable at the time that the product was placed on the market. North America Xerox operates a worldwide equipment take-back and reuse/ recycle program.
1. Overview The Xerox FreeFlow Scanner 665E is a Xerox color-enabled scanner that interfaces with FreeFlow software. The scanner is an optional accessory that is used in conjunction with the DocuColor 8000/7000 Digital Press. The FreeFlow Scanner 665E is capable of: • Scanning color images at 600 x 600 dots per inch (dpi). • Providing the same resolution and ranges for both Platen and Automatic Document Feeder (ADF) scanning. • Providing electronic page (ADF) deskew for color and black and white.
1. O ve r v i e w Hardware overview The Xerox FreeFlow Scanner 665E is a high quality, high volume scanner. Teamed with scanning software and a personal computer, the scanner is a powerful tool for capturing and manipulating graphics and text.
1. O v e r v ie w Control Panel The scanner includes a control panel on the front right corner. Use these controls to start and stop scans as well as monitoring the status of the scanner. The control panel consists of the following components: Start button (green): Stop button (red): Press this button to start a scan. Press this button to cancel a scan. The page currently being scanned will complete the scan process.
1. O ve r v i e w Automatic Document Feeder (ADF) ADF The Automatic Document Feeder has the following features: Automatic 2-sided scanning: Feeds many document types, including: High-speed scanning: Ability to separate the ADF from the Document Glass Cover 1- 4 When two-sided originals are scanned, the front (top) side is scanned first. The original is then turned over and passed through the ADF to scan the back side.
1. O v e r v ie w Document Glass Raise the entire ADF and Document Glass Cover Assembly to access the Document Glass. Document glass The Document Glass provides a 12 x 18 inch (304.8 mm x 457.2 mm) scanning area and has standard and book registration guides. Scan directly from the Document Glass if you are scanning an image on photographic paper or you are scanning a delicate or damaged document. SCSI Connection SCSI stands for Small Computer System Interface.
1. O ve r v i e w SCSI Cable A 9.8 foot (3 m) SCSI cable is provided with your Xerox Scanner. This cable enables communication between the scanner and the host PC. SCSI cable Power Cord Plug the power cord into the scanner at the left rear panel. Power cord The scanner requires a 10 amp 115 VAC connection in the United States or Canada, and a 5 amp 240 VAC connection in Europe. Contact an electrician if your electrical service does not match these requirements.
1. O v e r v ie w Overview of FreeFlow applications KEY POINT: This book uses illustrations showing a DocuColor 8000 Digital Press connected to a Fiery EXP8000 color server. Your system may vary depending on the digital press and color server for your work environment.
1. O ve r v i e w KEY POINT: This book uses illustrations showing a DocuColor 8000 Digital Press connected to a Fiery EXP8000 color server. Your system may vary depending on the digital press and color server for your work environment. Scan and Print: This application provides a quick, easy way to scan, print, and save documents. It also allows you to apply enhancements, headers, footers, and page numbers to your scan jobs.
1. O v e r v ie w KEY POINT: This book uses illustrations showing a DocuColor 8000 Digital Press connected to a Fiery EXP8000 color server. Your system may vary depending on the digital press and color server for your work environment. Advanced Scanning: The Advanced Scanning options are accessed from the Scan and Print window by clicking the button. The Advance Scanning provides more scanning options and allows you to better define the scanning parameters of your original document.
1. O ve r v i e w KEY POINT: This book uses illustrations showing a DocuColor 8000 Digital Press connected to a Fiery EXP8000 color server. Your system may vary depending on the digital press and color server for your work environment. Job Ticket/Job Setup: The Job Ticket/Job Setup options are accessed either from the Production Printer Settings application or from the Scan and Print application. A job ticket is an electronic record that specifies printing and finishing options for a document.
1. O v e r v ie w KEY POINT: This book uses illustrations showing a DocuColor 8000 Digital Press connected to a Fiery EXP8000 color server. Your system may vary depending on the digital press and color server for your work environment. Quick Print: This application is available on the scanner and also can be installed and executed from client workstations on which have the required PC platform software loaded.
1. O ve r v i e w KEY POINT: This book uses illustrations showing a DocuColor 8000 Digital Press connected to a Fiery EXP8000 color server. Your system may vary depending on the digital press and color server for your work environment. File Manager: The FreeFlow File Manager application allows you to manage your Raster Document Object (RDO) files. Use the FreeFlow File Manager to copy, move, rename, and/or delete an RDO file. KEY POINT: Do not confuse Windows Explorer with the FreeFlow File Manager.
1. O v e r v ie w KEY POINT: This book uses illustrations showing a DocuColor 8000 Digital Press connected to a Fiery EXP8000 color server. Your system may vary depending on the digital press and color server for your work environment. Security Certification: If your site requires a high security communication and you are connected to a DocuSP color server, you will this application. Security Certification is discussed in more detail on Chapter 8 on page 8-1.
1. O ve r v i e w Workstation platform The following table lists the required hardware components for the scanner workstation platform: Required workstation platform Workstation platform 1- 1 4 Description DELL OptiPlex The FreeFlow workstation platform: • 3.
1. O v e r v ie w Powering on/off the system The system consists of the scanner, the PC monitor, the and the PC workstation (hard drive tower, mouse, and keyboard). Power on Follow these steps when powering on the system. 1. Power on the scanner and wait for the green LED to light. 2. Power on the PC monitor. 3. Power on the workstation. 4. If required, log into the network.
1. O ve r v i e w RDO files RDO is the three-letter extension for the Raster Document Object file type. As stated earlier, the RDO file type is used primarily with FreeFlow, but you can use RDOs with other FreeFlow applications, or convert them to PostScript or PDF files. An RDO is a document file made up of images. An RDO has two parts: • A PostScript wrapper which contains all the information about the structure and format of the pages in your document. • A .
1. O v e r v ie w FreeFlow Help The FreeFlow Scanner 665E online Help system is an excellent source of information about the features available and how to use them. Accessing the Help system You can access the online Help system in a number of ways. The easiest way is to use the Help menu. Perform the following steps to access the Help system. 1. From any FreeFlow Scanner 665E application, select Help: and either Help Topics or Help. The Help dialog box displays with the Contents tab displays.
1. O ve r v i e w 2. Select the Index tab to display an alphabetical list of Help topics. As you enter text into the Type in the keyword to find text box, topics associated with the words you type display. 3. Select the Search tab to search the entire Help system for one or more specific keywords. 4. Type a word in the Type in the keyword to find text box; for example, type mode. NOTE: You can type more than one keyword at a time in the Type in the keyword to find text box. 5.
1. O v e r v ie w 6. Double-click on the Enhance Image settings topic in the Select Topics to display list box. The topic displays in the text window on the right. NOTE: You can store any displayed Help topic as a Favorite. With the desired topic selected, click on the Favorites tab. Select Add to add the topic to your list of Favorites. 7. Select Close ( ) in the title bar to close the Help system and return to the FreeFlow application window.
1. O ve r v i e w Using the Document Glass Use the document glass under the following conditions: • The document is old, fragile, or torn • The document stock is lighter than 13 lb. or heavier than 32# lb. • The document is on coated stock, inkjet paper, photographic paper, or other rigid media • The document is larger than 11.7 x 17 inches • The document is bound NOTE: Scan fragile documents, photographs (printed on photographic stock), inkjet papers, and bound documents on the Document Glass.
1. O v e r v ie w Scanning a bound document To scan a bound document: 1. Raise the document feeder. 2. Place the bound document on the Document Glass, registering it on the front center edge, as indicated by the icon on the document glass frame. 3. Lower the document feeder, being careful not to move the bound document out of registration. 4. From Advanced Scanning, select Document glass-bound original from the Scan location drop-down list. Refer to Chapter 4, “Original input” on page 4-15.
1. O ve r v i e w Using the ADF The ADF enables you to scan 1-sided and 2-sided documents quickly, and returns them in a stack in the same order you placed them in the input tray. Use the ADF for rapid scanning of up to 100 pages. The ADF can feed pages from 5.5 x 6.5 in. (139.7 x 165.1 mm), long edge feed (LEF), to 11.7 x 17 in. (297.2 x 431.8 mm) of uncoated, bond paper stock from 13 lb. (49 gsm) to 32 lb. (120 gsm). To use the ADF: 1.
1. O v e r v ie w 4. From Advanced Scanning, click the SEF/LEF toggle to specify how the document is loaded in the input tray. Indicates direction the documents are loaded in the ADF Refer to Chapter 4, “Original input” on page 4-15. 5. Make the desired selections from the Advanced Scanning and Scan and Print applications. The Scan and Print application is discussed in Chapter 3 on page 3-1 and the Advanced Scanning application is discussed in Chapter 4 on page 4-1. 6.
1.
2. Production Printer Settings Before you can print your scanned documents you must set up your printer or printers. This chapter provides step-by-step instructions for setting up, editing, and deleting a printer. Opening the Production Printer Settings application Select Start: Programs: Xerox FreeFlow Software: Printer Production Settings.
2. P r o d uc t i on P r i n te r S e tt i ng s KEY POINT: This book uses illustrations showing a DocuColor 8000 Digital Press connected to a Fiery EXP8000 color server. Your system may vary depending on the digital press and color server for your work environment. The Printer Production Settings dialog box opens: NOTE: This chapter uses illustrations showing a DocuColor 8000 Digital Press connected to a Fiery EXP8000 color server.
2. Pr o d uc t i on P r in t er S e tt in g s Adding/editing a printer KEY POINT: This book uses illustrations showing a DocuColor 8000 Digital Press connected to a Fiery EXP8000 color server. Your system may vary depending on the digital press and color server for your work environment. When adding a printer, enter the information for your site specific color printer by using the following procedure.
2. P r o d uc t i on P r i n te r S e tt i ng s 4. Type your in the Print queue text box; refer to the example below: NOTE: Type the appropriate information for your server and your print queue based on the server and the print queue at your site. 5. From the Printer model: drop-down list, select DocuColor 8000: or your site specific printer. 6. From the Print controller/server type: drop-down list, select your site specific print controller/server type. 7.
2. Pr o d uc t i on P r in t er S e tt in g s Editing a printer KEY POINT: This book uses illustrations showing a DocuColor 8000 Digital Press connected to a Fiery EXP8000 color server. Your system may vary depending on the digital press and color server for your work environment. You can edit an existing printer from the Production Printer Settings application. Select Edit Printer; the Edit Printer dialog box opens: To edit an existing follow Steps 1-9 of “Adding/editing a printer” on page 2-3.
2. P r o d uc t i on P r i n te r S e tt i ng s Deleting a printer KEY POINT: This book uses illustrations showing a DocuColor 8000 Digital Press connected to a Fiery EXP8000 color server. Your system may vary depending on the digital press and color server for your work environment. 1. From the Printer Production Settings dialog box, select the desired printer. 2. Select Delete Printer. A dialog box displays asking you if you want to delete the current printer. 3.
2. Pr o d uc t i on P r in t er S e tt in g s Setting a default printer KEY POINT: This book uses illustrations showing a DocuColor 8000 Digital Press connected to a Fiery EXP8000 color server. Your system may vary depending on the digital press and color server for your work environment. 1. From the Printer Production Settings dialog box, select the desired printer that you want as the default printer. 2. Select Set as Default Printer.
2. P r o d uc t i on P r i n te r S e tt i ng s Checking the printer status KEY POINT: This book uses illustrations showing a DocuColor 8000 Digital Press connected to a Fiery EXP8000 color server. Your system may vary depending on the digital press and color server for your work environment. KEY POINT: This button functions only when the scanner is connected to a DocuSP color server. 2- 8 1. From the Printer Production Settings dialog box, select the desired printer. 2. Select Printer Status. 3.
2. Pr o d uc t i on P r in t er S e tt in g s Creating a job ticket KEY POINT: This book uses illustrations showing a DocuColor 8000 Digital Press connected to a Fiery EXP8000 color server. Your system may vary depending on the digital press and color server for your work environment. 1. From the Printer Production Settings dialog box, select Create a Job Ticket. 2. The Job Setup dialog box opens.
2. P r o d uc t i on P r i n te r S e tt i ng s 3. 4. Make your desired selections. Select OK to save and close the Job Setup dialog box. This returns you to the Production Printer Settings dialog box. KEY POINT:The Job Setup/Job Ticket features are discussed in more detail in Chapter 5 on page 5-1. 5. 2- 1 0 Select Close. This closes the Production Printer Settings dialog box.
3. Scan and Print The Scan and Print process simulates a copier. The scanner creates a temporary digital file with which it uses to complete the copy.
3. S c a n a nd P r i n t Determine the condition of the hardcopy Always be aware of the condition of your hardcopy documents. The condition of the hardcopy document, or input document, determines how you scan a document or whether you must create a new original. If a hardcopy document is in good condition, you can use the multisheet or single-sheet feeder. If the hardcopy document is fragile or damaged, use the document glass for the most reliable scan.
3 . S c a n a nd P r in t Opening the Scan and Print application KEY POINT: This book uses illustrations showing a DocuColor 8000 Digital Press connected to a Fiery EXP8000 color server. Your system may vary depending on the digital press and color server for your work environment. From Start: Programs: select Xerox FreeFlow Software: and Scan and Print.
3. S c a n a nd P r i n t Scan and print an original KEY POINT: This book uses illustrations showing a DocuColor 8000 Digital Press connected to a Fiery EXP8000 color server. Your system may vary depending on the digital press and color server for your work environment. Scan options Print options Advanced Scanning button Enhance options Setup button More Options button Follow these steps when scanning an original. 1. 2.
3 . S c a n a nd P r in t NOTE: By clicking on the Advanced Scanning... button, more options are available. This button is discussed in more detail on Chapter 4, “Advanced Scanning” on page 4-1. Each one of these options is discussed in more detail later in this chapter or Chapter 4 on page 4-1 4. From the Enhance Image section, select either Deskew or Despeckle (black and white mode only). • Deskew eliminates the skew of an image. • Despeckle removes stray pixels that appear as “dirt” on an image.
3. S c a n a nd P r i n t NOTE: By clicking on the More Options... button, a Job Setup dialog box opens with additional options. This button is discussed in more detail in Chapter 5 on page 5-1. Each one of these options is discussed in more detail starting on page 3-24 and in Chapter 5 on page 5-1. NOTE: To disable all additional options without having to change each one individually, clear the Apply More Options check box. 7.
3 . S c a n a nd P r in t Scan and print a large job KEY POINT: This book uses illustrations showing a DocuColor 8000 Digital Press connected to a Fiery EXP8000 color server. Your system may vary depending on the digital press and color server for your work environment. You can use Scan and Print to build large copying jobs with the Scan to Job button.
3. S c a n a nd P r i n t Scan and save documents KEY POINT: This book uses illustrations showing a DocuColor 8000 Digital Press connected to a Fiery EXP8000 color server. Your system may vary depending on the digital press and color server for your work environment. You can scan a document and save it as an RDO or an Adobe PDF by using the Scan and Print application. 1. Select a Save option 2. Save section becomes active Follow these steps when scanning and saving documents. 1. 2.
3 . S c a n a nd P r in t 3. Select your job options; refer to Steps 3-8 of the “Scan and print an original” on page 3-4. NOTE: Step 6 of the “Scan and print an original” on page 3-4 discusses the Print options. For Save jobs, this section of the Scan and Print dialog box is called either Job Ticket Settings or PDF Options; refer to Step 8 of this procedure. The options for Job Ticket Settings are the same as the Print options.
3. S c a n a nd P r i n t 8. Select PDF Files (*.pdf) or RDO Files (*.rdo) from the Save as type list box. NOTE: When Save As: PDF is selected from the Save section, the Print section on the right side of the dialog box changes to PDF Options. When Save As: RDO is selected, this section changes to Job Ticket Settings. Refer to the illustration below. Save As: PDF and PDF Options 9. 10. 11. 12. 13.
3 . S c a n a nd P r in t Scan, print, and save documents KEY POINT: This book uses illustrations showing a DocuColor 8000 Digital Press connected to a Fiery EXP8000 color server. Your system may vary depending on the digital press and color server for your work environment. You can scan a document, print it, and save it as an RDO or an Adobe PDF by using the Scan and Print application. Follow these steps when scanning, printing, and saving documents. 1. 2. 3. 4.
3. S c a n a nd P r i n t 8. 9. 10. 11. Select PDF Files (*.pdf) or RDO Files (*.rdo) from the Save as type list box. Select Save to close the Save As dialog box and return to Scan and Print. The path for your job displays in the Location box. Click Save, Print & Save. When you are finished, close the Scan and Print application. Scan and Print features This section discusses in detail the various Scan and Print features.
3 . S c a n a nd P r in t Menus The Scan and Print application has the following menus: File: This menu contains: • Save User Defaults: Allows you to save the current settings as the user defaults for Scan and Print. All user default settings are restored when Scan and Print is opened. You can create user default settings to maintain your most frequently used feature settings between Scan and Print sessions.
3. S c a n a nd P r i n t View: Help: This menu contains: • Printer/Job Status: Opens the Job Manager dialog box so you can manage the jobs in the print queues. • Quick Print: Opens the Quick Print dialog box. • Inches: Select this option to change the measurement to inches. • Millimeters: Select this option to change the measurement to millimeters. This menu contains: • About Scan and Print: Displays version and copyright information for the Scan and Print application.
3 . S c a n a nd P r in t Scan KEY POINT: This book uses illustrations showing a DocuColor 8000 Digital Press connected to a Fiery EXP8000 color server. Your system may vary depending on the digital press and color server for your work environment. This area of the Scan and Print dialog box allows you to choose the following: • Sides to scan: Based on your original documents, select one of the following: – 1 Side: Select this option if your scan job consists of 1sided documents only.
3. S c a n a nd P r i n t • • 3- 1 6 Image orientation: This option allows you to rotate your original documents as you scan them; select one of the following: – Standard: This option does not rotate your documents. The scanned image appears in exactly the same orientation as the document’s orientation on the document glass. – Rotated: This option rotates the document 90° while scanning it. The scanned image is printed in this rotated orientation.
3 . S c a n a nd P r in t Save KEY POINT: This book uses illustrations showing a DocuColor 8000 Digital Press connected to a Fiery EXP8000 color server. Your system may vary depending on the digital press and color server for your work environment. KEY POINT: This area of the Scan and Print dialog box is active and available for use only if Save or Print and Save is selected. If the Print option is selected, this area of the dialog box is grayed out and not available for use.
3. S c a n a nd P r i n t Display in Acrobat Check the Display in Acrobat check box, and select one of these buttons: • Scan and Save or • Scan to Job and then Save Job or • Scan, Print and Save or • Scan to Job and then Print and Save Job Your document is scanned. Upon completion of the scan operation, Adobe Acrobat opens and displays your scanned document.
3 . S c a n a nd P r in t Enhance Image KEY POINT: This book uses illustrations showing a DocuColor 8000 Digital Press connected to a Fiery EXP8000 color server. Your system may vary depending on the digital press and color server for your work environment. KEY POINT: The Enhance Image option activates only when the Black and White scan option is selected. It is not available for color scan jobs.
3. S c a n a nd P r i n t • 3- 2 0 Despeckle: This option removes specks from the scanned image. The Despeckle feature locates and removes any background spots, or specks, that may occur on your scanned image. – The size you set for the Despeckle option refers to the maximum speckle size that will be removed from the image. For example, if the speckle size is set to 10, then ten refers to a 10 X 10 square pixel; any speckle this size or smaller is removed from the image.
3 . S c a n a nd P r in t Enhance Document This area of the Scan and Print dialog box provides options for adding headers, footers, or page numbers to scanned pages. To add headers, footers, page numbers or a combination of these options, use the following procedure. 1. To enable one or more of these options, simply click on the checkbox to the left of the desired option. 2.
3. S c a n a nd P r i n t 4. Make any other desired selections for your header or footer: • Position: Select where on the output copy that you want your header/footer printed. Choose one of the following Left, Center, Right, and then select either Top or Bottom. – Left: The header/footer is positioned in relation to the left edge of the page.
3 . S c a n a nd P r in t • Font: Select the desired font, font size, font style, and font color that will be used when printing the header/ footer. Select the font name, size, style, and color from their respective drop-down list. • Background: Select either Opaque or Transparent. – Depending on the vertical/horizontal position of the header/footer, selecting Opaque may print the header/footer over the scanned text/pictures. This may cause some of the scanned information to be unreadable. 5. 6.
3. S c a n a nd P r i n t Print/Job Ticket Settings/PDF Options KEY POINT: This book uses illustrations showing a DocuColor 8000 Digital Press connected to a Fiery EXP8000 color server. Your system may vary depending on the digital press and color server for your work environment.
3 . S c a n a nd P r in t KEY POINT: The features available on this area of the Scan and Print dialog box may vary depending on the Option selected (Print, Save, or Print and Save).
3. S c a n a nd P r i n t • Job type: Select the desired job type from the drop-down list. The various job types are discussed in more detail in Chapter 5 on page 5-1. • Stock size: Select the desired output size from the dropdown list. The various stock sizes are discussed in more detail in Chapter 5 on page 5-1. NOTE: The remainder of these features are not available when Save: Save As: PDF is selected. • Stock type: Select the desired output stock type from the drop-down list.
3 . S c a n a nd P r in t Scan and Print main buttons KEY POINT: This book uses illustrations showing a DocuColor 8000 Digital Press connected to a Fiery EXP8000 color server. Your system may vary depending on the digital press and color server for your work environment. Along the bottom of the Scan and Print dialog box are the application’s main buttons.
3. S c a n a nd P r i n t Two of these buttons and their functions change according to the feature selected in the Options area of the dialog box. The other three buttons never change and always retain the same function; refer to the illustration below: Print Option Uses these buttons Save Option Uses these buttons Save Option Uses these buttons These buttons always remain the same regardless of the Option selected.
3 . S c a n a nd P r in t Restore Defaults button Clicking this button restores the Scan and Print settings to their default settings. NOTE: The default settings that are restored are your user defined defaults. If you want to restore the factory defaults, you must select File: Restore Factory Defaults.
3.
4. Advanced Scanning The Advanced Scanning feature is accessed from the Scan and Print window. This chapter discusses the various Advanced Scanning features. Accessing Advanced Scanning KEY POINT: This book uses illustrations showing a DocuColor 8000 Digital Press connected to a Fiery EXP8000 color server. Your system may vary depending on the digital press and color server for your work environment.
4. A d v a nc e d S c an n i ng Using the Automatic Document Feeder and Advanced Scanning The Automatic Document feeder on the scanner will enable you to scan 1 and 2-sided documents quickly, and returns them in a stack in the same order you placed them in the input tray. To use the Automatic Document feeder: 1. 2. Ensure Document feeder is chosen in the Scan Location drop-down list located on the Basic Features tab. Place a document or stack of documents in the input tray face up, either SEF or LEF.
4 . A d v an c e d S c an ni n g Scanner software overview The FreeFlow Scanner 665E software is also known as Xerox Scanner software. The scanner software is comprised of two components: TWAIN Scanning Application This component is also called TWAIN Data Source or TWAIN driver and is used for scanning.
4. A d v a nc e d S c an n i ng Main scanning features There are three main parts to the TWAIN Scanning software interface. At the top of the screen are the control menus. Below these are the settings tabs and the scanning controls.
4 . A d v an c e d S c an ni n g Control menus There are four menus at the top of the scanner dialog box: File View Options Help Use the File menu to save new scan tickets, save changes to existing scan tickets, and as a way to exit the scanner software. Refer to the “File menu” on page 4-5 for more details on this menu. Use the View menu to select which controls are visible, and to select image viewing size. This is discussed in more detail on “View menu” on page 4-6.
4. A d v a nc e d S c an n i ng Skip Select Skip to discard the current preview image. This button is enabled when the Document feeder and Single page mode options are selected; this is discussed in more detail on “Single Page Mode” on page 4-11. Exit Select Exit to close the scanner window. At this point, all scanned files are returned to the imaging application (such as PhotoShop, Adobe Capture, etc.).
4 . A d v an c e d S c an ni n g Status Bar This control is checked by default. Status bar (at the bottom of the scanner window) When checked, the Status Bar displays the following information: Show Preview • Condition of scanner • Total pages scanned during a job • Original document size • Output document size (Image size) • File size This control is checked by default. When checked, the Preview window is visible. When unchecked, only the tabbed dialog is visible.
4. A d v a nc e d S c an n i ng Preferences Select Preferences to see a tabbed dialog with the following tabs: General Use the controls on this tab to specify default settings for common original documents. File Transfer Mode Settings: 4- 8 – Rotate Image: This option causes the scanner to rearrange the data in the output image so that the image will appear upright when viewed. – Use TIFF Orientation Tag Only: TIFF images contain a bit of information called an orientation tag.
4 . A d v an c e d S c an ni n g Localize Use the controls on this tab to set language and measurement defaults. Language: Use the Language list box to control what language text and numerals will be displayed in the scanner window. NOTE: The supported languages are English, French, Italian, German, Spanish, Dutch, and Brazilian Portuguese. Units: Inches is set as the default unit of measure. Use the Units list box to control which unit of measure is used by the scanner.
4. A d v a nc e d S c an n i ng Compression Use the controls on this tab to set compression defaults. Production Color (24-bit) compression controls: The controls within this group box define the compression setting when "Production Color (24-bit)" is the selected color mode. JPEG Compression Level slider: Use this slider to select from ten levels of JPEG compression. The default for this slider is nine, which is a good compromise between decent image quality and manageable file size.
4 . A d v an c e d S c an ni n g Calibrate Scanner Calibrate the scanner whenever you notice a degradation in image quality or consistency. Scanner calibration may be done any time the scanner is not in a "busy" state. This is discussed in more detail in the System Administration Guide, chapter 4. Hardware maintenance, “Calibrate Scanner” on page 4-12. Fast Preview The Fast Preview feature is activated and deactivated by clicking the item on the Options menu.
4. A d v a nc e d S c an n i ng Help menu Use the Help menu to access Help, Troubleshooting, and other information about the scanner. NOTE: The Help menu can be accessed from the keyboard by pressing ALT, H. The Help menu contains the following controls: Contents 4- 1 2 Select Contents to launch online Help. You will be at the top level (or the front page) of the Help system, and can navigate via the Table of Contents, the Index, or the Search function.
4 . A d v an c e d S c an ni n g Settings tabs Click on the tabs to access basic features, image quality, and image size settings. Basic Features Think of the Basic Features tab as the main control panel for the scanner. Use the Basic Features tab to describe your document’s features to the scanner (the input parameters), and to set resolution and image mode (output parameters). Unless your original needs to be resized or requires image quality adjustments, you can set up the whole scan job from this tab.
4. A d v a nc e d S c an n i ng To use an existing scan ticket, follow this procedure: 1. Click on the Scan ticket drop-down list on the Basic Features tab. 2. Click on the name of the ticket you wish to use. NOTE: The selection for Single Page Mode is not saved in any Scan Tickets. If you select a scan ticket and you wish to scan one page at a time you must manually select the Single Page Mode checkbox. To create a scan ticket, use the following procedure: 1. Adjust the settings for your scan job.
4 . A d v an c e d S c an ni n g To back up a scan ticket file, use the following procedure: NOTE: Making backup copies of your Scan Tickets is essential. This is the only way to prevent another operator from overwriting or deleting your saved settings. 1. 2. 3. 4. 5. Place a formatted floppy disk in drive A: Right click the Start button. Select Explore. Browse to C:\Program Files\Common Files\Xerox\ Scanner. Select all the files with the ".sct" extension; right-click and select Send To: 3½ Floppy (A].
4. A d v a nc e d S c an n i ng • Image orientation: Click the Image Orientation button to choose between portrait and landscape originals. • Original type: Select an original type that best describes your original document. Each Original Type has been programmed to give the best results for the kind of original it describes. NOTE: The Automatic type is only available for some printers.
4 . A d v an c e d S c an ni n g Output image From the Output image area, select the image mode, resolution, and optimization (if necessary). Image Mode KEY POINT: For the FreeFlow Scanner 665E there are only two image modes available: Production Color and Black & White (1 bit). The Image Mode selection is based on the Mode (Color/ Black and White) selection made from the main Scan and Print window.
4. A d v a nc e d S c an n i ng Image modes supported by the FreeFlow Scanner 665E for DocuColor 8000/7000 Digital Presses Image mode Output Black and white Images composed of black and white pixels only. No color or shading. (Appearance of shading achieved by controlling the density of the black pixels.) Images have the lowest bit depth (1 bit) and the smallest file size. Fastest scan speed achieved in this mode. Production Color Images composed of up to 16.
4 . A d v an c e d S c an ni n g Choosing a Printer for Optimization Every printer has different capabilities and methods for reproducing shading in black and white images. To get optimum results, your image has to be adjusted slightly for the target printer. Choose the printer to which the image will be sent for production printing. To select a target printer: 1. 2. 3. Click on the Basic Features tab. Click on the Optimize image for: dropdown list. Select the target printer from the list.
4. A d v a nc e d S c an n i ng Original type Choose the preset original type that best describes your document. These presets are designed to give good image quality for most documents of the types listed. For help on choosing an original type, refer to Chapter 9, “Guide to choosing an Original Type for your scan” on page 9-2. Image adjustments Brightness Use the Brightness control to adjust the lightness or darkness of the image.
4 . A d v an c e d S c an ni n g Fine Adjustments Click the Fine Adjustments button to launch the Advanced Image Adjustments dialog. The Advanced Image Adjustments dialog allows fine control over highlights, midtones, and shadows within a scanned image. NOTE: The Advanced Image Adjustments features are disabled when the Text and Line Art Original Type is selected. For more information, refer to the Online Help (Advanced Scanning/Image Quality Tab/Fine Adjustments button; click Help).
4. A d v a nc e d S c an n i ng Sharpen Use the Sharpen feature to increase contrasts along the edges of objects in the image. This has the effect of making objects more distinct. Changes you make can be seen using the Preview feature. Background suppression This feature is used to force the image background to white. Too much suppression can affect the highlights in an image, and is not recommended for full page photographs.
4 . A d v an c e d S c an ni n g Image Quality windows This button opens the Image Quality Windows dialog, which lets you manually segment the image into different original types, each with unique image quality adjustments. For more information on each one of these features, refer to the Online Help (Advanced Scanning/Image Quality Tab/Image Quality windows button). Image Size Use the tools on the Image Size tab to eliminate unwanted portions of the image or to reduce or enlarge the output image.
4. A d v a nc e d S c an n i ng Crop The Crop tool deletes the portion of the image outside the bounding box. By deleting the portion outside the bounding box, you are reducing the size of the file in bytes. Cropping the Image Use the Crop feature to delete unwanted portions of the image. Using this feature changes the physical dimensions of the image; this means that the output image will be smaller than the original. To preserve the original dimensions, use the Frame feature instead.
4 . A d v an c e d S c an ni n g Cropping 1-sided documents To crop 1-sided documents, use the following procedure: 1. 2. 3. 4. 5. 6. 7. Place the 1-sided document into the scanner, either on the document glass or in the document feeder, and enter all relevant input values on the Basic tab. Click the Image Size tab. Click the Preview button. Select the Crop/Frame checkbox. Click the Crop radio button.
4. A d v a nc e d S c an n i ng Cropping bound, head to toe documents To crop 2-sided documents, use the following procedure: 1. 2. On the Basic Features tab, choose Document glass-bound original. Place the original on the document glass as shown by the icon. 3. 4. 5. 6. 7. 8. Choose the input document original size (this is the dimension of one page). If only scanning one page, choose the top or bottom radio button. If scanning both pages, choose the Both pages radio button.
4 . A d v an c e d S c an ni n g Cropping bound documents To crop bound documents, use the following procedure: 1. 2. On the Basic Features tab, choose Document glass-bound original. Place the original on the document glass as shown by the icon. 3. 4. Choose the input document original size (this is the dimension of one page). If only scanning one page, choose the right or left radio button. If scanning both pages, choose the Both pages radio button.
4. A d v a nc e d S c an n i ng Frame Use the Frame feature to fill the outer edges of the image with white. Using the Frame tool yields an image of the same physical dimensions as the original document (assuming you have not reduced or enlarged). The Frame feature retains the physical dimensions of the image: the output image will be the same size as the original. To make the output image dimensions smaller than the original, use the Crop feature.
4 . A d v an c e d S c an ni n g Framing 1-sided documents To Frame 1-sided documents: 1. 2. 3. 4. 5. 6. 7. 8. Place the 1-sided document into the scanner, either on the document glass or in the document feeder, and adjust settings as needed on the Basic Features tab. Click the Image Size tab. Click the Preview button. Select the Crop/Frame checkbox. Click the Frame radio button. In the Preview window, use the mouse to drag the bounding box until the area you want to delete is outside the bounding box.
4. A d v a nc e d S c an n i ng Framing bound, head to toe documents To Frame bound, head-to-toe documents: 1. 2. On the Basic Features tab, choose Document glass-bound original. Place the original on the document glass as shown by the icon. 3. 4. 5. 6. 7. 8. Choose the input document original size (this is the dimension of one page). If only scanning one page, choose the top or bottom radio button. If scanning both pages, choose the Both pages radio button.
4 . A d v an c e d S c an ni n g Framing bound documents To Frame bound documents: 1. 2. On the Basic Features tab, choose Document glass-bound original. Place the original on the document glass as shown by the icon. 3. 4. Choose the input document original size (this is the dimension of one page). If only scanning one page, choose the right or left radio button. If scanning both pages, choose the Both pages radio button.
4. A d v a nc e d S c an n i ng Removing hole punch marks To remove hole punch marks: NOTE: Use this procedure if the Hole Fill feature does not give satisfactory results. 1. 2. 3. 4. 5. 6. 7. 8. Place the document into the scanner, either on the document glass or in the document feeder, and adjust settings as needed on the Basic Features tab. Click the Image Size tab. Click the Preview button. Select the Crop/Frame checkbox. Click the Frame radio button.
4 . A d v an c e d S c an ni n g Reduce/Enlarge The Reduce/Enlarge tools scale the image to a smaller or larger size. The Reduce/Enlarge controls allow you to change the size of the image to fit specific dimensions or by a percentage. The amount by which you can reduce or enlarge the image depends on the scan resolution and the size of the original. NOTE: Scanners enlarge images by scanning at a higher sample density (SPI) than requested.
4. A d v a nc e d S c an n i ng Preview window The Preview window is used to adjust margins for cropping and framing, and for previewing adjustments to image quality prior to scanning.
4 . A d v an c e d S c an ni n g Using the Preview Window When you click the Preview button, a representation of the scanned image appears in the Preview window. Use the Preview window to set Crop/Frame margins, create and edit Image Quality Windows, and to adjust Image Quality settings. To enable the Preview window, select View: Show Preview. NOTE: By default, the Preview feature is set to perform a fast preview of your image at a reduced resolution, regardless of the chosen scan resolution.
4. A d v a nc e d S c an n i ng Previewing both sides of a 2-sided document When you preview a bound document on the Document Glass or a 2-sided document from the Document Feeder, the A/B toggle will become enabled at the top of the Preview pane. To Preview both sides of a 2-sided document, use the following procedure: 1. Click A to view the first side. 2. Click B to view the second side of the image. NOTE: This feature is especially useful for previewing mirrored Crop/Frame margins.
4 . A d v an c e d S c an ni n g Using interactive preview (Single Page Mode) Single page mode allows you to scan a stack of documents, one at a time, from the document feeder. In this mode, the top page is fed, scanned and kept in the scanner's memory until you either accept the scan or skip to the next page. This mode is designed to help you adjust image quality, as you can continue to reprocess the image without reloading the page in the feeder as many times as necessary.
4. A d v a nc e d S c an n i ng 9. 10. If you do not want to scan the page, click Skip to delete the preview image and reject your changes. Click Preview to feed the next page through the scanner (unless you have Automatic Preview enabled). NOTE: Single page mode can be used with the Fine Adjustments controls and with the Image Quality Windows dialog.
5. Job Ticket/Job Setup This chapter defines what a job ticket/job setup is and discusses the various options available with the job ticket option. What is a job ticket? A job ticket is an electronic record that specifies printing and finishing options for a document. The job ticket options available for your document are listed in the Job Setup dialog box. Also known as...
5. J o b Ti c k e t/ J ob S e tu p Accessing the job ticket You can access the job ticket options one of three ways: • From the Scan and Print application or • From the Production Printer Settings application or • From the Quick Print application. KEY POINT: This book uses illustrations showing a DocuColor 8000 Digital Press connected to a Fiery EXP8000 color server. Your system may vary depending on the digital press and color server for your work environment.
5 . J ob Ti c k et /J o b S e tu p The Job Setup dialog displays. KEY POINT: This book uses illustrations showing a DocuColor 8000 Digital Press connected to a Fiery EXP8000 color server. Your system may vary depending on the digital press and color server for your work environment.
5. J o b Ti c k e t/ J ob S e tu p ...Or you can access it from Production Printer Settings: Select the Create Job Ticket button. The Job Setup dialog displays. KEY POINT: This book uses illustrations showing a DocuColor 8000 Digital Press connected to a Fiery EXP8000 color server. Your system may vary depending on the digital press and color server for your work environment.
5 . J ob Ti c k et /J o b S e tu p ...Or you can access it from Quick Print: Select the Job Setup button. The Job Setup dialog displays. KEY POINT: This book uses illustrations showing a DocuColor 8000 Digital Press connected to a Fiery EXP8000 color server. Your system may vary depending on the digital press and color server for your work environment.
5. J o b Ti c k e t/ J ob S e tu p Job Setup tabs The Job Setup/Job Ticket dialog box contains the following tabs: • Imaging/Job Setup • Job Notes • Paper Stocks • Color/Image Quality • Preferences Each of these tabs and their options are discussed on the following pages. KEY POINT: This book uses illustrations showing a DocuColor 8000 Digital Press connected to a Fiery EXP8000 color server. Your system may vary depending on the digital press and color server for your work environment.
5 . J ob Ti c k et /J o b S e tu p Job Type: Select the specific job type from the drop-down list. There are three primary job types, some with subtypes: • Standard: Prints the document pages in sequential order, using single sheets of paper stock. A standard job can be 1-sided (simplex), 2-sided (duplex) or Head-To-Toe (duplex). • Signature: Prints the document pages non-sequentially, to produce folded output. Signature jobs are always duplex.
5. J o b Ti c k e t/ J ob S e tu p – 2-Up flip right: Prints the same page twice, side by side, on one side of a page, with the right-side image rotated 180 degrees. You can change the paper size, if necessary. The Orientation depends on the N-Up type you choose. Image Shift is not available for 2-Up flip left. This option is often selected when using offline cutting and binding.
5 . J ob Ti c k et /J o b S e tu p – 8-Up: Prints the same page eight times on one side of a page. You can change the paper size, if necessary. The Orientation depends on the N-Up type you choose. Image Shift is not available for N-Up. – 16-Up: Prints the same page sixteen times on one side of a page. You can change the paper size, if necessary. The Orientation depends on the N-Up type you choose. Image Shift is not available for N-Up.
5. J o b Ti c k e t/ J ob S e tu p Image descriptions: Image operations: Select the Orientation and Sides Imaged from their respective drop-down lists: • Select Portrait if the short sides are the top and bottom edges and the long sides are the right and left edges. • Select Landscape if the long sides are the top and bottom edges and the short sides are the right and left edges. • Select 1-Sided to print images on only 1 side of your output paper.
5 . J ob Ti c k et /J o b S e tu p Job setup: From the Job setup area, make your desired selection for Collation, Output, and Finishing: • Collation: From the drop-down list box, select either: – Collated - to print multiple copies of a document in sequential order. – Uncollated - to print multiple copies of a document by page number. • Output: From the drop-down list, select your desired output option. NOTE: The output devices shown here may or may not be available for your system.
5. J o b Ti c k e t/ J ob S e tu p Job Notes NOTE: The available Job Notes fields depends on your digital press. You can create job notes for a specific job by typing in the Special Instructions area. If you save this job ticket, these special instructions are saved with it. KEY POINT: This book uses illustrations showing a DocuColor 8000 Digital Press connected to a Fiery EXP8000 color server. Your system may vary depending on the digital press and color server for your work environment.
5 . J ob Ti c k et /J o b S e tu p Paper Stocks NOTE: The available paper stocks depend on your digital press. Select the desired Size and Stock type from their respective drop-down lists. Check the Printer Default check box to print to the default paper stock weight. Clear the Printer Default check box to enter a different paper weight in the Weight text box, to select a weight from the Weight drop-down menu, or to print to a paper stock weight other than the printer default.
5. J o b Ti c k e t/ J ob S e tu p Color/Image Quality The Color/Image Quality tab settings control how images and text are printed by the target production printer. These settings will vary depending on the selected production printer. When a color printer is selected, users can adjust image brightness, color mode (grayscale or color), image and text sharpening, and black detection. Additional color rendering options are available if the users selects the Expert color (custom) color mode.
5 . J ob Ti c k et /J o b S e tu p Preferences NOTE: The available Preferences options depend on your digital press.
5. J o b Ti c k e t/ J ob S e tu p More Options Clicking the More Options button opens the Display Options dialog box. Clear the checkboxes next to the options you wish to hide in the associated tab dialog. For example, if you wish to hide the stapling options, clear the stapling checkboxes and select Save. The next time you open Job Setup, these stapling options will not be displayed in the Finishing drop-down list on the Imaging/Job Setup tab.
5 . J ob Ti c k et /J o b S e tu p Job Setup buttons On the bottom of the Job Setup dialog box are three buttons: Use these buttons for: • Resetting the job ticket defaults: Click this button to restore the job ticket to its default options. • Saving the job ticket: Click this button to save your job ticket settings. • Opening an existing job ticket: Click this button to access and open an existing job ticket.
5.
6. Quick Print Quick Print allows you to quickly access, create a job ticket, and print a job that was previously scanned and saved. Printing a single file KEY POINT: This book uses illustrations showing a DocuColor 8000 Digital Press connected to a Fiery EXP8000 color server. Your system may vary depending on the digital press and color server for your work environment. Use the following procedure to print a single file. 1. Select Start: Programs: Xerox FreeFlow Software: Quick Print.
6. Q ui c k P r i n t KEY POINT: This book uses illustrations showing a DocuColor 8000 Digital Press connected to a Fiery EXP8000 color server. Your system may vary depending on the digital press and color server for your work environment. The Quick Print dialog box opens: 2. 3. 4. 5. 6- 2 Select the file type you wish to print in the Show file type pull-down menu. Browse to the directory where the document is stored and select the file name of the document from the directory tree list.
6 . Q u ic k P r in t 6. Specify the number of copies to be printed. If you do not want to print the entire document, deselect the All checkbox and select the sequence of pages to print: a. Specify the starting page in the From list box. b. Specify the last page to print in the To list box. c. Click the Job Setup button to modify the job ticket settings as necessary. NOTE: The Job Setup button is disabled if an Adobe PDF file or an RDO with PDF pages that has been secured against printing.
6. Q ui c k P r i n t Printing a job with multiple files 1. 2. 3. 4. 5. 6. 7. 8. 9. 10. 11. 12. Select the file type you wish to print in the Show file type pull-down menu. Select the List multiple files to print checkbox. The Quick Print window expands to reveal the job list at the bottom of the screen. Browse to the location of the document from the directory tree box. Highlight the file name of the first document to print. Click Add button. The file name appears in the job list.
6 . Q u ic k P r in t 15. Select the appropriate radio button: • Print as one job: Jobs are printed as one job. The default job ticket is applied, but can be modified by clicking the Job Setup button. • 16. Print as separate jobs: Jobs are printed separately with the default job ticket applied to each file. Job Setup and Page Range options are disabled. Click Print to submit the jobs to the printer in the order they are listed.
6. Q ui c k P r i n t Printing all the files in a selected directory To print all the files in a selected directory: 1. Select the file type you wish to print in the Show file type pulldown menu. NOTE: By selecting a file type, only files of that type found in the directory will be printed. For example, if TIFF is the selected file type, all the TIFF files in the directory will be printed. 2. 3. Browse to the directory location and select the directory in the tree list.
6 . Q u ic k P r in t 9. 10. 11. 12. 13. Click the Remove button to remove a selected job from the print list, or the Remove All button to clear the list. Select a printer from the Printers pull-down menu. Click the Printer Settings button to modify the printer settings as necessary. Specify the number of copies to be printed. Click the Job Setup button to modify the job ticket settings as necessary.
6. Q ui c k P r i n t 15. Select the appropriate radio button: a. Print as one job: Jobs are printed as one job. The default job ticket is applied, but can be modified by clicking the Job Setup button. b. Print as separate jobs: Jobs are printed separately with the default job ticket applied to each file. Job Setup and Page Range options are disabled. c. Click Print to submit jobs to the printer. If multiple jobs are being printed, they will be submitted in the order they are listed.
7. File Manager This chapter discusses the File Manager application and provides instructions on how to copy, move, and delete objects or files. What is File Manager? File Manager is a substitute for the Windows Explorer, enabling you to manage large numbers of documents stored on the Windows file system. Use File Manager for moving and copying RDO objects. KEY POINT: DO NOT try to copy or move RDO documents using Windows Explorer; it is unfamiliar with RDO files and cannot manage them.
7. F il e M a na g er What is displayed in the File Manager window? KEY POINT: This book uses illustrations showing a DocuColor 8000 Digital Press connected to a Fiery EXP8000 color server. Your system may vary depending on the digital press and color server for your work environment. The File Manager window displays a directory tree and a directory contents list; a directory tree only; or a directory contents list only. • The directory tree displays the structure of the desktop as a set of levels.
7 . F i l e Ma n ag e r Icons File Manager uses the following icons to represent drives, directories, and file types. • Non-specific file • Associated file • .RDO document • PostScript file • Directory File Manager menus File Manager has the following menus: • File menu • Network menu • Volume menu • Tree menu • View menu • Options menu • Window menu • Help menu Each menu is briefly discussed starting on the next page.
7. F il e M a na g er File menu This menu contains of the following: 7- 4 • Move: Allows you to move a file or directory. • Copy: Allows you to copy a file or directory. • Delete: Allows you to delete a file or directory. • Rename: Allows you to rename a file or directory. • Properties: Provides a dialog for choosing the file Attributes, such as Read Only, Archive, Hidden, or System. • Run: Displays the Run dialog box, which allows you to start an application from the directory contents list.
7 . F i l e Ma n ag e r Network menu This menu contains the following: • Map Network Drive: Opens the Map Network Drive dialog box, which allows you to connect to shared directories on the network. This is a standard Windows Map Network Drive dialog box. • Disconnect Network Drive: Opens the Disconnect Network Drive dialog box, which allows you to disconnect your computer from a network drive. • Share As: Opens the New Share dialog box, which allows you to share a directory.
7. F il e M a na g er Tree menu This menu contains the following: • Expand One Level: Displays one level of subdirectories for the selected drive or directory in the directory tree window. You can use the + shortcut key to perform this operation on the selected drive or directory. • Expand Branch: Displays all subdirectories for the selected directory in the directory tree window. You can use the * shortcut key to perform this operation on the selected directory.
7 . F i l e Ma n ag e r • Arrange object icons: Allows you to sort objects in the active directory by name, by type, by size, by date, or by specified attribute. Also allows you to arrange items so they do not overlap one another and so that all text is clearly visible. • Line Up Icons: Arranges icons in the directory contents list into columns. • By Object Type: Opens the Object Type dialog box, which allows you to specify the type of objects displayed in the directory window.
7. F il e M a na g er Window menu This menu contains the following: • New Window: Opens an additional window in File Manager. • Cascade: Displays the window(s) in a cascade pattern. • Tile Horizontally: Displays the window(s) horizontally. • Tile Vertically: Displays the window(s) vertically. • Arrange icons: Arranges the icons in your window(s). • Refresh: Refreshes the window(s) to reflect changes you have made. • Directory list: Lists the directory(s) currently open in File Manager.
7 .
7.
7 . F i l e Ma n ag e r To access and use the online Help for File Manager, perform the following steps: 1. From Windows Start: Programs, select Xerox FreeFlow Software: File Manager. The File Manage application opens: 2. From the Help drop-down list, select Help Topics.
7. F il e M a na g er The Help dialog is displayed. 3. 4. 7- 1 2 Select the desired Help topic. When finished, close the Help dialog box by selecting (Close) in the title bar.
8. Security Certification If your site requires a high security communication and you are connected to a DocuSP color server, you will need to implement the client-side secured FTP and/or Secure IPP security certificate in order to communicate with the DocuSP 4.x/5.x color server. This is discussed in detail in the System Adminstration Guide, Chapter 6, “Installing a security certificate” on page 6-11.
8.
9. Hints and tips This chapter provides hints and tips to help you work more efficiently with the FreeFlow Scanner software. NOTE: Hints and Tips may also be accessed from the online Help. Page feed direction and image orientation Page feed controls have no relationship to output image orientation. Page feed direction and image orientation are mutually exclusive. Definition of portrait and landscape Portrait orientation is where the image is upright on a paper aligned vertically.
9. H i nts a nd ti ps Definition of SEF and LEF SEF (short edge feed) refers to the shorter edge of a document as the first edge to contact the Document Feeder rolls; for example, the 8.5 inch side of an 8.5 x 11 inch document. LEF SEF LEF (long edge feed) refers to the longer edge of a document as the first edge to contact the Document Feeder rolls; for example, the 11 inch side of an 8.5 x 11 inch document.
9 . H i nts a nd ti ps Guide to choosing a Media Type Use the following table to help you choose the best Media Type (Advanced Scanning) for your original documents: If your original is: Choose A continuous tone image developed on light-sensitive paper using a chemical emulsion Photograph An original that was printed with oil-based inks on an ink jet printer Inkjet An original that was printed with oil-based inks on a web or sheet fed offset press.
9. H i nts a nd ti ps The key to successfully editing, scanning, and printing images lies in understanding how pixels transform into inches and vice versa. Resolution is the interpreter between the physical world of inches and the digital world of pixels. When you scan an image, the scanner translates inches into pixels using resolution. When you print an image, the printer translates pixels into inches using resolution.
9 . H i nts a nd ti ps What is the difference between ppi and dpi? The term ppi (pixels per inch) originated in the world of computers, and dpi (dots per inch) in the world or printing, but today they are often used interchangeably. What resolution should I use to scan an image? As with taking a digital photo, your intended use for the image determines your best scanning resolution.
9. H i nts a nd ti ps NOTE: Keep in mind that as you increase your scanning resolution you create larger files that might be inordinately large for e-mailing or web publishing. Below are a list of some possible resolution and image size combinations: Original image Scan resolution Pixel count .BMP file size 4x6 inches 72 ppi/dpi 288x432 364 kb 4x6 inches 100 ppi/dpi 400x600 703 kb 4x6 inches 150 ppi/dpi 600x900 1.54 mb 4x6 inches 200 ppi/dpi 800x1200 2.
9 . H i nts a nd ti ps How do I calculate what resolution I need to print a 4"x6" image? You can use the simple resolution formula to calculate the embedded resolution you need for any given output. For example, imagine a two megapixel camera that creates a 1600 by 1200 pixel image. You can print this image at any number of different sizes by specifying different embedded resolutions. Take the length of the image in pixels and divide it by your target length in inches.
9. H i nts a nd ti ps To obtain a quality print, your image resolution should be slightly higher than the printer's given LPI. To calculate this ideal resolution, multiply the LPI by about 1.5 to obtain the ideal pixel per inch (ppi) figure for your image. For example, given a 360 dpi photo-quality printer with a 150 lpi, you can get a photo-quality print if your image has 150 x 1.5 or 225 ppi. If you do not know your printer's lpi, the best way to find your optimal print resolution is to experiment.
9 . H i nts a nd ti ps Using scan tickets Scan tickets are a powerful feature of the scanner software. They allow you to store all the settings for common or complex scan jobs (including Image Quality Windows and Custom Page Sizes) so that you can quickly reload the settings instead of manually reprogramming the scan job. Save common settings as Scan Tickets.
9. H i nts a nd ti ps Using custom defaults When the scanner software (Advanced Scanning) is launched, default settings such as page size, scan resolution, etc. may not be suitable for your scanning needs. You can save yourself time and start scanning more quickly by setting custom defaults so that the scanner is ready to scan with minimal adjustment. For more step-by-step instructions on creating custom defaults, refer to the online Help (Advanced Scanning).
10. Technical data Automatic Document Feeder (ADF) Maximum paper dimensions 11.7 x 17 inches (296.7 mm x 431.1 mm) Minimum paper dimensions 6.5 x 5.5 inches, short edge feed (165.1 x 139.
10 . Te c hn i c al da ta Scanner Platen size Color spaces & resolutions supported Input document types 12 x 18 inches (304.8 mm x 457.
11. Maintenance This chapter provides maintenance information and instructions for the various scanner components.
11 . M ai n te na n c e Maintenance intervals The scanner requires minimal maintenance by the operator. However, it is essential that you perform these tasks when indicated to ensure reliable operation and maximum product life. Preventive maintenance intervals To avoid any maintenance delays, ensure that you have the necessary spare parts and cleaning supplies on hand. Component Air Filter Action Replace Maintenance interval • Replace after 3,000 hours.
11. M ai n te n an c e Contacting Xerox Before contacting Xerox for a service problem, perform the following steps: Also refer to the Online Help for additional information and stepby-step instructions. 1. 2. 3. For image quality problems, first attempt to resolve the problem using the image quality troubleshooter. For worn out customer replaceable units, first attempt to replace the component yourself. If you have received a message directing you to call for service: a. Write down the service code. b.
11 .
12. Troubleshooting This chapter directs you to basic troubleshooting information. This troubleshooting information is found in the online Help (Advanced Scanning/Help menu/Troubleshooting). The online Help provides step-by-step instructions for troubleshooting and fixing various problems.
12 . Tr o u bl e s ho o ti ng Clearing paper jams and misfeeds The online Help provides specific step-by-step procedures for clearing paper jams and misfeeds from the scanner. You can access this information by opening the Advanced Scanning feature (click on the Advanced Scanning button from the Scan and Print dialog box). From Advanced Scanning, select Troubleshooting from the Help menu drop-down list. The online Help dialog box opens; click the Clearing Jams & Misfeeds link.
701P44148